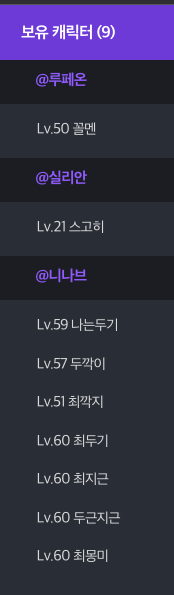
로아랑의 기능 중 검색 한 유저의 보유 캐릭터를 가져오는 기능이 있다

원래는 위와 같이 서버 구분 없이 가져오도록 되어있었으나 이를
위 공식 홈페이지와 같이 서버별로 구분해주고 싶었다
TableView의 header를 사용하면 간단하게 해결이 되지만 이 프로젝트는 rx를 이용해 tableView에 표시하고 있기 때문에 RxDataSource를 통해서 header나 footer등을 사용 할 수 있었다(애니메이션 등 다른 기능도 사용 가능)
0. 라이브러리 설치
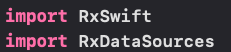
RxSwift는 기존 설치되어있던 라이브러리고 RxDataSource를 사용하기 위해서는 RxDataSources 를 추가로 설치해줘야 한다
1. Section Model 생성
struct OwnCharacterSection {
    var header: String
    var items: [Item]
}

extension OwnCharacterSection: SectionModelType {
    typealias Item = OwnCharacter

    init(original: OwnCharacterSection, items: [OwnCharacter]) {
        self = original
        self.items = items
    }
}
보유 캐릭터를 나타낼 section이기에 이름을 OwnCharacterSection이라 정해 구조체를 만들어줬다
(typealias를 사용하지 않고 직접 OwnCharacter 배열을 지정해줘도 작동에는 문제가 없지만 많은 다른 래퍼런스들을 보면 typealias를 사용하는 이유는 확장성을 위해서일까? 이 부분은 조금 더 공부가 필요 할 것 같다)
2. dataSource 정의
        let dataSource = RxTableViewSectionedReloadDataSource<OwnCharacterSection>(configureCell: { dataSource, tableView, indexpath, ownCharacter in
            guard let cell = tableView.dequeueReusableCell(withIdentifier: "\(OwnCharacterCell.self)", for: indexpath) as? OwnCharacterCell else {
                return UITableViewCell()
            }
            cell.setCellContents(ownCharacter: ownCharacter)

            return cell
        })
RxTableViewSectionedReloadDataSource를 통해 1번에서 만들어준 setion model을 넣어주었으며 그 내부에서 재사용 cell을 만들어준다
이 과정은 rx를 사용하지 않고 tableView를 구성하는 과정과도 유사하다고 느꼈다
3. section header지정
        dataSource.titleForHeaderInSection = { dataSource, index in
            return dataSource.sectionModels[index].header
        }
1번 과정에서 section model에 header프로퍼티를 만들어줬다 그 header를 사용하겠다는 코드이며 header가 아닌 footer를 사용하려면 그냥 header를 footer로만 바꿔주면 된다
4. sections 정의 및 tableView와 연결
let sections = BehaviorRelay<[OwnCharacterSection]>(value: [])View Model에 있는 프로퍼티 이며 받아오는 정보가 변경되었을 때 이 sections에 accept를 해 바로 반영될 수 있도록 따로 만들어뒀다
        viewModel.sections
            .bind(to: ownCharacterView.charactersTableView.rx.items(dataSource: dataSource))
            .disposed(by: disposeBag)
정의 해준 sections를 tableView와 연결 해 준다
기존 rx로만 연결할 때와 다른 점은 items뒤에 cell, item, index등의 아니라 2번에서 정의해 준 dataSource를 넣어줘야 한다는 것이다
bindView 메서드의 전체 코드
    private func bindView() {
        let dataSource = RxTableViewSectionedReloadDataSource<OwnCharacterSection>(configureCell: { dataSource, tableView, indexpath, ownCharacter in
            guard let cell = tableView.dequeueReusableCell(withIdentifier: "\(OwnCharacterCell.self)", for: indexpath) as? OwnCharacterCell else {
                return UITableViewCell()
            }
            cell.setCellContents(ownCharacter: ownCharacter)

            return cell
        })

        dataSource.titleForHeaderInSection = { dataSource, index in
            return dataSource.sectionModels[index].header
        }

        viewModel.sections
            .bind(to: ownCharacterView.charactersTableView.rx.items(dataSource: dataSource))
            .disposed(by: disposeBag)
    }
결과
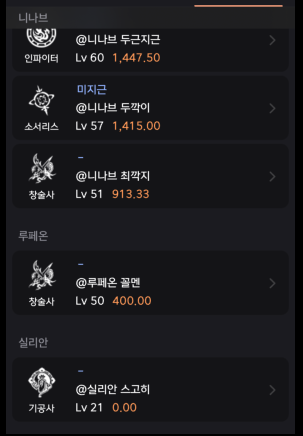
프로젝트에 직접 들어가서 보면 서버별로 구분을 하는 복잡한(?)로직을 거친 뒤에 각 서버별 캐릭터가 section으로 만들어져 sections에 추가되었으며 그 sections가 tableView와 잘 연결된 모습이다