개발 블로그 프로젝트 Hlog - 2 사용자 인증 및 인가를 위한 Spring Security 및 JWT 설정
📌 이 글에서 다룰 것
오늘은 사용자 인증 및 권한 관리 및 보안 관련 기능들을 제공해주는 Spring Security 설정과 JWT 에 대해서 다룬다.
이론적인 부분에 대해선 따로 작성하지 않고 개발한 내용을 기록한다.
유튜브 "메타코딩" 님의 강의를 참고했다.
기록할 것을 크게 크게 정리하자면 다음과 같다.
1. Spring Security Configure 커스터마이징
2. UserDetails와 UserDetailsService 구현
3. 인증 후 jwt 만들어서 응답
🔧 Spring Security 설정
SecurityConfig.java
@Configuration
@EnableWebSecurity
@RequiredArgsConstructor
public class SecurityConfig extends WebSecurityConfigurerAdapter {

    private final CorsFilter corsFilter;
    private final UserRepository userRepository;

    @Bean
    public BCryptPasswordEncoder passwordEncoder() {
        return new BCryptPasswordEncoder();
    }

    @Override
    protected void configure(HttpSecurity http) throws Exception {
        // 시큐리티 동작 전에 토큰을 이용해 걸러내기 위한 필터 걸어놓음
        http.csrf().disable();
        http.sessionManagement().sessionCreationPolicy(SessionCreationPolicy.STATELESS) // 세션사용 x
        .and()
        .addFilter(corsFilter) // @CrossOrigin(인증이 필요없을때사용) / 있을때는 시큐리티 필터에 등록
        .formLogin().disable()
        .httpBasic().disable() // Bearer 방식 사용 (토큰)
        .addFilter(new JwtAuthenticationFilter(authenticationManager())) // AuthenticationManager 파라미터
                // 로그인을 진행하는 필터기 때문에 매니저를 전달해줘야함
        .addFilter(new JwtAuthorizationFilter(authenticationManager(), userRepository)) // AuthenticationManager 파라미터
        .authorizeRequests()
        .antMatchers("/api/user/**")
        .access("hasRole('ROLE_USER') or hasRole('ROLE_ADMIN')")
        .antMatchers("/api/admin/**")
        .access("hasRole('ROLE_ADMIN')")
        .anyRequest().permitAll();
    }
}-
패스워드를 해시암호화 하기위해
BCryptPasswordEncoder를 Bean으로 등록했다. -
configure메서드를 오버라이딩 한다. -
개발편의성을 위해
csrf disable -
JWT를 사용해 토큰기반 인증을 할 것이기 때문에 세션에 따로 저장하지 않기때문에
stateless로 설정해준다. -
corsFilter를 추가했는데 아래에서 설명한다. -
토큰기반 인증을 할 때는
formLogin을 사용할 수 없다.disable 처리 -
formLogin을 사용하지 않기 때문에 기본적인 로그인(인증) 프로세스도 동작하지 않는다.
만들어줘야 한다. ->JwtAuthenticationFilter와JwtAuthorizationFilter에authenticationManager를 파라미터로 주고 필터로 추가한다. 이 내용도 아래에서 설명한다. -
그리고
/api/user~~와/api/admin~~주소 요청에는 각각의 권한이 필요하다고 설정 후 나머지 요청들은 전부 허용한다.
CorsConfig.java
@Configuration
public class CorsConfig {

    // 얘를 필터에 등록해줘야함
    @Bean
    public CorsFilter corsFilter() {
        UrlBasedCorsConfigurationSource source = new UrlBasedCorsConfigurationSource();
        CorsConfiguration config = new CorsConfiguration();
        config.setAllowCredentials(true);
        config.addAllowedOriginPattern("*");
        config.addAllowedHeader("*");
        config.addAllowedMethod("*");
        source.registerCorsConfiguration("/api/**", config);
        return new CorsFilter(source);
    }

}-
@Configuration와@Bean을 통해 corsFilter를 컨테이너에 올려준다. -
setAllowCredentials(true);- 내 서버가 응답을 할 때 json 을 자바스크립트에서 처리할 수 있게 할지를 설정 -
addAllowedOriginPattern("*");- 모든 ip에 응답을 허용 -
addAllowedHeader("*");- 모든 header 에 응답을 허용 -
addAllowedMethod("*");- 모든 post, get , put ,delete, fetch 요청을 허용
PrincipalDetails.java
@Data
public class PrincipalDetails implements UserDetails {
    private User user;

    public PrincipalDetails(User user) {
        this.user = user;
    }

    @Override
    public Collection<? extends GrantedAuthority> getAuthorities() {
        Collection<GrantedAuthority> authorities = new ArrayList<>();
        user.getRoleList().forEach(r -> {
            authorities.add(() -> r);
        });
        return authorities;
    }

    @Override
    public String getPassword() {
        return user.getPassword();
    }

    @Override
    public String getUsername() {
        return user.getUsername();
    }

    @Override
    public boolean isAccountNonExpired() {
        return true;
    }

    @Override
    public boolean isAccountNonLocked() {
        return true;
    }

    @Override
    public boolean isCredentialsNonExpired() {
        return true;
    }

    @Override
    public boolean isEnabled() {
        return true;
    }
}-
PrincipalDetails는 로그인 한 사용자의 정보를 담는다. PrincipalDetailsService에서
로그인 성공 시 PrincipalDetails를 만들어 return 하게 된다. -
getAuthorities()- 사용자가 가진 권한 목록을 return -
getPassword()- 비밀번호 return -
getUsername()- 사용자 이름 return -
isAccountNonExpired()- 계정의 만료 여부 return (true: 만료안됨) -
isAccountNonLocked()- 계정의 잠김 여부 return (true: 잠기지 않음) -
isCredentialsNonExpired()- 비밀번호 만료 여부 return (true: 만료안됨) -
isEnabled()– 계정의 활성화 여부 return (true: 활성화)
PrincipalDetailsService.java
@Service
@RequiredArgsConstructor
public class PrincipalDetailsService implements UserDetailsService {

    private final UserRepository userRepository;

    @Override
    public UserDetails loadUserByUsername(String username) throws UsernameNotFoundException {
        System.out.println("PrincipalDetailsService의 loadUserByUsername() 실행");
        User userEntity = userRepository.findByUsername(username);
        return new PrincipalDetails(userEntity);
    }
}
-
먼저 Service 어노테이션을 통해 스프링에게 알려야한다.
-
User 엔티티에 연결된
UserRepository(JPA 사용)를@RequiredArgsConstructor로 받아줬다. -
loadUserByUsername()은 로그인 요청시에 실행된다. 이 코드에서는 request 에서사용자의 이름을 전달 받아 검색한다. -
사용자 이름으로 검색해서
userEntity에 담은 후, 위에서 언급했던PrincipalDetails에 다시 담아서생성해주고 return한다.
여기까지 보면 간단한 인증은 끝이다. 나는 로그인을 email로 하고싶은데? 한다면 그냥
loadUserByUsername 에서 받는 파라미터를 email로 수정하고 그 email로 검색해주기만 하면 된다.
다음으로는 JWT를 설명하겠다.
✔ JWT 생성
JwtAuthenticationFilter.java
코드가 길어 두개로 나눠 설명하겠다.
@RequiredArgsConstructor
public class JwtAuthenticationFilter extends UsernamePasswordAuthenticationFilter {
    private final AuthenticationManager authenticationManager;
    // /login 요청을 하면 로그인 시도를 위해서 실행되는 함수
    // 실행되는 함수 attemptAuthentication
    @Override
    public Authentication attemptAuthentication(HttpServletRequest request, HttpServletResponse response) throws AuthenticationException {
        System.out.println("JwtAuthenticationFilter: 로그인 시도");
        try {
            // 1. username, password 받아서
            ObjectMapper om = new ObjectMapper(); // json 데이터를 파싱해줌
            User user = om.readValue(request.getInputStream(), User.class);
            System.out.println(user);

            UsernamePasswordAuthenticationToken authenticationToken =
                    new UsernamePasswordAuthenticationToken(user.getUsername(), user.getPassword());

            // PrincipalDetailsService 의 loadUserByUsername 실행된 후 정상이면 authentication이 리턴됨
            // 내 로그인한 정보가 담김 => DB에 있는 username 과 password 가 일치한다.

            // 2. 정상인지 로그인 시도 해보기 authenticationManager 로 로그인 시도하면
            Authentication authentication = authenticationManager.authenticate(authenticationToken);

            // 2-1. > PrincipalDetailsService 가 호출됨 > loadUserByUsername() 실행됨 > 정상이면 PrincipalDetails 리턴
            // => 아래가 된다면 로그인이 됐다는 뜻
            PrincipalDetails principalDetails = (PrincipalDetails) authentication.getPrincipal();
            System.out.println("로그인 완료 됨 : "+principalDetails.getUser().getUsername()); // 로그인 정상적으로 되었다는 뜻

            // 리턴될 때 authentication 객체가 session 영역에 저장됨
            // 리턴의 이유는 권한관리를 security 가 대신 해주기 때문에 편하려고 하는 것
            // 굳이 JWT 토큰을 사용하면서 세션을 만들 이유가 없음. 근데 단지 권한 처리 때문에 넣어 줌
            return authentication;

        } catch (IOException e) {
            e.printStackTrace();
        }
        return null;
}- 먼저 스프링 시큐리티는
UsernamePasswordAuthenticationFilter라는 것이 있는데
/login(시큐리티의 기본 로그인 요청 주소)요청해서username, password전송하면 (post)
UsernamePasswordAuthenticationFilter가 동작하는 구조로 되어있다.
지금은 시큐리티에서 form login을 안쓴다고 했기 때문에 직접 필터로 어떻게 구성해 연결해줘야 한다. 이 메서드에서 각각의 설명은 주석으로 달아두는게 덜 복잡할 것 같아서 주석으로 달아뒀다.
    @Override
    protected void successfulAuthentication(HttpServletRequest request, HttpServletResponse response, FilterChain chain, Authentication authResult) throws IOException, ServletException {
        System.out.println("successfulAuthentication 실행됨");
        PrincipalDetails principalDetails = (PrincipalDetails) authResult.getPrincipal();
        String jwtToken = JWT.create()
                .withSubject(JwtProperties.SECRET)
                .withExpiresAt(new Date(System.currentTimeMillis() + JwtProperties.EXPIRATION_TIME)) // 만료시간 = 현재시간 + 10분
                .withClaim("id", principalDetails.getUser().getId())
                .withClaim("username", principalDetails.getUser().getUsername())
                .sign(Algorithm.HMAC512(JwtProperties.SECRET)); // RSA 아니고 HASH 암호 방식, 서버만 알고있는 키 가지고 있어야 함

        response.addHeader(JwtProperties.HEADER_STRING, JwtProperties.TOKEN_PREFIX + jwtToken);
    }
}-
다음으로 attemptAuthentication 실행 후 인증이 정상적으로 되었으면 successfulAuthentication 함수가 실행된다.
-
여기서 JWT 토큰 만들어서 request 요청한 사용자에게 JWT 토큰을 response의 헤더에 add 해주면 된다.
-
JwtProperties 부분에는 서명을 위한 secret 키와 만료시간 등을 지정해두고 반복적으로 들어갈 부분에 사용했다.
-
.withSubject- 단순히 토큰 이름? 정도로 보면 될 것 같다. -
.withExpiresAt- 만료시간을 지정한다.JwtProperties.EXPIRATION_TIME에 60000*10 을 해서 10분으로 지정해뒀다. -
.withClaim- 담을 정보 지정 -
sign- 서명을 어떤 알고리즘으로 할 것인지 지정하고 Secret key도 넣어줘야한다.
JwtAuthorizationFilter.java
public class JwtAuthorizationFilter extends BasicAuthenticationFilter {

    private UserRepository userRepository;
    public JwtAuthorizationFilter(AuthenticationManager authenticationManager, UserRepository userRepository) {
        super(authenticationManager);
        this.userRepository = userRepository;
    }

    // 인증이나 권한이 필요한 주소요청이 있을 때 해당 필터를 타게 된다.
    @Override
    protected void doFilterInternal(HttpServletRequest request, HttpServletResponse response, FilterChain chain) throws IOException, ServletException {

        System.out.println("인증이나 권한이 필요한 주소 요청됨");

        String jwtHeader = request.getHeader(JwtProperties.HEADER_STRING);
        System.out.println("jwtHeader : " + jwtHeader);

        // header 가 있는지 확인
        if (jwtHeader == null || !jwtHeader.startsWith("Bearer")) { // 널이거나 bearer 아니면
            chain.doFilter(request,response); // 필터 다시타라
            return;
        }

        // jwt 토큰을 검증을 해서 정상적인 사용자인지 확인
        // 앞에 Bearer 없앰
        String jwtToken = request.getHeader(JwtProperties.HEADER_STRING).replace(JwtProperties.TOKEN_PREFIX,"");
        String username =
                JWT.require(Algorithm.HMAC512(JwtProperties.SECRET)).build().verify(jwtToken).getClaim("username").asString();
        System.out.println("jwtToken : " + jwtToken);
        // 서명이 정상적으로 됨
        if (username != null) {
            System.out.println("서명정상");
            User userEntity = userRepository.findByUsername(username);
            System.out.println("토큰들고 온 유저: "+userEntity.getUsername());
            // jwt 토큰 서명을 통해서 서명이 정상이면 Authentication 객체를 만들어준다.
            PrincipalDetails principalDetails = new PrincipalDetails(userEntity);
            Authentication authentication =
                    new UsernamePasswordAuthenticationToken(principalDetails, null, principalDetails.getAuthorities());

            // 강제로 시큐리티의 세션에 접근하여 authentication 객체 저장
            SecurityContextHolder.getContext().setAuthentication(authentication);
            chain.doFilter(request, response);
        }
    }
}-
시큐리티는 많은 filter 를 가지고 있는데 그중에 BasicAuthenticationFilter 라는 것이 있다.
-
권한이나 인증이 필요한 특정 주소를 요청 -> 이 필터를 무조건 타게 돼있다.
-
만약 권한, 인증이 필요한 주소 아니면 이 필터를 타지 않는다.
-
즉
/api/user/~~주소로 접근하려고 한다면? 이 주소는 user 권한이 필요한 주소이기 때문에 위의 filter를 타게된다. -
따로 보면 복잡할 수 있어서 주석으로 설명을 대체했다.
🔍 테스트
RestApiController.java
@RequiredArgsConstructor
@RestController
public class RestApiController {

    private final UserRepository userRepository;
    private final BCryptPasswordEncoder passwordEncoder;

    @GetMapping("/home")
    public String home() {
        System.out.println("클라이언트로부터 /home 요청");
        return "<h1>home</h1>";
    }

    @PostMapping("/token")
    public String token() {
        System.out.println("클라이언트로부터 /token 요청");
        return "<h1>token</h1>";
    }

    @PostMapping("/join")
    public String join(@RequestBody User user){
        user.setPassword(passwordEncoder.encode(user.getPassword()));
        user.setRoles("ROLE_USER");
        userRepository.save(user);

        return "회원가입 완료";
    }

    // user , admin 권한
    @GetMapping("/api/user")
    public String user(Authentication authentication) {
        PrincipalDetails principalDetails = (PrincipalDetails) authentication.getPrincipal();
        System.out.println("authentication :" + principalDetails.getUsername());
        return "user";
    }

    // admin 권한
    @GetMapping("/api/admin")
    public String admin() {
        return "admin";
    }
}- 테스트 순서는 다음과 같다.
/join으로 회원가입 요청 (USER 권한 갖게 함)- 컨트롤러엔 없지만 필터로 등록했기 때문에 가능해진
/login으로 로그인 요청 - 로그인 성공하고 받은 jwt token을 헤더에 담아서
/api/user와/api/admin으로 각각 요청 보내보고 결과 작성
postman - /join (post)

/join으로username과password를 json 형식으로 보내준다.
결과
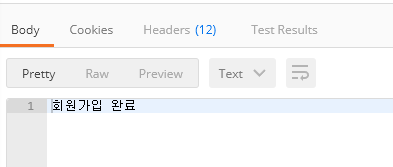
- 회원가입을 완료했으니 로그인 해보자
postman - /login (post)

/login으로 로그인 요청한다.
결과

- 헤더를 확인해보면 응답으로 토큰을 받은것을 알 수 있다.
이 토큰을 들고 인증이나 권한이 필요한 주소인/api/user,/api/admin으로 요청을 해보자
postman - /api/user (get)
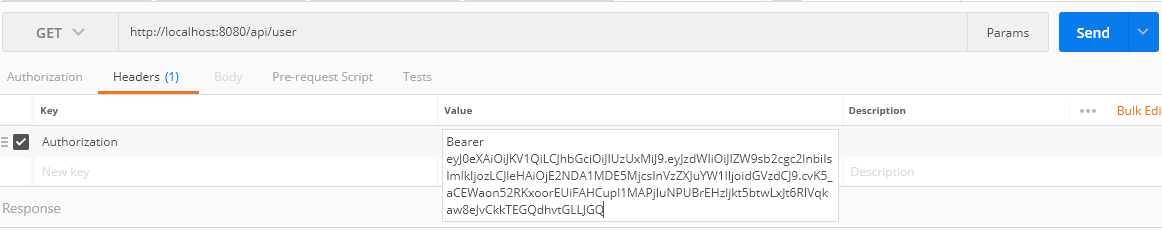
- 요청을 할때 header에 Authorization key를 만들어 전에 받은 토큰을 넣어준다.
결과

- 정상적으로 "user" 라는 응답을 받았다. 인증 된 사용자라는 뜻이다.
- 하지만 지금 test 사용자는 ROLE_USER 권한만 가지고 있다.
/api/admin으로 요청을 한다면 어떻게 될까?
postman - /api/admin (get)
/api/user에 요청할 때와 똑같이 토큰을 넣어주고 admin으로 요청을 한다.
결과
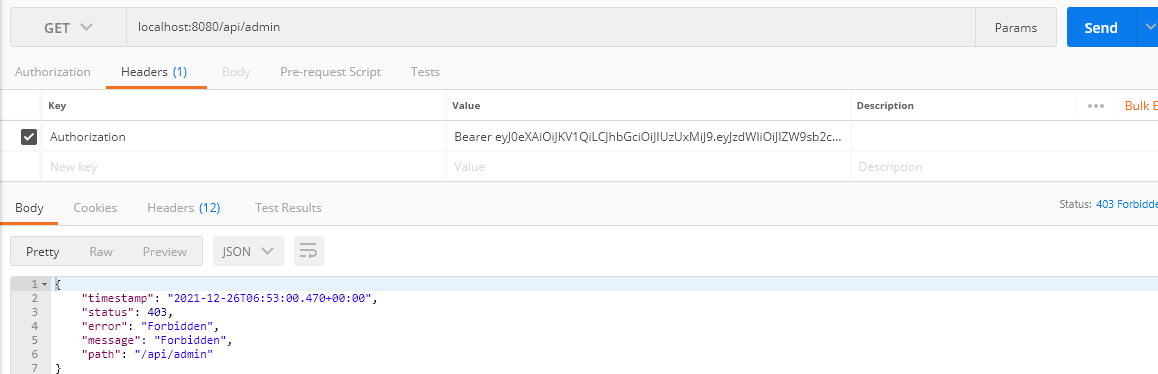
403 statusForbidden- 위 2개가 뜬것을 볼 수 있다.
- 접근권한이 없을 때 출력되는 것들이다.
지금 test 사용자는 ROLE_ADMIN 권한이 없기 때문에/api/admin으로는 접근할 수 없다. - 테스트 성공적으로 완료
🔍 결론, 다음 할 작업
우선은 postman 으로만 테스트 했는데
frontend측에서 회원가입, 로그인 시도도 만들어봐야한다.
javascript로 axios 통신을 통해 요청할 예정이며,
현재 DTO도 만들어져 있지 않다. Entity에 setter도 제거하여 무분별한 변경을 막아주고 DTO를 통해 요청 응답을 구현할 생각이다.
크게 보면 다음 할 작업은frontend backend 제대로 이어주기,DTO 만들어 수정하기인 셈이다.
다음에 봐요~