기능
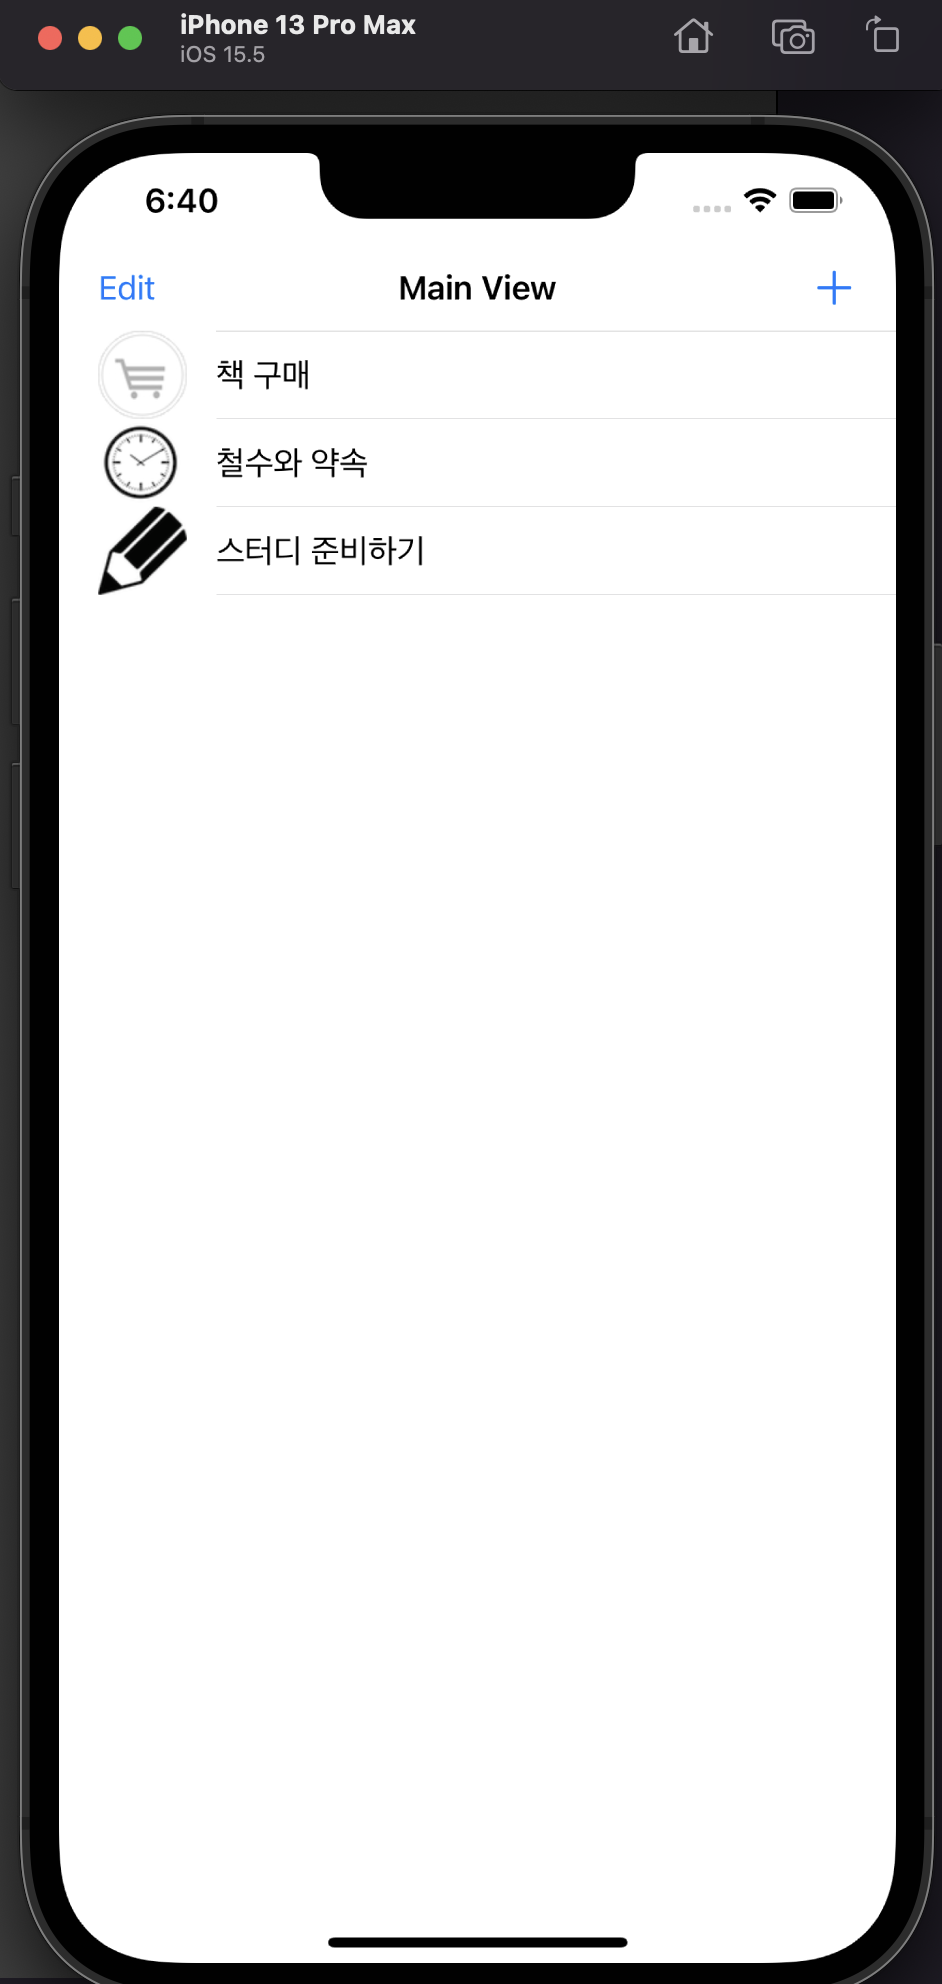
- 테이블 뷰 삭제 및 자리 바꾸기가 가능
- 테이블 뷰 셀 클릭시 해당 해야할 일이 뷰 전환되며, 레이블에 표기
- +을 눌러 todo리스트 추가 가능
코드
import UIKit

var toDoArray = ["책 구매", "철수와 약속", "스터디 준비하기"]
var imageListArray = ["cart","clock","pencil"]

class TableViewController: UITableViewController {

    @IBOutlet var tableViewList: UITableView!

    override func viewDidLoad() {
        super.viewDidLoad()
        self.navigationItem.leftBarButtonItem = editButtonItem

    }

    override func viewWillAppear(_ animated: Bool) {
        tableViewList.reloadData()
    }
    // MARK: - Table view data source

    override func numberOfSections(in tableView: UITableView) -> Int {
        // #warning Incomplete implementation, return the number of sections
        return 1
    }

    override func tableView(_ tableView: UITableView, numberOfRowsInSection section: Int) -> Int {
        // #warning Incomplete implementation, return the number of rows
        return toDoArray.count
    }

    override func tableView(_ tableView: UITableView, cellForRowAt indexPath: IndexPath) -> UITableViewCell {
        let cell = tableView.dequeueReusableCell(withIdentifier: "toDoCell", for: indexPath)
        cell.textLabel?.text = toDoArray[indexPath.row]
        cell.imageView?.image = UIImage(named:imageListArray[indexPath.row])
        return cell
    }


    /*
    // Override to support conditional editing of the table view.
    override func tableView(_ tableView: UITableView, canEditRowAt indexPath: IndexPath) -> Bool {
        // Return false if you do not want the specified item to be editable.
        return true
    }
    */

    // Override to support editing the table view.
    override func tableView(_ tableView: UITableView, commit editingStyle: UITableViewCell.EditingStyle, forRowAt indexPath: IndexPath) {
        if editingStyle == .delete {
            toDoArray.remove(at: indexPath.row)
            imageListArray.remove(at: indexPath.row)
            tableView.deleteRows(at: [indexPath], with: .fade)
        }
    }

    override func tableView(_ tableView: UITableView, titleForDeleteConfirmationButtonForRowAt indexPath: IndexPath) -> String? {
        return "삭제"
    }

    // Override to support rearranging the table view.
    override func tableView(_ tableView: UITableView, moveRowAt fromIndexPath: IndexPath, to: IndexPath) {
        let toDoArrayElement = toDoArray[fromIndexPath.row]
        let imageListArrayElement = imageListArray[fromIndexPath.row]
        toDoArray.remove(at: fromIndexPath.row)
        imageListArray.remove(at: fromIndexPath.row)
        toDoArray.insert(toDoArrayElement, at: to.row)
        imageListArray.insert(imageListArrayElement, at: to.row)
    }


    /*
    // Override to support conditional rearranging of the table view.
    override func tableView(_ tableView: UITableView, canMoveRowAt indexPath: IndexPath) -> Bool {
        // Return false if you do not want the item to be re-orderable.
        return true
    }
    */


    // MARK: - Navigation

    // In a storyboard-based application, you will often want to do a little preparation before navigation
    override func prepare(for segue: UIStoryboardSegue, sender: Any?) {
        if segue.identifier == "detailSegue"{
            let detailViewController = segue.destination as! DetailViewController
            let cell = sender as! UITableViewCell
            let index = tableViewList.indexPath(for: cell)
            detailViewController.text = toDoArray[index!.row]
        }
    }


}
import UIKit
class DetailViewController: UIViewController {
var text = ""
@IBOutlet var toDoLable: UILabel!
override func viewDidLoad() {
super.viewDidLoad()
toDoLable.text = text
// Do any additional setup after loading the view.
}
/*
// MARK: - Navigation
// In a storyboard-based application, you will often want to do a little preparation before navigation
override func prepare(for segue: UIStoryboardSegue, sender: Any?) {
// Get the new view controller using segue.destination.
// Pass the selected object to the new view controller.
}
*/
}import UIKit
class AddViewController: UIViewController {
@IBOutlet var textField: UITextField!
override func viewDidLoad() {
super.viewDidLoad()
// Do any additional setup after loading the view.
}
@IBAction func touchUpAddButton(_ sender: UIButton) {
toDoArray.append(textField.text!)
imageListArray.append(imageListArray[0])
navigationController?.popViewController(animated: true)
}
/*
// MARK: - Navigation
// In a storyboard-based application, you will often want to do a little preparation before navigation
override func prepare(for segue: UIStoryboardSegue, sender: Any?) {
// Get the new view controller using segue.destination.
// Pass the selected object to the new view controller.
}
*/
}- viewDidLoad() -> viewWillAppear() -> viewDidAppear() 순으로 호출되며, viewWillAppear()은 스토리보드가 나타나기 직전에 호출된다.
- 다른 네비게이션 뷰로 이동할 때, viewDidLoad()가 호출된다.
- 루트 네비게이션 뷰로 돌아올 때, viewWillAppear()가 호출된다.

개발자 지망생