
⚡ 들어가기
이 포스팅은 Cognito user pool을 생성해두었다는 가정하에 작성했습니다.
Amplify UI를 활용해서 쉽게 구현할 수도 있지만, custom 항목을 늘리려고 하니 amplify ui는 custom에 한계를 느껴서 React에서 직접 ui를 작성해서 사용했습니다.
Cognito user pool
현재 required attributes는 name, email, zoneinfo 입니다.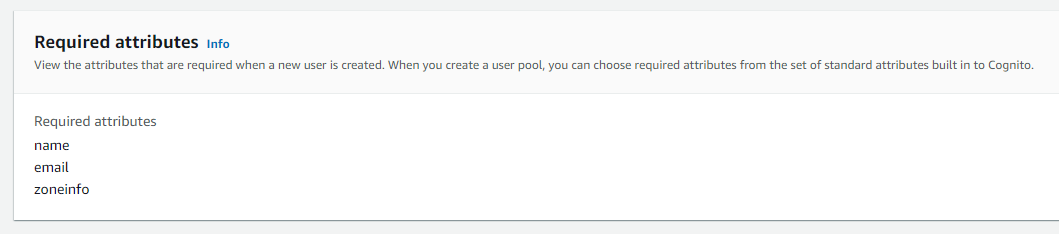
💥구현
🔥 Amplify 설정
📌 Amplify 패키지 설치
React에서 amplify 사용을 위한 패키지를 설치합니다.
amplify ui를 사용하지 않으면 첫 번째는 생략.
npm install aws-amplify @aws-amplify/ui-react
npm install aws-amplify
📌 Amplify 설정 파일 작성
awsconfig.js라는 파일을 작성해서 사용했습니다.
export default {
  Auth: {
    region: "YOUR-REGION", // ex) us-east-1
    userPoolId: "YOUR-POOL-ID",
    userPoolWebClientId: "YOUR-CLIENT-ID"
  }
}
userPoolId는 해당 user pool에 들어가면 확인할 수 있습니다. 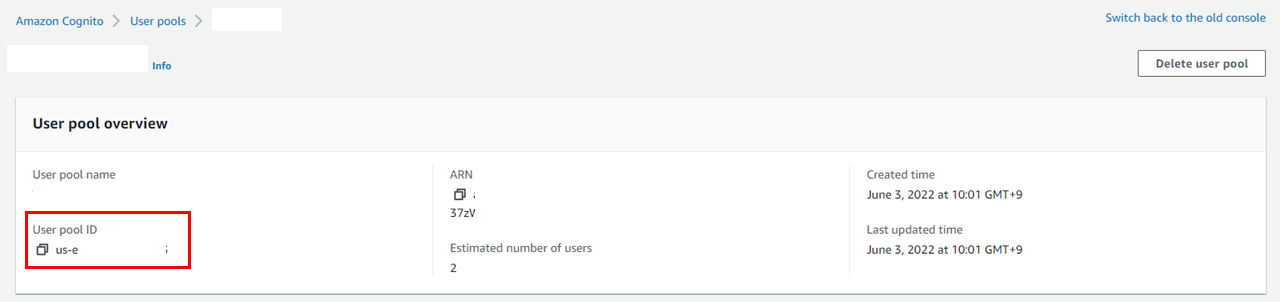 client id는 user pool에서 [App Integration] - [App client list]에서 client id를 복사해서 넣으면 됩니다.
  설정 파일은 아래처럼 import해서 사용합니다.
import Amplify, { Auth } from "aws-amplify";
import awsconfig from "../auth/awsconfig";
Amplify.configure(awsconfig);
🔥 Sign-up
회원가입 화면은 다음과 같이 이름, email, password, country를 입력할 수 있게 되어 있습니다.
📌 회원가입 화면 코드
<ValidatorForm onSubmit={handleFormSubmit}>
	<TextValidator
	    sx={{ mb: 3, width: '100%' }}
	    variant="outlined"
	    size="small"
	    label="Username"
	    onChange={handleChange}
	    type="text"
	    name="username"
	    value={username || ''}
	    validators={['required']}
	    errorMessages={['this field is required']}
	/>
	<TextValidator
	    sx={{ mb: 3, width: '100%' }}
	    variant="outlined"
	    size="small"
	    label="Email"
	    onChange={handleChange}
	    type="email"
	    name="email"
	    value={email || ''}
	    validators={['required', 'isEmail']}
	    errorMessages={[
	        'this field is required',
	        'email is not valid',
	    ]}
	/>
	<TextValidator
	    sx={{ mb: '16px', width: '100%' }}
	    label="Password"
	    variant="outlined"
	    size="small"
	    onChange={handleChange}
	    name="password"
	    type="password"
	    value={password || ''}
	    validators={['required']}
	    errorMessages={['this field is required']}
	/>
	<FormControl
	    style={{ minWidth: '100%' }}
	    size="small"
	>
	    <InputLabel>Country</InputLabel>
	    <Select
	        value={zoneinfo || ''}
	        label="Country"
	        name="zoneinfo"
	        onChange={handleChange}
	        MenuProps={MenuProps}
	    >
	        {countryList.map((country, index) => (
	            <MenuItem
	                key={index}
	                value={country.countryCode}
	            >
	                {country.label}
	            </MenuItem>
	        ))}
	    </Select>
	</FormControl>
	<FormControlLabel
	    sx={{ mb: '16px' }}
	    name="agreement"
	    onChange={(e) =>
	        handleChange({
	            target: {
	                name: 'agreement',
	                value: e.target.checked,
	            },
	        })
	    }
	    control={
	        <Checkbox
	            size="small"
	            checked={agreement || false}
	        />
	    }
	    label="I have read and agree to the terms of service."
	/>
	<FlexBox>
	    <Button
	        type="submit"
	        color="primary"
	        variant="contained"
	        sx={{ textTransform: 'capitalize' }}
	    >
	        Sign up
	    </Button>
	    <Span sx={{ mr: 1, ml: '20px' }}>or</Span>
	    <Button
	        sx={{ textTransform: 'capitalize' }}
	        onClick={() =>
	            navigate('/session/signin')
	        }
	    >
	        Sign in
	    </Button>
	</FlexBox>
	</ValidatorForm>
📌 handleFormSubmit 함수
sign-up 함수를 통해서 cognito user pool에는 입력한 정보로 user 항목이 생성됩니다.
하지만 실제 사용을 위해서는 이메일 확인이 필요합니다.
sign-up 되었다면, username을 정보를 가지고 confirm 화면으로 넘어가게 됩니다.
import { Auth } from 'aws-amplify'
...
// 회원가입
const handleFormSubmit = async (event) => {
    try {
        const user = await Auth.signUp({
            username: state.email,
            password: state.password,
            attributes: {
                email: state.email, // optional
                name: state.username,
                zoneinfo: state.zoneinfo,
            },
        })
        setState({ stage: 'VERIFYING' })
        // confirm 창으로 넘어가야 함
        navigate('/session/confirm', { state: { username: state.email } })
    } catch (e) {
        console.log(e)
    }
}
📌 confirm 화면
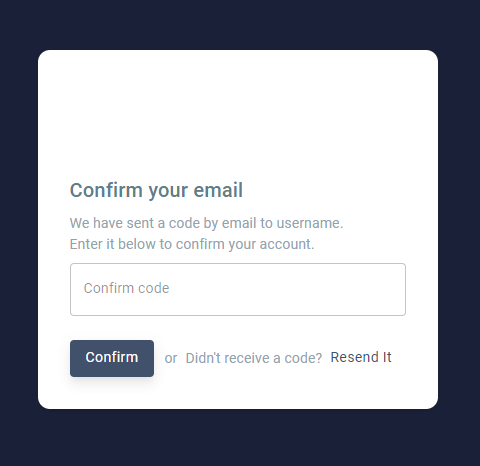
이메일로 받은 confirm code를 입력하고, confirm 버튼을 누르게 되면, handleFormSubmit 함수가 실행됩니다.
<Stack
    direction="column"
    spacing={1}
    padding={4}
    paddingTop={1}
>
    <TitleTypo>Confirm your email</TitleTypo>
    <Typography style={{ whiteSpace: 'pre-wrap' }}>
        {confirmStr}
    </Typography>
    <ValidatorForm onSubmit={handleFormSubmit}>
        <TextValidator
            sx={{ mb: 3, width: '100%' }}
            variant="outlined"
            // size="small"
            label="Confirm code"
            onChange={handleChange}
            type="text"
            name="code"
            value={code || ''}
            validators={['required']}
            errorMessages={['this field is required']}
        />
        <FlexBox>
            <Button
                type="submit"
                sx={{ textTransform: 'capitalize' }}
                variant="contained"
            >
                Confirm
            </Button>
            <Span sx={{ mr: 1, ml: '10px' }}>or</Span>
            <Typography>
                Didn't receive a code?
            </Typography>
            <Button
                sx={{ textTransform: 'capitalize' }}
                onClick={handleResend}
            >
                Resend It
            </Button>
        </FlexBox>
    </ValidatorForm>
</Stack>
📌 handleFormSubmit 함수
const handleFormSubmit = async () => {
    try {
        await Auth.confirmSignUp(username, code)
        navigate('/')
    } catch (error) {
        console.log('error confirming sign up', error)
    }
}
signup 화면에서 받아온 username(=email)과 사용자가 입력한 코드를 사용해 confirmSignup 함수를 실행하게 됩니다.
resend it 버튼을 클릭하게 되면 handleResend가 실행되고, resend에는 이메일만 필요합니다.
const handleResend = async () => {
    try {
        await Auth.resendSignUp(username)
        console.log('code resent succesfully')
    } catch (error) {
        console.log('error resending code: ', error)
    }
}
💧 마치며
amplify ui를 사용하면 쉽게 구현할 수 있다는 장점이 있지만, custom하기 어렵다는 단점이 있고, 그냥 react를 사용하면 ui 코드 작성은 조금 번거롭지만 custom이 쉽다는 장점이 있다.
무슨 ui를 사용하던지, amplify의 함수만 활용하고 ui끼리 연결만 해주면 되기 때문에 크게 어렵지는 않는 것 같습니다.
참조
https://github.com/thejungwon/cognito-auth-react/blob/master/src/FormComponent.js
