spring 프로젝트에 swagger 적용하기.
spring에 많이 사용되는 swagger llibrary는 springfox와 springdoc이 있다.
기존 프로젝트 들에 springfox가 많이 사용되고 있어서 새로 설정을 할 때도 이걸 사용해야하나 하고 좀 살펴보니 최근에는 springdoc을 많이 사용한다고 한다.
springfox가 먼저 개발되어 더 많이 사용되었는데 2018년부터 2020년까지 업데이트가 없는 사이 springdoc이 많이 사용되기 시작했다고 한다. 2020년 6월과 7월에 springfox가 마지막 업데이트를 한 이후 후속 업데이트가 없어서 이후에 나온 기능들에 대한 대응이 안되는 경우가 종종 생긴다고 한다. springfox github issuses에 가보면 이미 끝난 프로젝트나 다름 없으니 springdoc으로 넘어가라는 반응들이 많이 보인다.

그래서 이번에는 springfox를 쓰지 않고 springdoc을 이용해서 설정해보려고 한다.
build.gradle 설정
dependencies {
//	spring-doc
	implementation group: 'org.springdoc', name: 'springdoc-openapi-ui', version: '1.6.9'

}
springdoc 최신 버전으로 dependency 설정.
적용된 UI를 확인하고 싶으면 /swagger-ui.html에 접속하면 된다.
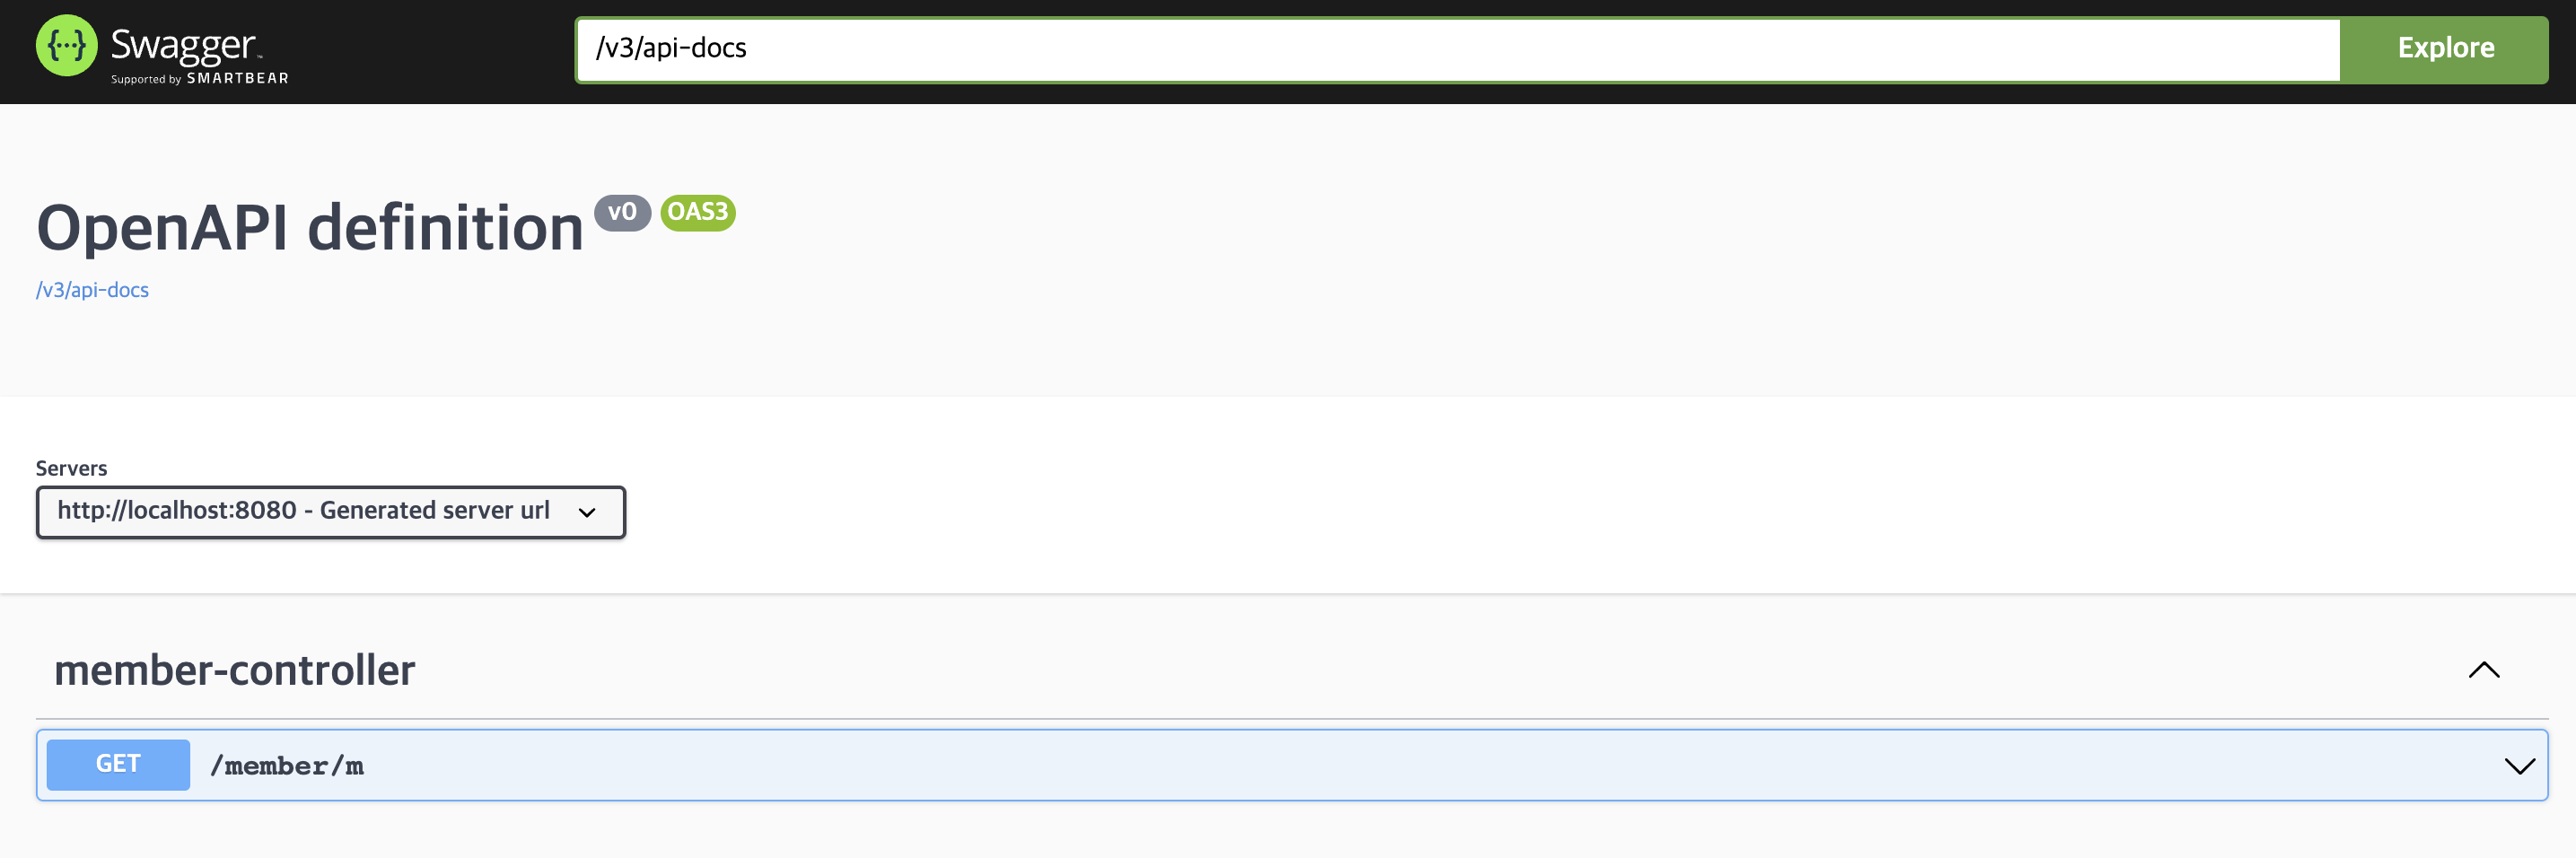
json 형식으로 보고 싶다면 /v3/apidocs에 접속하면 된다.
// http://localhost:8080/v3/api-docs

{
  "openapi": "3.0.1",
  "info": {
    "title": "OpenAPI definition",
    "version": "v0"
  },
  "servers": [
    {
      "url": "http://localhost:8080",
      "description": "Generated server url"
    }
  ],
  "paths": {
    "/member/m": {
      "get": {
        "tags": [
          "member-controller"
        ],
        "operationId": "getTest",
        "responses": {
          "200": {
            "description": "OK",
            "content": {
              "*/*": {
                "schema": {
                  "type": "string"
                }
              }
            }
          }
        }
      }
    }
  },
  "components": {

  }
}
properties 설정
반대로 swagger를 외부에 노출시키고 싶지 않다면 application.yml등에 설정 값을 추가하면 된다.
#springdoc swagger
springdoc:
  # Disabling the /v3/api-docs endpoint
  api-docs:
    enabled: false
  # Disabling the swagger-ui
  swagger-ui:
    enabled: false
그 외 properties 설정 값들은 이 문서를 참조해보면 좋다.
#springdoc swagger
springdoc:
  api-docs:
    path: /docs # 접속 path 설정

  swagger-ui:
    path: /swagger-ui # 접속 path 설정
    display-request-duration: true  # try it out 을 했을 때 request duration 을 추가로 찍어줌

  cache:
    disabled: true # swagger cache 설정
명세 상세 설정
명세 전체에 대한 공통 설명을 설정하기 위해서는 설정을 위한 파일을 하나 만들고 @OpenAPIDefinition과 @Configuration을 통해 내용을 작성하면 된다.
@OpenAPIDefinition(
info = @Info(
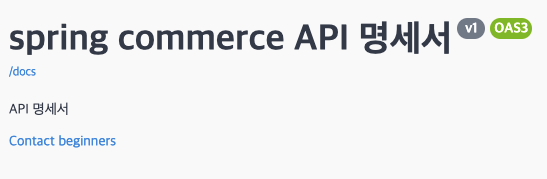
title = "spring commerce API 명세서",
description = "API 명세서",
version = "v1",
contact = @Contact(
name = "beginners",
email = "sample@email.co.kr"
)
)
)
//todo: SecuritySchemes
@Configuration
public class OpenApiConfig {
//
// @Bean
// public GroupedOpenApi sampleGroupOpenApi() {
// String[] paths = {"/member/**"};
//
// return GroupedOpenApi.builder().group("샘플 멤버 API").pathsToMatch(paths)
// .build();
// }
}
GroupedOpenApi 설정을 하면 그룹 설정된 api 들만 문서에 노출시킬 수 있게 해준다. 이번엔 사용하지 않아서 작성 후 주석처리 해두었다.
@Tag(name="[@Tag] 샘플 컨트롤러")
@RequestMapping("/sample")
@RestController
public class SampleController {
@Operation(summary = "get test api summary", description = "[@Operation] get test api")
@GetMapping("/get/{id}")
public String getTest1(
@Parameter(name = "id", description = "아이디값", example = "예시")
@PathVariable String id,
@RequestParam(value = "q", defaultValue = "default", required = false) String queryParam
) {
return id + queryParam;
}
@Operation(summary = "post test api summary", description = "[@Operation] post test api")
@PostMapping("/post")
public String postTest2(
@RequestBody SampleRequestDto sampleRequestDto
) {
return sampleRequestDto.getUserId() + sampleRequestDto.getPassword();
}
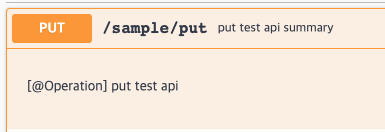
@Operation(summary = "put test api summary", description = "[@Operation] put test api")
@PutMapping("/put")
public String putTest3(
@Valid @RequestBody SampleRequestDto sampleRequestDto
) {
return "hi";
}
@Operation(summary = "delete test api summary", description = "[@Operation] delete test api")
@DeleteMapping("/delete")
public String deleteTest4() {
return "hi";
}
}
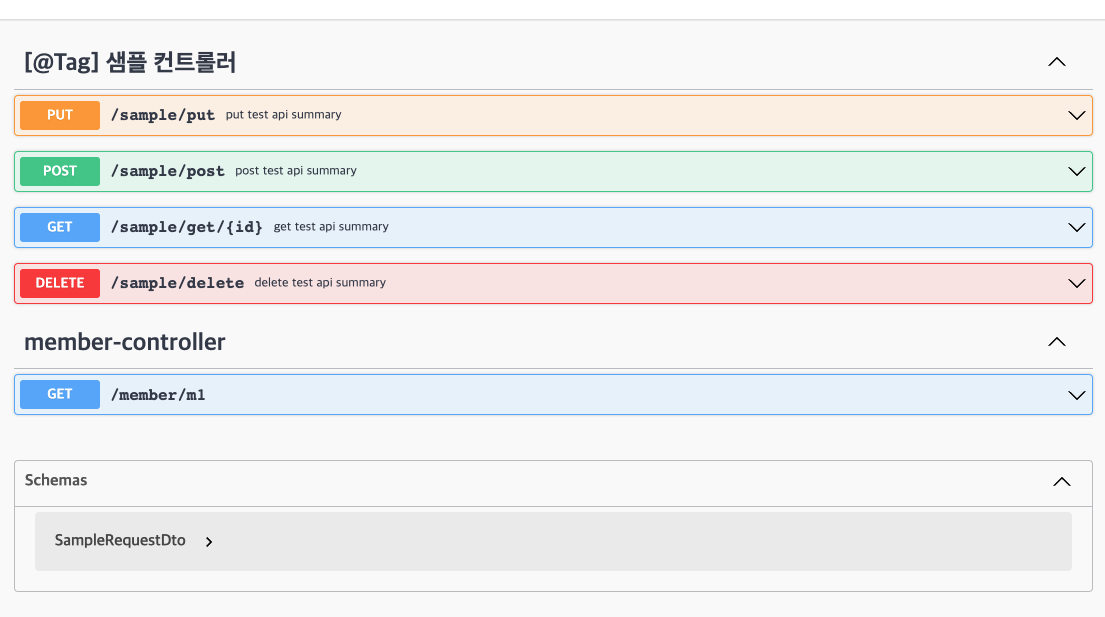
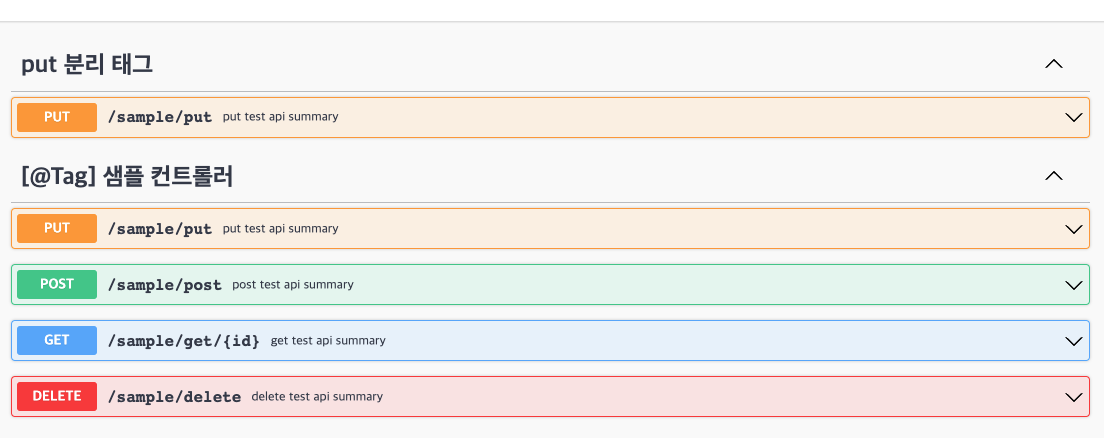
SampleController라는 컨트롤러를 만들고 @Tag 어노테이션을 통해 class 전체를 하나의 그룹으로 묶어줬다. 이렇게 그룹으로 묶어줘도 각각의 메서드에 다시 한 번 @Tag를 사용해서 설정하면 기존 클래스 외에도 따로 분리되어 명세가 추가 생성 된다.
    @Tag(name="put 분리 태그")
    @Operation(summary = "put test api summary", description = "[@Operation] put test api")
    @PutMapping("/put")
    public String putTest3(
        @Valid @RequestBody SampleRequestDto sampleRequestDto
    ) {
        return "hi";
    }
@Operation : 메서드에 적용하여 메서드에 대한 설명을 추가할 수 있다. summary 값은 path 뒤에 설명 값을 추가해주고, description은 메서드 명세 내부에 설명 값을 추가해준다.
@Parameter는 parameter 에 대한 설명값을 정의해준다. @Parameter(name = "id", description = "아이디값", example = "예시")
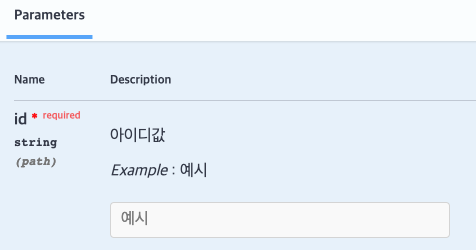
@PathVariable은 swagger 요소는 아니나 path variable을 받을 수 있게 해주고 swagger에 표시해준다. @PathVariable String id
@RequestParam은 swagger 요소는 아니나 query param을 받을 수 있게 해주고, default 값과 required 여부를 설정할 수 있으며 이 값을 swagger에 표시해준다. @RequestParam(value = "q", defaultValue = "default", required = false) String queryParam
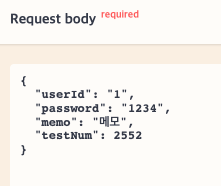
@RequestBody는 swagger 요소는 아니나 request body를 받을 수 있게 해주고, 이 값을 swagger에 표시해준다.
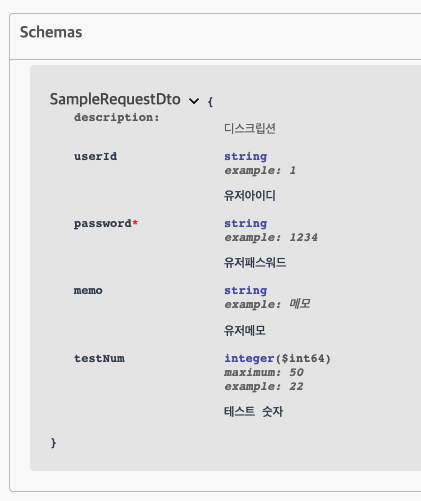
request body를 위한 dto 필드에 schema을 사용하면 swagger에 예시를 표현할 수 있고, 최하단 schemas 섹션을 통해 추가 정보를 제공할 수 있다. maximum 등의 필드를 통해 값을 지정할 수는 있지만 참고의 기능만 하고 유효성 검증을 해주진 않는 것 같다.
@Getter
@Setter
public class SampleRequestDto {

    @Schema(description = "유저아이디", example = "1")
    String userId;

    @NotNull
    @Schema(description = "유저패스워드", example = "1234")
    String password;

    @Null
    @Schema(description = "유저메모", example = "메모")
    String memo;

    @Schema(description = "테스트 숫자", example = "22", maximum = "50")
    Long testNum;
}

https://www.hentai-foundry.com/user/bothbest/blogs/20379/Top-Bamboo-Flooring-Styles-Dominating-Modern-Interiors
https://blog.libero.it/wp/bothbestbamboo/2025/09/07/color-trends-bamboo-flooring-from-blonde-tones-to-rich-espresso/
https://blog.libero.it/wp/bothbestbamboo/2025/09/06/choosing-the-right-bamboo-flooring-for-family-home/
https://qualityherb.livepositively.com/what-sets-premium-bamboo-flooring-apart/
https://www.edufex.com/forums/discussion/general/japan-vs-china-bamboo-flooring-a-technologists-perspective
https://qualityherb.livepositively.com/natural-vs-carbonized-bamboo-flooring-a-deep-dive-into-color-performance-and-manufacturing/
https://www.hentai-foundry.com/user/bothbest/blogs/20387/Buying-Click-Strand-Woven-Bamboo-Flooring-from-China
https://zybuluo.com/bothbest/note/2622032
https://www.chambers.com.au/forum/view_post.php?frm=3&pstid=107382
https://spcfactory.blogspot.com/2024/03/5-reasons-why-bamboo-is-superior.html
https://spcfactory.blogspot.com/2024/03/the-ultimate-guide-to-maintaining-your.html
https://spcfactory.blogspot.com/2024/10/the-pros-and-cons-of-12mm-spc-flooring.html
https://spcfactory.blogspot.com/2025/09/adhesives-and-lacquers-in-durable.html