Thymeleaf의 사용법을 알아보기 위해서 몇 가지 예제를 진행하겠다. 서버에서 가공한 데이터를 뷰 쪽에 전달하여 해당 데이터를 출력하는 예제, 서버로 데이터를 전송하는 예제 등을 살펴보겠다.
th:text 예제
com.shop 아래 경로에 dto 패키지를 생성하고 뷰 영역에서 사용할 ItemDto 클래스를 생성한다. 데이터를 주고 받을 때는 Entity 클래스 자체를 반환하면 안 되고 데이터 전달용 객체(DTO)를 생성해서 사용해야 한다. 데이터베이스의 설계를 외부에 노출할 필요도 없으며, 요청과 응답 객체가 항상 엔티티와 같지 않기 때문이다.
package com.shop.dto;

import lombok.Getter;
import lombok.Setter;

import java.time.LocalDateTime;

@Getter
@Setter
public class ItemDto {

    private Long id;
    private String itemNm;
    private Integer price;
    private String itemDetail;
    private String sellStatCd;
    private LocalDateTime regTime;
    private LocalDateTime updateTime;

}
ItemDto 객체를 하나 생성하고 모델에 데이터를 담아서 뷰에 전달한다.
package com.shop.controller;
import com.shop.dto.ItemDto;
import org.springframework.stereotype.Controller;
import org.springframework.ui.Model;
import org.springframework.web.bind.annotation.GetMapping;
import org.springframework.web.bind.annotation.RequestMapping;
import java.time.LocalDateTime;
@Controller
@RequestMapping(value = "/thymeleaf")
public class ThymeleafExController {
//코드 생략
@GetMapping(value = "/ex02")
public String thymeleafExample02(Model model) {
ItemDto itemDto = new ItemDto();
itemDto.setItemDetail("상품 상세 설명");
itemDto.setItemNm("테스트 상품1");
itemDto.setPrice(10_000);
itemDto.setRegTime(LocalDateTime.now());
model.addAttribute("itemDto", itemDto);
return "thymeleafEx/thymeleafEx02";
}
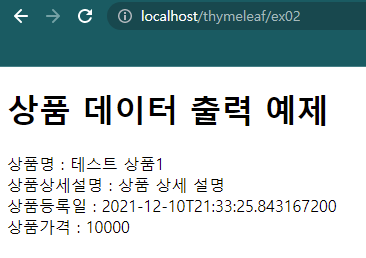
}전달받은 itemDto 객체를 th:text를 이용하여 출력한다.
<!doctype html>
<html xmlns:th=""http://www.thymeleaf.org>
<head>
    <meta charset="UTF-8">
    <title>Title</title>
</head>
<body>
    <h1>상품 데이터 출력 예제</h1>
    <div>
        상품명 : <span th:text="${itemDto.itemNm}"></span>
    </div>
    <div>
        상품상세설명 : <span th:text="${itemDto.itemDetail}"></span>
    </div>
    <div>
        상품등록일 : <span th:text="${itemDto.regTime}"></span>
    </div>
    <div>
        상품가격 : <span th:text="${itemDto.price}"></span>
    </div>
</body>
</html>
ShopApplication을 실행한 후에 아래 이미지와 같이 URL을 입력하면 입력한 데이터가 화면에 정상적으로 출력되는 것을 볼 수 있다.
해당 게시글은 변구훈, 『스프링 부트 쇼핑몰 프로젝트 with JPA』, 로드북, 2021를 참고하여 작성하였습니다.

I DEVELOP THEREFORE, I AM 😄