오늘은 테이블뷰에 들어갈 셀을 configure하는 방법에 대해 적어보겠다.
그전에 테이블뷰가 뭔지 간단히 알아보자면,
테이블 뷰는 계층적인 데이터를 표현할 때 네비게이션 컨트롤러와 함께 자주 쓴다.
테이블 뷰를 만들때는 이 네가지 요소를 고려해야한다
UITableView → 테이블의 기본적인 모습을 관리하지만,
UITableViewCell → 로 실제 컨텐츠를 관리한다.
UITableViewDataSource -> 셀에 들어갈 컨텐츠의 내용을 관리한다.
UITableViewDelegate -> 이벤트가 발생했을때 일어날 일을 관리한다.
UITableViewCell
이 중에서 오늘은 UITableViewCell에 대해서 알아볼 것이다.
cell을 통해 테이블의 row의 모습을 정의할 수 있다.
cell은 UITableViewCell 객체로 만든다. 마치 템플릿을 정의하는 느낌
cell또한 뷰이고, 뷰에는 서브뷰를 담을 수도 있어서 셀 안에 label, image view 등을 담을 수도 있다.
테이블에 들어갈 셀을 만들 때 두가지 방식이 존재한다.
A. 애플이 제공하는 기본적인 셀 템플릿을 사용 -> deprecated
B. 직접 커스텀셀을 정의하여 사용
셀 만드는 순서
A. 애플이 제공하는 기본 템플릿 사용시
- 테이블뷰컨 생성 or 뷰컨 생성하고 테이블뷰, 테이블뷰셀을 인터페이스에 추가
- prototype cell의 style을 아무거나 지정한다
- attribute 항목에서 cell의 identifier을 지정한다
B. 커스텀 셀을 정의하여 나만의 템플릿을 사용시
-
테이블뷰컨 생성 or 뷰컨 생성하고 테이블뷰, 테이블뷰셀을 인터페이스에 추가
-
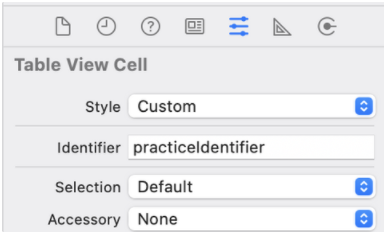
prototype cell의 style을 custom으로 지정한다
-
attribute 항목에서 cell의 identifier을 지정한다
-
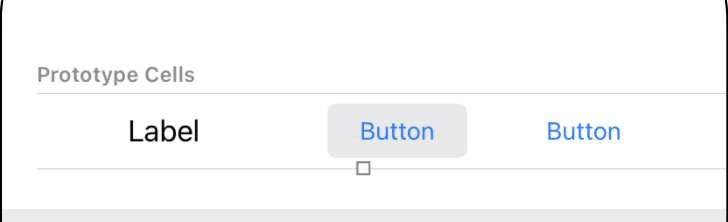
prototype cell에 뷰(버튼, 레이블..)나 제약조건을 추가한다
-
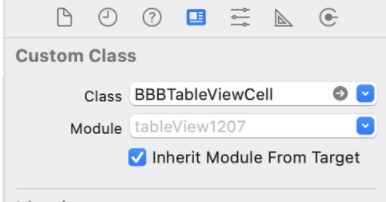
inspector 항목에서 cell의 class를 지정한다
-
5에서 지정한 클래스를 정의해준다. (UITableViewClass 파일 하나 생성하기)
이때 4에서 추가해준 버튼이나 레이블들을 다 IBOutlet으로 연결한다.
class FoodCell: UITableViewCell {
    @IBOutlet var name : UILabel?
    @IBOutlet var plantDescription : UILabel?
    @IBOutlet var picture : UIImageView?
}
*커스텀 셀 만들때 주의사항
- 정적 뷰인 label 이나 imageView 등을 이용해 구성하기
- 성능을 낮추는 유저 인터렉션이 필요한 뷰등은 최대한 피하기
셀 사용
자 그럼 이렇게 정의한 셀을 어디서 사용하냐?
UITableViewController는 UITableViewDataSource 프로토콜을 자동으로 채택하고 있는데, UITableViewDataSource의 cellForRowAt 메서드에서 사용해주면 된당
A. 애플이 제공하는 기본 템플릿 사용시
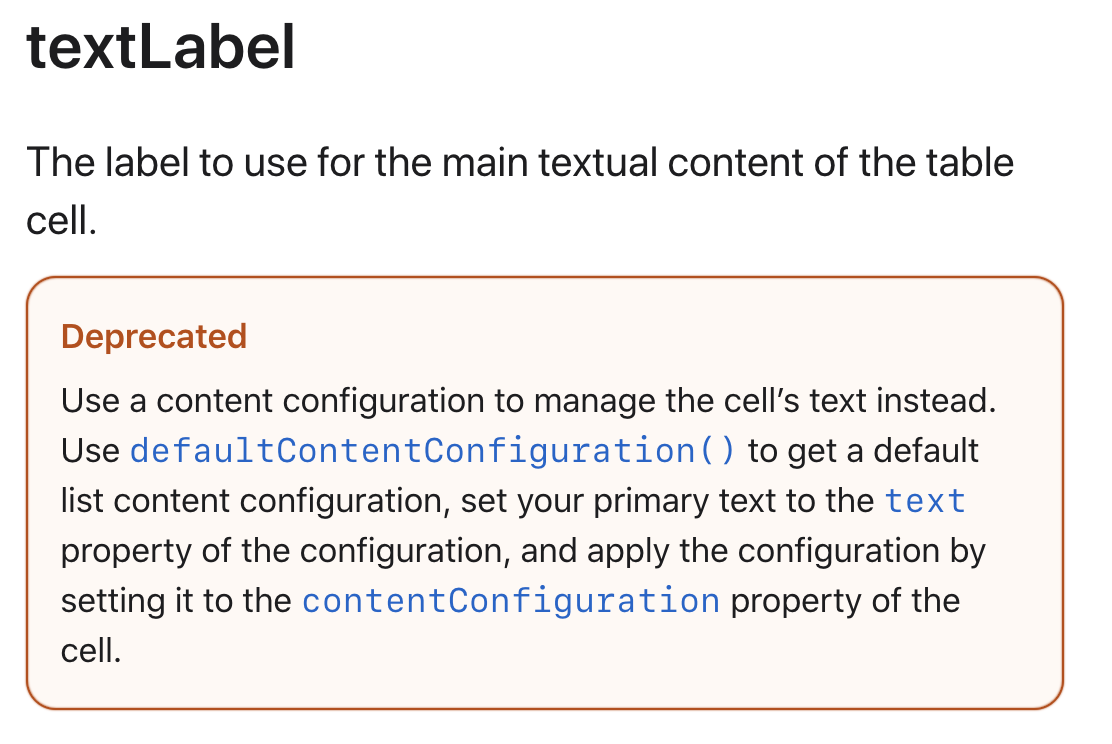
UITableViewCell의 프로퍼티인
textLabel, detailTextLabel, imageView 사용
이때는 아까 뷰에서 지정해준 style에 맞는 항목을 세팅해준다.
예를 들어 style에 imageView가 없는데 여기서 imageView를 할당해주면 뷰에 반영이 안된다는 것
override func tableView(_ tableView: UITableView,
             cellForRowAt indexPath: IndexPath) -> UITableViewCell {
   // 다운캐스팅 안해도됨
   let cell = tableView.dequeueReusableCell(withIdentifier: "basicStyle", for: indexPath)

   // For a standard cell, use the UITableViewCell properties.
   cell.textLabel!.text = "Title text"
   cell.imageView!.image = UIImage(named: "bunny")
   return cell
}
B. 커스텀 셀을 정의하여 나만의 템플릿을 사용시
커스텀 셀 사용시에는 dequeueReusableCell 메서드 사용시 반드시 다운캐스팅 필수!!
그리고, 아까 정의한 클래스의 IBOutlet에 데이터를 할당해준다.
override func tableView(_ tableView: UITableView,
             cellForRowAt indexPath: IndexPath) -> UITableViewCell {

   // 여기서 다운캐스팅을 해줘야한다-> 만들어준 커스텀셀을 가져와서 밑에서 그 프로퍼티에 접근하기위해!!!
   let cell = tableView.dequeueReusableCell(withIdentifier: "foodCellType",
                         for: indexPath) as! FoodCell

   // Fetch the data for the row.
   let theFood = foods[indexPath.row]

   // Configure the cell’s contents with data from the fetched object.
   cell.name?.text = theFood.name
   cell.plantDescription?.text = theFood.description
   cell.picture?.image = theFood.picture

   return cell
}
func tableView(_ tableView: UITableView, cellForRowAt indexPath: IndexPath) -> UITableViewCell {
guard let cell = tableView.dequeueReusableCell(withIdentifier: "testIdentifier", for: indexPath) as? CustomTableViewCell else { return CustomTableViewCell() }
// A 프로토타입 셀의 요소를 쓰는 것 -> 오류
// cell.textLabel?.text = "안녕하세요 " + asset[indexPath.row] + "행 입니다."
// cell.imageView?.image = UIImage(systemName: "circle")
// B 수박 추천 방법) 커스텀 셀에서 만들었던 IBOutlet을 쓰는 것 -> 이거하기 위해 다운캐스팅 해주는 듯
let camperAsset = jsonParser()
cell.myLabel.text = camperAsset[indexPath.row].nicName
cell.pointLabel.text = camperAsset[indexPath.row].yagomPoint.description
// C 애플문서에 나온 방법) 커스텀 셀을 안만들고 하는 방법 -> 됨
// var content = cell.defaultContentConfiguration()
// content.text = "안녕하세요 " + asset[indexPath.row] + "행 입니다."
// content.image = UIImage(systemName: "circle")
//
// cell.contentConfiguration = content
// cell.showsReorderControl = true
return cell
}커스텀 셀 구현시에는 B번 방법인 커스텀 셀에서 연결해준 IBOutlet을 갖고오는게 베스트인듯
앞에서 설명안한 C번 방법은 디폴트 스타일로 구현된 셀을 가져와서 설정값을 바꿔주고 다시 cell에 할당해주는 방법이다. 이 방법도 애플 문서에 나와서 괜찮은 방법인데 걍 일단,, B번쓰자.
var content = cell.defaultContentConfiguration()

// Configure content.
content.image = UIImage(systemName: "star")
content.text = "Favorites"

// Customize appearance.
content.imageProperties.tintColor = .purple

cell.contentConfiguration = contentReference
Configuring the Cells for Your Table
[Swift5] TableView 만들기 (custom cell을 만들어 보기)