
프롤로그
지난 12줄의 코드에서 점점 더 개선을 하는 작업을 하게 된다. 기본으로 나타났던 목록에서 해당 게시물을 누르면 상세 페이지에 대한 정보를 불러오는 작업까지 작성 해 보자.
나아가서 중복되는 코드는 함수로 묶어주면서 점점 더 반복되는 코드를 없앤다.
(지난 포스팅에 더해져서 이어가는 코드라 순서대로 보는 것을 권장한다!)
1. 구분짓는 id값 설정
리스트를 만들 때 해당 값을 구별 할 수 있는 id 를 a 태그의 href 속성으로 설정 해 주었다. 코드를 보자.
for(let i = 0; i < 10; i++) {
  const div = document.createElement('div')

  div.innerHTML = `
    <li>
      <a href="${newsFeed[i].id}">
        ${newsFeed[i].title} (${newsFeed[i].comments_count})
      </a>"
    </li>
  `;

  ul.appendChild(div.firstElementChild);
}
데이터를 newsFeed라는 배열 데이터에 담아놓는다.
for 문으로 객체로 받은 데이터를 돌리면서 title, comments_count, id 를 세팅 해 주고 있다.
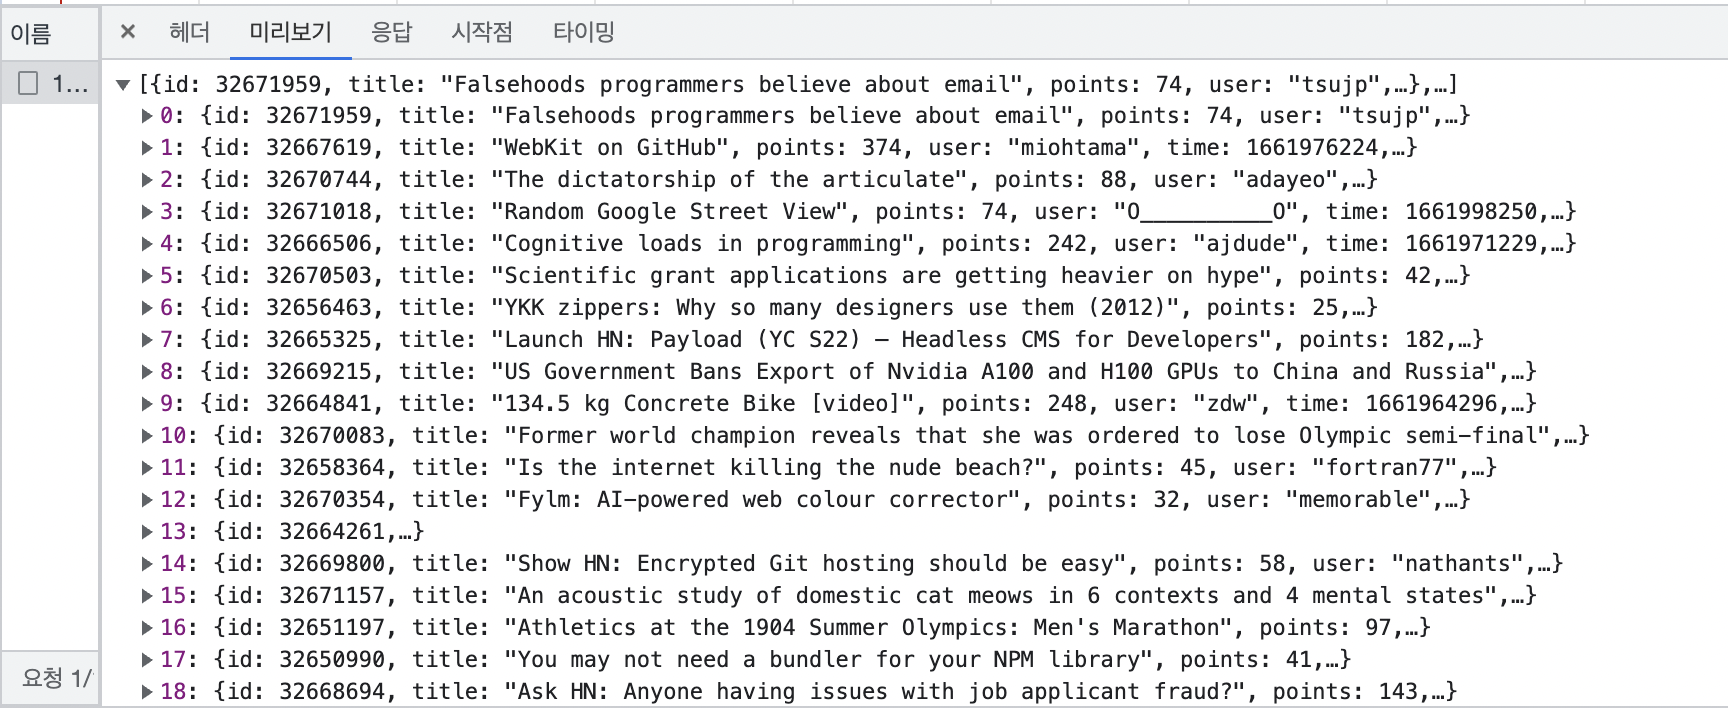
객체화 된 데이터를 잠깐 보자면 이렇다.
2. 해당 게시물의 데이터 받아 오기
id 값에 따라 달라지는 데이터를 받아 오기 위해 다시 api 를 호출한다.
id 값에 따라 달라지는 url 주소가 되므로 @id 로 적어 놓고, 이후에 대체하는 식으로 작성해 놓았다. 바로 아래 이벤트에서 다뤄 보자.
const CONTENT_URL = 'https://api.hnpwa.com/v0/item/@id.json';
3. 아이템 클릭 감지
사용자가 해당 게시물을 클릭했을 때 컴퓨터는 어떻게 감지할까? 답은 윈도우에서 자체 이벤트를 제공해 준다. 그래서 addEventListenr 라는 메서드를 이용해서 클릭을 감지해 주고, 그에 해당하는 데이터를 불러오게 한다. (로직)
window.addEventListener('hashchange', function() {
  const id = location.hash.substr(1);

  ajax.open('GET', CONTENT_URL.replace('@id', id), false);
  ajax.send();

  const newsContent = JSON.parse(ajax.response);
  const title = document.createElement('h1');

  title.innerHTML = newsContent.title;

  content.appendChild(title);
});-
hashchange라는 이벤트를 이용해서 주소값에 #뒤가 바뀌면 #뒤의 id 값을 잡아와서 변수에 담아준다. -
@id 를 변수에 담아 놓은 id 로 대체 한다.
-
이제 url 주소값을 잡았으니 api 호출하고 받아와서
JSON.parse를 통해 객체로 만들어 준다.
중간) 전체코드
전체코드를 잠시 보자
const container = document.getElementById('root');
const ajax = new XMLHttpRequest();
const content = document.createElement('div');
const NEWS_URL = 'https://api.hnpwa.com/v0/news/1.json';
const CONTENT_URL = 'https://api.hnpwa.com/v0/item/@id.json';

ajax.open('GET', NEWS_URL, false);
ajax.send();

const newsFeed = JSON.parse(ajax.response);
const ul = document.createElement('ul');

window.addEventListener('hashchange', function() {
  const id = location.hash.substr(1);

  ajax.open('GET', CONTENT_URL.replace('@id', id), false);
  ajax.send();

  const newsContent = JSON.parse(ajax.response);
  const title = document.createElement('h1');

  title.innerHTML = newsContent.title;

  content.appendChild(title);
});

for(let i = 0; i < 10; i++) {
  const div = document.createElement('div')

  div.innerHTML = `
    <li>
      <a href="${newsFeed[i].id}">
        ${newsFeed[i].title} (${newsFeed[i].comments_count})
      </a>"
    </li>
  `;

  ul.appendChild(div.firstElementChild);
}

container.appendChild(ul);
container.appendChild(content);
4.중복 코드 합치기
강사님은 마무리로 항상 중복코드를 합쳐가며 코드를 깔끔하게 유지하기를 강조하셨다. 뒤로 가면 갈 수록 (나는 안보이거나 생각 못한 ) 중복 코드를 꺼내서 따로 빼고 분리하는 작업을 하시는데 .. wow 이다. 이렇게 코드를 다루는구나 싶었다.
일단 api 를 호출 하는 부분이 계속 반복 되니까 저 부분은 함수로 합치자. 지금은 반복 되는 부분이 api 밖에 없다.
function getData(url) {
  ajax.open('GET', url, false);
  ajax.send();

  return JSON.parse(ajax.response);
}
5. 마무리 전체 코드
const container = document.getElementById('root');
const ajax = new XMLHttpRequest();
const content = document.createElement('div');
const NEWS_URL = 'https://api.hnpwa.com/v0/news/1.json';
const CONTENT_URL = 'https://api.hnpwa.com/v0/item/@id.json';

function getData(url) {
  ajax.open('GET', url, false);
  ajax.send();

  return JSON.parse(ajax.response);
}

const newsFeed = getData(NEWS_URL);
const ul = document.createElement('ul');

window.addEventListener('hashchange', function() {
  const id = location.hash.substr(1);

  const newsContent = getData(CONTENT_URL.replace('@id', id))
  const title = document.createElement('h1');

  title.innerHTML = newsContent.title;

  content.appendChild(title);
});

for(let i = 0; i < 10; i++) {
  const div = document.createElement('div');

  div.innerHTML =  `
    <li>
      <a href="#${newsFeed[i].id}">
        ${newsFeed[i].title} (${newsFeed[i].comments_count})
      </a>
    </li>
  `;

  ul.appendChild(div.firstElementChild);
}

container.appendChild(ul);
container.appendChild(content);
에필로그
화면을 어떻게 전환시키는가를 이해하는것이 해당 어플리케이션을 빠르게 이해 할 수 있다고 말해주셨다. 웹은 url 로만 전환을 시켜왔고, react 를 할 때 spa 를 처음 접해봤는데 이러한 부분도 어플이나 웹앱을 쓸 때 좀 더 유의깊게 봐야 할 포인트인 것 같다.