들어가며
- 원티드 프리온보딩 인턴십 기간에 기본적으로 husky, lint 설정을 진행했다.
- 기존에는 CRA로 모든걸 작업했는데, Vite의 사용과 더불어 husky, lint 등을 사용하며, 더욱 체계적인 초기환경을 잡아준 것에 큰 도움이 돼, 잊지 않으려 작성해두려 한다.
- 어떤 식으로 구성하면 될지 순서 위주로 작성할 계획이지만, 더불어 왜 사용했는지에 대해서도 작성해보려 한다.
vite 사용 이유
- 빌드 타임이 매우 빠르다고한다.
- 과거에는 브라우저에서 모듈을 사용하기 위해, 여러개로 쪼개진 파일을 합쳐주는 자바스크립트 번들러가 나왔다. 다만 이러한 번들러들 (webpack, rollup 등)은 빌드 속도가 느리다는 단점이 있었다.
- 그러다 esbuild라는, 기존 번들러들보다 100배 빠른(!) 번들러가 나왔다.
- 그럼에도 esbuild는 webpack만큼 사용되지 못했는데, webpack은 빌드를 넘어선 통합적인 툴을 제공했고 esbuild는 그러지 못했기 때문이다.
- 하지만 esbuild를 안쓰기엔 너무 아까웠기에, esbuild를 활용한 snowpack이 나오게 됐다.
- snowpack의 HMR(Hot Module Replace)방식은 파일 수정 시 전체를 수정하지 않고 수정된 파일의 내용만 반영하는 방식으로 매우 강력한 기능을 제공할 수 있게 됐다.
- 그러나 snowpack이 webpack과의 연동 등에서 다양한 버그가 나왔고, 안정적이지 못했다.
- 이렇게 snowpack의 아쉬운 점을 보고, '에반 유' 라는 사람이 vite를 만들게 된다.
- '에반 유'의 특기가 기존 제품의 단점을 보완하여 나은 제품을 만드는 사람이라고 한다.
- 이렇게 나오게 된 vite는 snowpack의 컨셉 + 다른 번들 도구에서 제공하는 기능을 제공하는 번들툴로서 나오게 됐다 !
vite 설치
- template으로 react-ts를 바로 설정할 수 있다.
yarn create vite ./ --template react-ts
Lint, prettier, react-router-dom 설치
일반적으로 Lintting 기능은 ESLint에, Code Formatting은 Prettier에 일임하는 방식으로 사용한다.
git init
yarn add react-router-dom
yarn add eslint -D
yarn add prettier -D
yarn create @eslint/config
config 설정을 해준다 (원하는 형태로 Yes, No)


- .eslintrc.json 파일이 생성된다.
- 알아서 rules을 설정해주면 되는데, 일단 내가 적용한 rule은 다음과 같다.
~~ 위에 생략
"plugins": ["react", "@typescript-eslint"],
  "rules": {
    "no-var": "error",
    "no-multiple-empty-lines": "error",
    "no-console": ["warn", { "allow": ["error"] }],
    "eqeqeq": "error",
    "dot-notation": "error",
    "no-unused-vars": "off",
    "@typescript-eslint/no-unused-vars": "error",
    "react/react-in-jsx-scope": "off",
    "react/prop-types": "off",
    "import/order": [
      "error",
      {
        "groups": [
          "builtin",
          "external",
          "internal",
          "parent",
          "sibling",
          "index",
          "object",
          "type"
        ],
        "pathGroups": [
          {
            "pattern": "@/*",
            "group": "internal",
            "position": "after"
          }
        ],
        "newlines-between": "always",
        "alphabetize": {
          "order": "asc",
          "caseInsensitive": true
        }
      }
    ]
  }
import export 구문 lint 설정하기위한 plugin
yarn add -D eslint-plugin-import
//.eslintrc.json extends, plugin 설정
  "extends": [
    "eslint:recommended",
    "plugin:react/recommended",
    "plugin:@typescript-eslint/recommended",
    "plugin:import/typescript",
    "prettier"
  ],
  "overrides": [],
  "parser": "@typescript-eslint/parser",
  "parserOptions": {
    "ecmaVersion": "latest",
    "sourceType": "module"
  },
"plugins": ["react", "@typescript-eslint", "import"],- import 순서 등은 위에 적은 rules group등에 설정되어 있는 것이다.
eslint-config-prettier
yarn add -D eslint-config-prettier
- eslint는 linting 기능을, prettier는 formatting을 담당하는 구조가 이상적
- 하지만, eslint에는 일부 formatting 관련된 rule도 포함되어 있음
- 이 rule들이 prettier와 다른 설정을 가지고 있다면 설정 충돌이 발생함
- 따라서, eslint에서 formatting 관련 rule들을 모두 해제해야할 필요가 있음 수
동으로 진행할 수도 있지만, 이를 적용해주는 eslint plugin이 존재
Prettier 설정
.prettierrc.cjs 루트 폴더에 생성
- 설정파일의 확장자 형식은 다양하게 지원하고 있다(JSON, YAML, JS, TOML)
- 내가 적용한 prettier 설정은 다음과 같다.
module.exports = {
  bracketSpacing: true,
  singleQuote: true,
  tabWidth: 2,
  trailingComma: "all",
  printWidth: 100,
  endOfLine: "auto",
  useTabs: false,
  semi: true,
  jsxSingleQuote: true,
  arrowParens: "always",
};
husky, lint-staged 사용이유
git hook 설정을 도와주는 npm package.
husky는 git에서 특정 이벤트(커밋, 푸쉬 등)을 실행할 때 이벤트에 hooks를 설정하여 hooks에 설정된 스크립트를 실행할 수 있다.
line-staged는 git의 staged된 상태에 파일들에 특정 명령어를 실행할 수 있도록 해주는 도구이며
line-staged는 Staged된 파일을 수정한 후 다시 git add를 하지 않아도 문제가 없도록 도와주는 도구다.
husky lint-staged 설치
yarn add -D husky lint-staged
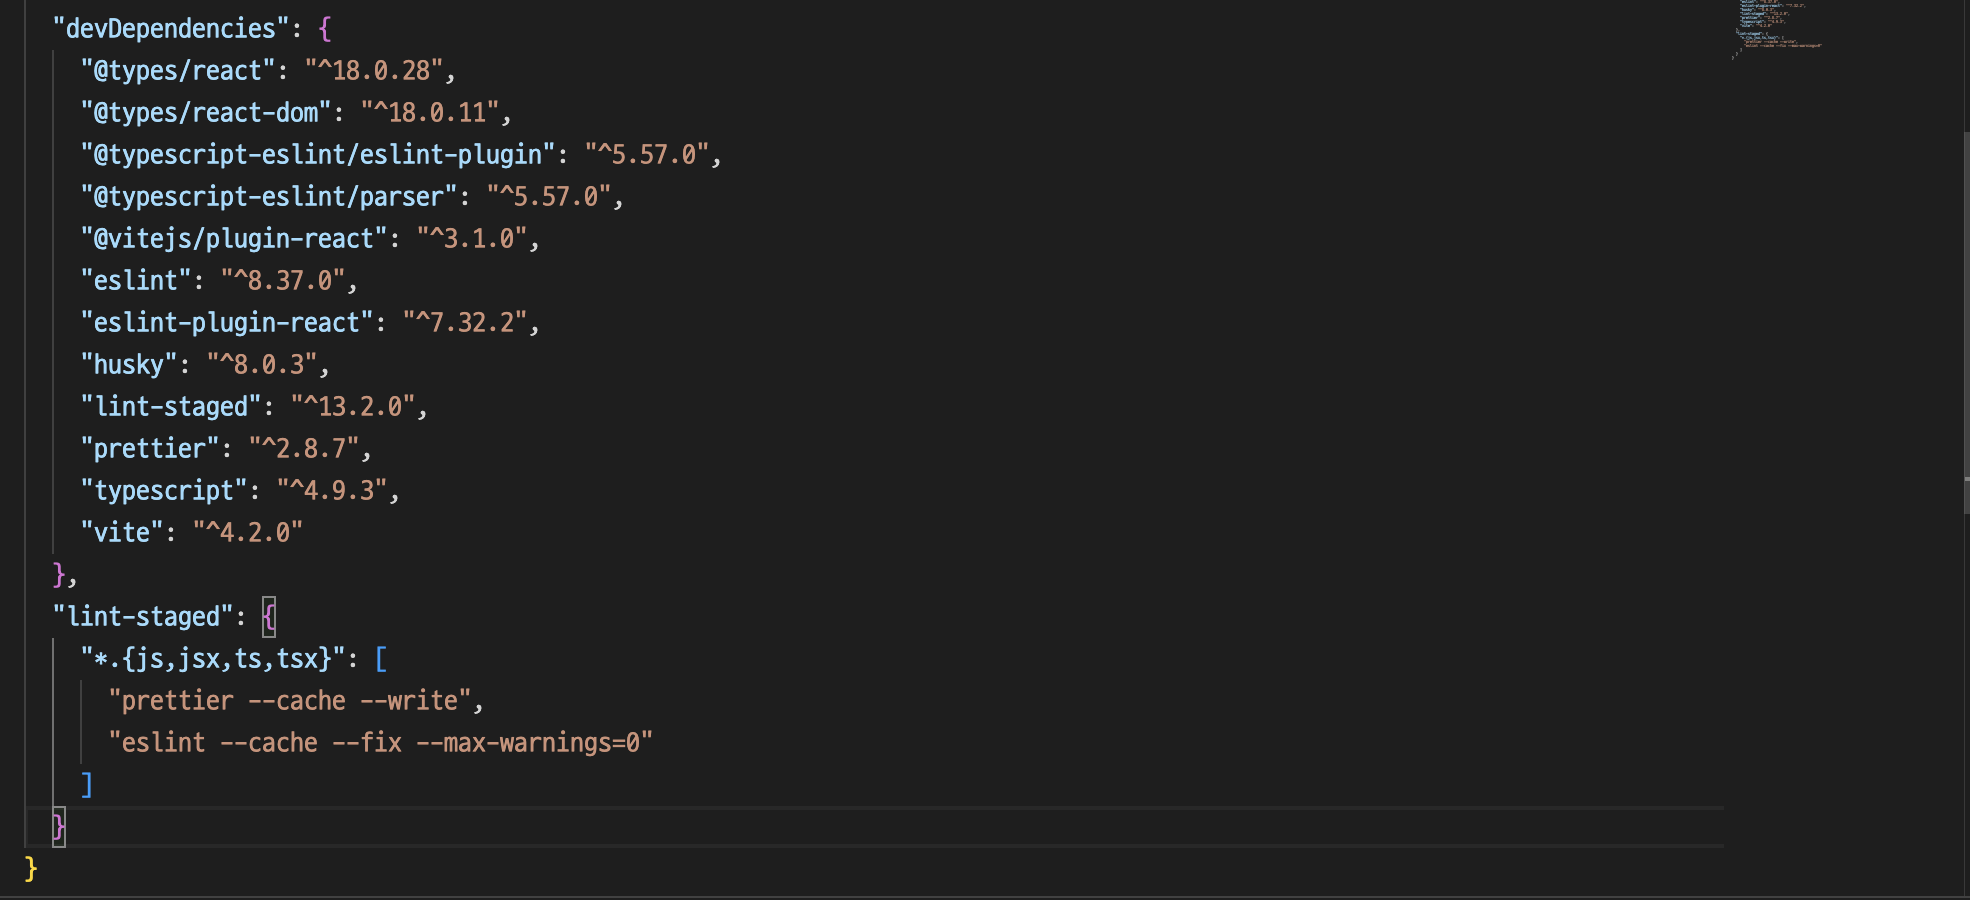
//package.json devDependencies: { ~~ },콤마 뒤에 추가해준다.
"lint-staged": {
    "*.{js,jsx,ts,tsx}": [
      "prettier --cache --write",
      "eslint --cache --fix --max-warnings=0"
    ]
  }
이후에 clone 받아서 사용하는 사람들은 npm install후에 자동으로 husky install 이 될 수 있도록 하는 설정
// package.json

{
  "scripts": {
    "postinstall": "husky install"
  },
}
script 설정
// package.json

{
  "scripts": {
    "postinstall": "husky install",
		"format": "prettier --cache --write .",
		"lint": "eslint --cache .",
  },
}
yarn husky install
해줘야 husky 폴더가 생긴다.
npx husky add .husky/pre-commit "yarn lint-staged"
npx husky add .husky/pre-commit "yarn format"
import path경로 줄이기
- ../../../../utils 처럼 import하면서 부르는 모양을 줄일 수 있다.
 "baseUrl": ".",
    "paths": {
      "@/*": ["src/*"]
    }
paths 설정을 하면 아래처럼 import가 가능하다.
import { chartDataOptions, chartOptions } from '@/utils/chartOptions';
vite 에서는 추가로 설정해주어야 한다. 안그러면 에러가 발생.
yarn add -D vite-tsconfig-paths
로 추가후, vite.config.ts에서 아래와 같이 수정
// vite.config.ts
import { defineConfig } from 'vite'
import react from '@vitejs/plugin-react'
import tsconfigPaths from 'vite-tsconfig-paths'

// https://vitejs.dev/config/
export default defineConfig({
  plugins: [react(), tsconfigPaths()],
})
마치며
- 많은 설정을 해준거 같은데, 실제 체감적으로 느껴지는 가장 좋은건 console이 적혔을 때 commit이 안되는 점이다. 다른 lint 설정을 어기지 않는다면 console로 commit 막히는 걸 제일 많이 겪을 수 있는데, 살짝 불편하면서도 오히려 막아줘서 좋다.!
** 틀린 부분은 알려주시면 확인 후 수정할 수 있도록 하겠습니다.
출처
출처 : Vite 이야기 - 테오의 프론트엔드
참고자료 : Prettier 옵션 설명
Eslint -configure/plugins
Eslint -rules
원티드 1주차 강의