*M1 Mac환경
MongoDB 설치
$ brew tap mongodb/brew
$ brew install mongodb-community
MongoDB 실행 및 정지
- 서버 시작
$ brew services start mongodb-community- 서버 종료
$ brew services stop mongodb-community*서버를 시작하면 MongoDB의 기본 포트인 27017 포트로 열린다.
 다음과 같이 뜨면 서버 구동에 성공한것 이다.
MongoDB 터미널 활용하기
$ mongomongo서버를 구동하고,
터미널에서 mongo를 입력하면 터미널에서 서버에 접속할 수 있다.
*zsh: command not found: mongo와 같은 오류가 발생해서,
$ brew install mongodb-community-shellcommunity shell을 설치해주었다.
- 기본 명령어
// DB생성
use 데이터베이스
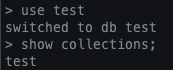
//데이터베이스 보기
show dbs;
//컬렉션 생성
db.createCollection('컬렉션 명');
//컬렉션 보기
show collections;
//컬렉션 삭제
db.컬렉션명.drop();
//데이터베이스 삭제
db.dropDatabase();
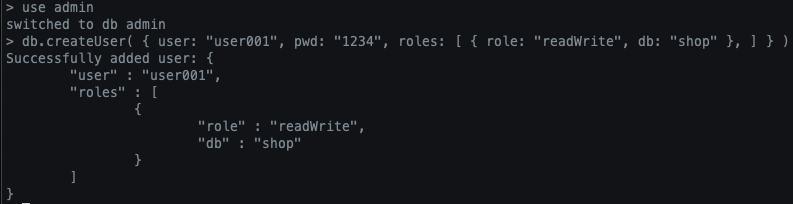
admin계정도 만들어 주었다.
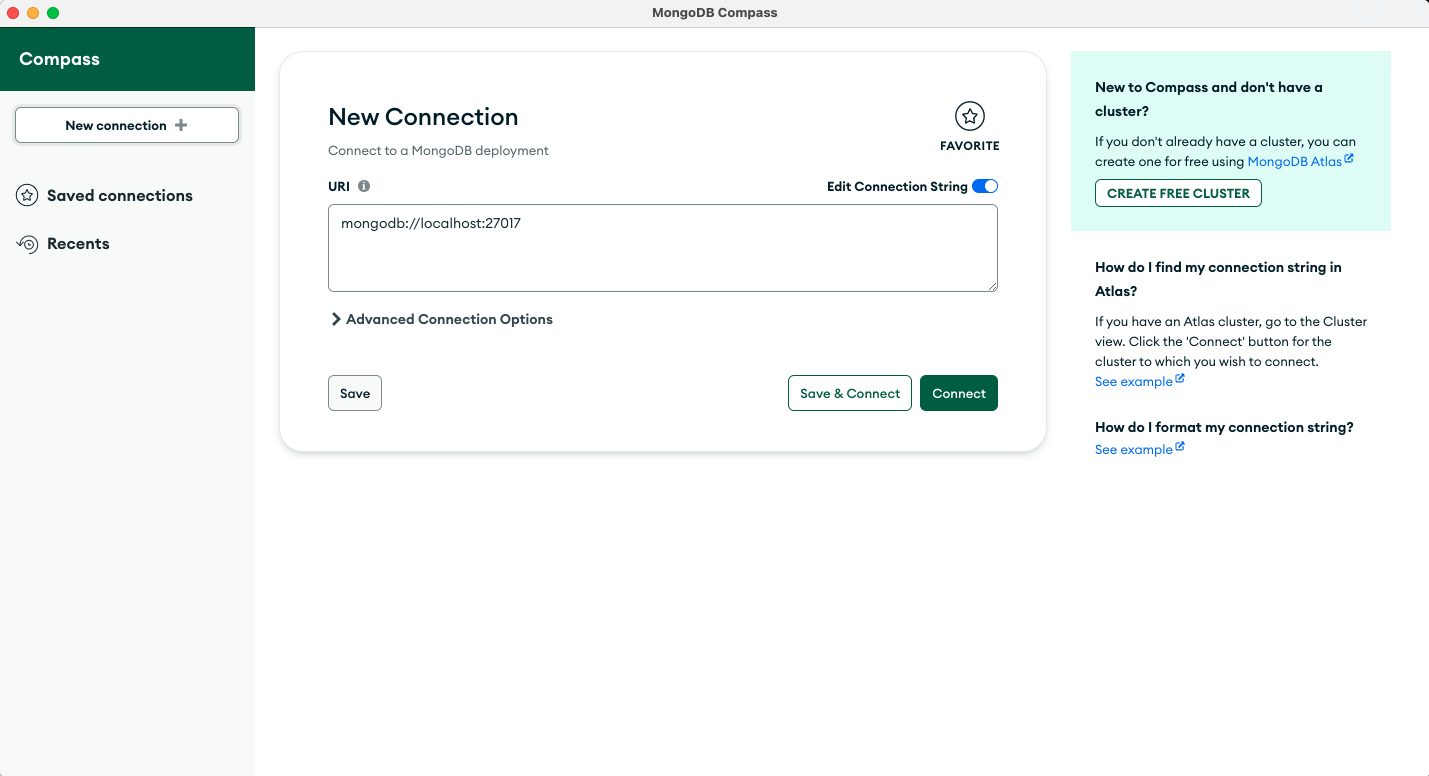
compass - MongoDB GUI 다운로드
https://www.mongodb.com/try/download/compass

Spring에 적용시키기
- build.gradle 작성
implementation 'org.springframework.boot:spring-boot-starter-data-mongodb'위와 같이 dependency를 추가해준다.
- application.yml 설정
spring:
  data:
    mongodb:
      host: localhost
      port: 27017
      authentication-database: admin
      database: my-database
      username: DDonghyeo
password: 1234- Model 생성
@Getter
@Setter
@Document(collection = "user")
public class User{

	private Long id;
    private String name;
    private String email;
}
- Repository 생성
public interface UserRepository extends MongoRepository<User, String> {

    public String findByName(String name);
}
userRepository 추상 메서드를 생성했다.
Spring에서 Data Repository에 한해 Naming Convention이 맞는 메서드에 대해
동적으로 data access에 대한 implementation을 제공한다.
따라서 실제로 findByName을 구현하진 않았지만, 조회가 잘 동작한다.
- Service 생성
@Slf4j
@Component
public class UserSerivce {

    @Autowired
    UserRepository userRepository;

    public String findUserByName(String name){
        ObjectMapper objectMapper = new ObjectMapper();
        try {
            if (userRepository.findByName(name) == null){
                log.info("can't find user : {} ", name);
                return String.format("can't find user : %s", name);
            } else {
                return userRepository.findByName(name);
            }

        } catch (JsonProcessingException e) {
            e.printStackTrace();
            return "ERROR";
        }
    }

    public void addUser(User user){
        if(userRepository.findById(user.getId()) != null){
            log.info("user already exists.");
        } else {
            userRepository.save(user);
            log.info("user added completely");
        }
    }
}
간단하게 이름으로 유저 찾기(findUserByName), 유저 등록하기(addUser) 메서드를 만들었다.
- Controller 생성
@Slf4j
@RestController
@RequestMapping("/user")
public class UserController {

    @Autowired
    UserSerivce userSerivce;

    @GetMapping("/find")
    public String findUser(@RequestParam String name){
        return userSerivce.findUserByName(name);
    }

    @PostMapping("/add")
    public void addUser(@RequestBody User user){
        userSerivce.addUser(user);
    }

}
/find에서는 name으로 사용자를 찾고, /add에서는 user를 등록할 수 있다.
실행 테스트
- 유저 등록

먼저 서버를 돌리고, postman으로 테스트 해봤다.

Body에 User를 담아서 Post한 결과
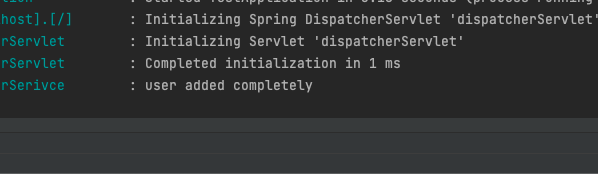

설정해뒀던 로그가 잘 떴고, compass에서도 잘 확인됐다.
*중복 유저 등록 시

- 유저 찾기
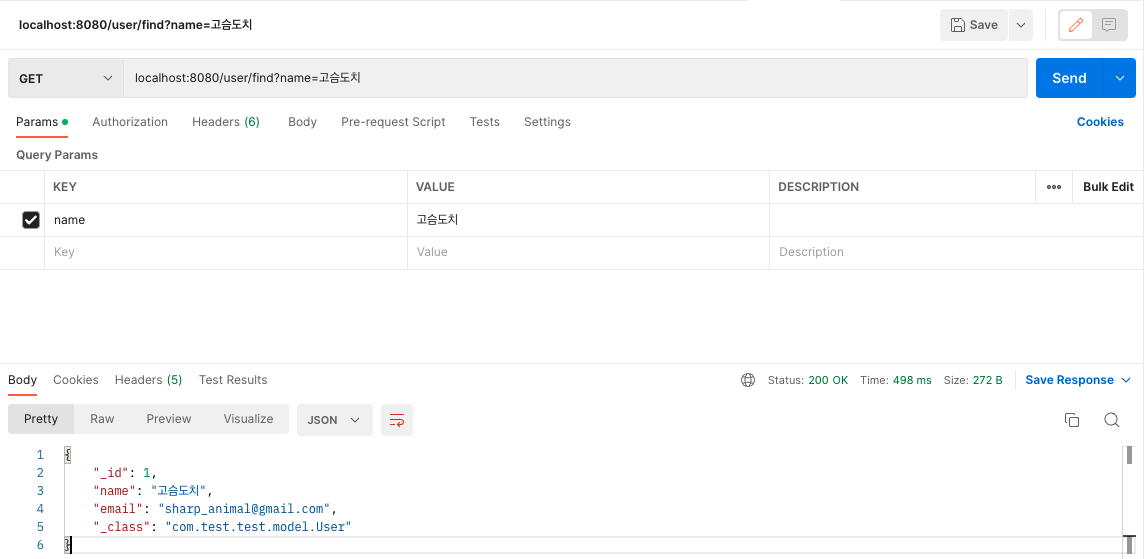
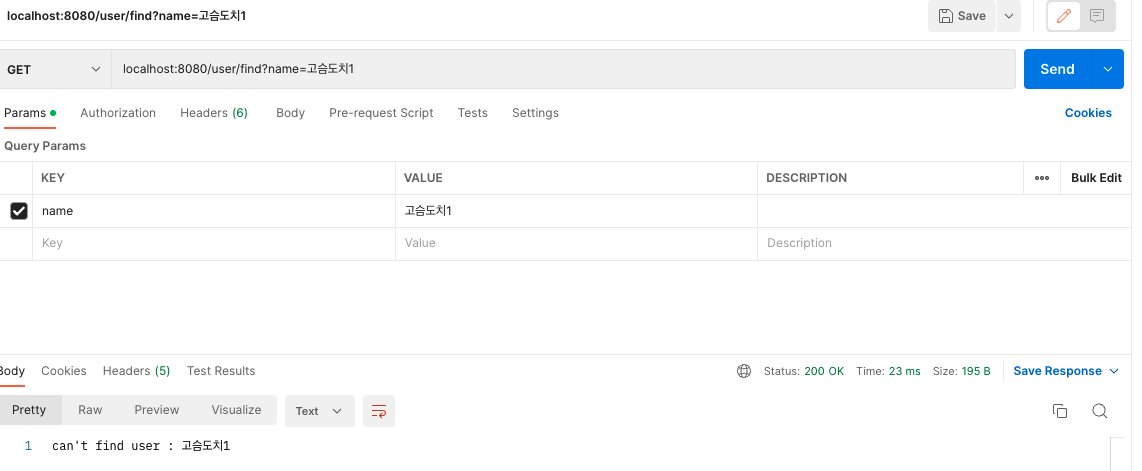

모두 실행이 잘 되는 것을 볼 수 있다.
이로써 스프링 프로젝트에 NoSQL을 적용시켜서 써 봤는데,
NoSQL이 훨씬 편하고 보기도 좋은 것 같기도 하다 !!