한창 장고로 개발을 하고나면 runserver로 테스트를 했지만, 직접 배포를 runserver로 하게되면 보안, 안정성, 효율 등 여러 면에서 좋지않다.
- django.core.servers.basehttp
"""
HTTP server that implements the Python WSGI protocol (PEP 333, rev 1.21).
Based on wsgiref.simple_server which is part of the standard library since 2.5.
This is a simple server for use in testing or debugging Django apps. It hasn't
been reviewed for security issues. DON'T USE IT FOR PRODUCTION USE!
"""
장고에서도 runserver를 테스트나 디버깅 용으로 쓰라고 권장한다.

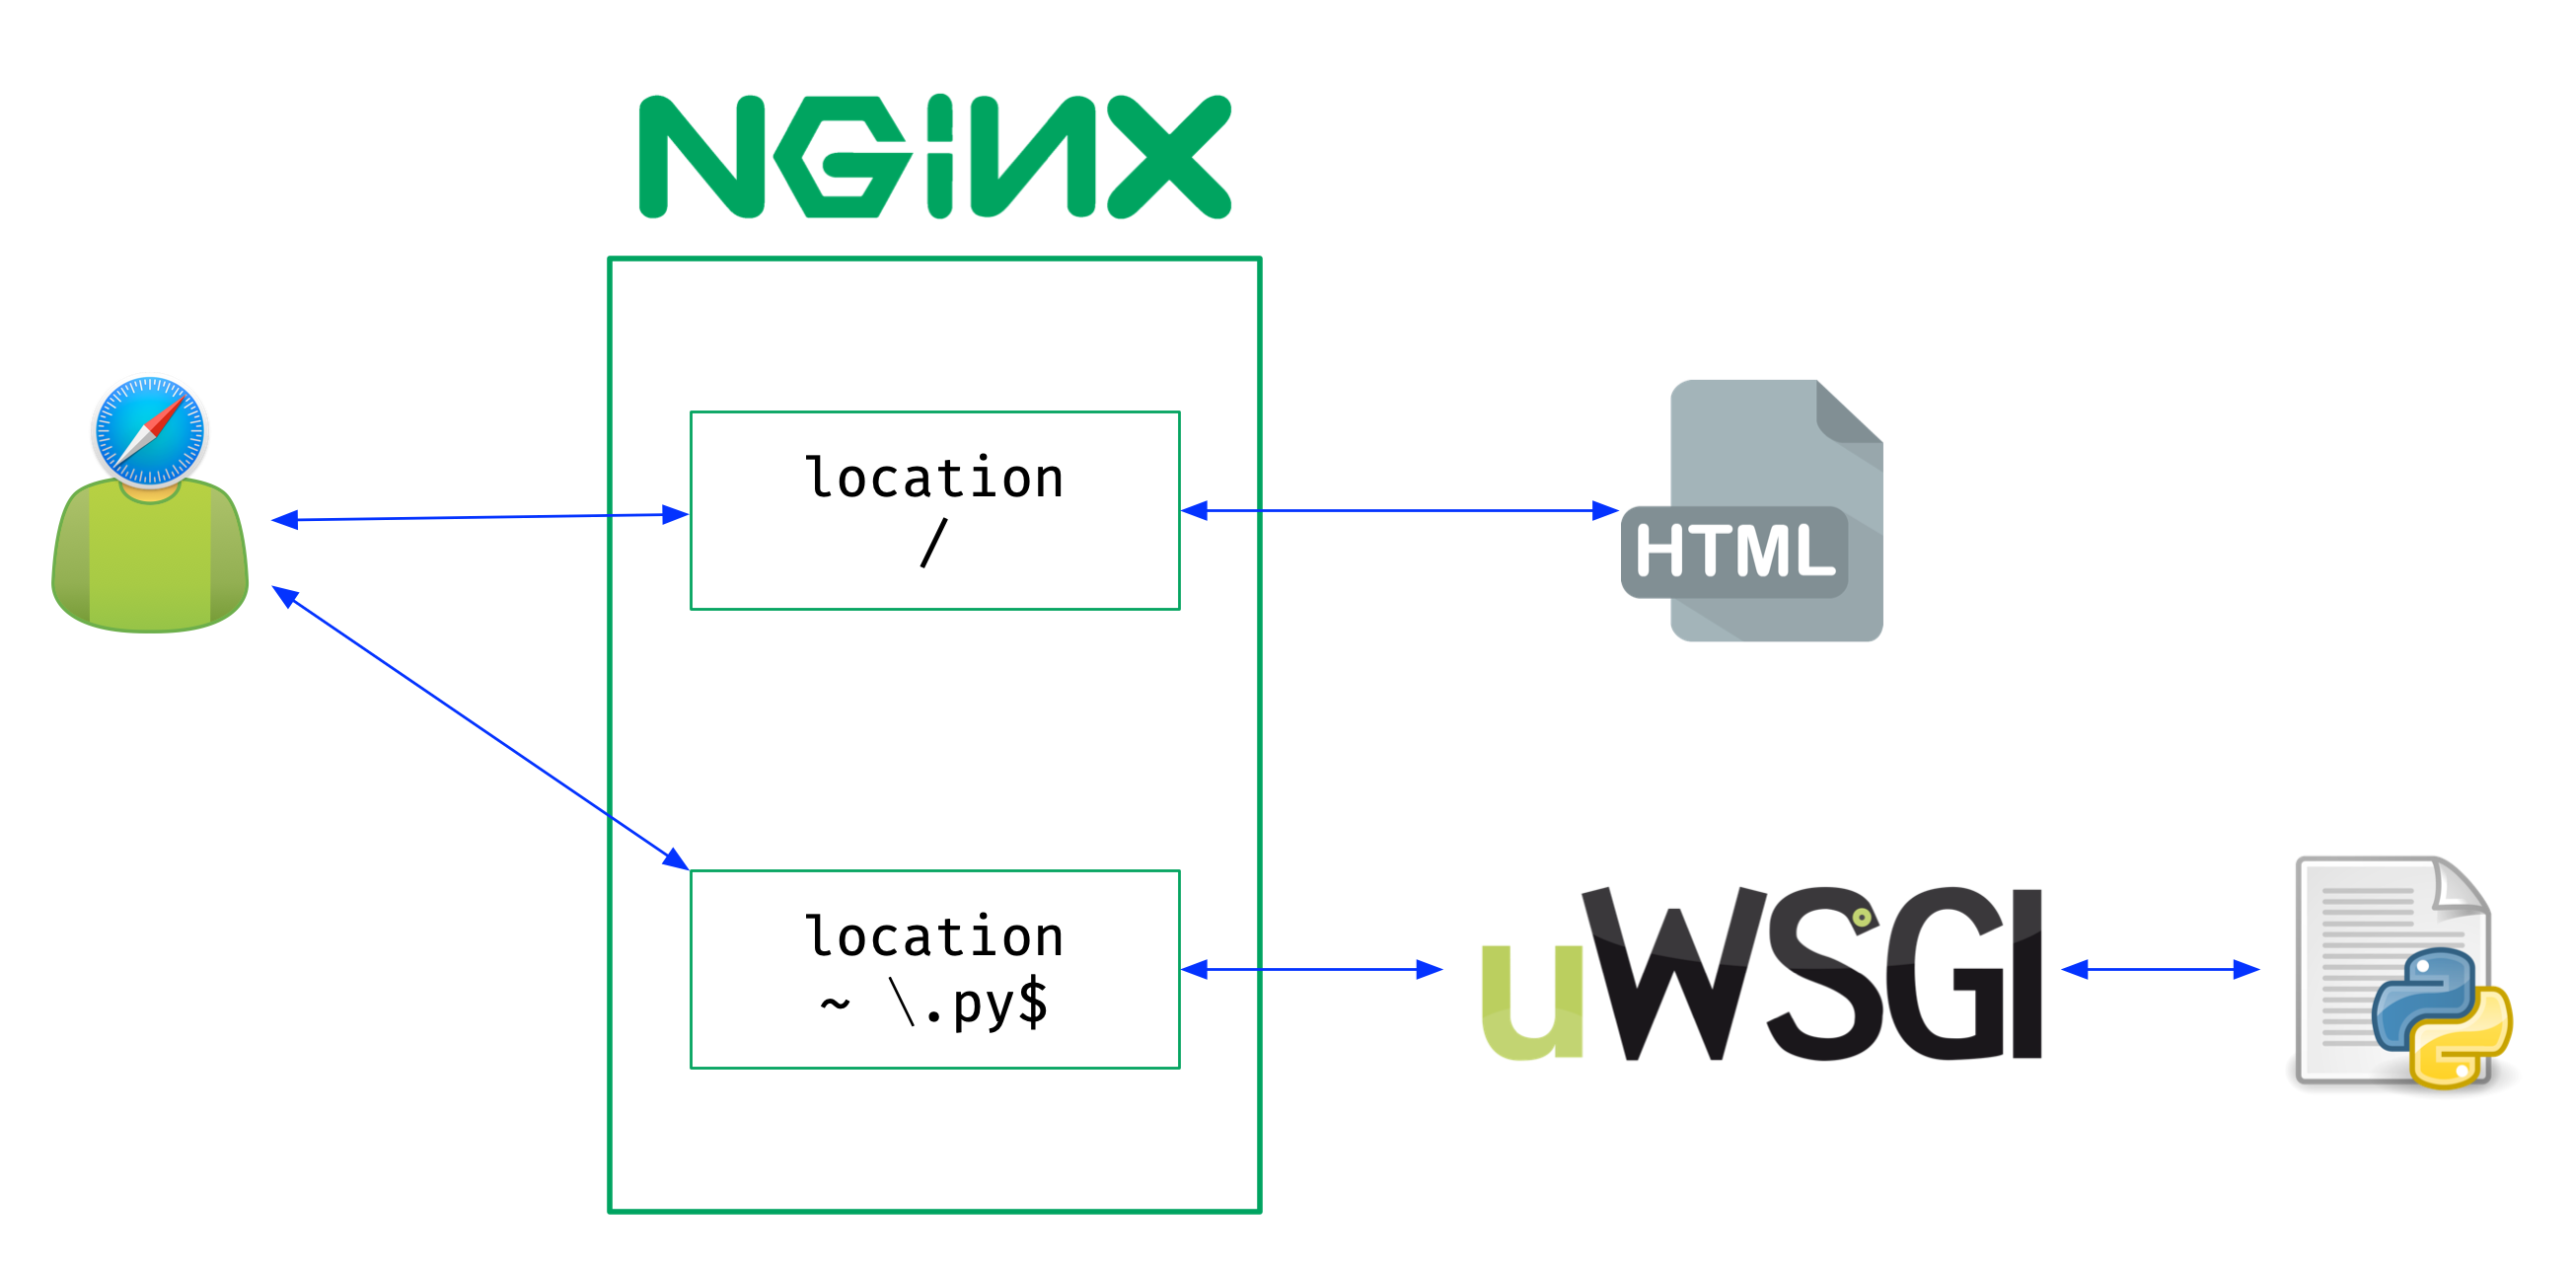
따라서, WS인 NGINX와 uWSGI를 통해서 연동시켜 보려고 한다.
NGINX와 같은 WS들은 python 프로그램을 해석할 능력이 없다.
python과같은 언어를 해석할 수 있는 인터페이스 역할을 하는 CGI가 필요하다.
이 때 WSGI는 웹 요청을 처리하는 표준 인터페이스이다.
보통은 WS + CGI + Django
에서 WSGI로 gunicorn이나 uWSGI를 많이 사용하는 것 같은데, gunicorn보다 uWSGI가 효율적인 면에서 좋은 것 같아서 uWSGI를 이용해보려고 한다.
1. uWSGI 설정
uWSGI 설치
yum install -y gcc
pip install uwsgi
먼저 서버에 uWSGI를 설치해준다.
uWSGI 설정
설치를 완료했다면, 설정 파일을 만들어준다.
mkdir -p /etc/uwsgi/sites
vi /etc/uwsgi/sites/django-project.ini
위 파일명의 'django-project'에는 내가 시작한 장고 프로젝트의 이름을 넣어놓도록 하자.
[uwsgi]
project = django-project #프로젝트 명
username = ec2-user #사용자
base = / #base 디렉토리

### Django Settings
# base directory
chdir = /home/ec2-user/django-project #장고 프로젝트 디렉토리
# python path
home = /usr #파이썬 홈 디렉토리
# virtualenv path
# virtualenv = /home/env/test #가상환경. 있다면 설정
# wsgi.py path
module = config.wsgi:application #장고 프로젝트 내 wsgi


master = true
processes = 5 #프로세스 수

uid = ec2-user
socket = /run/uwsgi/django-project.sock #소켓 전달 위치
chown-socket = root:nginx
chmod-socket = 660
vacuum = true

logto = /var/log/uwsgi/django-project.log
정말 많은 사이트를 뒤져봤지만.. 나는 이렇게 설정해야 작동했다.
- home의 경우 python 홈 디렉토리로 자동으로 설정된다. 만약 파이썬이 /usr/bin/python 경로에 있다면, /usr 만 설정해주면 uwsgi가 돌아가면서 자동으로 뒤에 /bin/python을 붙인다.
- module의 경우 장고 프로젝트의 wsgi.py를 매핑해주면 된다. 내 프로젝트는 config 앱 내에 wsgi.py가 있었기 때문에 config.wsgi:application로 설정해줬다.
uWSGI를 구동하는 사이 나오는 로그는 logto의 디렉토리로 가게 된다. 해당 디렉토리를 만들어 주어야 한다.
mkdir -p /var/log/uwsgiuWSGI 서비스 작성
uWSGI가 서비스로 작동할 수 있게 설정해줘야 한다.
emperor모드에서 실행해줘야 한다.
vi /etc/systemd/system/uwsgi.service[Unit]
Description=uWSGI service
[Service]
ExecStartPre=/bin/mkdir -p /run/uwsgi
ExecStartPre=/bin/chown root:nginx /run/uwsgi
ExecStart=/home/ec2-user/.local/bin/uwsgi --emperor /etc/uwsgi/sites
Restart=always
Type=notify
NotifyAccess=all
[Install]
WantedBy=multi-user.target리로드
systemctl daemon-reload실행
systemctl start uwsgi2. NGINX 설정
이제 설치해둔 NGINX를 설정해주자.
vi /etc/nginx/nginx.confserver{
listen 8000;
server_name {서버 도메인 또는 IP};
location / {
include uwsgi_params;
uwsgi_pass unix:/run/uwsgi/django-proejct.sock;
}
}서버에 맞게 설정해주면 된다.
uwsgi_params는 프로토콜 변수이다. 해당 변수를 include 해줌으로써 웹 서버가 전달하는 변수들을
uWSGI서버가 동적으로 실행될 수 있다.
uwsig_pass는 uwsgi프로토콜을 이용해서 uWSGI에 서버 트래픽을 전달하고, ini파일에서 작성했던 unix socket을 사용한다.
3. Selinux
vi /etc/sysconfig/selinuxSELINUX=disabledrebootwell-known포트를 사용하기 위해 해제해준다.
원래는 Selinux를 사용하지 않고 부분권한을 주는게 좋다.
하지만 이렇게 진행하겠다...
3. 실행
 systemctl start uwsgi
 systemctl enable uwsgi
uwsgi 서버를 실행하고, 8000포트로 접속하면 장고 앱 프로젝트가 실행된 것을 볼 수 있다.