QRCode 만들기
1) pip install qrcode
import qrcode
qr_data = 'https://www.python.org'
qr_img=qrcode.make(qr_data)

qr_img.save('./Python_practice/site.png')
QR 인식 시 www.python.org 로 이동

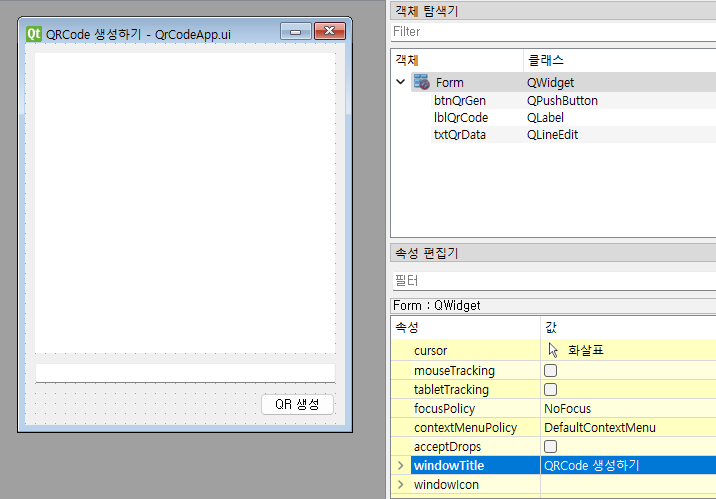
QrCode 생성 APP
Qt Designer 을 사용하여 UI 디자인
# PyQT와 QR을 활용한 앱
import sys
from PyQt5 import uic
from PyQt5.QtWidgets import *
from PyQt5.QtGui import *
from PyQt5.QtCore import * #Qt.white 사용하기 위함
import qrcode #qr코드 사용

# QRCode 커스터마이징 클래스
class Image(qrcode.image.base.BaseImage):
    def __init__(self, border, width, box_size) -> None:
        self.border=border
        self.width=width
        self.box_size=box_size
        # size 생성
        size = (width+border*2) * box_size

        self._image = QImage(size,size,QImage.Format_RGB8)
        self._image.fill(Qt.white)

    def pixmap(self):
        return QPixmap.fromImage(self._image)

class qtApp(QWidget):
    def __init__(self):
        super().__init__()
        uic.loadUi('./Python_practice/QrCodeApp.ui',self) #Qt Designer로 만든 ui 사용
        self.setWindowTitle('QrCode 생성앱')
        self.setWindowIcon(QIcon('./Python_practice/qrIcon.png'))

        # 시그널/슬롯
        self.btnQrGen.clicked.connect(self.btnQrGenClicked)
        # 엔터 쳤을때 만들어지게 하기
        self.txtQrData.returnPressed.connect(self.btnQrGenClicked)

    #QR생성하기 버튼 클릭 함수
    def btnQrGenClicked(self):
        data = self.txtQrData.text()

        if data=='':
            QMessageBox.warning(self,'경고','데이터를 입력하세요')
            return
        else :
            qr_img=qrcode.make(data)
            qr_img.save('./Python_practice/site.png')

            img=QPixmap('./Python_practice/site.png')
            self.lblQrCode.setPixmap(QPixmap(img).scaledToWidth(300))


if __name__=='__main__':
    app=QApplication(sys.argv)
    ex=qtApp()
    ex.show()
    sys.exit(app.exec_())
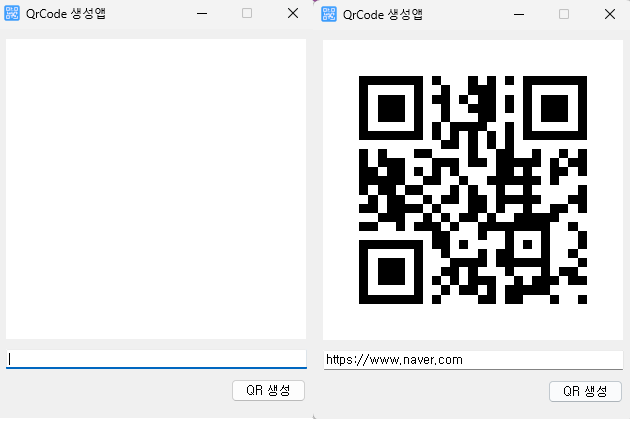
QR 링크 연결 시 작성한 url로 연결됨
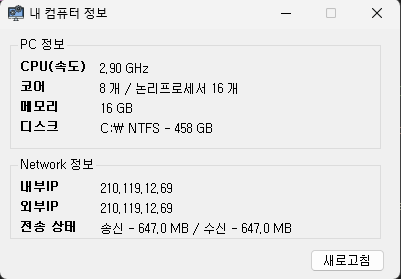
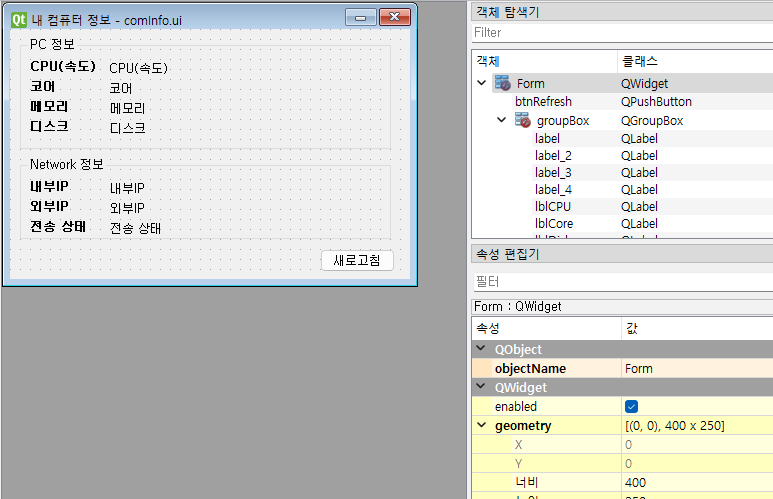
내 컴퓨터 정보 출력 앱
Qt Designer을 사용하여 UI 디자인
# 컴퓨터 정보 출력 앱
import sys
from PyQt5 import uic
from PyQt5.QtWidgets import *
from PyQt5.QtGui import *
from PyQt5.QtCore import *
>
import psutil
import socket
import requests
import re
>
class qtApp(QWidget):
    def __init__(self):
        super().__init__()
        uic.loadUi('./Python_practice/comInfo.ui',self) #Qt Designer로 만든 ui 사용
        self.setWindowTitle('내 컴퓨터 정보')
        self.setWindowIcon(QIcon('./Python_practice/cominfo.png'))
>
        self.initInfo()
        #새로고침 버튼
        self.btnRefresh.clicked.connect(self.btnRefreshClicked)
    >
    def btnRefreshClicked(self):
        self.initInfo()
>
    def initInfo(self):
        cpu=psutil.cpu_freq()
        cpu_ghz=round(cpu.current / 1000, 2) # 1000으로 나누고 두번째 자리에서 반올림
        self.lblCPU.setText(f'{cpu_ghz:.2f} GHz')
>
        core=psutil.cpu_count(logical=False)
        logical=psutil.cpu_count(logical=True)
        self.lblCore.setText(f'{core} 개 / 논리프로세서 {logical} 개')
>
        memory=psutil.virtual_memory()
        mem_total=round(memory.total / 1024**3)
        self.lblMemory.setText(f'{mem_total} GB')
>
        disks=psutil.disk_partitions()
        for disk in disks:
            if disk.fstype == 'NTFS':
                du = psutil.disk_usage(disk.mountpoint)
                du_total = round(du.total / 1024**3)
                msg=f'{disk.mountpoint} {disk.fstype} - {du_total} GB'
>
                self.lblDisk.setText(msg)
                break
        >
        in_addr = socket.socket(socket.AF_INET , socket.SOCK_STREAM)
        in_addr.connect(('www.google.com',443))
        self.lblInnerNet.setText(in_addr.getsockname()[0])
>
        req = requests.get('http://ipconfig.kr')
        out_addr=req.text[req.text.find('<font color=red>')+17:req.text.find('</font><br>')]
        self.lblExtraNet.setText(out_addr)
>
        net_stat = psutil.net_io_counters()
        sent=round(net_stat.bytes_sent / 1024 **2 ,1)
        recv=round(net_stat.bytes_sent / 1024 **2 ,1)
        self.lblNetStat.setText(f'송신 - {sent} MB / 수신 - {recv} MB')
>
if __name__=='__main__':
    app=QApplication(sys.argv)
    ex=qtApp()
    ex.show()
    sys.exit(app.exec_())