Jupyter Notebook/Folium/JSON
주피터 노트북 사용법 학습
간단한 설정
- Ctrl+, 로 설정 - line검색 - Notebook line 부분 on
- jupyter debug 검색 - Jupyter:Show Variable View When Debugging 체크
마크다운, 파이썬 셀 추가, 파이썬 셀 실행 : 단축키
- 현재 셀 앞에 셀 추가 : a
- 현재 셀 뒤에 셀 추가 : b
- 현재 셀을 마크다운으로 변경 : m
- 현재 셀을 코드 셀로 변경 : y
- 셀 실행 : Ctrl + Enter
- 셀 실행 + 다음 셀로 이동(셀 없을 시 생성) : Shift + Enter
- 셀 실행 + 다음 셀 생성 : Alt + Enter
- 주석 처리 : Ctrl + K + C
디버깅
- 디버그 쉘 : Ctrl + Shift + Alt + Enter
- 함수가 다른 셀에 선언되어있어 한번에 디버깅 불가능 한 경우
--> 상단 메뉴 ... - 내보내기 - 새로운 파일로 저장(.py로 바뀜) - F5로 기존 py 파일 디버그 하는것 처럼 수행하면된다
--> 근데 이걸 굳이 왜 해야하는지.. 그냥 같은 셀에 입력해서 돌리면 되는거아닌지;- Jupyter 에서는 print(arr) / arr 같은 출력
Jupyter 에서 껐다가 다시 열었을 때 위에서부터 실행을 해줘야 위에서 선언한 변수를 아래 셀 에서 사용 할 수 있음
Folium 지도 사용
- 셀 안에서 !pip install folium + (Ctrl+Enter)
import folium
#location [위도,경도], zoom_start=1~19(얼마나 확대 할 지)
m=folium.Map(location=[35.117479,129.090394],zoom_start=15)
m
-----------------------출력-----------------------
-----------------------출력-----------------------
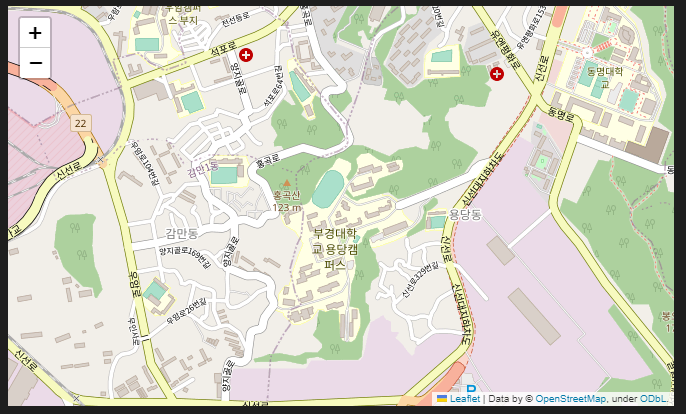
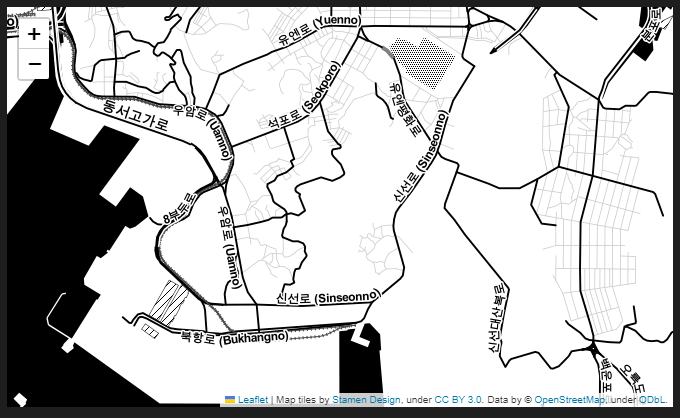
- Map 옵션(tiles로 style)변경
m=folium.Map(location=[35.117479,129.090394],zoom_start=14,tiles='Stamen Toner')
m
-----------------------출력-----------------------
-----------------------출력-----------------------
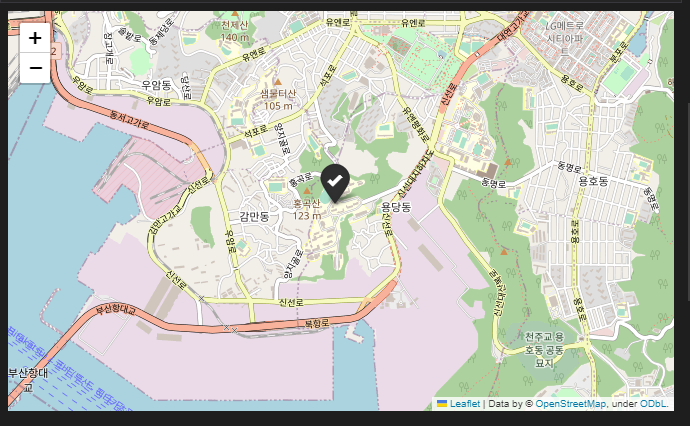
- Marker 사용
m=folium.Map(location=[35.117479,129.090394],zoom_start=14)
folium.Marker([35.117479,129.090394],
            popup='부경대 용당캠',
            icon=folium.Icon(color='black',icon='ok')).add_to(m)
m
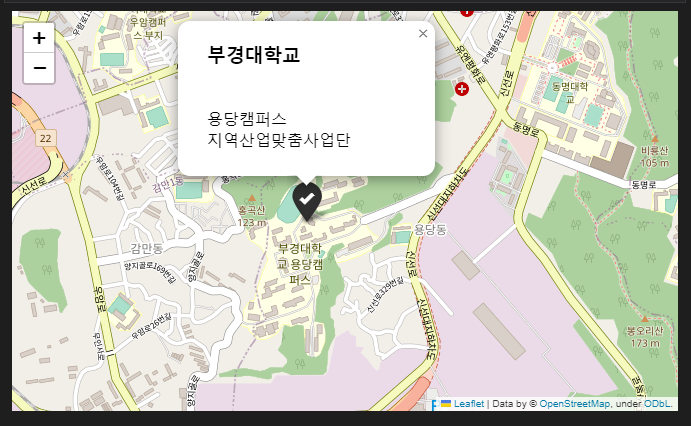
- Marker 커스터마이즈
m=folium.Map(location=[35.117479,129.090394],zoom_start=14)
iframe = folium.IFrame('<h3>부경대학교</h3><br>용당캠퍼스<br>지역산업맞춤사업단')
popup = folium.Popup(iframe,min_width=210,max_width=200)
folium.Marker([35.117479,129.090394],
            popup=popup,
            icon=folium.Icon(color='black',icon='ok')).add_to(m)
m
-----------------------출력-----------------------
-----------------------출력-----------------------
- 특정 구역 표시
https://raw.githubusercontent.com/southkorea/seoul-maps/master/juso/2015/json/seoul_municipalities_geo_simple.json
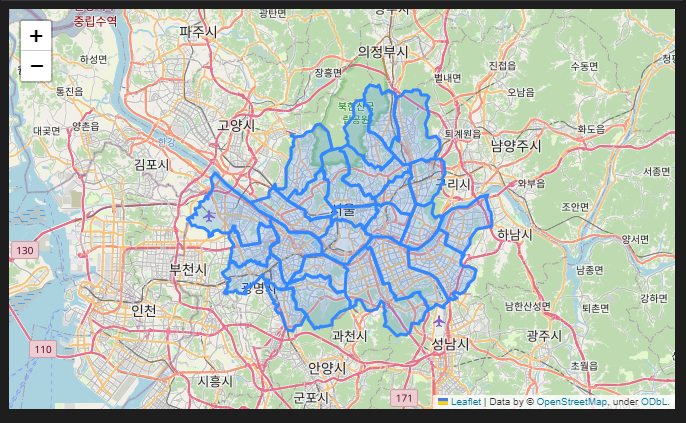
에서 세부 내용 Ctrl+a 로 긁어서 json 파일(파일이름:원하는대로) 저장import json m=folium.Map(location=[37.566345,126.977893],zoom_start=10) gfile=open('./seoul_municipalities_geo_sample.json','r',encoding='utf-8').read() json_data=json.loads(gfile) #json파일의 텍스트를 전부 읽어옴 folium.GeoJson(json_data,name='municipalites').add_to(m) m -----------------------출력----------------------- -----------------------출력-----------------------
- 대한민국 시 도 영역 표시 + 웹페이지로 저장
https://raw.githubusercontent.com/southkorea/southkorea-maps/master/kostat/2018/json/skorea-provinces-2018-geo.json
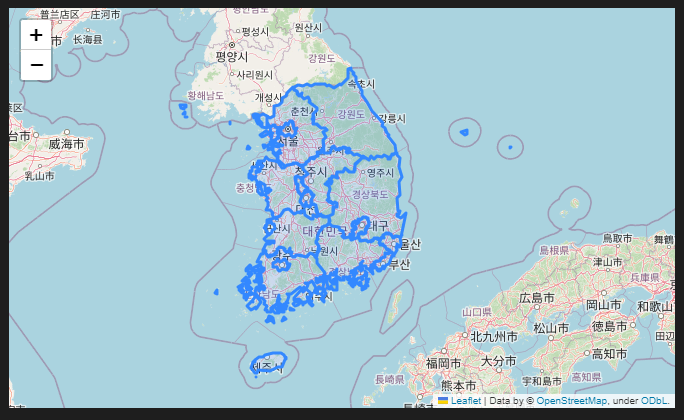
에서 우클릭 - 다른이름으로 저장 - 내가쓰는 폴더에 저장import json m=folium.Map(location=[37.566345,126.977893],zoom_start=7) gfile=open('./skorea-provinces-2018-geo.json','r',encoding='utf-8').read() json_data=json.loads(gfile) #json파일의 텍스트를 전부 읽어옴 folium.GeoJson(json_data,name='대한민국 시도경계').add_to(m) m.save('./index.html')# 웹페이지로 저장 m -----------------------출력----------------------- -----------------------출력-----------------------
--> m.save('./index.html')을 통해 지정한 폴더에 .html파일로 저장
- 위경도 팝업 출력
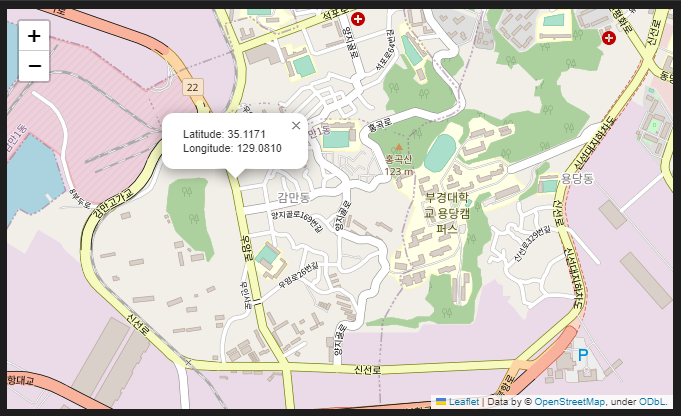
m=folium.Map(location=[35.117479,129.090394],zoom_start=15)
m.add_child(folium.LatLngPopup())
m
마우스 클릭하는 위치의 위/경도를 팝업으로 표시
- PolyLine 만들기(경로 만들기)
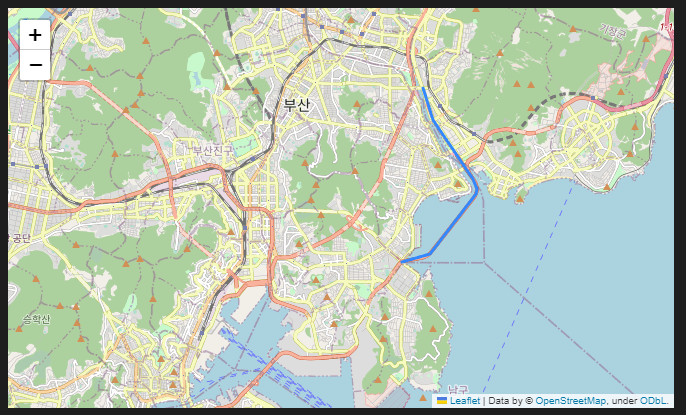
m=folium.Map(location=[35.1508,129.0904],zoom_start=12)
#위경도 팝업
m.add_child(folium.LatLngPopup())
#gps 경로값
gps_coord=[
    (35.1844,129.1184),#위도,경도
    (35.1755,129.1220),
    (35.1589,129.1358),
    (35.1572,129.1368),
    (35.1562,129.1370),
    (35.1546,129.1367),
    (35.1379,129.1209),
    (35.1356,129.1112)
]
folium.PolyLine(gps_coord,tooltip='광안대교 통행').add_to(m)
m
-----------------------출력-----------------------
-----------------------출력-----------------------
JSON 파일 읽고 쓰기
파일 읽고 쓰기의 test.json 원본파일
{
    "sm5":{
        "price":3700000,
        "year":"2010"
    },
    "genesis":{
        "price":8000000,
        "year":"2021"
    },
    "BMW":{
        "price":9999999,
        "year":"2022"
    }
}
- 파일 읽어오기
import json
file=open('./test.json','r',encoding='utf-8') #기본적인 파일 읽기(close 필요) <- 선호
json_data1 = json.load(file)
print(json.dumps(json_data1,indent='\t')) #indent 로 들여쓰기(원래 파일처럼)
file.close()
-----------------------출력-----------------------
-----------------------출력-----------------------
{
	"sm5": {
		"price": 3700000,
		"year": "2010"
	},
	"genesis": {
		"price": 8000000,
		"year": "2021"
	},
	"BMW": {
		"price": 9999999,
		"year": "2022"
	}
}
- json 파일 값읽기
json_data1['genesis']['price']
-----------------------출력-----------------------
-----------------------출력-----------------------
8000000
- json 파일 수정하기
json_data1['genesis']['price']=9999999999
print(json.dumps(json_data1,indent='\t'))
-----------------------출력-----------------------
-----------------------출력-----------------------
{
	"sm5": {
		"price": 3700000,
		"year": "2010"
	},
	"genesis": {
		"price": 9999999999,
		"year": "2021"
	},
	"BMW": {
		"price": 9999999,
		"year": "2022"
	}
}
- json 파일 저장
with open('./test2.json','w',encoding='utf-8') as file:
    json.dump(json_data1,file,indent='\t')
--> 상위폴더에 test2.json 파일 저장됨
- 파일 읽을 때 한글 파일 읽어오기
import json
file=open('./test.json','r',encoding='utf-8') #기본적인 파일 읽기(close 필요) <- 선호
json_data1 = json.load(file)
print(json.dumps(json_data1,indent='\t', ensure_ascii=False)) #indent 로 들여쓰기(원래 파일처럼)
file.close()
-----------------------출력-----------------------
-----------------------출력-----------------------
{
	"sm5": {
		"price": 3700000,
		"year": "2010"
	},
	"genesis": {
		"price": "8천만원",
		"year": "2021"
	},
	"BMW": {
		"price": 9999999,
		"year": "2022"
	}
}
--> ensure_ascii=False 옵션으로 한글도 읽어 올 수 있음(8천만원)
json으로 자료 저장 및 출력
import json
supercars=dict()
audi=dict()
audi['price']=9999
audi['year']='2020'
supercars['audi']=audi
porshe=dict()
porshe['price']=99999
porshe['year']='2022'
supercars['porshe']=porshe
#json 파일로 저장
with open('./supercar.json','w',encoding='utf-8') as file:
    json.dump(supercars,file,indent='\t',ensure_ascii=True)
#json 파일 로드
with open('./supercar.json','r',encoding='utf-8') as file:
    json_data=json.load(file)
print(json.dumps(json_data,indent='\t'))
-----------------------출력-----------------------
-----------------------출력-----------------------
{
	"audi": {
		"price": 9999,
		"year": "2020"
	},
	"porshe": {
		"price": 99999,
		"year": "2022"
	}
}
--> 딕셔너리 만들어서 자료 저장 후 파일로 저장/불러오기 까지 구현