Apache(2.4.53) 수동설치
-
(본인 기준) 넉넉 잡아 1시간 정도 소요
-
필수 패키지 설치
필수 패키지 설치
먼저 필요한 패키지들을 설치한다.

// root 계정 반영구적으로 빌린다.
$ sudo su
// make 패키지 설치
$ apt-get install make

$ apt-get install build-essential

$ apt-get install gcc

$ apt-get install --reinstall make

$ apt-get install libexpat1-dev

$ apt-get install g++

$ apt-get install net-tools

$ apt-get install curl- apr, apr-util, prce, apache 설치
-
APR은 아파치 웹 서버를 위한 지원 라이브러리다. 일정한 동작 위해 필요. OS에 매핑되는 API 세트 제공
-
pcre는 정규표현식 라이브러리
/usr/local mkdir apache /usr/local# wget http://mirror.navercorp.com/apache//apr/apr-1.7.0.tar.gz #(apr주소) /usr/local #wget http://mirror.navercorp.com/apache//apr/apr-util-1.6.1.tar.gz #(apr-util주소) /usr/local# tar xvfz apr-1.7.0.tar.gz #apr 파일을 압축을 해제 /usr/local# tar xvfz apr-util-1.6.1.tar.gz # apr-util 파일 압축을 해제 /usr/local# cd apr-1.7.0 /usr/local/apr-1.7.0# ./configure --prefix=/usr/local/apr ### 여기서 오류가 난다면 # cp -arp libtool libtoolT /usr/local/apr-1.7.0# make /usr/local/apr-1.7.0# make install /usr/local# cd apr-util-1.6.1 /usr/local/apr-util-1.6.1# ./configure --prefix=/usr/local/apr-util --with-apr=/usr/local/apr /usr/local/apr-util-1.6.1# make /usr/local/apr-util-1.6.1# make install // 다시 usr/local로 # wget https://sourceforge.net/projects/pcre/files/pcre/8.45/pcre-8.45.tar.gz #순서대로 설치해준다 # tar xvfz pcre-8.45.tar.gz # cd usr/local/pcre-8.45 // 여기로 들어가라 # ./configure --prefix=/usr/local/pcre # make # make install // 다시 usr/local로 wget https://dlcdn.apache.org//httpd/httpd-2.4.53.tar.gz # tar xvfz httpd-2.4.53.tar.gz # cd httpd-2.4.53 # ./configure --prefix=/usr/local/apache-2.4 \ --enable-module=so --enable-rewrite --enable-so \ --with-apr=/usr/local/apr \ --with-apr-util=/usr/local/apr-util \ --with-pcre=/usr/local/pcre \ --enable-mods-shared=all ### 여기서 din not find working script at pre-config 에러 발생하면 --with-pcre=/usr/local/pcre/ 에서 --with-pcre=/usr/local/pcre/bin/pcre-config 로 변경 # make // 여기서 시간 조금 걸린다. # make install -
아파치의 경우, apache 파일 다운로드할 때 url 체크 필수
-
- apr, apr-util, pcre make install하면서 나왔는지 확인!
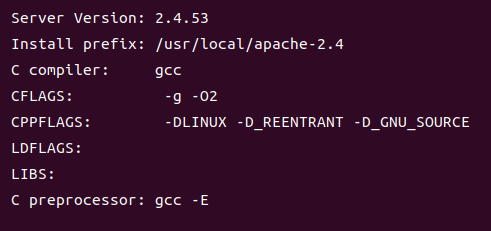
- apache configure 완료
- Apache 실행
/usr/local# sudo apache-2.4/bin/httpd -k start
/usr/local# ps -ef | grep httpd | grep -v grep
/usr/local# sudo netstat -anp | grep httpd
/usr/local# sudo curl http://127.0.0.1

이후 파이퍼폭스에 127.0.0.1 을 치면 It works 가 나올 것이다.-
에러 의심부분(에러가 발생하지않았으나)
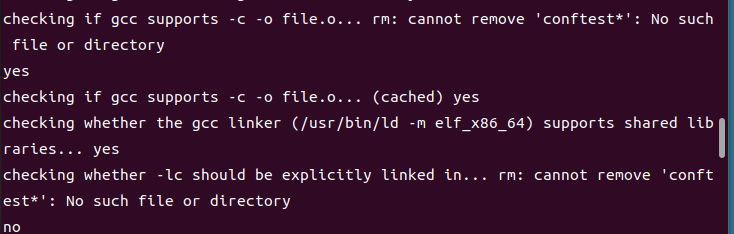
- .configure apr 도중
- apache 실행 도중

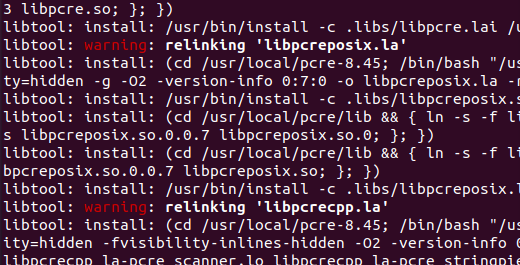
- pcre make 과정
- .configure apr 도중
MYSQL(8.0.19) 수동설치
-
(본인 기준) 4시간 소요
-
필수 패키지
$ apt-get update
$ apt-get install cmake
$ apt-get install libssl-dev
$ apt-get install libboost-all-dev
$ apt-get install libncurses5-dev libncursesw5-dev
$ apt-get install perl
$ cd /usr/local
-
소스 설치 =⇒ 8.0.27
# wget https://dev.mysql.com/get/Downloads/MySQL-8.0/mysql-8.0.19.tar.gz # tar xvfz mysql-8.0.19.tar.gz $ cd /usr/local/mysql-8.0.19 /usr/local/mysql-8.0.19# mkdir dir_mysql (이름 아무거나 상관없음) /usr/local/mysql-8.0.19# cd dir_mysql $ cmake \ .. \ -DCMAKE_INSTALL_PREFIX=/usr/local/mysql \ -DMYSQL_DATADIR=/usr/local/mysql/data \ -DMYSQL_UNIX_ADDR=/usr/local/mysql/mysql.sock \ -DMYSQL_TCP_PORT=3306 \ -DDEFAULT_CHARSET=utf8 \ -DDEFAULT_COLLATION=utf8_general_ci \ -DSYSCONFDIR=/etc \ -DWITH_EXTRA_CHARSETS=all \ -DWITH_INNOBASE_STORAGE_ENGINE=1 \ -DWITH_ARCHIVE_STORAGE_ENGINE=1 \ -DWITH_BLACKHOLE_STORAGE_ENGINE=1 \ -DDOWNLOAD_BOOST=1 \ -DWITH_BOOST=/usr/local/mysql/boost $ make $ make test $ make install- mysql은 os에 맞게 버전 다운로드 가능
-
Mysql는 Apache와 PHP와 달리 ./configure 가 아니라 cmake를 사용하는 이유
Makefile은 간단한 프로젝트를 관리하기 좋지만, 프로젝트 크기가 커질 경우, 아니면 해당 프로젝트를 여러 플랫폼에서 배포하기 위해서는 이것 저것 불편한 점이 많습니다. 이러한 문제를 해결하기 위해서 자주 사용하는 프로그램이 CMake 입니다. 참고 -
make 하는데 시간이 많이 걸린다.
- 35%되기까지 30분 걸림. 40%: 1시간. 83% 3시간. 100% 4시간

- 35%되기까지 30분 걸림. 40%: 1시간. 83% 3시간. 100% 4시간
MySQL DB 초기화
1. mysql 그룹 및 유저 생성
cd /usr/local/mysql-8.0.19/dir_mysql
# groupadd mysql
# useradd -r -g mysql -s /bin/false mysql
2. 디렉토리 생성
/usr/local# cd mysql
/usr/local/mysql# mkdir mysql-files (이름 아무거나 상관없음)
3. 권한주기
/usr/local/mysql# chown -R mysql:mysql /usr/local/mysql
/usr/local/mysql# chown mysql:mysql mysql-files
/usr/local/mysql# chmod 750 mysql-files
4. 기본 DB 생성
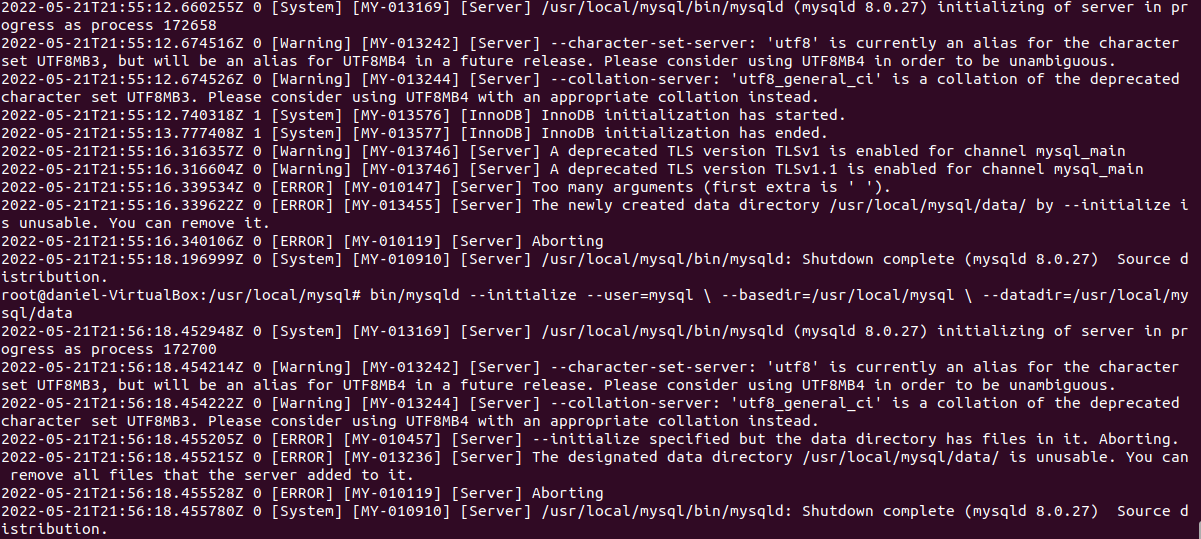
/usr/local/mysql# bin/mysqld --initialize --user=mysql \
--basedir=/usr/local/mysql \
--datadir=/usr/local/mysql/data
이렇게 실행이 끝나면 임시 비밀번호가 나온다 ! 기억해둘 것
MySQL 서버 실행 및 비밀번호 재설정
- MySQL 서버 실행
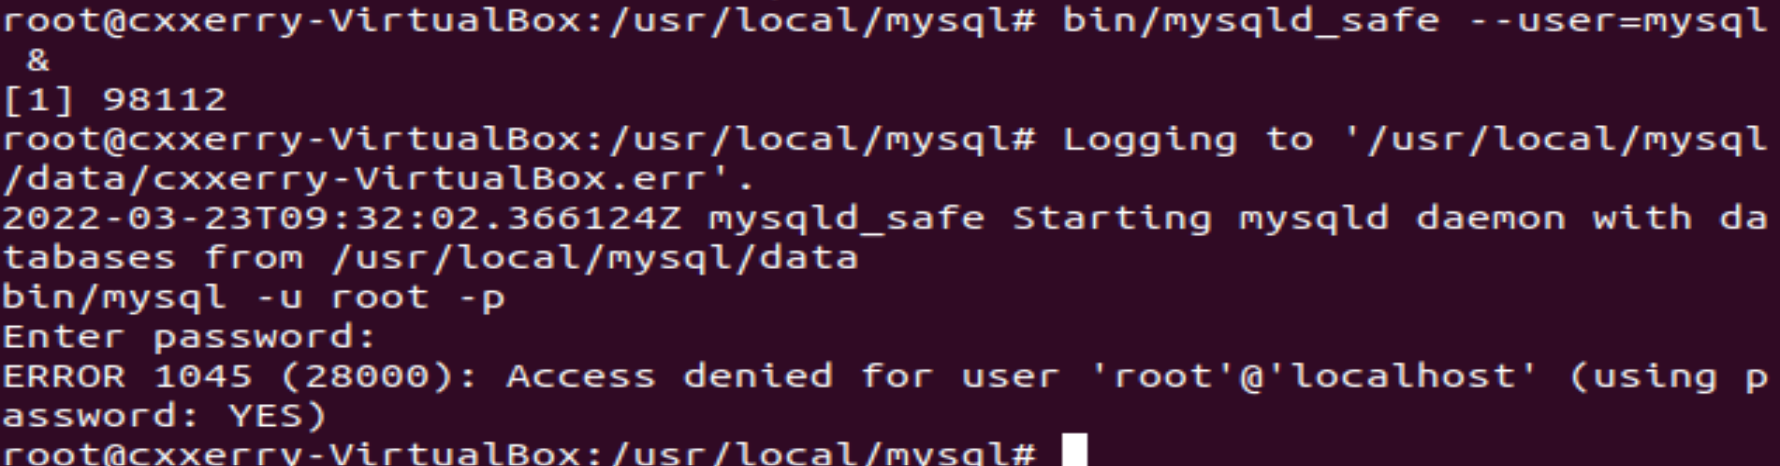
/usr/local/mysql# bin/mysqld_safe --user=mysql &이렇게 명령어를 입력하면 다음과 같이 터미널이 멈춰있다.

이때, 여기서 바로 명령어를 입력하고 임시 비밀번호를 입력하면 mysql에 접속 성공
#bin/mysql -u root -p
#Enter password: 비밀번호 입력
바꿀 패스워드를 입력하고 엔터를 쳤다.
서버가 실행되고 있는 것을 보고 싶다면 다른 터미널 창에서
$ps -ef | grep mysqld명령어를 입력하면 실행되고 있는 것이 보인다.
- 비밀번호 재설정 및 서버 종료
여기서 'root-password'부분에 본인이 원하는 비밀번호를 입력하면 된다.
mysql> ALTER USER 'root'@'localhost' IDENTIFIED BY 'root-password';
mysql>exit
서버를 종료하고 싶을 때 shutdown 이용하기
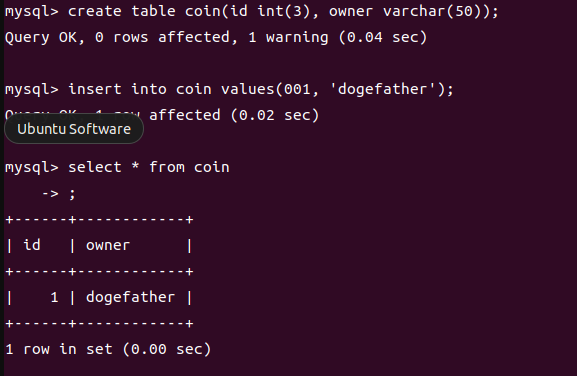
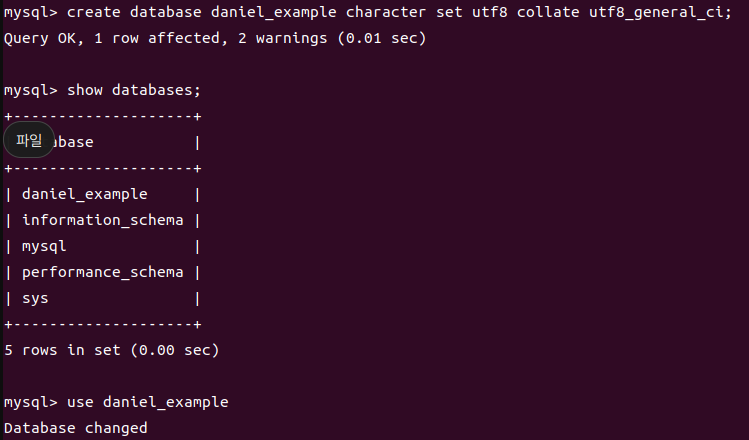
/usr/local/mysql# bin/mysqladmin -u root -p shutdownDB 사용해보기
-
에러
-
cmake을 할 때
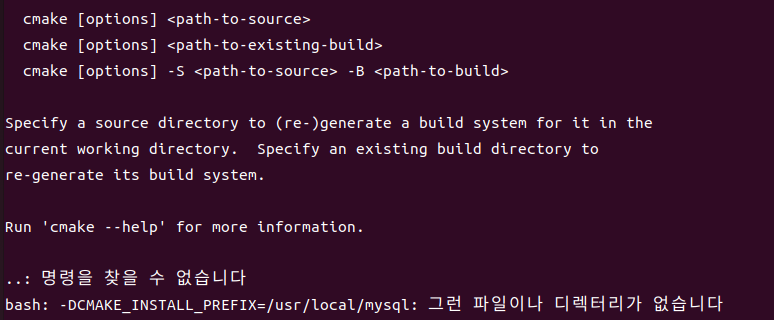
### mysql-8.0.19에서
$ cmake \
.. \
-DCMAKE_INSTALL_PREFIX=/usr/local/mysql \
-DMYSQL_DATADIR=/usr/local/mysql/data \
-DMYSQL_UNIX_ADDR=/usr/local/mysql/mysql.sock \
-DMYSQL_TCP_PORT=3306 \
-DDEFAULT_CHARSET=utf8 \
-DDEFAULT_COLLATION=utf8_general_ci \
-DSYSCONFDIR=/etc \
-DWITH_EXTRA_CHARSETS=all \
-DWITH_INNOBASE_STORAGE_ENGINE=1 \
-DWITH_ARCHIVE_STORAGE_ENGINE=1 \
-DWITH_BLACKHOLE_STORAGE_ENGINE=1 \
-DDOWNLOAD_BOOST=1 \
-DWITH_BOOST=/usr/local/mysql/boost

==> cmake error the source directory /usr/local does not
appear to contain cmakelists.txt

이런 에러가 날 경우에 다운로드 받은 MySQL의 압축을 푼 디렉토리에 CMakeLists.txt
 파일이 있는지 확인. CMAKE 가 동작하기 위해서는 저 파일이 필요하다.
출처: https://m.blog.naver.com/PostView.naver?isHttpsRedirect=true&blogId=moonv11&logNo=60176351289

### dir_mysql에서
$ cmake \
.. \
-DCMAKE_INSTALL_PREFIX=/usr/local/mysql \
-DMYSQL_DATADIR=/usr/local/mysql/data \
-DMYSQL_UNIX_ADDR=/usr/local/mysql/mysql.sock \
-DMYSQL_TCP_PORT=3306 \
-DDEFAULT_CHARSET=utf8 \
-DDEFAULT_COLLATION=utf8_general_ci \
-DSYSCONFDIR=/etc \
-DWITH_EXTRA_CHARSETS=all \
-DWITH_INNOBASE_STORAGE_ENGINE=1 \
-DWITH_ARCHIVE_STORAGE_ENGINE=1 \
-DWITH_BLACKHOLE_STORAGE_ENGINE=1 \
-DDOWNLOAD_BOOST=1 \
-DWITH_BOOST=/usr/local/mysql/boost

==> CMake Error at CmakeLists.txt
please do not build in-source.

==> could not find git(missing: GIT_EXECUTABLE)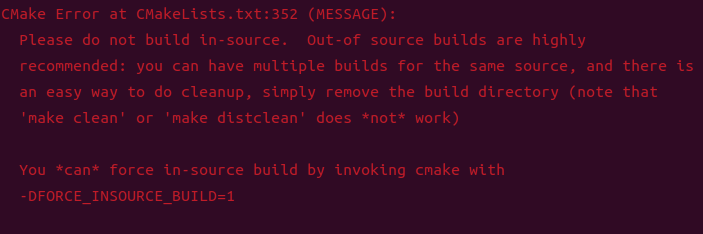
소스 디렉토리에서 build 하지말라는 것이다. 이전 버전과 달리 최근 버전에서는 이게 권고사항 소스 디렉터리 내에 build를 위한 디렉터리를 추가 생성하고 (디렉터리 이름은 마음대로) 그 안에서 작업을 진행하도록 권고
-
할 수 있는 방법
rm CMakeCache.txt
-
Cmake 도중 boost 파일 관련 에러
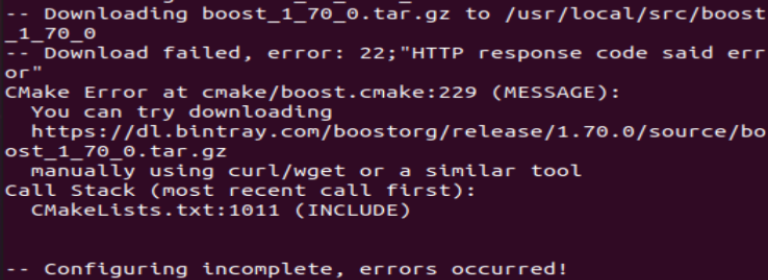
/usr/local# cd src /usr/local/src# sudo wget https://boostorg.jfrog.io/artifactory/main/release/1.70.0/source/boost_1_70_0.tar.gz /usr/local/src# sudo tar xvfz boost_1_70_0.tar.gz 다시 dir_mysql 이동 cmake \ .. \ -DCMAKE_INSTALL_PREFIX=/usr/local/mysql \ -DMYSQL_DATADIR=/usr/local/mysql/data \ -DMYSQL_UNIX_ADDR=/usr/local/mysql/mysql.sock \ -DMYSQL_TCP_PORT=3306 \ -DDEFAULT_CHARSET=utf8 \ -DDEFAULT_COLLATION=utf8_general_ci \ -DSYSCONFDIR=/etc \ -DWITH_EXTRA_CHARSETS=all \ -DWITH_INNOBASE_STORAGE_ENGINE=1 \ -DWITH_ARCHIVE_STORAGE_ENGINE=1 \ -DWITH_BLACKHOLE_STORAGE_ENGINE=1 \ -DDOWNLOAD_BOOST=1 \ -DWITH_BOOST=/usr/local/src/boost_1_70_0 -
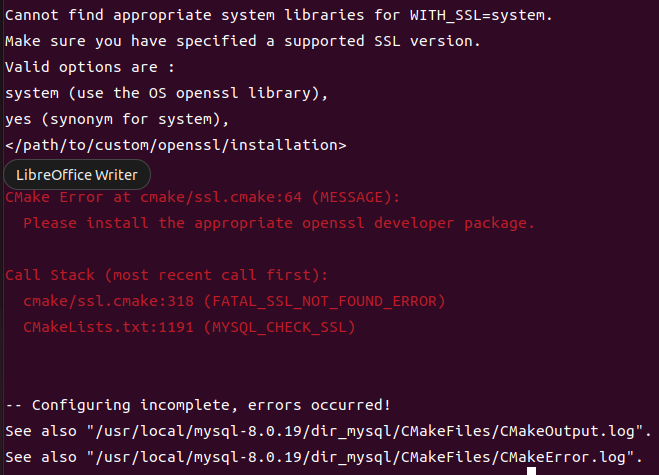
cmake 도중 발생 에러
cmake 도중 발생 에러(얘가 최종보스 느낌)
-
centos에서는
#yum install openssl #yum -y install openssl-devel 로 해결이 되는 것 같은데… -
노력 1. Openssl 설치 링크
## OPENSSL 1.1.1 설치 // https://www.openssl.org/source/ // 지금 최신이 1.1.1o $ wget https://www.openssl.org/source/openssl-1.1.1o.tar.gz $ tar xvfz openssl-1.1.1o.tar.gz $ cd openssl-1.1.1o/ // 64bit OS일 경우 $ ./config -fPIC --prefix=/usr/local/openssl $ make $ make install- 에러
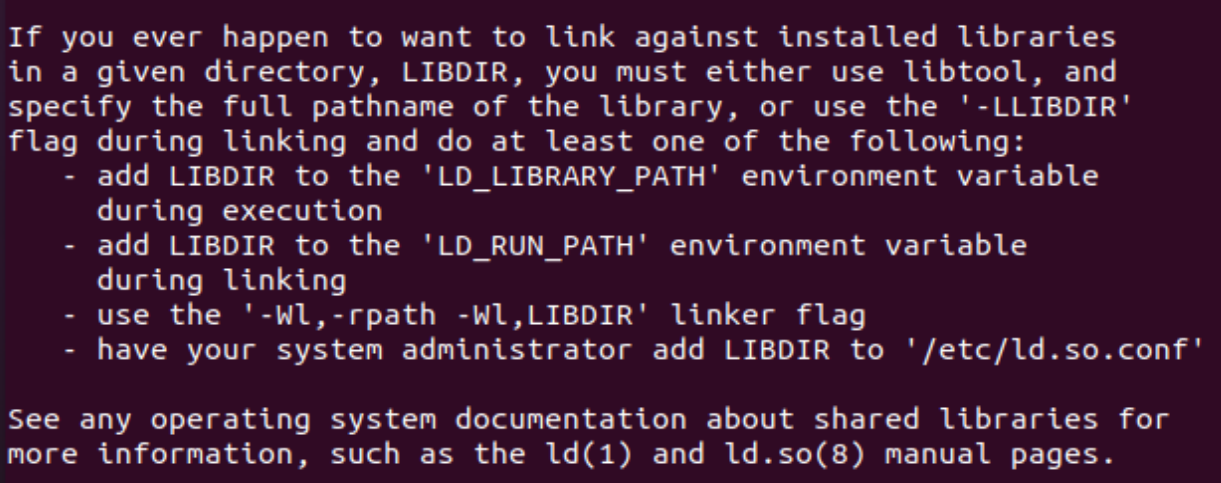
~# 로 가기위해 cd만 치면 된다.

[root@localhost ~]# /usr/local/openssl/bin/openssl version
/usr/local/openssl/bin/openssl: error while loading shared libraries: libssl.so.1.1: cannot open shared object file: No such file or directory

### 라이브러리 설정 및 등록
[root@localhost ~]# vi /etc/ld.so.conf
include ld.so.conf.d/*.conf
/usr/local/openssl/lib  -> 추가 후 저장

[root@localhost ~]# ldconfig
[root@localhost ~]# /usr/local/openssl/bin/openssl
OpenSSL> version
OpenSSL 1.0.2s  20 Nov 2018
[root@localhost ~]# /usr/local/openssl/bin/openssl version
OpenSSL 1.1.1d  10 Sep 2019
- 에러
-
노력2. 스택오버플로우
-
노력3. sudo apt-get install libssl-dev로 SSL 관련 개발 패키지를 설치
-
https://luminitworld.tistory.com/78
apt-get install libssl-dev
apt-get install openssl
-
-
노력4. Need to specify openssl path -DWITH_SSL=/usr/local/openssl⇒ 진척이 보인다.
- 아무래도 기존의 cmake을 진행했을 때 결과에서 openssl major, minor, fix version 가 공백으로 남겨져있는 것이 문제였던 것 같다. 즉, openssl의 경로를 제대로 못찾아서 그런듯
- /usr/local/openssl 말고도 system 등 여러 옵션이 있는 것 같다.
- https://www.programmersought.net/article/342368952.html
- MySQL 컴파일 설치 시, -DWITH_SSL 옵션으로 지정된 컴파일 설치한 OpenSSL의 라이브러리를 사용할 수 있다. 참고
- ex : “-DWITH_SSL=/usr/local/openssl”
- cmake .. -DWITH_SSL=/usr/local/openssl 작성

-
apt install pkg-config 하고나서
-
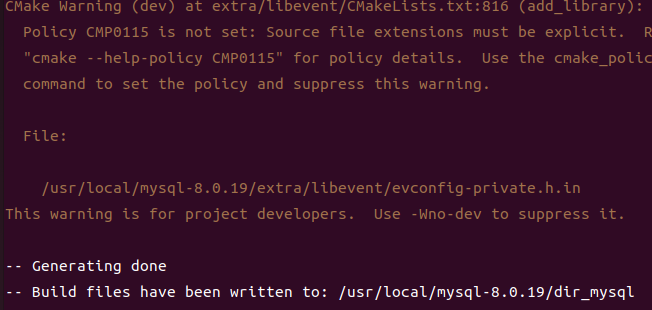
다시 cmake 진행
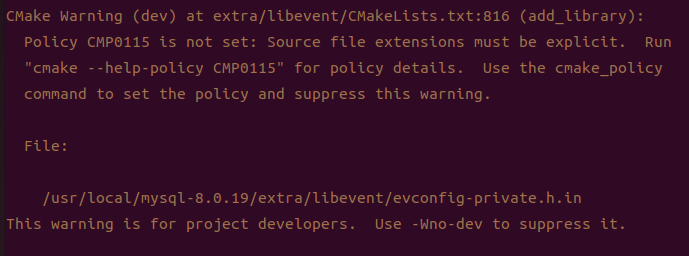
- Cmake 자체적으로 생기는 에러라서 할 수있는 방법이 없다네…?
- https://bugreports.qt.io/browse/QTBUG-88801
- 딱히 중요하지않으나 정리가 필요해보인다. 참고
- CMP0115 관련 검색은 적으나 -Wno-dev to suppress 검색은 많다.
- 문제의 이유를 자세하게 다룬 사람들이 있으나 알아들을 수가 없다. https://github.com/TriBITSPub/TriBITS/issues/364
- 차이점
- 기존의 cmake로 진행했을 때 공백이었던 것들이 값 설정!

- Cmake 자체적으로 생기는 에러라서 할 수있는 방법이 없다네…?
make 47% 도중 발생한 에러…
-
-
다행인 것은 재부팅해도 처음부터 다시 시작할 필요가 없다는게 좋다.
- 문제의 원인이 되는 sql-common/sql_string.cc 로 vi 들어갔다.
마지막 줄이 문제다. numeric_limits가 std 멤버가 아니고, > 도 가 문제…
consolidate compiler generated dependencies of target sql_main building CXX object sql/CMakeFiles/sql_main.dir/__/sql-common/sql_string.cc.o usr/local/mysql-8.0.19/sql-common/sql_string.cc: In member function ‘bool String::mem_realloc(size_t, bool)’: /usr/local/mysql-8.0.19/sql-common/sql_string.cc:111:20: error: ‘numeric_limits’ is not a member of ‘std’ 111 | if (len > std::numeric_limits::max()) return true; | ^~ /usr/local/mysql-8.0.19/sql-common/sql_string.cc:111:41: error: expected primary-expression before ‘>’ token 111 | if (len > std::numeric_limits::max()) return true; // > 앞에 뭔가가 있다는 소리? | ^ /usr/local/mysql-8.0.19/sql-common/sql_string.cc:111:47: error: no matching function for call to ‘max()’ 111 | if (len > std::numeric_limits::max()) return true; | ~^~ In file included from /usr/include/c++/11/algorithm:62, from /usr/local/mysql-8.0.19/sql-common/sql_string.cc:25: /usr/include/c++/11/bits/stl_algo.h:3467:5: note: candidate: ‘template<class _Tp, class _Compare> constexpr _Tp std::max(std::initializer_list<_Tp>, _Compare)’ 3467 | max(initializer_list<_Tp> l, _Compare comp) | ^~~ /usr/include/c++/11/bits/stl_algo.h:3467:5: note: template argument deduction/substitution failed: /usr/local/mysql-8.0.19/sql-common/sql_string.cc:111:47: note: candidate expects 2 arguments, 0 provided 111 | if (len > std::numeric_limits::max()) return true; | ~^~ In file included from /usr/include/c++/11/algorithm:62, from /usr/local/mysql-8.0.19/sql-common/sql_string.cc:25: /usr/include/c++/11/bits/stl_algo.h:3461:5: note: candidate: ‘template constexpr _Tp std::max(std::initializer_list<_Tp>)’ 3461 | max(initializer_list<_Tp> l) | ^~~ /usr/include/c++/11/bits/stl_algo.h:3461:5: note: template argument deduction/substitution failed: /usr/local/mysql-8.0.19/sql-common/sql_string.cc:111:47: note: candidate expects 1 argument, 0 provided 111 | if (len > std::numeric_limits::max()) return true; | ~^~ In file included from /usr/include/c++/11/bits/char_traits.h:39, from /usr/include/c++/11/string:40, from /usr/local/mysql-8.0.19/include/sql_string.h:36, from /usr/local/mysql-8.0.19/sql-common/sql_string.cc:23: /usr/include/c++/11/bits/stl_algobase.h:300:5: note: candidate: ‘template<class _Tp, class _Compare> constexpr const _Tp& std::max(const _Tp&, const _Tp&, _Compare)’ 300 | max(const _Tp& a, const _Tp& b, _Compare comp) | ^~~ /usr/include/c++/11/bits/stl_algobase.h:300:5: note: template argument deduction/substitution failed: /usr/local/mysql-8.0.19/sql-common/sql_string.cc:111:47: note: candidate expects 3 arguments, 0 provided 111 | if (len > std::numeric_limits::max()) return true; | ~^~ In file included from /usr/include/c++/11/bits/char_traits.h:39, from /usr/include/c++/11/string:40, from /usr/local/mysql-8.0.19/include/sql_string.h:36, from /usr/local/mysql-8.0.19/sql-common/sql_string.cc:23: /usr/include/c++/11/bits/stl_algobase.h:254:5: note: candidate: ‘template constexpr const _Tp& std::max(const _Tp&, const _Tp&)’ 254 | max(const _Tp& a, const _Tp& b) | ^~~ /usr/include/c++/11/bits/stl_algobase.h:254:5: note: template argument deduction/substitution failed: /usr/local/mysql-8.0.19/sql-common/sql_string.cc:111:47: note: candidate expects 2 arguments, 0 provided 111 | if (len > std::numeric_limits::max()) return true; | ~^~ make[2]: [sql/CMakeFiles/sql_main.dir/build.make:3956: sql/CMakeFiles/sql_main.dir/__/sql-common/sql_string.cc.o] 오류 1 make[1]: [CMakeFiles/Makefile2:20752: sql/CMakeFiles/sql_main.dir/all] 오류 2 make: *** [Makefile:166: all] 오류 2 -
노력 2. https://narusika.tistory.com/entry/mysql-make시에-에러-발생-error-expected-primaryexpression-before-token ⇒ 해결
-
이런식으로 뜨면 gcc버전 문제로 설치가 안 된다고 함. 보통의 경우 gcc 및 g++ 버전이 높아 설치시 에러가 뜨는것 같다?
-
gcc 호환 잘되는 거 선택(나의 경우 gcc 11에서 10으로 바꿨더니 에러 해결)
🔥 해결방법: gcc 버전이 높아서 설치 시 에러가 발생할 수 있다 + gcc 호환되는 거 설정
- https://www.linuxcapable.com/how-to-install-gcc-compiler-on-ubuntu-22-04-lts/
-
-
-
에러 의심 부분
- make test 에러
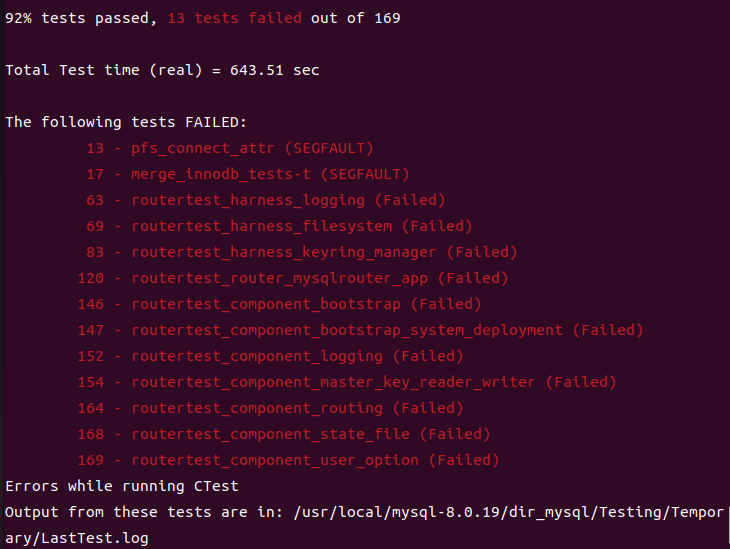
- make test 에러
데스크탑 PHP(8.16) 수동 설치
- 필수 패키지
$sudo su /usr/local# apt-get install libxml2-dev /usr/local# apt-get install libjpeg-dev /usr/local# apt-get install libpng-dev /usr/local# apt-get install libsqlite3-dev - 소스 설치(이 때 최신 버전이 8.1.6)
/usr/local# wget https://www.php.net/distributions/php-8.1.6.tar.gz
/usr/local# tar xvfz php-8.1.6.tar.gz

/usr/local# cd php-8.1.6

/usr/local/php-8.1.6# ./configure \
--with-apxs2=/usr/local/apache-2.4/bin/apxs \
--enable-mysqlnd \
--with-mysql-sock=mysqlnd \
--with-mysqli=mysqlnd \
--with-pdo-mysql=mysqlnd \
--with-imap-ssl \
--with-iconv \
--enable-gd \
--with-jpeg \
--with-libxml \
--with-openssl

/usr/local/php-8.1.6# make
/usr/local/php-8.1.6# make test
/usr/local/php-8.1.6# make install
-
에러
-
./configure 도중 발생한 에러
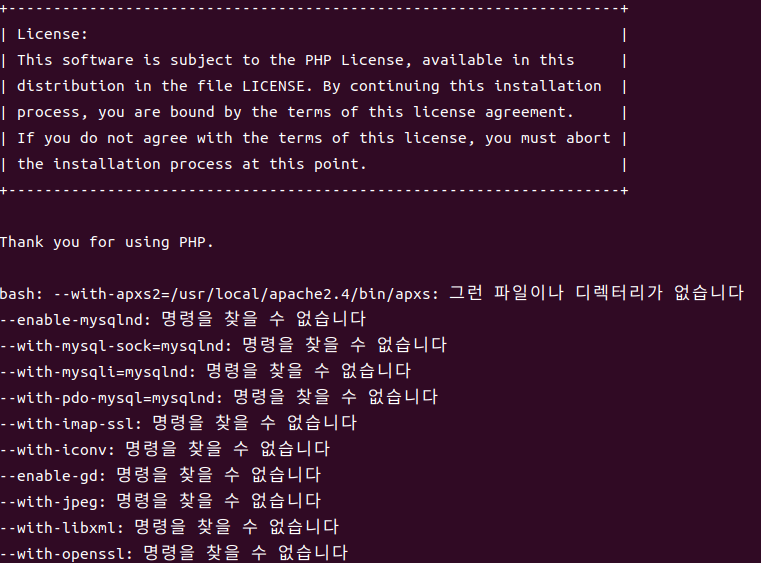
-
해결: 따로 각각 옵션을 설정하니까 되는듯하다. 흠… 돌고돌아 libphp확인이 안되는게 이게 문제가 되는 듯하다. =⇒> \를 지우고 한줄로 쓰니까 되었다! ㅠㅠ 참고 -
make 과정에서 발생
-
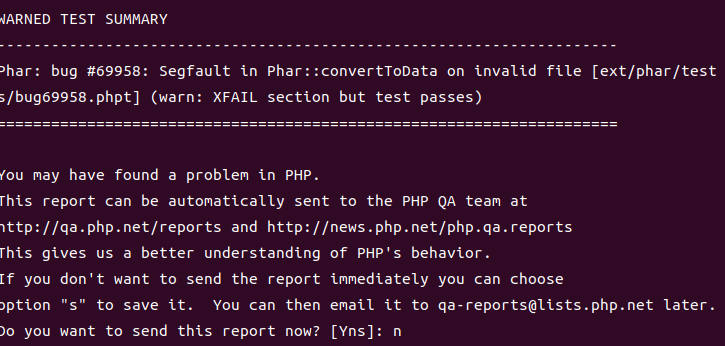
pear package php_archive not installed generated phar will require php's phar extension be enabled
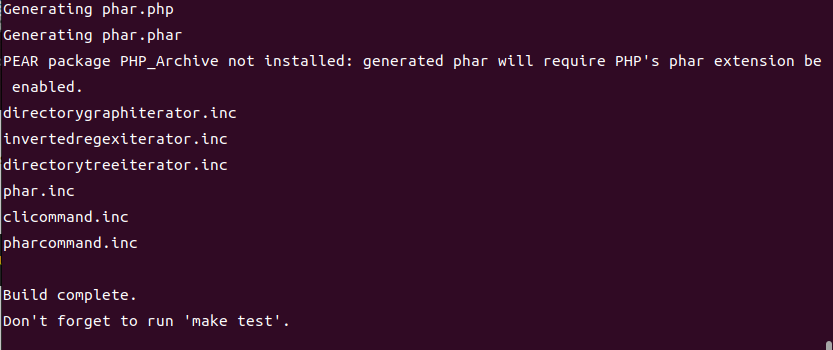
-
참고: https://linuking.com/GNHome/index.php?mid=LinuxEtc&document_srl=4224&listStyle=viewer&page=4
- php go-pear.phar xml extension not found
-
ext/opcache/jit/zend_jit.lo 오류
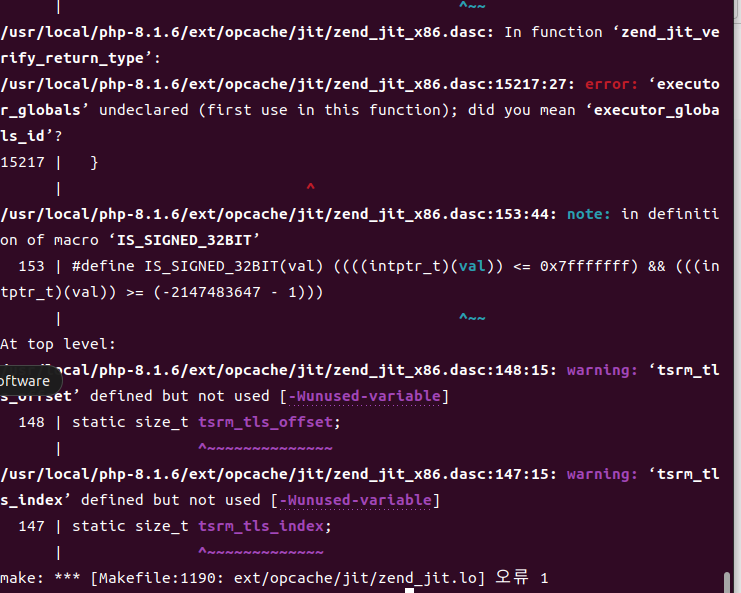
- 힌트: 가끔 문제가 없이 잘될 때가 있고, 아닐 때도 있다고 한다…..
- make, make install 하면 다 요게 나온다…
- https://bugs.php.net/bug.php?id=81666
- https://github.com/Justintime50/nginx-php-docker/issues/26
- OPcache는 PHP script 를 bytecode로 컴파일한 후에 공유 메모리에 저장하여 성능을 향상시키는 모듈이다.
- 노력
- zend opcache 설치: https://www.tecmint.com/install-opcache-in-debian-ubuntu/
- ./configure —enalbe -zts https://bugs.php.net/bug.php?id=80561
해결- make clean 하고나서 다시 make 진행
- 명령하면 현재 디렉토리의 모든 object 파일 들과 생성된 실행파일들을 rm 명령어로 제거해 줍니다.
- make clean 하고나서 다시 make 진행
- 힌트: 가끔 문제가 없이 잘될 때가 있고, 아닐 때도 있다고 한다…..
-
-
make install 과정에서 발생
-
노력 1 https://m.blog.naver.com/PostView.naver?isHttpsRedirect=true&blogId=commind7&logNo=40179568799
-
노력 2:
apt-get install php-phar -
conf나 modules 에서 libphp 확인이 안됨
- 힌트
- 다른 경로에 생성되었을 수도 있다. 그랬다면 복사해서 붙여준다. https://computist.tistory.com/51 https://www.linux.co.kr/bbs/board.php?bo_table=qa_linux&wr_id=35480&sca=리눅스&sst=wr_hit&sod=desc&sop=and&page=564
- ./configure --with-apxs2=/usr/local/apache/bin/apxs 로 다시 컴파일 https://ejnahc.tistory.com/458
- 다시 컴파일해야하는 걸까..
- libphp.so 파일 생성 옵션 http://pchero21.com/?p=1059 unrecognized option…
- 다른 경로에 생성되었을 수도 있다. 그랬다면 복사해서 붙여준다. https://computist.tistory.com/51 https://www.linux.co.kr/bbs/board.php?bo_table=qa_linux&wr_id=35480&sca=리눅스&sst=wr_hit&sod=desc&sop=and&page=564
- 노력
- conf에 LoadModule php_module modules/libphp.so 수동 추가 여전한 에러.. modules 폴더에서 읽어올 수가 없으니..
- conf에 LoadModule php_module modules/libphp.so 수동 추가 여전한 에러.. modules 폴더에서 읽어올 수가 없으니..
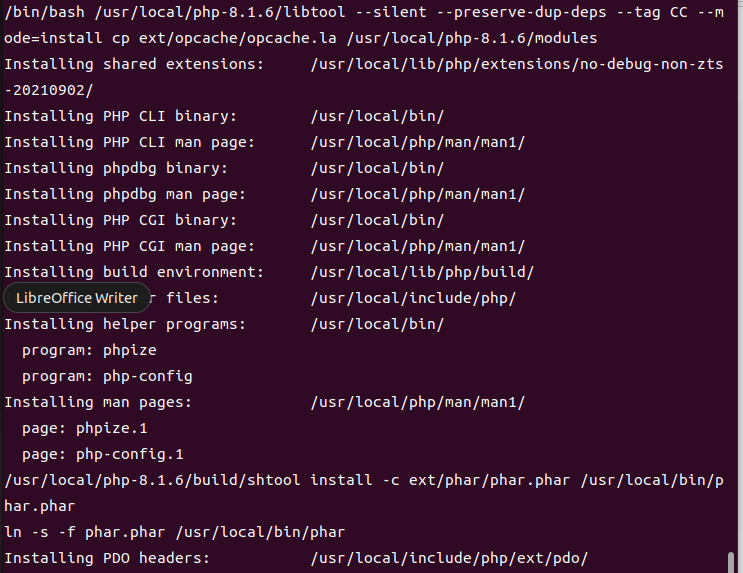
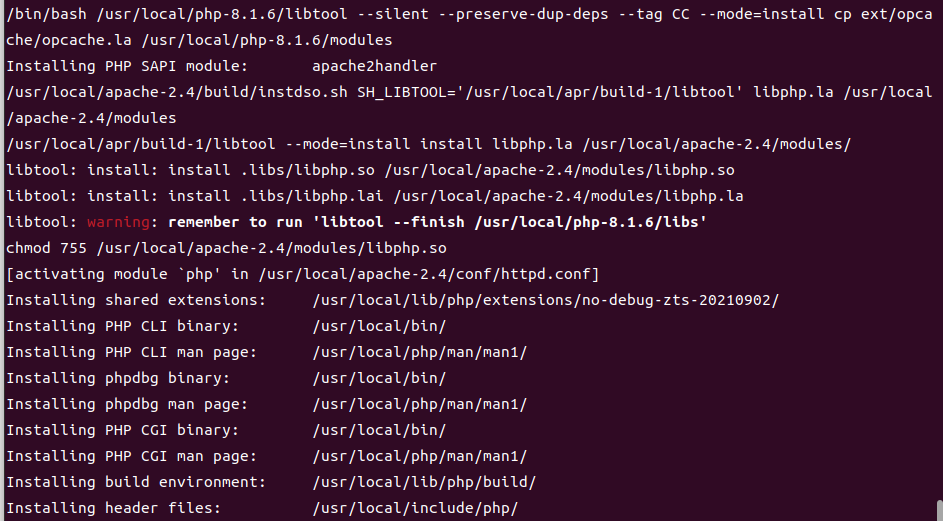
- 해결 - 드디어 libphp.so가 생겼다.
- libtool: warning: remember to run 'libtool --finish /usr/local/apache/modules’
- make install 과정에서 발생

- 힌트
-
- 에러 의심
-
make test 과정에서 발생
-
- make 하는 도중에 생긴 pear 문제 해결 도중 Current include path 이 비어있다.
Apache, PHP 연동
- 모듈 설치 확인
잘 설치되었다면 mine_module에 사진과 같이 작성한다./usr/local# cd apache-2.4/conf /usr/local/apache-2.4/conf# gedit httpd.conf 혹은 /usr/local/apache2.4/modules ls 로 LoadModule php_module modules/libphp.so 가 있는지 확인!! ### php 8 버전부터는 libphp+버전이 아니라 그냥 libphp.so 이다!
- php.ini 파일 설정
/usr/local# cd php-8.1.6

// php.ini은 PHP설정 파일
# cp php.ini-production /usr/local/lib/php.ini
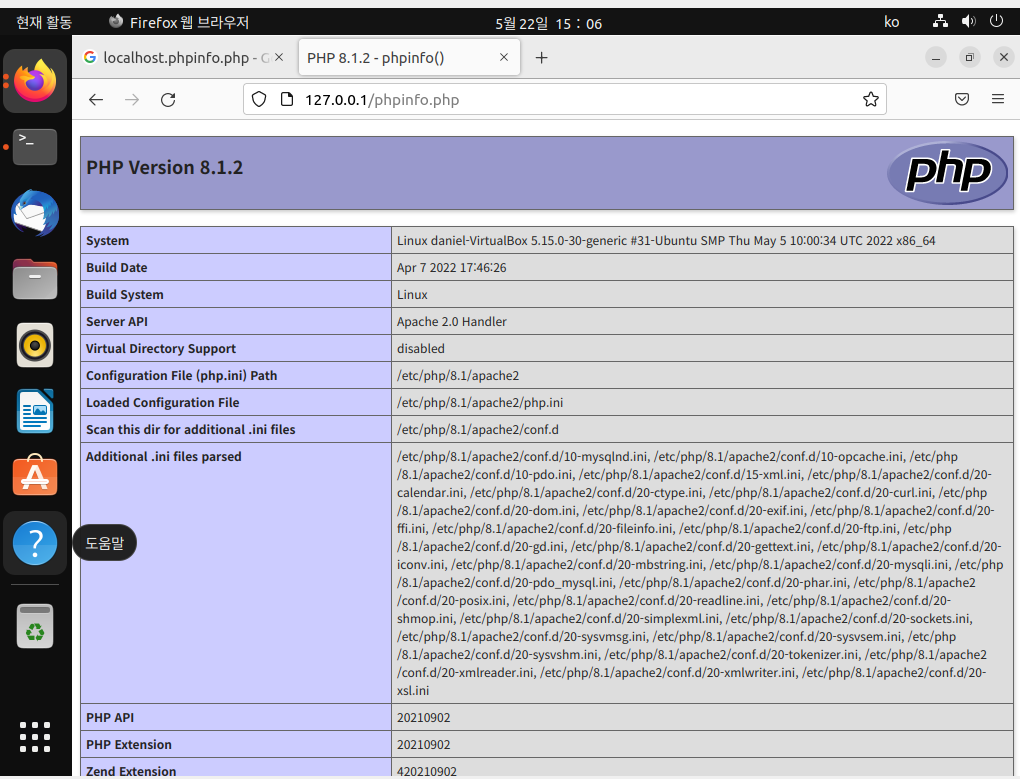
- 테스트용 php 파일 작성
아파치의 웹 콘텐츠(html,php 파일 등)는 htdocs 디렉토리에 위치한다.
이 곳에 phpinfo.php를 작성한다.

/usr/local# cd apache-2.4/htdocs
/usr/local/apache-2.4/htdocs# vi phpinfo.php

해당 편집기에
<?php
phpinfo();
?> 작성
-
연결 확인
// httpd -k start 명령어로 아파치를 실행시킨다.ps -ed | grep httpd 명령어로 아파치가 실행 중인지 확인한다.

/usr/local# apache-2.4/bin/httpd -k start
/usr/local# ps -ef | grep httpd | grep -v grep
/usr/local# netstat -anp | grep httpd
/usr/local# curl http://127.0.0.1
// 결과물로 html이 길게 나오면 성공!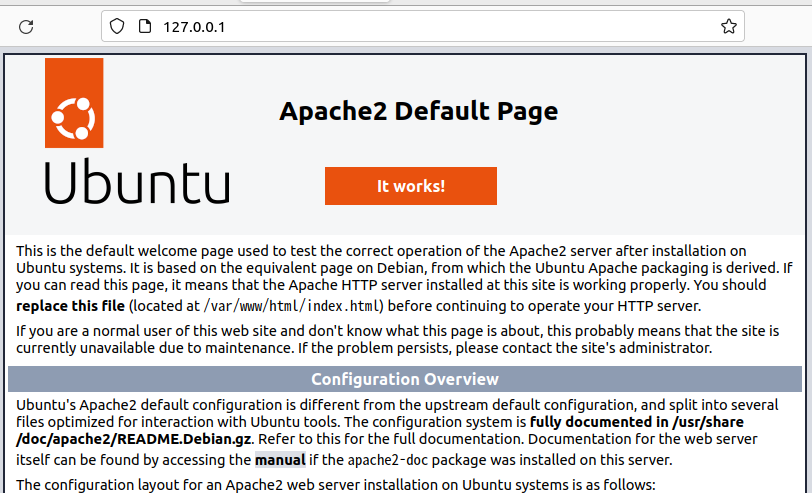
-
아파치 서버 중지, 시작, 재시작
- 재시작 :
systemctl restart apache2 - https://oingdaddy.tistory.com/24
- 재시작 :
-
에러
-
apache-2.4/bin/httpd -k start 과정에서 발생.

-
노력
- 포트 프로세스 죽이기 https://mytory.net/archives/1797
- 죽여도 바로 생기는 문제가.. 부모 프로세스가 있어서 그럴 것이다. https://m.ppomppu.co.kr/new/bbs_view.php?id=developer&no=22584
- 포트 프로세스 죽이기 https://mytory.net/archives/1797
-
127.0.0.1/phpinfo.php 404 에러.
-
힌트
-
해결
- /usr/local/apache-2.4/htdocs 에서 아래 링크를 참고해서 gedit/var/www/html/phpinfo.php 로 한 다음 를 넣고 아파치를 재시작했더니 해결되었다. + AddType application/x-httpd-php .php4 .php .phtml .ph .inc .html .htm
- https://m.blog.naver.com/PostView.naver?isHttpsRedirect=true&blogId=pretty9922&logNo=220553972575
- /usr/local/apache-2.4/htdocs 에서 아래 링크를 참고해서 gedit/var/www/html/phpinfo.php 로 한 다음 를 넣고 아파치를 재시작했더니 해결되었다. + AddType application/x-httpd-php .php4 .php .phtml .ph .inc .html .htm
-
-
php 설치 후 아파치 시작할 때 계속 it works 출력 페이지만 나오는 에러(ubuntu 디폴트 페이지가 안 나옴)
apache Could not reliably determine the server's fully qualified domain name, using 127.0.1.1 **httpd (pid xxxxx) already running**- 힌트
- 노력 :
- https://velog.io/@kijrary/httpd-pid-xxxxx-already-running
- 디렉토리에 /var/www/html 추가 https://junhyeok.tistory.com/718
- httpd.conf 수정 https://linuxtut.com/en/fca116b1b387fe56c93c/
-
-
데스크탑은 완료. 노트북은 apache ubuntu 디폴트 페이지와 phpinfo.php.. 데스크탑과는 다른 버전이라 같은버전으로 재설치해서 해결해야할 듯
-
httpd.conf 구성요소
