[kind] MacBook m1에 kuernetes 설치해보기
Kind 설치
Kubernetes 공부용으로 Kubernetes를 어디에 설치해야할지 난감하다면, minikube, k3s, kind를 사용해서 간단하게 Kubernetes를 구축할 수 있다.
본 글에서는 Kind를 이용하여 간단하게 Kubernetes를 구축 해 보고자 한다.
Kind 공식 사이트
Kind를 설치하기 전에 go, docker 또는 podman이 있어야 하는데 없는 경우 아래 명령어로 설치 후
Kind를 설치하면 된다.
brew install docker
brew install go
이제 Kind를 설치 해 보자 완전 간단하다.
brew install kind이러면 Kind 설치는 끝났고 Kubernetes도 한줄이면 끝난다.
kind create cluster


**# 출력
Creating cluster "kind" ...
 ✓ Ensuring node image (kindest/node:v1.27.3) 🖼
 ✓ Preparing nodes 📦
 ✓ Writing configuration 📜
 ✓ Starting control-plane 🕹️
 ✓ Installing CNI 🔌
 ✓ Installing StorageClass 💾
Set kubectl context to "kind-kind"
You can now use your cluster with:

kubectl cluster-info --context kind-kind
Kubernetes 동작 확인
이렇게 Kubernetes 설치는 끝났고, 정상적으로 설치된 것을 확인하려면 kubectl 명령어를 써야하는데 없으면 해당 파일도 설치해야한다.(이미 파일이 있다면 문제없다.)
curl -LO "https://dl.k8s.io/release/v1.27.3/bin/linux/arm64/kubectl"
chmod u+x kubectl #실행권한 추가
mv kubectl /usr/local/bin/kubectl #kubectl 파일 위치 변경
Kind로 설치한 Kubernetes 버전이 v1.27.3이므로, 해당 버전에 맞게 설치하자.
참고로 마이너 버전이 1정도 차이나는건 괜찮다. 예를 들어 1.26 버전의 kubectl를 설치해도 되고, 1.28을 설치해도 무관하다.
kubectl version 으로 현재 kubectl(client) 버전과 Kubernetes(server) 간의 버전을 확인할 수 있다.
kubectl cluster-info --context kind-kind이후 위 명령어를 실행하면, 아래처럼 결과가 출력된다.
Kubernetes control plane is running at https://127.0.0.1:53824
CoreDNS is running at https://127.0.0.1:53824/api/v1/namespaces/kube-system/services/kube-dns:dns/proxy
이제 Kubernetes가 정상적으로 동작하는지 확인해보자.
kubectl get node -owide
NAME                 STATUS   ROLES           AGE   VERSION   INTERNAL-IP   EXTERNAL-IP   OS-IMAGE                         KERNEL-VERSION     CONTAINER-RUNTIME
kind-control-plane   Ready    control-plane   35m   v1.27.3   172.18.0.2    <none>        Debian GNU/Linux 11 (bullseye)   5.15.49-linuxkit   containerd://1.7.1
Kubernetes control-plane 1개가 생성됐다.
kubectl get pod -A -owide
NAMESPACE            NAME                                         READY   STATUS    RESTARTS   AGE   IP           NODE                 NOMINATED NODE   READINESS GATES
kube-system          coredns-5d78c9869d-22kx4                     1/1     Running   0          25s   10.244.0.3   kind-control-plane   <none>           <none>
kube-system          coredns-5d78c9869d-z6jxl                     1/1     Running   0          25s   10.244.0.4   kind-control-plane   <none>           <none>
kube-system          etcd-kind-control-plane                      1/1     Running   0          40s   172.18.0.2   kind-control-plane   <none>           <none>
kube-system          kindnet-7fsx9                                1/1     Running   0          25s   172.18.0.2   kind-control-plane   <none>           <none>
kube-system          kube-apiserver-kind-control-plane            1/1     Running   0          42s   172.18.0.2   kind-control-plane   <none>           <none>
kube-system          kube-controller-manager-kind-control-plane   1/1     Running   0          41s   172.18.0.2   kind-control-plane   <none>           <none>
kube-system          kube-proxy-hdhqm                             1/1     Running   0          25s   172.18.0.2   kind-control-plane   <none>           <none>
kube-system          kube-scheduler-kind-control-plane            1/1     Running   0          42s   172.18.0.2   kind-control-plane   <none>           <none>
local-path-storage   local-path-provisioner-6bc4bddd6b-9p7s8      1/1     Running   0          25s   10.244.0.2   kind-control-plane   <none>           <none>
kube-system 네임스페이스에 coredns, etcd, kube-apiserver, kube-controlloer-manager, kube-scheduler, kube-proxy 그리고 kindnet이 생성됐다.
cat <<EOF >nginx.yaml
apiVersion: apps/v1
kind: Deployment
metadata:
  name: nginx
spec:
  selector:
    matchLabels:
      app: nginx
  replicas: 1
  template:
    metadata:
      labels:
        app: nginx
    spec:
      containers:
      - name: nginx
        image: nginx:1.23
---
apiVersion: v1
kind: Service
metadata:
  name:  nginx-service
spec:
  selector:
    app: nginx
  ports:
  - protocol: TCP
    port: 80
EOF
이렇게 테스트용으로 Kubernetes에 nginx라는 Pod를 생성해 볼 것이다.
kubectl apply -f nginx.yaml

# 출력
deployment.apps/nginx created
service/nginx-service created
이러면 default 네임스페이스에 deployment와 service에 리소스들이 생성이 되었고,
kubectl get all
NAME                         READY   STATUS    RESTARTS   AGE
pod/nginx-76478fbd9f-wpv2r   1/1     Running   0          12s

NAME                    TYPE        CLUSTER-IP     EXTERNAL-IP   PORT(S)   AGE
service/kubernetes      ClusterIP   10.96.0.1      <none>        443/TCP   9m3s
service/nginx-service   ClusterIP   10.96.75.195   <none>        80/TCP    12s

NAME                    READY   UP-TO-DATE   AVAILABLE   AGE
deployment.apps/nginx   1/1     1            1           12s

NAME                               DESIRED   CURRENT   READY   AGE
replicaset.apps/nginx-76478fbd9f   1         1         1       12s
최종적으로 위와 같이 리소스들이 생성되었다.
그럼 nginx가 정상적으로 동작하는지 확인하려면 웹페이지에 접근해봐야 확인이 가능하니 port-forward 기능을 이용하여 접근해보자.
kubectl port-forward svc/nginx-service 8080:80
Forwarding from 127.0.0.1:8080 -> 80
Forwarding from [::1]:8080 -> 80
이렇게 포트포워딩을하면 맥북에서 nginx로 접근할 수 있다.
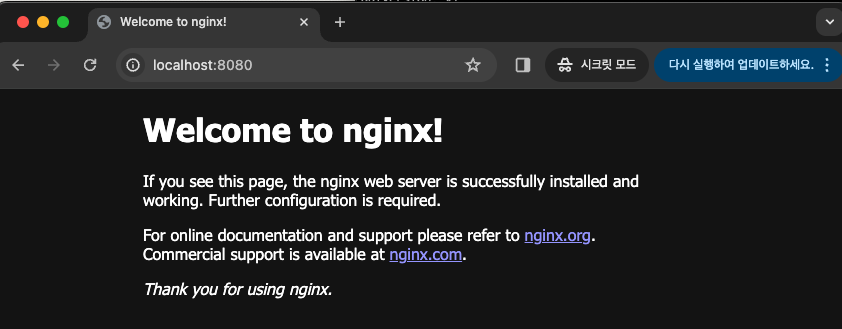
웹 브라우저에서localhost:8080을 검색하면 위와 같이 nginx 기본 홈페이지 화면이 출력된다.
이로써 Kind를 이용해 Kubernetes 구축 및 확인이 끝났다.
Kind 삭제
kind delete cluster로 kubernetes를 삭제할 수 있다.
kind delete cluster --name kind
Deleting cluster "kind" ...
Deleted nodes: ["kind-control-plane"]