요즘 Postgresql 공부를 하면서 계속해서 테스트용으로 샘플 데이터를 만든다.
그런데 이 과정에서 테스트용 DB, Schema, Table 을 생성하는데,
항상 하는 법을 까먹어서 이 글에 기록해둔다.
내가 필요한 만큼만 기록할 것이라서 조금 모자랄 수도 있다 😋
🥝 Database 생성
1. 콘솔을 켜고, psql 을 실행한다.
psql -U postgres
postgres 사용자의 암호:
psql (13.2)
도움말을 보려면 "help"를 입력하십시오.

postgres=# -- 여기서 보이는 postgres 는 현재 사용자가 접속한 Database 이다.
참고: psql 에 더 다양한 파라미터를 줘서 db 에 접근할 수 있습니다.
psql -h localhost -p 7432 -d postgres -U postgres
# -h 는 호스트명(또는 IP)
# -p 는 포트번호
# -d 는 데이터베이스
# -U 는 접속 계정
2. database 생성 명령어 입력
postgres=# create database test_db;

# 해당 디비에 접근하고 싶다면
postgres=# \c test_db
참고: 만약 ENCODING, COLLATE, CTYPE 을 직접 지정하고 싶다면?
CREATE DATABASE korean WITH ENCODING 'EUC_KR'
LC_COLLATE='ko_KR.euckr' LC_CTYPE='ko_KR.euckr' TEMPLATE=template0;
참고2: COLLATE, CTYPE 은 실질적으로 어떤 영향을 주는걸까?
- COLLATE : 정렬방식
- CTYPE : postgresql function 에서 사용되는 문자열에 대한 카테고리
- https://dba.stackexchange.com/questions/94887/what-is-the-impact-of-lc-ctype-on-a-postgresql-database#answer-94972 참고
3. Database 생성하기 및 확인해본다.
postgres=# \l -- \l 을 입력하면 Database 목록을 볼 수 있다. 생성한 DB 확인.
데이터베이스 목록
이름 | 소유주 | 인코딩 | Collate | Ctype | 액세스 권한
------------+----------+--------+------------------+------------------+-----------------------
postgres | postgres | UTF8 | Korean_Korea.949 | Korean_Korea.949 |
template0 | postgres | UTF8 | Korean_Korea.949 | Korean_Korea.949 | =c/postgres +
| | | | | postgres=CTc/postgres
template1 | postgres | UTF8 | Korean_Korea.949 | Korean_Korea.949 | =c/postgres +
| | | | | postgres=CTc/postgres
test_db | postgres | UTF8 | Korean_Korea.949 | Korean_Korea.949 |
postgres=# -- 참고로 template0, template1, postgres 는 기본 Database 이므로 지우지 말자.
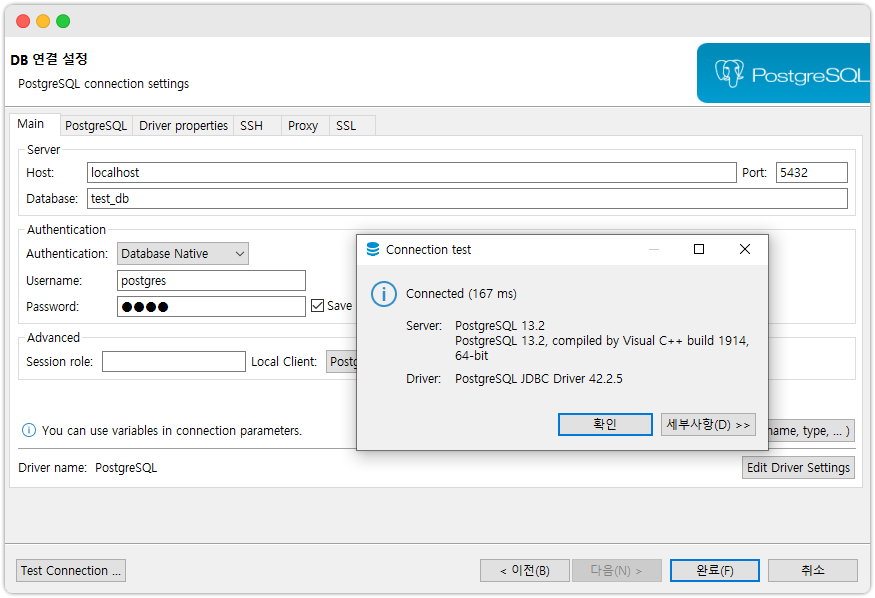
postgres=# quit -- 볼 일 다봤으니 quit 하여 psql을 종료시킨다.4. Dbeaver 로 연결 및 접속. 이제부터 DBeaver 로 작업을 할 수 있다.
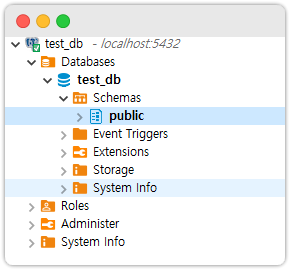
🥝 Schema 생성 & 적용
-- 스키마 생성 + authorization user 를 해서 테이블 생성이 가능하도록 함.
create schema if not exists test authorization postgres;

-- 확인
select * from pg_catalog.pg_namespace pn
order by nspname;

-- 생성한 schema 를 기준으로만 쿼리가 동작하도록 세팅
set search_path to test;

-- 제대로 스키마가 적용되었는지 확인
show search_path;
참고: database 생성하면 기본 Schema 로public을 제공한다.
테이블이 얼마 안될 때는 그냥 이 스키마를 쓰면 되지만, 만약 테이블이 많아지면
public스키마 외에도 다른 스키마를 생성해서 테이블을 관리하는 게 더 좋다.
🥝 테이블 생성
🥥 Data type
일단 테이블을 생성하려면 테이블의 컬럼들이 어떤 Data Type을 사용할 수 있는지
알아야 한다. 여기서는 내가 자주 접하는 타입만 작성하겠다.
| Name | Aliases | Description |
|---|---|---|
bigint | int8 | signed eight-byte integer |
bigserial | serial8 | autoincrementing eight-byte integer |
boolean | bool | logical Boolean (true/false) |
bytea | binary data (“byte array”) | |
character [ (*n*) ] | char [ (*n*) ] | fixed-length character string |
character varying [ (*n*) ] | varchar [ (*n*) ] | variable-length character string |
date | calendar date (year, month, day) | |
integer | int, int4 | signed four-byte integer |
numeric [ (*p*, *s*) ] | decimal [ (*p*, *s*) ] | exact numeric of selectable precision |
smallint | int2 | signed two-byte integer |
smallserial | serial2 | autoincrementing two-byte integer |
serial | serial4 | autoincrementing four-byte integer |
text | variable-length character string | |
timestamp [ (*p*) ] [ without time zone ] | date and time (no time zone) | |
timestamp [ (*p*) ] with time zone | timestamptz | date and time, including time zone |
더 많은 Data Type 를 알고 싶다면 postgresql 공식 문서를 보도록 하자.
ps: Type 에 대해서 더 알고 싶으면 여기를 가보자.
최근에 알아낸 블로그인데, 타입에 대한 설명이 잘되어 있다. 궁금하면 한 번 보자.
🥥 테이블 생성 흐름
테이블은 생성은 단순하게 create 명령어만 하고 끝나는 게 아니라고 생각한다.
외래키 제약조건을 걸어준다던가, 인덱스를 추가한다던가 등의 작업도 한다.
그래서 테이블 생성 과정을 쪼개서 생각해보면 아래처럼 나눌 수 있다.
- CREATE TABLE
- AUTO INCREMENT
- SEQUENCE 사용
- SERIAL 데이터 타입 사용
- GENERATED ALWAYS AS IDENTITY 문법 사용
- ALTER
- CREATE INDEX
지금부터 이 순서대로 글을 작성해보겠다.
1. CREATE TABLE
create table public.emp (
	empno bigint not null,     -- 사번
	ename varchar(10) null,    -- 이름
	hiredate date null,        -- 입사일
	sal numeric(7,2) null,     -- 월급
	deptno numeric(2) null,    -- 부서 번호
	constraint emp_pk primary key (empno)  -- PK 로는 사번을 사용
);

comment on table public.emp is '직원_테이블';

comment on column public.emp.empno is '사원번호';
2. AUTO INCREMENT
테이블 create 시에 pk 컬럼이 고유한 값이 자동으로 매겨지도록
auto increment 기능을 사용해서 자동으로 고유 ID 가 주입되도록 한다.
이를 위해서 제공하는 방식으로는 sequence, serial, GENERATED ALWAYS AS IDENTITY
등이 있다.
지금부터 각 방식으로 테이블 생성에 적용하도록 해보자.
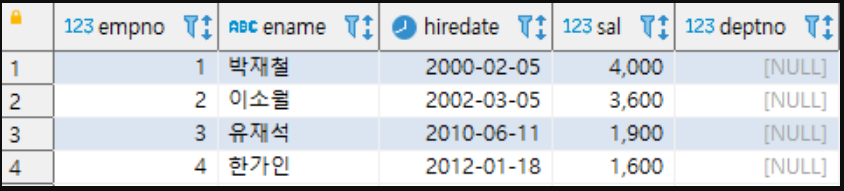
참고! 테스트 INSERT 쿼리
각
AUTO INCREMENT방식들을 사용하더라도 아래의 insert 쿼리를 똑같이 사용할 수 있다. 그래서 각 과정에서 생성된 테이블에 insert sql 을 아래와 같이 입력해서 각자 테스트 해보자.insert into emp(empno,ename,hiredate,sal) values (default, '박재철', to_date('2000-02-05', 'yyyy-mm-dd'), 4000); -- default 라고 명시하면 자동으로 시퀀스를 사용한다! insert into emp(ename,hiredate,sal) values ('이소월', to_date('2002-03-05', 'yyyy-mm-dd'), 3600); insert into emp(ename,hiredate,sal) values ('유재석', to_date('2010-06-11', 'yyyy-mm-dd'), 1900); insert into emp(ename,hiredate,sal) values ('한가인', to_date('2012-01-18', 'yyyy-mm-dd'), 1600); select * from emp; -- 마지막으로 조회 쿼리를 돌려보자.
2-1. SEQUENCE
create sequence emp_pk_seq;  -- 시퀀스 생성

create table emp (
	empno bigint not null default nextval('emp_pk_seq'), -- 시퀀스 사용
	ename varchar(10) null,
	hiredate date null,
	sal numeric(7,2) null,
	deptno numeric(2) null,
	constraint emp_pk primary key (empno)
);
주의!
테이블 삭제 시에는 같이 사용하던 시퀀스도 잊지말고 지워주자.drop table if exists emp; drop sequence if exists emp_pk_seq;
2-2. SERIAL
create table emp (
	empno serial,
	ename varchar(10) null,
	hiredate date null,
	sal numeric(7,2) null,
	deptno numeric(2) null,
	constraint emp_pk primary key (empno)
);
참고: serial 은 사실 sequence 를 생성한다.
serial 타입을 사용하면, postgresql 내부적으로는 현재 테이블의 이름과 컬럼명을
합친 명칭으로 sequence 를 생성한다. 그리고 내부적으로 해당 시퀀스를 사용해서
auto-increment 넘버링을 수행한다. 스택오버플로우 참고.
2-3. GENERATED ALWAYS AS IDENTITY
create table emp (
	empno bigint generated always as identity,
	ename varchar(10) null,
	hiredate date null,
	sal numeric(7,2) null,
	deptno numeric(2) null,
	constraint emp_pk primary key (empno)
);

-- 아래처럼 PK 를 수동으로 1을 넣으려고 하면 ERROR!
insert into emp (empno, ename) values (1, '호로록');
GENERATED ALWAYS AS IDENTITY 는 한가지 장점이 있다.
그건 바로 insert 쿼리로 PK에 어떤 값을 수동적으로 넣는 것을 막아준다는 것이다.
앞서 본 sequence, serial 모두 이런 기능은 없다.
참고로
GENERATED ALWAYS AS IDENTITY도 결국 시퀀스 객체를
생성하여 사용하게 됩니다. 그리고 해당 시퀀스는{table 명칭}_{identity 컬럼 명칭}_seq와 같은 패턴으로 이름이 지어집니다.
3. ALTER
테이블을 생성 후에 제약조건 등을 변경할 때 ALTER 라는 키워드를 사용한다.
내가 자주 사용하는 방식은 아래 2가지다.
3-1. 외래키 제약 걸기
create table emp (
	empno bigint generated always as identity,
	ename varchar(10) null,
	hiredate date null,
	sal numeric(7,2) null,
	deptno numeric(2) null,
	constraint emp_pk primary key (empno)
);

create table dept (
	deptno numeric not null,
	dname varchar(14) null,
	location varchar(255) null,
	constraint dept_pk primary key (deptno)
);


alter table emp add constraint emp_fk foreign key (deptno)
references dept(deptno);

-- 참고: 만약 외래키를 지우고 싶다면 아래처럼 하면 된다.
-- alter table emp drop constraint emp_fk;
참고: 외래키 제약을 굳이 alter 로 하는 이유
외래키 제약조건은 다음 4가지 규칙을 갖는다.
1. 부모 테이블이 자식 테이블보다 먼저 생성되어야 한다.
2. 부모 테이블은 자식 테이블과 같은 데이터 타입을 가져야 한다.
3. 부모 테이블에서 참조된 컬럼의 값만 자식 테이블에서 입력 가능하다.
4. 참조되는 컬럼은 모두 프라이머리 키이거나 unique 제약조건 형식이어야 한다.이 중에서 1번 때문에 테이블을 부모 테이블 먼저 생성하고, 자식 테이블을
생성해야만 한다. 그런데 이런 순서를 계속 생각하면서 테이블을 만들기 귀찮아서
alter 를 쓰는 것이다.
참고: alter table 은 사실 기능이 엄청 많다.
그러므로 더 많은 기능을 알고 싶다면 여기를 참고하길 바란다.
3-2. 시퀀스를 테이블에 묶기
create sequence foo_seq;

create table foo (
	id int not null default nextval('foo_seq'),
	description varchar(200) null,
	constraint foo_pk primary key (id)
);

alter sequence foo_seq owned by foo.id;

drop table foo; -- 이때 테이블과 시퀀스가 한번에 삭제된다!
4. CREATE INDEX
테이블 생성 후에는 특정 컬럼에 대해서 인덱스를 걸고 싶은 경우도 많다.
그때는 아래처럼 해주자.
-- 한 개의 컬럼에 대한 인덱스
CREATE INDEX index_name
ON table_name (column_name);

-- 두 개의 컬럼에 대한 인덱스
CREATE INDEX index_name
ON table_name (column1_name, column2_name);

-- 인덱스 뿐만 아니라 데이터 무결성도 지켜준다. 중복되는 값이 들어오면 에러를 일으킨다.
CREATE UNIQUE INDEX index_name
on table_name (column_name);

-- 인덱스 삭제
DROP INDEX index_name;
참고로 Primary, Unique 제약조건을 걸면 자동으로
해당 컬럼은 인덱스가 생성된다는 점도 알고 넘어가자.
🥥 참고) 도메인 생성 및 Check 제약걸기
도메인이란?
기본 데이터 타입을 기반으로 선택적으로 제약조건을 걸 수 있는 "사용자 정의 타입"
일단 도메인을 생성하기 전에 Check 제약은 아래처럼 걸 수 있다.
create table person (
	id serial not null primary key,
	name varchar(30) not null,
	location varchar(100),
	age integer check (age > 0 and age <= 120)
);

insert into person (id, name, location, age)
values (default, 'good man', 'somewhere', -1);
-- SQL Error [23514]: 오류:
--   새 자료가 "person" 릴레이션의 "person_age_check" 체크 제약 조건을 위반했습니다.
그리고 도메인을 써서 Check 제약을 걸려면 아래처럼 하면 된다.
create domain person_age as integer check (value > 0 and value <= 120);

create table person (
	id serial not null primary key,
	name varchar(30) not null,
	location varchar(100),
	age person_age
);

insert into person (id, name, location, age)
values (default, 'good man', 'somewhere', -1);
-- SQL Error [23514]: 오류:
--    person_age 도메인용 값이 "person_age_check" 체크 제약 조건을 위반했습니다
🥝 참고