0️⃣ 서론
Test를 통합 테스트가 아닌 Unit Test로 더 작은 단위로 쪼개기 위해서 Controller, Service, Repository 계층별로 테스트를 진행해야 했습니다.
하지만, Controller는 Spring Security와 JWT와 깊은 의존성을 가지고 있어서 테스트를 진행하기가 어려웠습니다,,,
그리고 인증 인가를 Controller에서 진행하기 때문에, Service, Repository는 Spring Security,JWT와 깊은 연관이 없어서 테스트를 쉽게 진행할 수 있었습니다.
그러면 다른 분들은 어떠한 방식으로 Spring Security와 관련된 테스트를 진행하고 있을지 계속 검색하고 찾아봤습니다~!
그래서 내린 결론은 @WithMockUser를 사용해서 moking 유저를 사용해서 인증절차를 통과시키자!! 였습니다.
검색해서 참고한 자료는 아래의 블로그글입니다.
1️⃣ 본론
PART 1. 현재 프로젝트의 Spring Security 구조 파악하기 🔧
- 아래의 링크는 현재 프로젝트와 관련된 Spring Security 구조에 대해 작성한 글입니다.
https://handayeon-coder.github.io/posts/Spring-Security-OAuth2-로그인-+-JWT-구현하기/
✔️ SecurityFilterChain 살펴보기
먼저, Spring Security를 자세하게 살펴보기 위해서는 SecurityFilterChain를 확인해봐야 합니다.
    @Bean
    public SecurityFilterChain filterChain(HttpSecurity http) throws Exception {

        http
                .csrf().disable()
                .sessionManagement()
                .sessionCreationPolicy(SessionCreationPolicy.STATELESS)
                .and()
                .cors().configurationSource(corsConfigurationSource())
                .and()
                .headers().frameOptions().disable()
                .and()
                .authorizeRequests()
                .antMatchers("/h2-console/**", "/actuator/**",
                        "/", "/api-docs/**", "/swagger-ui/**").permitAll()
                .antMatchers("/v1/**", "/login/**").hasRole(Role.USER.name())
                .anyRequest().authenticated()
                .and()
                .logout()
                .logoutSuccessUrl("/")
                .and()
                .addFilterBefore(new JwtAuthFilter(tokenService),
                        UsernamePasswordAuthenticationFilter.class)
                .oauth2Login()
                .successHandler(oAuth2SuccessHandler)
                .failureHandler(oAuth2FailureHandler)
                .userInfoEndpoint()
                .userService(customOAuth2UserService);

        return http.build();
    }
여기에서 주목해야 할 곳은 JwtAuthFilter를 UsernamePasswordAuthenticationFilter 앞에 추가했다는 점입니다.
따라서 JWT 토큰을 클라이언트 요청의 Header에 제공해줬다면, JWT 토큰을 인증하고 나서 JwtAuthFilter를 통과하게 되고 인증이 허가됩니다.
.addFilterBefore(new JwtAuthFilter(tokenService),
        UsernamePasswordAuthenticationFilter.class)
그러면, JwtAuthFilter를 통과하는 모습을 자세하게 살펴보겠습니다!
토큰이 인증되면, 토큰에서 이메일을 가져오고 "ROLE_USER"의 권한을 부여하여 Authentication auth 인스턴스를 생성합니다.
이때, 생성한 auth 인스턴스를 SecurityContextHolder.getContext().setAuthentication(auth); SecurityContextHolder에 저장해줍니다.
@RequiredArgsConstructor
public class JwtAuthFilter extends GenericFilterBean {

    private final TokenService tokenService;

    @Override
    public void doFilter(ServletRequest request, ServletResponse response,
            FilterChain chain) throws IOException, ServletException {

        String token = tokenService.resolveToken((HttpServletRequest) request);
        if (token != null && tokenService.validateToken(token)) {
            String email = tokenService.getEmail(token);

            Authentication auth = new UsernamePasswordAuthenticationToken(email, "", Arrays.asList(new SimpleGrantedAuthority("ROLE_USER")));
            SecurityContextHolder.getContext().setAuthentication(auth);
        }
        chain.doFilter(request, response);
    }
}
여기에 저장해준 Authentication 객체(auth)를 Controller에서 사용할 수 있습니다.
@RequiredArgsConstructor
@RestController
public class UserController {

    private final UserService userService;

    @GetMapping("")
    public ApiResponse<String> login(@RequestParam String token) {
        return ApiResponse.success();
    }

    @Operation(summary = "회원 정보 조회", description = "해당 회원의 정보를 조회할 수 있습니다.")
    @GetMapping("/v1/user")
    public ApiResponse<GetUserInfoResponse> getUserInfo(Authentication authentication) {
        String email = authentication.getName();

        return ApiResponse.success(userService.getUserInfo(email));
    }

    @Operation(summary = "회원 탈퇴", description = "해당 회원 탈퇴할 수 있습니다.")
    @DeleteMapping("/v1/user")
    public ApiResponse<String> deleteUser(Authentication authentication) {
        String email = authentication.getName();
        userService.deleteUser(email);

        return ApiResponse.success();
    }

    @Operation(summary = "회원 프로필 이미지 조회", description = "해당 회원 프로필 이미지를 조회할 수 있습니다.")
    @GetMapping("/v1/user/profile")
    public ApiResponse<GetProfileUrlResponse> getProfileUrl(Authentication authentication) {
        String email = authentication.getName();
        GetProfileUrlResponse getProfileUrlResponse = new GetProfileUrlResponse(
                userService.getProfileUrl(email));
        return ApiResponse.success(getProfileUrlResponse);
    }
}
PART 2. Spring Security Controller Unit Test하기 🍄
Controller에서 받는 클라이언트의 요청을 Mock해서 SecurityContext에 가짜 사용자를 등록하고 Controller에서 가짜 사용자를 꺼내서 사용하면 Controller를 실제 클라이언트 요청없이 Unit 테스트를 진행할 수 있습니다.

SecurityContextHolder 사진 출처 : https://gregor77.github.io/2021/04/19/spring-security-01/
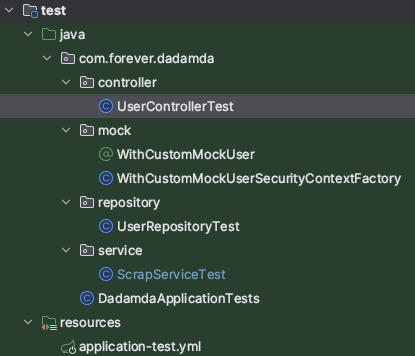
- 위의 사진은 테스트 프로젝트 폴더 구조입니다.
1. Custom 한 @WithMockUser 만들기
@Retention(RetentionPolicy.RUNTIME)
@WithSecurityContext(factory = WithCustomMockUserSecurityContextFactory.class)
public @interface WithCustomMockUser {

    String email() default "1234@naver.com";
}- 이메일 주소가 "1234@naver.com"인 가짜 사용자를 만들어줍니다.
@WithSecurityContext(factory = WithCustomMockUserSecurityContextFactory.class)는 WithCustomMockUserSecurityContextFactory를 이용하여 SecurityContext를 생성하여 테스트를 실행할 수 있습니다.
public class WithCustomMockUserSecurityContextFactory implements
    WithSecurityContextFactory<WithCustomMockUser> {

    @Override
    public SecurityContext createSecurityContext(WithCustomMockUser annotation) {
        String email = annotation.email();

        Authentication auth = new UsernamePasswordAuthenticationToken(email, "",
                List.of(new SimpleGrantedAuthority("ROLE_USER")));

        SecurityContext context = SecurityContextHolder.getContext();
        context.setAuthentication(auth);

        return context;
    }
}- 위의 로직은 위에서 설명한 JwtAuthFilter의 로직과 동일한 구조입니다.
- 따라서 WithCustomMockUser에서 선언해 준 "1234@naver.com"인 가짜 사용자를 SecurityContext를에 등록해줍니다.
2. ControllerTest 작성하기
@SpringBootTest
@AutoConfigureMockMvc
@TestPropertySource(locations = "classpath:application-test.yml")
public class UserControllerTest {

    @Autowired
    private MockMvc mockMvc;

    @Autowired
    private UserRepository userRepository;

    @BeforeEach
    void setUp() {
        User user = User.builder()
                .name("koko")
                .provider(Provider.GOOGLE)
                .role(Role.USER)
                .email("1234@naver.com")
                .profileUrl("https://www.naver.com")
                .build();

        userRepository.save(user);
    }

    @Test
    @WithCustomMockUser
    public void IfUserExistsThenGetUserInfoReturnsSuccess() throws Exception {
        mockMvc.perform(get("/v1/user")
                        .header("X-AUTH-TOKEN", "aaaaaaa"))
                .andExpect(MockMvcResultMatchers.status().isOk());
    }
}@WithCustomMockUser를 테스트 함수 위에 선언해주면, 가짜 사용자를 SecurityContext를에 등록하여 Controller에서 사용할 수 있습니다.- 이때,
.header("X-AUTH-TOKEN", "aaaaaaa")헤더에 선언해준 TOKEN은 HTTP의 형식을 맞추기 위해서 선언해주었고 Controller 테스트 시에는 활용하지 않으므로 TOKEN의 값은 아무거나 선언해주어도 됩니다!

3️⃣ 결론
이번에는 Spring Security로 인해서 의존성이 강하게 연결되어 있는 Controller에 대한 테스트를 진행하였습니다.
이번 계기로 통해서 의존성이 강하게 연결되어 있어서 테스트를 진행하기 매우 어려우므로 의존성이 약한 하는 구조의 중요성🍁을 다시 한번 깨닫게 되었습니다!!!
그리고 프로젝트의 구조를 더 유연한 구조로 변경하여 테스트뿐만 아니라 기능 수정에도 용이한 구조로 변경해야겠다는 의지를 다지게 되었습니다~!

좋은 정보 잘 보고 갑니다.
감사합니다.