📍 시작
노마드 코더 강의는 끝났지만 학습하는 개념으로 꾸준히 개선하고자한다.
챌린지 신청도 고려했지만 유료 강의를 먼저 수강해야한다고 한다.ㅠㅠ
자기 계발을 위해 유료 강의도 고려해 봐야겠다!
이번에는 메인페이지에 인기 영화 TOP10을 추가하고
이를 캐러셀로 한줄로 보이도록해보는 작업을 해보자!
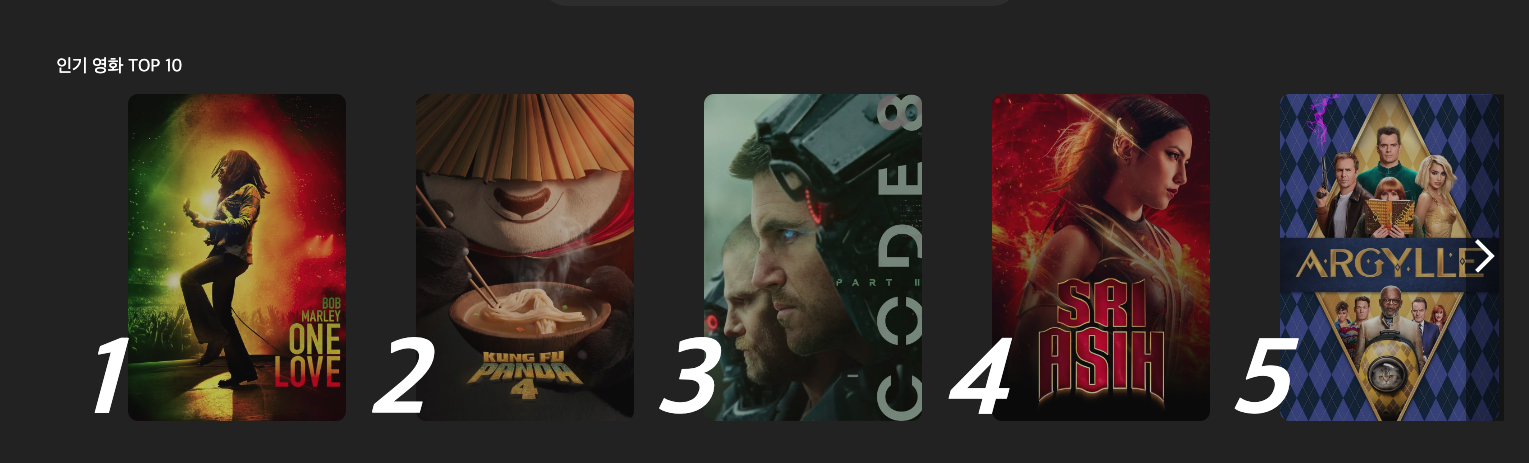
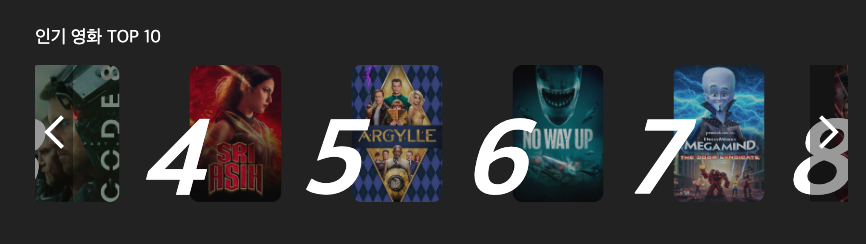
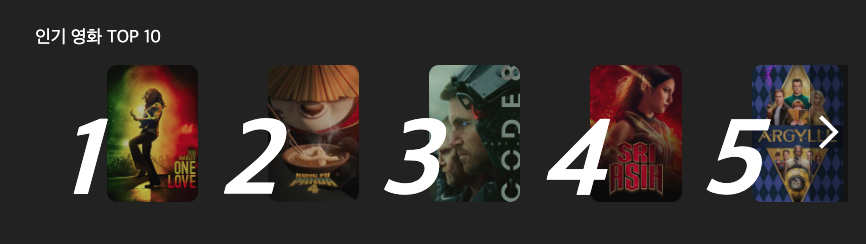
✨ 인기영화 TOP 10
구현한 화면
1. 별점 높은 순으로 배치 후 10개만 가져오기
- 별점이 높은 순으로 10개의 영화만 보여줄 예정이다.
- 그러기 위해선
sort메서드를 활용할 수 있다.
const voteAverage = movies.sort((a, b) => b.vote_average - a.vote_average).slice(10)sort는 두가지 인자를 받아 온다.a-b는 내림차순,b-a는 오름차순으로 값을 반환한다.- 마지막으로 10개의 영화만 필요하기에
slice(10)해주었다.
sort?
배열의 요소를 적절한 위치에 정렬한 후 그 배열을 반환합니다.
정렬은 stable sort가 아닐 수 있습니다. 기본 정렬 순서는 문자열의 유니코드 코드 포인트를 따릅니다.
-mdn정리하자면
sort는 오름차순, 내림차순으로 정렬을 할 수 있다.단, 유니코드 기반으로 하기 때문에 간혹 제대로 된 결과 값을 가져오지 않기도 한다.
sort메서드 사용 법은 알지만 원리는 잘 모르는 것 같다.
시간 될 때 정독해 봐야겠다.
원리를 제대로 아는 사람이 거의 없는 Sort메서드
2. 인기순 전용 컴포넌트 만들기
"use client"

import Image from "next/image";
import styles from "../styles/movie-hot.module.css";
import { useRouter } from "next/navigation";

interface MoviePropsT {
  id: number;
  title: string;
  poster_path: string;
  idx: number;
}

const MovieHot = ({ id, title, poster_path, idx }: MoviePropsT) => {
  const router = useRouter();
  const onClick = () => {
    router.push(`/movie/${id}`);
  }
  return (
    <div className={styles.movieHot}>
      <span className={styles.hotNum}>{idx + 1}</span>
      <div className={styles.imgWrap}>
        <Image src={poster_path} fill alt={title} onClick={onClick} />
      </div>
    </div>
  );
};

export default MovieHot;- 기존에 있던 movie 컴포넌트를 활용하려고 했으나, 달라지는 요소가 많아
MovieHot이라는 컴포넌트로 분리했다. - 컴포넌트 이름은... 다시 정해봐야겠다.
3. 캐러셀 컴포넌트 및 기능 구현하기
캐러셀?
- 캐러셀은 이미지나 텍스트의 슬라이드를 가로로 슬라이드시켜 여러 개를 표시하는 컴포넌트
캐러셀
- 라이브러리를 활용하기 보단 직접 구현하고자 한다.
- 또한, 이전 웹디자인기능사 실기 공부를 할 때 비슷한 맥락으로 진행한 경험이 있어서 그 경험을 살려 진행할 예정이다.
3-1.버튼 작업
return (
  <section className={styles.carouselContainer}>
    <div className={styles.carouselWrap}>
      {voteAverage.map((movie: ImoviesT, idx) => (
        <MovieHot key={movie.id} id={movie.id} title={movie.title} idx={idx} poster_path={movie.poster_path} />
      ))}
    </div>
    <button className={styles.prevBtn} onClick={handlerPrev}><Arrow type='left' /></button>
    <button className={styles.nextBtn} onClick={handlerNext}><Arrow type='right' /></button>
  </section>
);
figma를 통해 화살표 아이콘을 제작하고 이를 svg로 내보냈다.
- svg파일을 사용하기 보단 이를 컴포넌트 형식으로 만들어 추후 재사용성을 고려했다.- button에
type속성을 추가해 하나의 컴포넌트만 사용해 위치를 변경할 수 있도록했다.
3-2.순서를 알기위해 useState 사용하기
const [currentIndex, setCurrentIndex] = useState<number>(0);- currentIndex를 통해 슬라이스 순서를 파악할 예정이다.
- currentIndex 값이 유동적으로 변경할 수 있도록 useState로 선언했다.
3-3.리스트를 감싸고 있는 요소의 스타일을 변경하기 위해 useRef사용하기
const carouselRef = useRef<HTMLDivElement>(null);
.
.
.
return (
  <section className={styles.carouselContainer}>
  <div ref={carouselRef} className={styles.carouselWrap}>
    {voteAverage.map((movie: ImoviesT, idx) => (
      <MovieHot key={movie.id} id={movie.id} title={movie.title} idx={idx} poster_path={movie.poster_path} />
      ))}
        </div>
<button className={`${styles.prevBtn} ${prevDis}`} onClick={handlerPrev}><Arrow type='left' /></button>
<button className={`${styles.nextBtn} ${nextDis}`} onClick={handlerNext}><Arrow type='right' /></button>
</section>
);- 각각의 영화 컴포넌트 리스트를 감싸고 있는 컴포넌트에
ref속성을 추가했다. - 이는 추후 리스트를 앞, 뒤로 이동하기 위한
DOM에 스타일을 직접 추가하기 위해서다.
3-4.이전, 다음 버튼 클릭 시 currentIndex +1, -1하기
const handlerPrev = () => {
  if (currentIndex > 0) {
    setCurrentIndex(currentIndex - 1);
  }

}
const handlerNext = () => {
  if (currentIndex <= 2) {
    setCurrentIndex(currentIndex + 1);
  }
}- 버튼 클릭 시 currentIndex에 숫자를 하나씩 추가하도록 했다.
- 캐러셀을 제어할 때 필요하다.
handlerPrev클릭 시
-> currentIndex가 0보다 클 경우-1handlerNext클릭 시
-> currentIndex가 2보다 크거나 같을 경우+1
3-5.currentIndex의 값에 따라 옆 또는 앞으로 이동하기
useEffect(() => {
  if (carouselRef.current) {
    carouselRef.current.style.transition = "all 0.6s";
    if (currentIndex > 0) {
      carouselRef.current.style.transform = `translateX(${currentIndex * 25}%)`;
    }
    if (currentIndex <= 2) {
      carouselRef.current.style.transform = `translateX(-${currentIndex * 25}%)`;
    }
  }
}, [currentIndex])- useEffect를 사용하여 currentIndex 값이 변경 될 때 마다 적용하도록 했다.
- currentIndex가 0보다 클 경우
-> carouselRef.current에 transform:translateX 값을 현재에서currentIndex * 20%을 준다. - currentIndex가 2보다 크거가 같을 경우
-> carouselRef.current에 transform:translateX 값을 현재에서-currentIndex * 20%를 준다. - 여기서 20% 수치는 작업 화면을 보며 유동적으로 조절하면 된다.
(이 부분에 대해서는 아마 반응형 작업 시 수정되지 않을까 싶다.)
transform으로 캐러셀을 이동시킨 이유
transform은 GPU로 동작하기에 position 보다 CPU 부하가 적다.margin을 이용해서 구현할 수도 있다.
3-6.그에 따른 버튼 표시 유무
const nextDis = currentIndex >= 2 ? styles.disNone : styles.disBlock;
const prevDis = currentIndex > 0 ? styles.disBlock : styles.disNone;
.
.
.
return (
<section className={styles.carouselContainer}>
  <div ref={carouselRef} className={styles.carouselWrap}>
    {voteAverage.map((movie: ImoviesT, idx) => (
      <MovieHot key={movie.id} id={movie.id} title={movie.title} idx={idx} poster_path={movie.poster_path} />
    ))}
  </div>
  <button className={`${styles.prevBtn} ${prevDis}`} onClick={handlerPrev}><Arrow type='left' /></button>
  <button className={`${styles.nextBtn} ${nextDis}`} onClick={handlerNext}><Arrow type='right' /></button>
</section>- currentIndex 값에 따라 이전, 다음 버튼을 보이게, 안 보이게 작업했다.
동적으로 스타일하기
- React는
CSS-in-JS로 props를 활용해 동적인 스타일을 줄 수 있었다. - Next.js에서는 CSS 모듈이
객체 형식으로 굳이 className 내부 말고도 외부에서 작성할 수 있다.이 방법은 동적으로 스타일할 내용이 많아지만 코드도 길어질 것 같다. 아마 더 좋은 방법이 있지 않을까 싶다.
const nextDis = currentIndex >= 2 ? styles.disNone : styles.disBlock;
const prevDis = currentIndex > 0 ? styles.disBlock : styles.disNone;
className 여러개 추가하기
- Next.js에서 className을 여러개 작성해야한다면
${클래스 이름}내부에 작성해 해결 할 수 있다.
<button className={`${styles.prevBtn} ${prevDis}`} onClick={handlerPrev}><Arrow type='left' /></button>
<button className={`${styles.nextBtn} ${nextDis}`} onClick={handlerNext}><Arrow type='right' /></button>
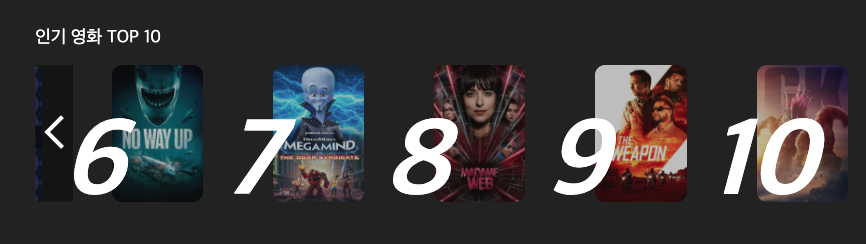
- 맨 앞에 있을 경우 이전 버튼이, 맨 마지막에 배치할 경우 다음 버튼이 없어지는 걸 확인할 수 있다.
4. 완성된 코드
"use client";

import { useEffect, useRef, useState } from "react";
import { ImoviesT } from "@/types/type";
import styles from "../styles/movie-carousel.module.css";
import Arrow from "./icons/arrow";
import MovieHot from "./movie-hot";

const MovieCarousel = ({ movies }: { movies: ImoviesT[] }) => {
  const voteAverage = movies.sort((a, b) => b.vote_average - a.vote_average).slice(10)
  const carouselRef = useRef<HTMLDivElement>(null);
  const [currentIndex, setCurrentIndex] = useState<number>(0);
  const nextDis = currentIndex >= 2 ? styles.disNone : styles.disBlock;
  const prevDis = currentIndex > 0 ? styles.disBlock : styles.disNone;

  const handlerPrev = () => {
    if (currentIndex > 0) {
      setCurrentIndex(currentIndex - 1);
    }
  }

  const handlerNext = () => {
    if (currentIndex <= 2) {
      setCurrentIndex(currentIndex + 1);
    }
  }

  useEffect(() => {
    if (carouselRef.current) {
      carouselRef.current.style.transition = "all 0.6s";
      if (currentIndex > 0) {
        carouselRef.current.style.transform = `translateX(${currentIndex * 25}%)`;
      }
      if (currentIndex <= 2) {
        carouselRef.current.style.transform = `translateX(-${currentIndex * 25}%)`;
      }
    }
  }, [currentIndex])

  return (
    <section className={styles.carouselContainer}>
      <div ref={carouselRef} className={styles.carouselWrap}>
        {voteAverage.map((movie: ImoviesT, idx) => (
          <MovieHot key={movie.id} id={movie.id} title={movie.title} idx={idx} poster_path={movie.poster_path} />
        ))}
      </div>
      <button className={`${styles.prevBtn} ${prevDis}`} onClick={handlerPrev}><Arrow type='left' /></button>
      <button className={`${styles.nextBtn} ${nextDis}`} onClick={handlerNext}><Arrow type='right' /></button>
    </section>
  );
};

export default MovieCarousel;
✏️ 마치며
사실 넷플릭스의 인기순 처럼 이전, 다음 버튼 클릭 시 무한으로 이동되게 하고 싶었다.
아마 Node를 복제해서 붙이지 않았을까 싶다.
이점에 대해서는 좀 더 학습이 필요하다.
또한, 반응형인 경우를 고려하지 않고 작업을 진행했다.
만약 반응형으로 진행할 경우를 대비하여 스타일 및 코드가 수정될 것 같다.
현재는 어떤 식으로 동작하는지 등을 학습하는 개념으로 진행하고 있어, 리팩토링 등도 아직이다.
참고 - 더 있었지만.. 너무 많은 구글링을 했다..🥹
React에서 className 여러개 주기