Long-range Video
When I want to integrate a camera with some robot projects, I usually use ESP32-CAM modules, which are cheap and pretty fast. However, that only works when we have wi-fi available or are close to the module during AP mode. Sometimes, we want to receive video from very remote places, and my solution for it was to use FPV modules that many drone hobbyists use. FPV modules use radio signals, which are slower than wi-fi but have a range of 5 km in open areas.
However, those modules are so dedicated to quadropters that it is hard to customize their functions. For example, we sometimes want to process the video before the transmitter sends it or create a special on-screen display (OSD) that is not supported by the transmitter module. Therefore, instead of directly connecting the transmitter with the camera, we connect it with a Raspberry PI module.
Raspberry Pi TV Out
The Raspberry Pi is a linux-based microcomputer that works well as a second computer for small robots, alongside microcontrollers that control motors or read sensors. And older versions of Raspberry Pi models, like the Raspberry Pi Zero, have TV-out ports that can be connected with old TVs that do not have HDMI ports and support NTSC and PAL TV standards. The interesting part about this is that FPV modules also use those standards, which means that if you connect the FPV transmitter to TV-out ports, it will broadcast the Raspberry Pi's screen in real-time. This method is extremely simple because you only need to connect wires (TV, GND), and FPV modules have the same voltage input as the Raspberry Pi, which is 5V.

For this, I use the Raspberry Pi Zero a lot because of its small size and cheap price. And I prefer Zero 1 more than Zero 2 because it has pin holes dedicated to TV out, which makes soldering easier. Also, it's way cheaper than Zero 2 (Zero 1: $5, Zero 2: $15).
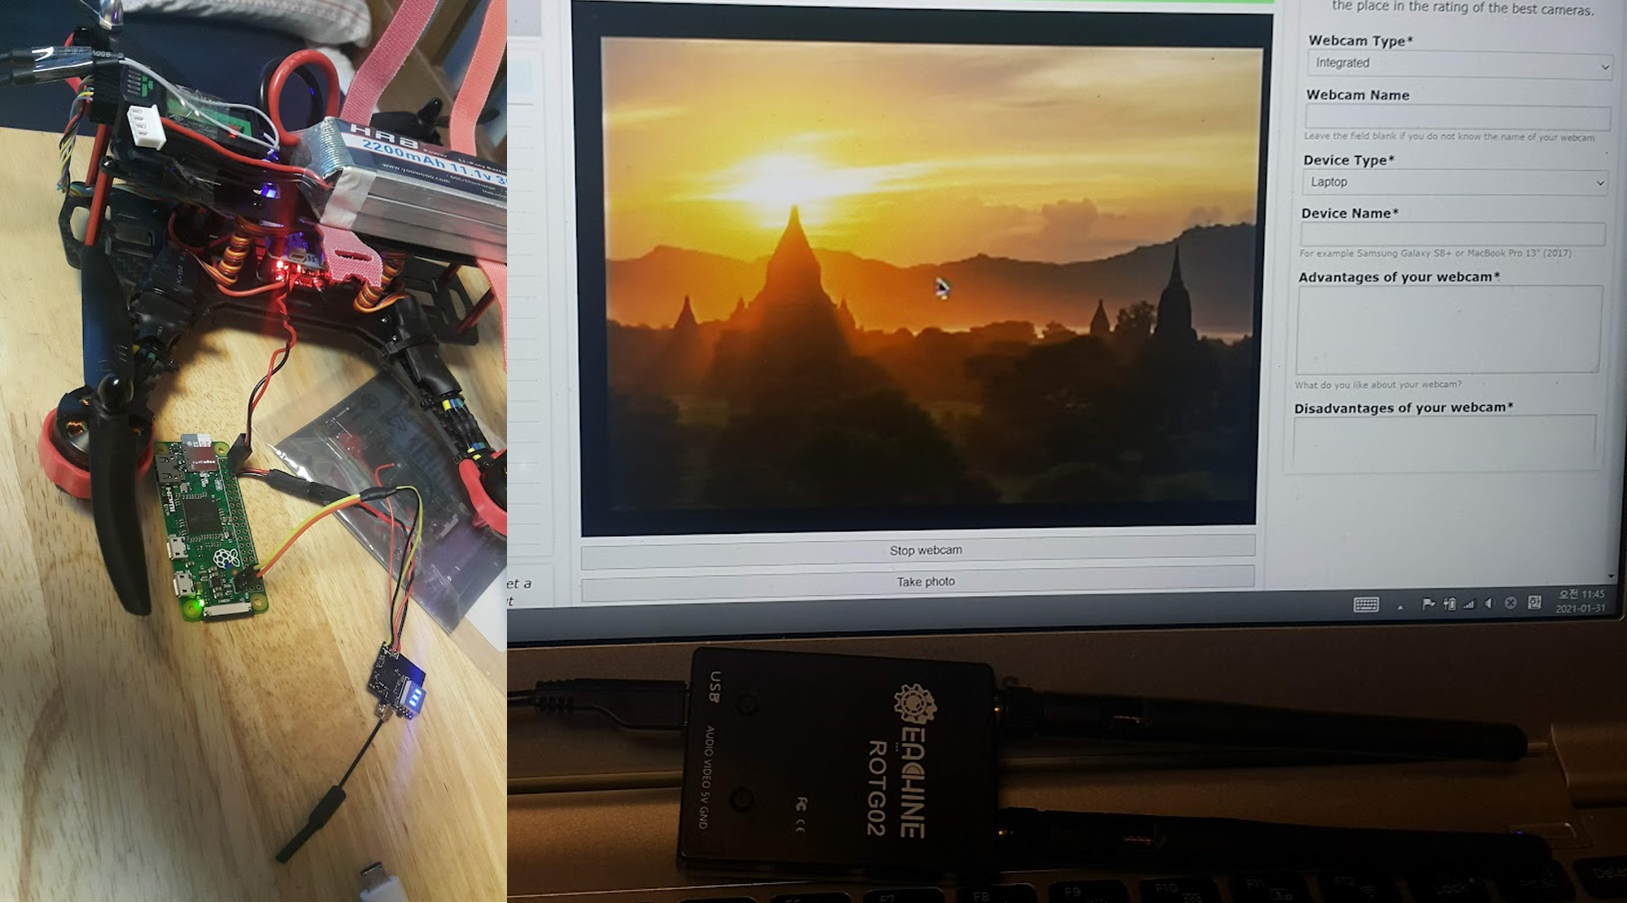
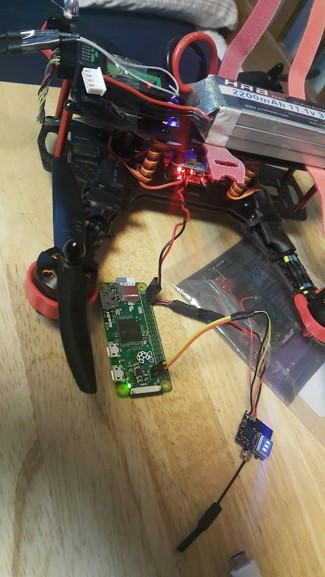
The above image is my work connecting a Raspberry Pi Zero to the drone and receiving its video using an FPV receiver, which is connected to the laptop. The FPV receiver works like a USB camera in the laptop.
Future directions
I used this method to create a drone that tracks human faces. I connected the camera to the Raspberry Pi and wrote Python code that automatically starts the detection when the Raspberry Pi starts or reboots and sends results in real-time. However, you can use this for other things like 1. on-board visual inertial SLAM or 2. radio-based computer control using additional serial modules for remote inputs.
And one of the possible improvements is using software-defined radios to receive NTSC and PAL signals even further than 5 km away with low latency.