블로그 쓰는게 좀 무서워서 계속 미뤄왔는데, 나만의 일기를 기록한다는 느낌으로 가볍게 쓰려고 마음먹고
처음으로 글을 쓴다. 오늘의 주제는 React Styled Component 를 구현하기다.
근데 아직 Styled Component 사용법도 잘 몰라서 그것부터 확인한다.
Styled Component 사용법
import React from 'react';
import styled from 'styled-components';

const Circle = styled.div`
  width: 5rem;
  height: 5rem;
  background: black;
  border-radius: 50%;
`;

function App() {
  return <Circle />;
}

export default App;
https://react.vlpt.us/styling/03-styled-components.html 에서 간단한 예제를 가져왔다.
우선 이런 형태로 쓰는걸 목표로 시작해본다.
프로젝트 만들기
먼저 깃허브에 프로젝트를 만들었다.
https://github.com/cothis/styled-component

아무것도 없는 빈 프로젝트 모습..
리액트 보일러 플레이트 코드 가져오기
기존에 만들어놨던 보일러플레이트 코드가 있어서 가져오고 약간 수정했다.

styled-components를 만들어서 styled 라는걸 리턴
이때 styled.div, styled.span 처럼 쓸수 있게 만들어야된다.
우선은 css 는 생각하지말고 컴포넌트 생성만이라도 할 수 있게 해보자.
styled라는 객체의 div, span 등등의 key에 tagged template 함수를 넣어줘야한다.
그리고 taggedTemplate의 반환결과는 컴포넌트여야한다.
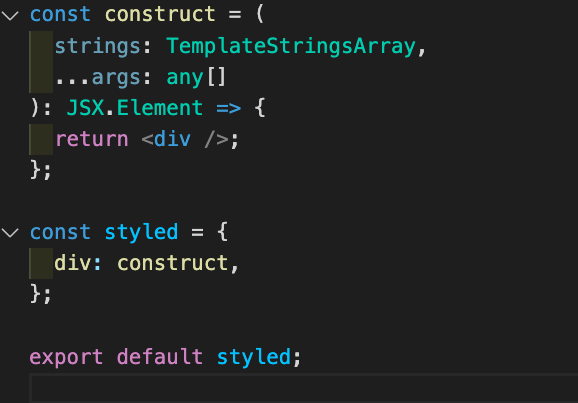
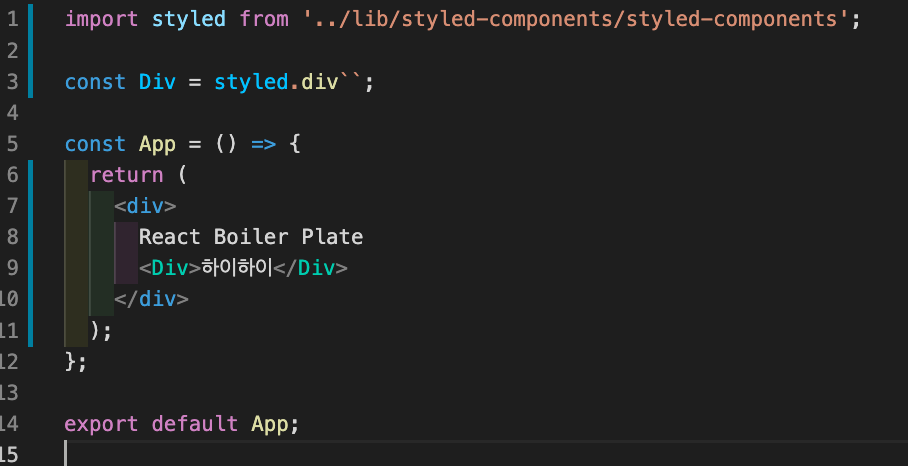
일단 첫단계로 div 만 만들어볼 수 있게 해보았다.
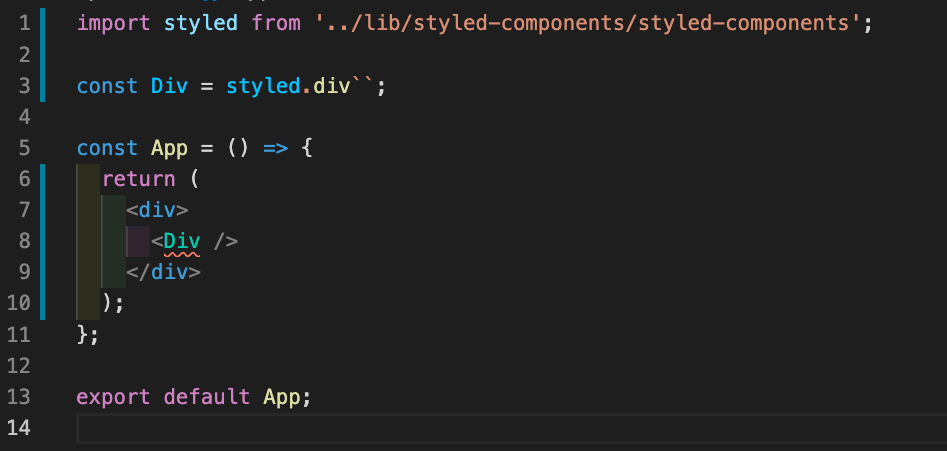

음..이렇게 하니까 안되네.. 다른 방법을 찾아본다.
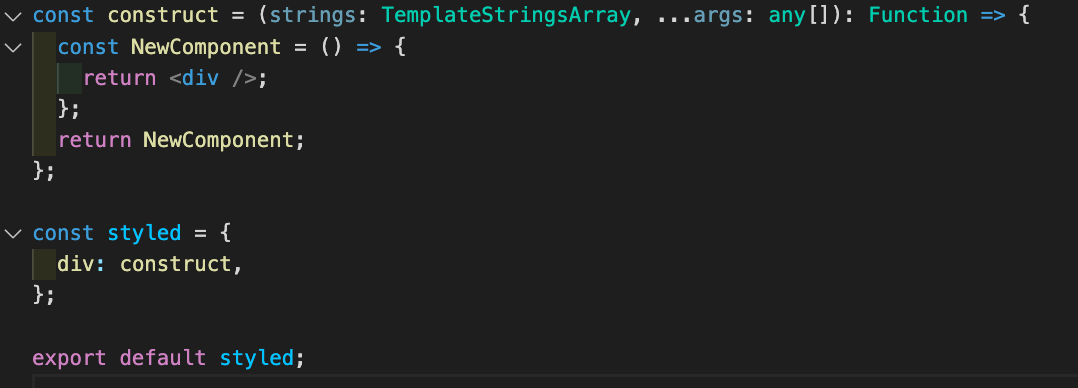
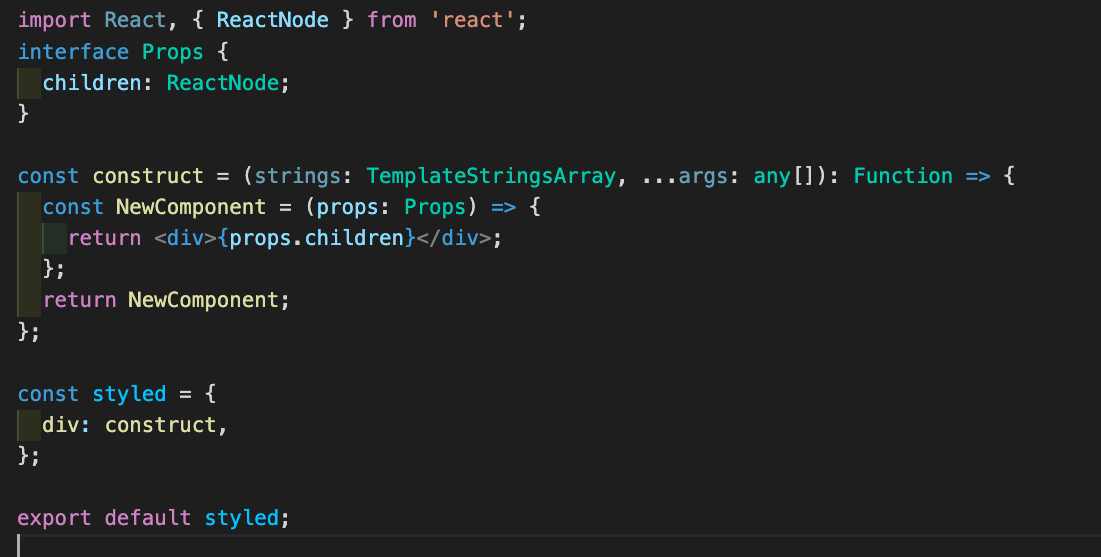
styled 의 생성부분을 변경했더니 App.tsx의 에러도 사라지고 웹페이지에서도 렌더링이 된다.
근데 이렇게 했더니 중간의 하이하이 글자가 표시되지 않는다.. props에서 children을 넣어줘야할것 같다.
이렇게 변경해줬더니
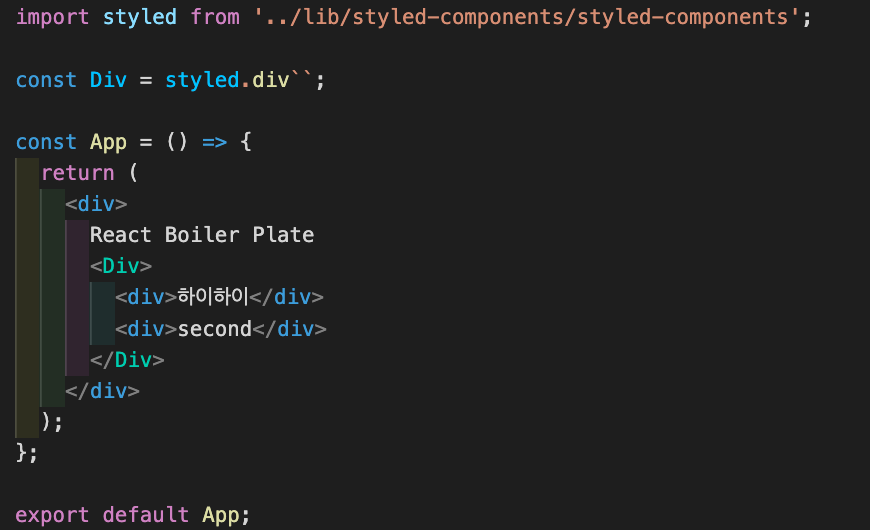
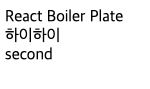
렌더가 된다.
이제 여기다가 span, form, a, 등등 다양한 컴포넌트를 만들수있게 해야겠다
먼저 construct 를 감싸는 constructWithTag 함수를 만들었다. 이 함수는 tag 스트링을 인자로 받아서
그 인자이름으로 CustomTag를 생성해주는 함수를 반환한다.
import React, { ReactNode } from 'react';
interface Props {
  children: ReactNode;
}

const constructWithTag = (tag: string) => {
  const CustomTag = `${tag}` as keyof JSX.IntrinsicElements;

  const construct = (
    strings: TemplateStringsArray,
    ...args: any[]
  ): Function => {
    const NewComponent = (props: Props) => {
      return <CustomTag>{props.children}</CustomTag>;
    };
    return NewComponent;
  };

  return construct;
};

const styled = {
  div: constructWithTag('div'),
  span: constructWithTag('span'),
  a: constructWithTag('a'),
  form: constructWithTag('form'),
  button: constructWithTag('button'),
};

export default styled;
/* App.tsx */
import styled from '../lib/styled-components/styled-components';
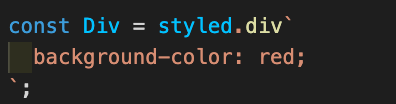
const Div = styled.div``;
const Button = styled.button``;
const A = styled.a``;
const App = () => {
return (
<div>
React Boiler Plate
<Div>
<Button>버튼</Button>
<A href="www.naver.com">앵커태그</A>
</Div>
</div>
);
};
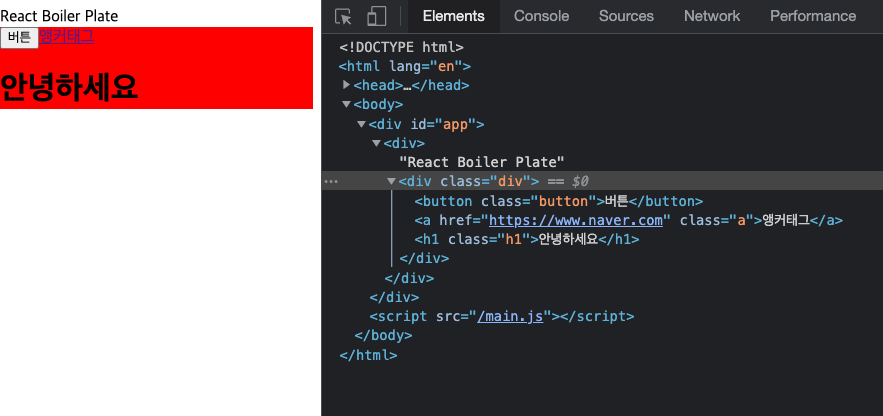
export default App;이처럼 만들었을때, 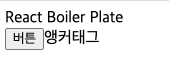
렌더가 잘 되는걸 확인했다.
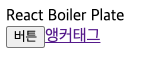
그러나, A태그의 href속성이 먹히질 않는걸 확인했다.
이걸 적용되도록 한번 바꿔본다.
const constructWithTag = (tag: string) => {
  const CustomTag = `${tag}` as keyof JSX.IntrinsicElements;

  const construct = (
    strings: TemplateStringsArray,
    ...args: any[]
  ): Function => {
    const NewComponent = (props: Props) => {
      return <CustomTag {...props}>{props.children}</CustomTag>;
    };
    return NewComponent;
  };

  return construct;
};
{...props} 를 통해 CustomTag에 props를 넘겨줬다.
이제 좀 다양한 태그를 적용할 수 있도록 바꿔본다.
/* dom-elmements.ts */
export default [
  'a',
  'abbr',
  'address',
  'area',
  'article',
  'aside',
  'audio',
  'b',
  'base',
  'bdi',
  'bdo',
  'big',
  'blockquote',
  'body',
  'br',
  'button',
  'canvas',
  'caption',
  'cite',
  'code',
  'col',
  'colgroup',
  'data',
  'datalist',
  'dd',
  'del',
  'details',
  'dfn',
  'dialog',
  'div',
  'dl',
  'dt',
  'em',
  'embed',
  'fieldset',
  'figcaption',
  'figure',
  'footer',
  'form',
  'h1',
  'h2',
  'h3',
  'h4',
  'h5',
  'h6',
  'head',
  'header',
  'hgroup',
  'hr',
  'html',
  'i',
  'iframe',
  'img',
  'input',
  'ins',
  'kbd',
  'keygen',
  'label',
  'legend',
  'li',
  'link',
  'main',
  'map',
  'mark',
  'marquee',
  'menu',
  'menuitem',
  'meta',
  'meter',
  'nav',
  'noscript',
  'object',
  'ol',
  'optgroup',
  'option',
  'output',
  'p',
  'param',
  'picture',
  'pre',
  'progress',
  'q',
  'rp',
  'rt',
  'ruby',
  's',
  'samp',
  'script',
  'section',
  'select',
  'small',
  'source',
  'span',
  'strong',
  'style',
  'sub',
  'summary',
  'sup',
  'table',
  'tbody',
  'td',
  'textarea',
  'tfoot',
  'th',
  'thead',
  'time',
  'title',
  'tr',
  'track',
  'u',
  'ul',
  'var',
  'video',
  'wbr',

  // SVG
  'circle',
  'clipPath',
  'defs',
  'ellipse',
  'foreignObject',
  'g',
  'image',
  'line',
  'linearGradient',
  'mask',
  'path',
  'pattern',
  'polygon',
  'polyline',
  'radialGradient',
  'rect',
  'stop',
  'svg',
  'text',
  'tspan',
];
dom Elements 리스트를 styled component github에서 구해왔다.
위 형태로 domElements 배열 항목들을 동적으로 넣어줬다.
import styled from '../lib/styled-components/styled-components';

const Div = styled.div``;
const Button = styled.button``;
const A = styled.a``;
const H1 = styled.h1``;

const App = () => {
  return (
    <div>
      React Boiler Plate
      <Div>
        <Button>버튼</Button>
        <A href="https://www.naver.com">앵커태그</A>
        <H1>안녕하세요</H1>
      </Div>
    </div>
  );
};

export default App;
위처럼 작성하고 테스트해보니...
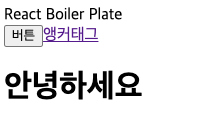
이렇게 렌더링이 된다!
다만 아쉬운건, 이렇게 동적으로 추가해줬을때, styled. 눌렀을때 자동완성이 안뜬다.. 이건 해결방법이 없을까??
CSS 적용시키기
명확한 목표
- scss 파싱 -> 클래스로 만들어줘야함
- keyframe 되야함
parsing을 위해 stylis 라이브러리를 설치했다.
yarn add stylis @types/stylis
stylis 라이브러리의 주요 기능은 compile, serialize, stringify 이다.
이걸 이용해서 클래스의 내용물을 만들어서, script 태그에 넣어주도록 해본다.
이떄 태그명을 앞에 클래스명으로 붙여보겠다.
const stylis = (tag: string, content: string) =>
  serialize(compile(`.${tag}{${content}}`), stringify);
일단은 tagged template으로 들어오는 값을 변수가 없다고 생각하고 처리한다. 문자열로 변환해준다.
const css = strings.map((string, i) => `${string}${args[i] ?? ''}`).join('');그 후에, css를 class에 들어갈 스트링으로 바꿔본다.
const classString = stylis(tag, css);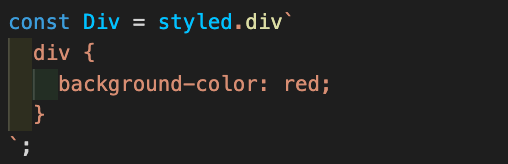
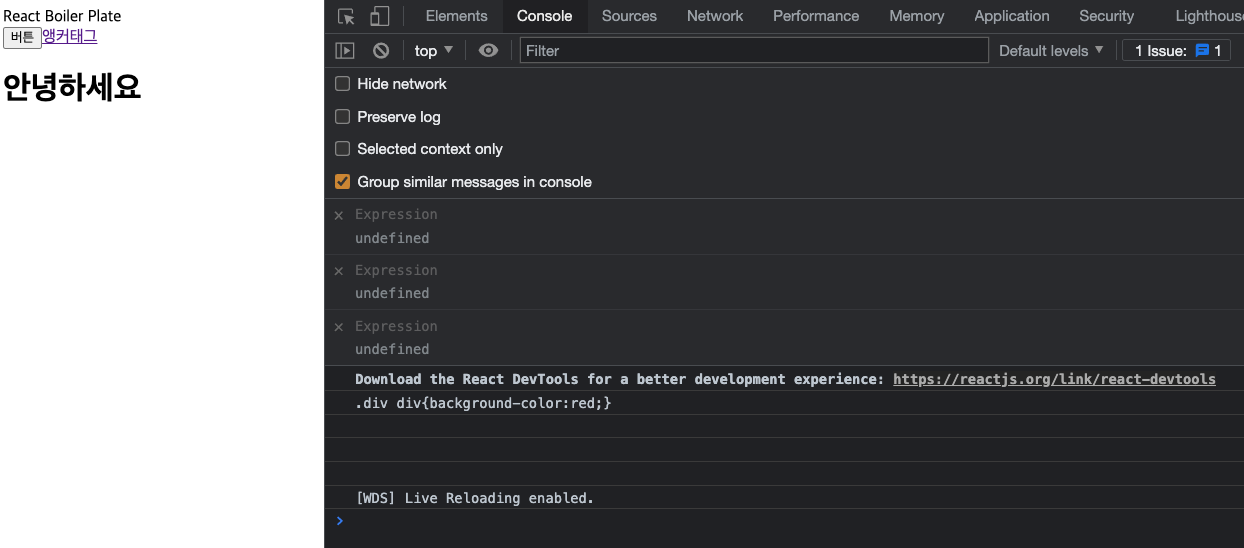
이런식으로 .div div{background-color:red;} 가 나오는걸 확인할 수 있다.
이제 이 내용물을 style 태그를 만들어서 넣어주고, header에 붙여본다.
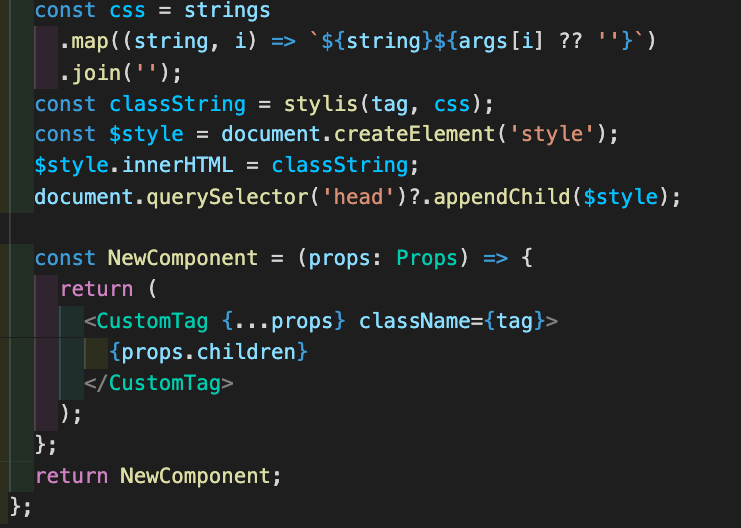
그리고 CustomTag의 클래스네임에 해당 tag를 넣어줘봤다.
테스트해보니 안되서, 확인했더니
이런식으로 변경해줘야 했다. 이 태그 자체에 붙는 스타일이니까...
그렇게 하면 결론은
이 상태로도 꽤 만족할만큼 결과물이 나왔다. keyframe, class 만들어주는 기능 완료
그런데, 아직 아쉬운점은 props를 넘겨줄수가 없다!
props를 넘겨주도록 해보자.
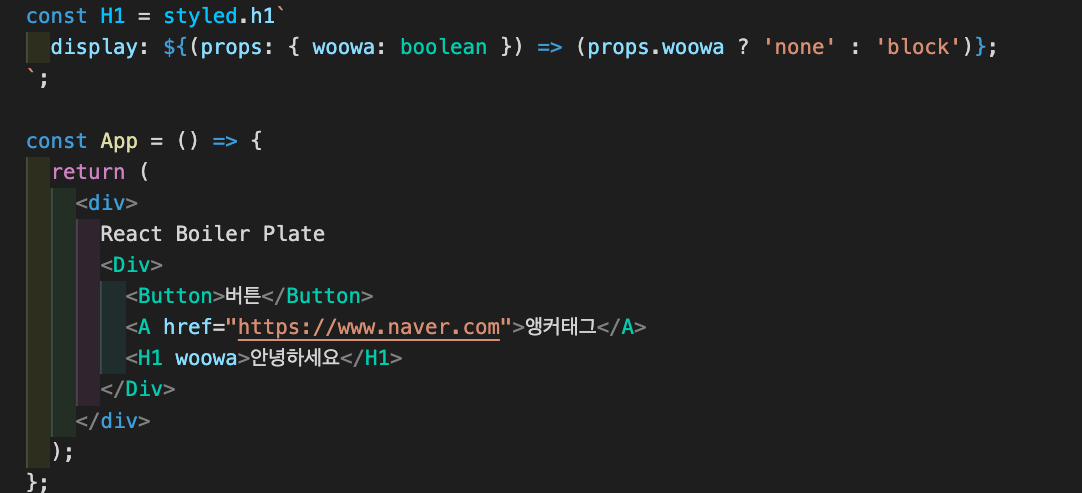
이 사진처럼 H1 woowa라는 속성을 props에 넘겨주려고 한다.
기존 코드에서 태그드 템플릿 처리(class string 만드는 과정)을 컴포넌트 외부에서 했더니, Props에 접근할 수가 없었다.
저 콜백함수에서 Props를 써야하기 때문에 접근해야 한다. 그렇기 때문에, 이를 Component의 useEffect 안으로 옮겨왔다.
const constructWithTag = (tag: string) => {
  const CustomTag = `${tag}` as keyof JSX.IntrinsicElements;

  const construct = (
    strings: TemplateStringsArray,
    ...args: any[]
  ): Function => {
    const NewComponent = (props: Props) => {
      useEffect(() => {
        const css = strings
          .map((string, i) => {
            let arg = args[i] ?? '';
            if (arg instanceof Function) {
              console.log(arg, props);
              arg = arg(props);
            }
            return `${string}${arg}`;
          })
          .join('');
        const classString = stylis(tag, css);
        const $style = document.createElement('style');
        $style.innerHTML = classString;
        document.querySelector('head')?.appendChild($style);
        return () => {
          $style.remove();
        };
      }, []);

      return (
        <CustomTag {...props} className={tag}>
          {props.children}
        </CustomTag>
      );
    };
    return NewComponent;
  };

  return construct;
};
이것처럼 useEffect 안으로 오니까 문제가 해결되었다.
이제 또다른 문제는..
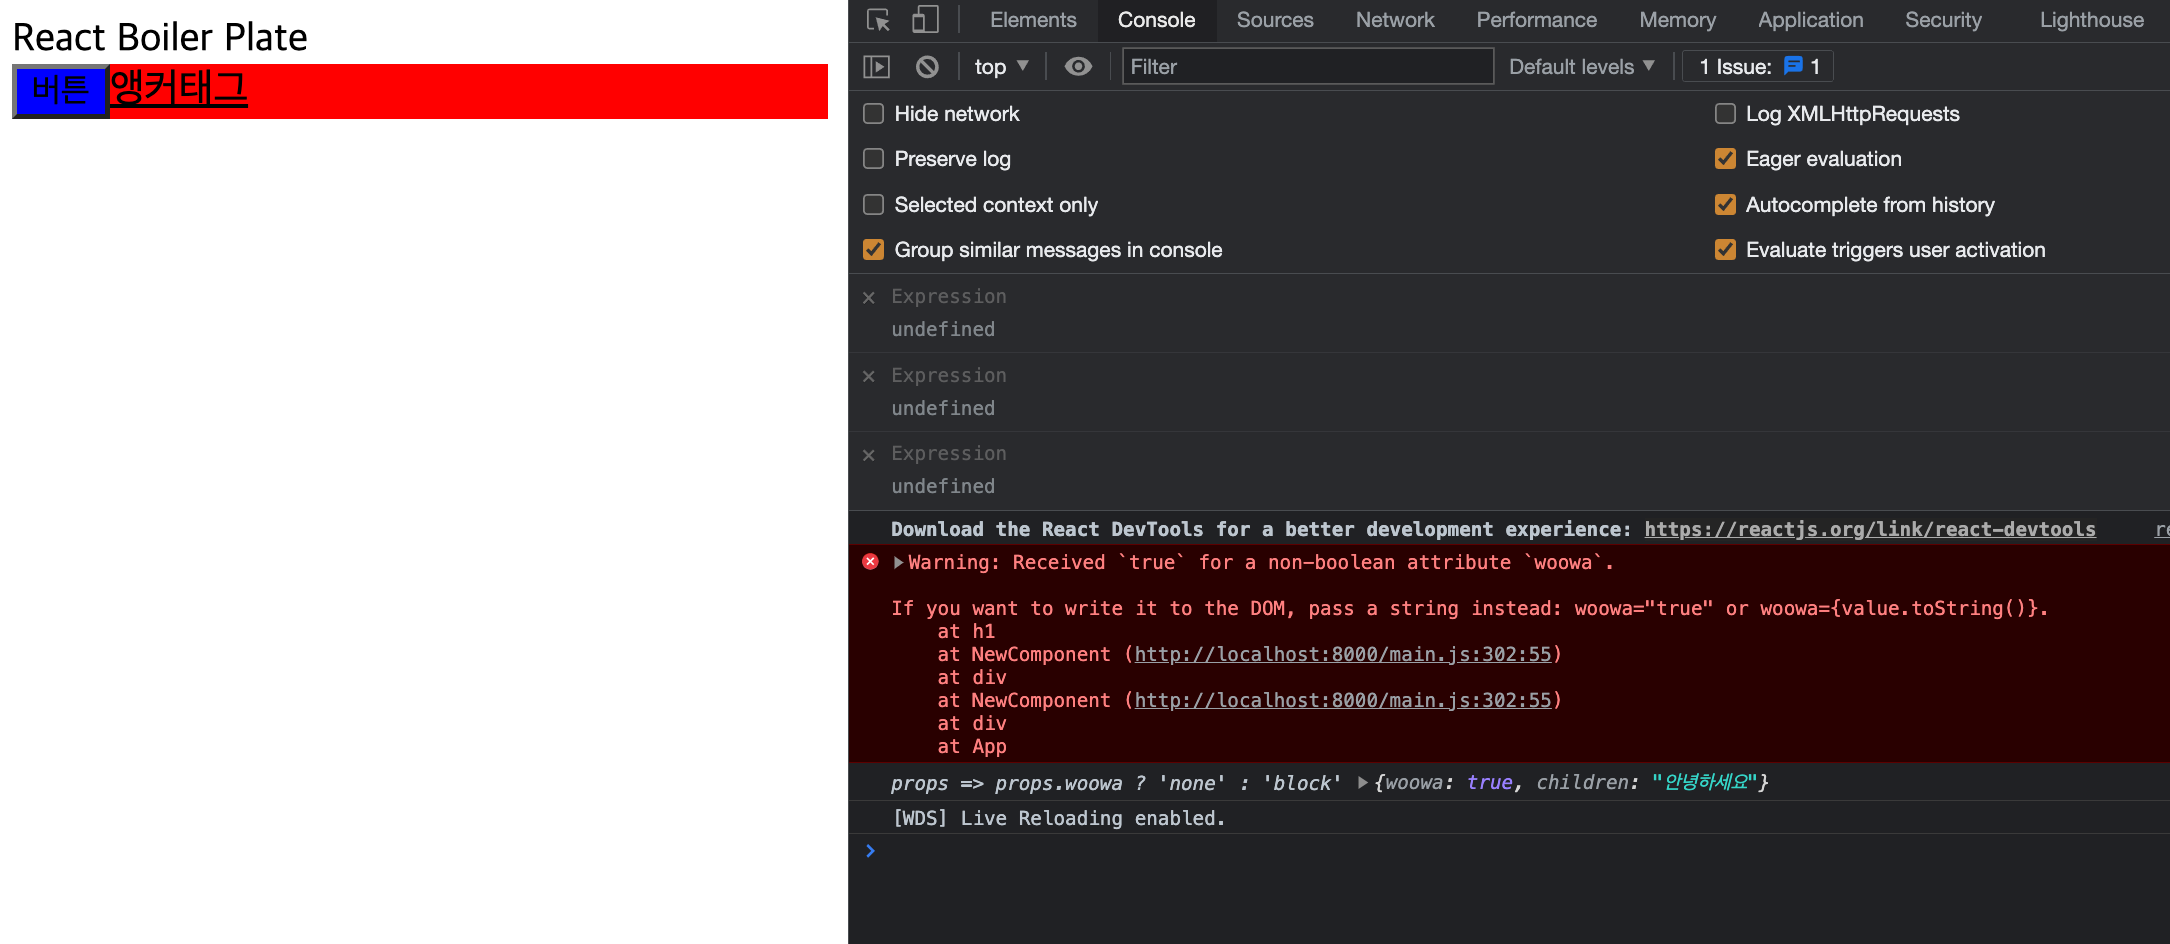
이 에러를 해결해야한다.
Warning: Received 'true' for a non-boolean attribute 'woowa'.
에러 해결하기
에러 해결전에..
기존 Styled 타입을 이렇게 변경했다.
type Styled = Record<
  typeof domElements[number],
  ReturnType<typeof constructWithTag>
>;
prop 중에 해당 dom Element의 Attribute 중에 존재하는것만 따로 빼서 dom에 넣어주도록 코드를 변경했다.
const domProps: { [key: string]: any } = {};
      const $dom = document.createElement(tag);
      Object.keys(props).forEach((prop) => {
        if (prop in $dom) {
          domProps[prop] = props[prop];
        }
      });

      return (
        <CustomTag {...domProps} className={tag}>
          {props.children}
        </CustomTag>
      );
글로벌 스타일 적용하기
tag를 입력하지 않았을때, 클래스명없이 css 적용을 시켜주기 위한 기능을 추가했다.
export const createGlobalStyle = constructWithTag(); 로 만들었고 이를 추가하기 위해
tag에 undefined 일때에 대한 처리를 추가해줬다.
import React, { ReactNode, useEffect, AllHTMLAttributes } from 'react';
import domElements from './dom-elements';
import { compile, serialize, stringify } from 'stylis';
interface Props {
children: ReactNode;
[key: string]: any;
}
const constructWithTag = (tag?: string) => {
const CustomTag = `${tag ?? 'div'}` as keyof JSX.IntrinsicElements;
const stylis = (tag: string | undefined, content: string) => {
if (!tag) {
return serialize(compile(`${content}`), stringify);
} else {
return serialize(compile(`.${tag}{${content}}`), stringify);
}
};
const construct = (
strings: TemplateStringsArray,
...args: any[]
): Function => {
const NewComponent = (props: Props) => {
useEffect(() => {
const css = strings
.map((string, i) => {
let arg = args[i] ?? '';
if (arg instanceof Function) {
console.log(arg, props);
arg = arg(props);
}
return `${string}${arg}`;
})
.join('');
const classString = stylis(tag, css);
const $style = document.createElement('style');
$style.innerHTML = classString;
document.querySelector('head')?.appendChild($style);
return () => {
$style.remove();
};
}, []);
const domProps: { [key: string]: any } = {};
if (tag) {
const $dom = document.createElement(tag);
Object.keys(props).forEach((prop) => {
if (prop in $dom) {
domProps[prop] = props[prop];
}
});
$dom.remove();
}
return (
<CustomTag {...domProps} className={tag}>
{props.children}
</CustomTag>
);
};
return NewComponent;
};
return construct;
};
type Styled = Record<
typeof domElements[number],
ReturnType<typeof constructWithTag>
>;
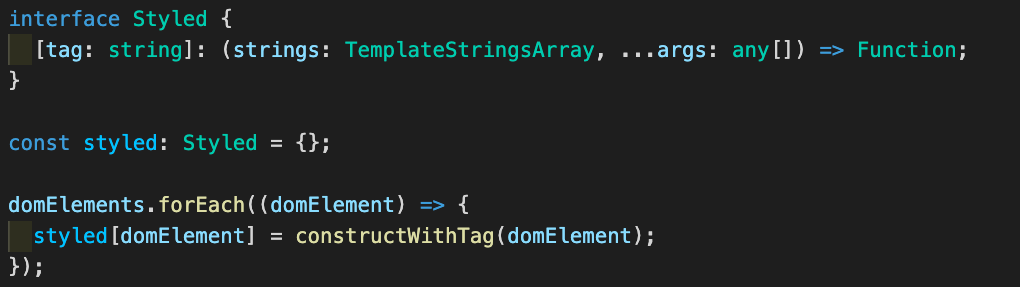
const styled: Styled = {};
domElements.forEach((domElement) => {
styled[domElement] = constructWithTag(domElement);
});
export default styled;
export const createGlobalStyle = constructWithTag();다음으로는 클래스명에 hash 값으로 중복되지않는 문자열 붙여주기
매번 생성때마다 증가되는 숫자값이 필요하다.
이 숫자값을 가지고 적절한 hash 처리후 문자열로 변경하여 class명에 붙여준다.
간단히 최상단에 sequence = 1을 주고, stylis 함수내에서 sequnce++을 함으로써 값을 증가시킬 수 있고, 이걸 문자열로 변환처리를 해보겠다.
import React, { ReactNode, useEffect } from 'react';
import domElements from './dom-elements';
import { compile, serialize, stringify, hash } from 'stylis';

let sequence = 1;

interface Props {
  children: ReactNode;
  [key: string]: any;
}

const constructWithTag = (tag?: string) => {
  const CustomTag = `${tag ?? 'div'}` as keyof JSX.IntrinsicElements;

  const stylis = (className: string | undefined, content: string) => {
    if (!className) {
      return serialize(compile(`${content}`), stringify);
    } else {
      return serialize(compile(`.${className}{${content}}`), stringify);
    }
  };

  const construct = (
    strings: TemplateStringsArray,
    ...args: any[]
  ): Function => {
    const NewComponent = (props: Props) => {
      const suffix = `${sequence}`;
      const className = tag ? tag + '-' + suffix : '';
      sequence++;

      useEffect(() => {
        const css = strings
          .map((string, i) => {
            let arg = args[i] ?? '';
            if (arg instanceof Function) {
              arg = arg(props);
            }
            return `${string}${arg}`;
          })
          .join('');
        const classString = stylis(className, css);
        const $style = document.createElement('style');
        $style.innerHTML = classString;
        document.querySelector('head')?.appendChild($style);
        return () => {
          $style.remove();
        };
      }, []);

      const domProps: { [key: string]: any } = {};
      if (tag) {
        const $dom = document.createElement(tag);
        Object.keys(props).forEach((prop) => {
          if (prop in $dom) {
            domProps[prop] = props[prop];
          }
        });
        $dom.remove();
      }

      return (
        <CustomTag {...domProps} className={className}>
          {props.children}
        </CustomTag>
      );
    };
    return NewComponent;
  };

  return construct;
};

type Styled = Record<
  typeof domElements[number],
  ReturnType<typeof constructWithTag>
>;

const styled: Styled = {};

domElements.forEach((domElement) => {
  styled[domElement] = constructWithTag(domElement);
});

export default styled;

export const createGlobalStyle = constructWithTag();
위처럼 sequence를 주고, dom 을 생성할때마다 className을 변경하도록 만들었다.
그다음 이걸 문자열로 바꿔주기 위해서 generateAplphabeticName이란 코드를 라이브러리에서 가져오고, 조금 수정했다.
그런다음 suffix를 만들어줄때 이 함수를 사용해서 처리했다.
/* This is the "capacity" of our alphabet i.e. 2x26 for all letters plus their capitalised
 * counterparts */
const charsLength = 52;

/* start at 75 for 'a' until 'z' (25) and then start at 65 for capitalised letters */
const getAlphabeticChar = (code: number) =>
  String.fromCharCode(code + (code > 25 ? 39 : 97));

/* input a number, usually a hash and convert it to base-52 */
export function generateAlphabeticName(code: number) {
  let name = '';
  let x;

  code = code << 27;

  /* get a char and divide by alphabet-length */
  for (x = Math.abs(code); x > charsLength; x = (x / charsLength) | 0) {
    name = getAlphabeticChar(x % charsLength) + name;
  }

  return name;
}
결과는 이렇게 나왔다!
남은 업무
- useContext 처리
- 컴포넌트 합성?
ThemeProvider 만들기
먼저 아래 코드를 추가했다.
const ThemeProvider = {};

export { ThemeProvider };
이제 이 코드를 동작할수 있도록 만들어야 한다.
ThemeProvider는 컨텍스트 api 를 활용하는것이고, 먼저 공부해보고 개발을 진행해보겠다.
코드를 보니까, css랑 DefaultTheme도 export해야되서, 둘다 export 할수있도록 코드를 변경했다.
const ThemeProvider = {};
const DefaultTheme = {};
const css = {};

export { css, DefaultTheme, ThemeProvider };
이제 이걸 어떻게 채워야할까...
먼저 css는 태그드 템플릿 함수이고 추후 리턴값을 재사용할 수 있다.
그럼 문자열로 컴파일된걸 넘겨주면 안될까? 우선 그렇게 시도해보겠다.
const css = (strings: TemplateStringsArray, ...args: any[]) => {
  const result = strings.map((string, i) => `${string}${args[i] ?? ''}`).join('');
  return serialize(compile(result), stringify);
};
그리고 ThemeProvider를 만들어본다.
ThemeProvider를 만들다보니 다른것도 다 필요해서 같이 만들었다.
interface DefaultTheme {
  [key: string]: any;
}

const ThemeContext = React.createContext<DefaultTheme>({});
ThemeContext.displayName = 'ThemeContext';

const ThemeProvider = (props: ProviderProps<DefaultTheme>) => {
  return <ThemeContext.Provider {...props}>{props.children}</ThemeContext.Provider>;
};
그리고 중간에 argument 처리에서 함수호출부분을
arg = arg({ ...ThemeContext, ...props });처럼 변경했다.
.png)