
📍 Redux?
redux란 컴포넌트간의 전역 상태관리를 위한 라이브러리다. 이전 섹션에서 다룬 context와 같은 개념인데, context는 리액트에 내장되어 있는 것인 반면 redux는 외부 라이브러리이다.
Redux vs Context
context와 Redux는 양자택일의 개념이 아니다. 하나의 앱을 구성할 때 큰 맥락에서는 redux를 사용하고 특정 일부 컴포넌트와 관련해서는 context를 사용할 수도 있다. 이렇듯 상황에 따라서 사용하면 된다.
하지만 context는 상황에 따라서 잠재적인 단점이 있다.
1️⃣ 구축하는 상태관리가 복잡해질 수 있다.
작은 앱의 경우 큰 문제가 없을 수 있지만, 규모가 커질 수록 복잡해질 수 있다.
context를 사용할 때는provider로 감싸서 사용해야 한다.context로 다루는 상태가 많아질 수록provider가 아래와 같이 중첩되어 사용되는 경우가 많을 것이다.<FirstProvider> <SecondProvider> <ThirdProvider> <FourthProvider> <Component> </FourthProvider> </ThirdProvider> </SecondProvider> </FirstProvider>물론 이렇게 많은
context를 구축하지 않아도 된다. 하나의context를 정의하여 모든 state를 안에서 관리할 수도 있지만, 그럴 경우 역시나 하나의context가 포함하는게 너무 많아져서 클린한 코드로 작성되지 않고 복잡해진다.2️⃣ 성능 차이
업데이트의 빈도가 적은 경우에는
context와redux의 성능 차이가 크지 않을 수 있지만, 업데이트 빈도가 커지는 경우context의 성능은 아주 안좋아지게 된다.
📍 Redux 사용법!
redux를 사용할 경우 하나의 어플리케이션에 오직 하나의 데이터(state) 저장소를 갖게된다. 해당 저장소에 컴포넌트간에 혹은 전체 어플리케이션에서 사용하는 모든 state들을 선언하고 사용하면 된다. 이렇게 하면 context 하나를 정의해서 관리하는 것과 같이 managing에 어려움이 있을 것 같지만, 사실 redux를 사용하면 직접적으로 해당 state들을 관리할 일이 없다.
해당 state를 사용하는 component에서 전체 저장소(store)를 구독한다. 저장소를 구독한 component는 저장소(store)에 있는 state 값들을 받아올 수 있다. 해당 값이 업데이트 될 경우에도 값을 받아와서 UI를 변경시킬 수 있다.
🧐 그렇다면 저장소에 저장된 state값들은 어떻게 변경시킬까?
이 작업은 절대!! component에서 이루어지지 않는다.
Reducer함수 를 통해서 redux는 state값을 변경시킨다.
(이때 useReducer hook과 이름이 혼동될 수 있는데 다른 함수라는 것을 기억하자)
🧐 그렇다면 이 reducer함수 를 어떻게 발생시킬까?
component에서 생성한 action이 reducer함수를 trigger하도록 redux가 작동한다. component가 보낸 action은 단순 객체값이다.
정리하면!
component의 해당
action을 보고reducer함수가 적절한 방식으로 실행되고, 이렇게 실행된reducer함수가 저장소의 state를 변경시키고, 해당 저장소를 구독한 component에서는 이렇게 변경된 state값을 받아와서 UI를 업데이트 시킨다!!
createStore()
이제부터 알아볼 코드 예시에서 createStore()를 사용할 것인데, 사실 redux에서는 공동 저장소를 만들 때 제공하는 툴킷이 있고, 이것을 사용하는 것을 권장한다. 하지만, 이 부분에 대해서는 조금 후에 다루어볼 예정이고 우선은 createStore()을 사용하여 알아보자
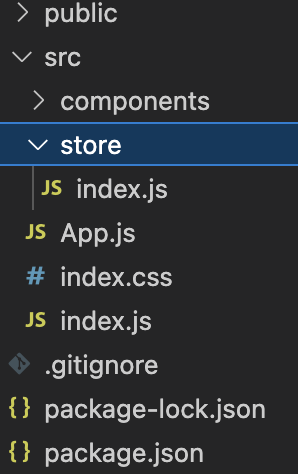
📁 파일 구조
1️⃣ store, reducer함수 만들기
이때
Reducer함수에서 반환하는 state값은 항상 오버라이드되어서 기존의 State값을 대체 시킨다. 만약,reducer함수내부에서 직접적으로 기존의 State값을 변경하려고 한다면 이것은 매우매우!! 잘못된 접근이다. 당장은 문제없이 작동하는 듯 보일 수 있어도, 우리가 업데이트하는 state값은 참조값이기 때문에 기존의 State값을 변형하여 에러를 발생시킬 수 있다. 때문에 무조건! 기존의 객체 값 형식을 가지는 새로운 객체값을 반환하여야 한다.// store > index.js import { createStore } from 'redux'; // reducer 함수 만들기 // 1. 기존 state (첫실행을 고려해서 default값 넣어주기) // 2. 발송된 action (액션에 따라 다른 동작 실행하기) // return : 새로운 state 반환 (보통 객체) // http 요청, local storage에 저장하기 fetch하기 등등은 못함 const counterReducer = (state = {counter:0}, action) => { if (action.type === 'increment') { // state.counter++와 같이 기존 state 손대기 절대 안됨! // 아래와 같이 새로운 state를 반환해야 한다. return { counter: state.counter + 1, } } if (action.type === 'decrement') { return { counter: state.counter - 1, } } return state; } // store 만들기 // redux에서 제공하는 저장소 만드는 메소드 // 어떤 reducer가 이 저장소를 변경하는지 알려주기 위한 매개변수 const store = createStore(counterReducer); export default store;
2️⃣ store 제공하기
<Provider>로 감싸기!useContext때와 같은 맥락이다. 이때Provider의store prop에 만든 저장소 넘겨주어야 한다. 이렇게provider로 감싸진 component들과 그 하위 component들은 모두 store에 저장되어있는 state에 접근할 수 있고 구독을할 수 있으며action을 보내서reducer함수를 호출할 수 있게 된다.// src > index.js import React from 'react'; import ReactDOM from 'react-dom/client'; import { Provider } from 'react-redux'; import './index.css'; import App from './App'; import store from './store'; const root = ReactDOM.createRoot(document.getElementById('root')); root.render( <Provider store={store}> <App /> </Provider> );
3️⃣ 하위 component에서 store의 값들 사용하기
- react-redux가 제공하는
useSelector라는 custom Hook을 import한다.
useStore이라는 hook도 있는데,useSelector가 저장소가 관리하는 state의 부분을 우리가 자동으로 선택할 수 있게 하기 때문에 더 사용이 편리하다- 내부 component에서 action 보내기(dispatch)
react-redux가 제공하는 custom Hook인useDispatch사용하기// src > component > counter.js // component에서 사용하기 import { useSelector, useDispatch } from 'react-redux'; import classes from './Counter.module.css'; const Counter = () => { // store에서 사용하고자 하는 state값을 뽑아오는 함수를 매개변수로 넣어주기 // useSelector사용시 자동으로 이 component를 state저장소에 구독을 설정하게된다. const counter = useSelector(state => state.counter); // 매개변수로 아무것도 받지 않음 // dispatch function을 반환한다 const dispatch = useDispatch(); // 받아온 dispatch 함수를 통해서 store에 action을 보낸다. // 이때 보내는 action 객체는 store에 저장된 값을 그대로 사용해야한다. ex)type: 'increment' const incrementHandler = () => { dispatch({ type: 'increment'}); }; const decrementHandler = () => { dispatch({ type: 'decrement'}); }; const toggleCounterHandler = () => {}; return ( <main className={classes.counter}> <h1>Redux Counter</h1> <div className={classes.value}>{counter}</div> <div> <button onClick={incrementHandler}>Increment</button> <button onClick={decrementHandler}>Decrement</button> </div> <button onClick={toggleCounterHandler}>Toggle Counter</button> </main> ); }; export default Counter;
+) dispatch에 추가적인 action 만들기
이때까지는dispatch로 전송하는 함수가 굉장히 간단하고 하드코딩된 값이었다. 하지만 실제 프로젝트에서는 정해진 값이 아닌 늘 다른 값 예를 들면 사용자 입력값과 같은 값으로 작업해야 한다. 이를 위해선 dispatch를 보낼 때 추가적인 데이터를 전달해야한다.
action으로부터 증가시키고자 하는 값을 얻어서 증가시키는 새로운 reducer함수를 만들어보자.
store에 새로운 reducer함수 만들기
// store > index.js

import { createStore } from 'redux';

// reducer 함수 만들기
const counterReducer = (state = {counter:0}, action) => {
    if (action.type === 'increment') {
        return {
            counter: state.counter + 1,
        }
    }
	// 새로운 Reducer 함수
    if (action.type === 'increase') {
        return {
            counter: state.counter + action.amount,
        }
    }

    if (action.type === 'decrement') {
        return {
            counter: state.counter - 1,
        }
    }

    return state;
}

const store = createStore(counterReducer);

export default store;
dispatch에 추가적인 데이터 포함해서 action 보내기
// src > component > counter.js
const Counter = () => {
	const dispatch = useDispatch();

  // 새로운 action을 보내는 Handler
    const increaseHandler = () =>{
    dispatch({type: 'increase', amount: 5})
  }

  return (
    <button onClick={increaseHandler}>Increase by 5</button>
  )
}
🚨 프로젝트 규모가 커지면 따라올 문제점
1️⃣ action type 충돌
dispatch할 때 action identifier (type과 같은 것)을 store에 저장된 값과 동일하게 작성하는 것에 매우매우 유의하여야한다. 작은 어플리케이션의 경우 큰 문제가 되지 않을 수 있지만, 프로젝트의 규모가 커지고 여러명의 개발자가 작업을 하게될 경우 서로 다른 액션이 많아지면 식별자에 충돌이 생길 수 있다. (css class 이름 충돌하게 되는 것과 비슷)
2️⃣ 관리하는 데이터 양
위에서 잠깐 말했듯 Reducer 함수는 기존의 state값을 직접적으로 변경해서는 안되고 상태를 복사해서 업데이트해야한다. 만약 관리하는 state가 많고 데이터 양이 많아진다면 해당 상태들을 관리하기가 매우 복잡해지고 redux 파일의 규모가 유지할 수 없을만큼 거대해질 수 있다.
📍 해결법 : redux toolkit
1️⃣ 터미널에서 toolkit 설치하기
npm install @reduxjs/tookit
2️⃣
createSlice사용해서 정의하기일전에 기존의 state에 직접 접근해서 변경하는 것은 절대 하면 안된다고 작성해두었다. 따라서 이전에
Reducer 함수내부에서 state에 접근할 때는 기존의 state값을 복사해서 다시 사용하는 오버라이드의 방식을 사용하였다.
createSlice의 내부에서도 당연히 직접적으로 state에 접근해서는 안되지만state.counter++와 같이 직접적으로 접근하여도 문제없이 작동한다. 그 이유는Redux toolkit이 내부적으로 작동할 때 위와같은 코드를 감지해서 오버라이드하는 형식으로 바꾸어서 동작하기 때문이다. 결국 개발자는 편하게 코드를 작성하고, 내부적으로 동작할 때는redux-toolkit이 알아서 올바르게 작동하게 되는 것이다~~// src > store > index.js import { createStore } from 'redux'; import {createSlice} from '@reduxjs/toolkit' const initialState = { counter: 0, showCounter: true }; // 전역상태 slice 미리 만들어서 사용하기 // name : slice마다 필요한 식별자 // initialState: 초기 state값 // reducers: 관련된 메서드 정의해두기 createSlice({ name: 'counter', initialState: initialState, // reducer들은 가장 최신의 state와 action을 받아올 수 있음 // reducer를 trigger하는 액션은 이제 필요하지 않음 (알아서 trigger해줌) // 데이터를 전달해야 하는 경우에 액션을 사용하게 된다 reducers: { increment(state) { state.counter++; }, decrement(state) { state.counter--; }, // {type: redux가 만든 고유 Identifier, payload: 5} increase(state, action) { state.counter = state.counter + action.payload; }, toggleCounter(state) { state.showCounter = !state.showCounter; }, } })이렇게
createSlice를 통해 slice를 정의한 후에는 store에 등록을 해주어야 한다.// store 만들고 slice에 설정한 Reducer들 전달 // createStore에는 하나의 slice만 전달 가능 const store = createStore(counterSlice.reducer);
이때 만약 작은 규모의 어플리케이션이라면 위와 같이 전달해도 큰 문제는 없지만, 만약 규모가 커진다면 여러개의 slice를 사용하게 될 것이다. createStore에는 하나의 slice만 전달 가능하므로, 우리는 configureStore이라는 Redux toolkit이 제공하는 메소드를 사용하여야 한다. 이 메소드는 여러개의 Reducer를 하나의 Reducer로 합칠 수 있게 한다.
📍 configureStore()
configureStore에는 객체를 전달한다. 해당 객체에는 Reducer함수들을 넘긴다. 이때 리덕스에서는 전역 상태를 관리하는 단 하나의 주요 Reducer를 필요로 한다. 만약 지금처럼 하나의 slice만을 가지고 작업을 할 경우에는
// store 만들고 slice에 설정한 Reducer들 전달
const store = configureStore({
  reducer: counterSlice.reducer
})
와 같이 사용하면 되지만, 아까 말했듯 여러개의 slice로 작업을 하게 될 경우에는, 여러개의 Reducer 함수를 Key:value를 가지는 객체값으로 넘겨야 한다. 이렇게 넘긴 다수의 Reducer들을 configureStore이 내부에서 작업할 때 하나의 Reducer로 합쳐서 사용하게 된다.
// store 만들고 slice에 설정한 Reducer들 전달
const store = configureStore({
  reducer: {counter: counterSlice.reducer}
})
3️⃣ action 만들기
위에서 만든
Reducer 함수들은 if문을 통해서 작동되지 않기 때문에 각 액션이 어떤 Identifier로 동작하게 되는지 정의해두지 않았다. 이와같은 경우 dispatch를 어떻게 해야할까?1. 액션 생성하기
이때
createSlice가 액션 전달하는 것을 도와준다.createSlice는 각각의Reducer 함수에 고유 액션 식별자를 자동으로 생성한다. 해당 액션 식별자 값은counterSlice.actions로 사용하면 된다. 이건 key값으로 이루어진 객체로 우리가 정의한Reducer 함수들의 이름이 들어가있다. (increment, decrement등)
counterSlice.actions.toggleCounter와 같이 사용하면 액션 객체가 자동으로 생성된다. 우리는 이렇게 생성된 액션 객체를 사용 Export해서 다른 component에서 사용하면 된다.export const counterActions = counterSlice.actions2. 액션 사용하고 dispatch하기
Export한 액션 객체를 사용하려는 곳에서 Import하고, Key값들로 접근하여 원하는 Reducer를 호출하면 된다.
이때 만약 추가적인 데이터를 전달하는 액션이 있다면, 호출한 메소드에 매개변수로 데이터를 넘겨주면 된다. 이때 데이터는 객체값일 수도 숫자일수도 아무 값이나 들어갈 수 있다. 이렇게 전달된 데이터는payload라는 필드명에 저장되게 된다!import { useSelector, useDispatch } from 'react-redux'; import {counterActions} from '../store/index' const Counter = () => { // store에서 사용하고자 하는 state값을 뽑아오는 함수를 매개변수로 넣어주기 // useSelector사용시 자동으로 이 component를 state저장소에 구독을 설정하게된다. const counter = useSelector((state) => state.counter); const show = useSelector((state) => state.showCounter); // 매개변수로 아무것도 받지 않음 // dispatch function을 반환한다 const dispatch = useDispatch(); // 받아온 dispatch 함수를 통해서 store에 action을 보낸다. // 이때 보내는 action 객체는 store에 저장된 값을 그대로 사용해야한다. ex)type: 'increment' const incrementHandler = () => { dispatch(counterActions.increment()); }; const increaseHandler = () => { dispatch(counterActions.increase(5)); // {type: redux가 만든 고유 Identifier, payload: 5} }; const decrementHandler = () => { dispatch(counterActions.decrement()); }; const toggleCounterHandler = () => { dispatch(counterActions.toggleCounter()); };
📍 다중 slice로 작업하기
counter와 관련된 slice 외에도 authentication과 관련된 state을 만들어보려고 한다. 사용자가 로그인을 한 경우 nav바에 보이는 것을 다르게 하고 유저 프로필을 띄우는 형식을 만드려고 한다.
authentication과 관련된 다른 slice를 하나 더 만든다. 이때 기억할 것은 slice가 여러개라고 하더라도 store는 무조건 하나이다. 따라서 configureStore은 단 한 번만 호출해야 한다.
// 첫 번째 slice
const counterSlice = createSlice({...})

const initialAuthState = {
    isAuthenticated: false
};

// 두 번째 slice
const authSlice = createSlice({
    name: 'authentication',
    initialState: initialAuthState,
    reducers: {
        login(state) {
            state.isAuthenticated = true;
        },
        logout(state) {
            state.isAuthenticated = false;
        }
    }
});

// 객체로 담아서 하나의 reducer로 저장하기
const store = configureStore({
  reducer: { counter: counterSlice.reducer. auth: authSlice.reducer },
});

export const counterActions = counterSlice.actions;
export const authActions = authSlice.actions;
📍 정리하자면 ...
store 에서는!
1. slice 만들기
name, initialState, reducers 정의하기
import { createSlice, configureStore } from '@reduxjs/toolkit';

const counterSlice = createSlice({
  name: 'counter',
  initialState: initialCounterState,
  reducers: {
    increment(state) {
      state.counter++;
    },
    decrement(state) {
      state.counter--;
    },
    increase(state, action) {
      state.counter = state.counter + action.payload;
    },
    toggleCounter(state) {
      state.showCounter = !state.showCounter;
    },
  },
});
2. store 만들기
모든 Redux체계는 하나의 어플리케이션 당 하나의 store만을 가짐
const store = configureStore({})3. reducers store에 저장하기
하나의 Reducer를 전달해야 하므로 다중 slice일 경우 객체에 Key-value값으로 담아서 전달하기
const store = configureStore({
  reducer: { counter: counterSlice.reducer, auth: authSlice.reducer },
});
4. action 만들기
counterSlice.actions 를 사용하면, counterSlice 내부에 있는 Reducer들을 객체형태로 저장해서 호출 가능함. 예를들어 counterSlice.actions.increment의 형태로 Reducer를 호출할 수 있음
5. action과 store Export하기
export const counterActions = counterSlice.actions;
export const authActions = authSlice.actions;
export default store;
component 에서는!
1. store Import 후 사용할 component들 감싸기
import store from './store';

root.render(
  <Provider store={store}>
  <App />
  </Provider>
)
2. 각 component에서 store에 저장된 slice의 state값 사용할 것 불러오기
import { useSelector, useDispatch } from 'react-redux';
import {counterActions} from '../store/index'

const counter = useSelector((state) => state.counter.counter);
이때 reducer들을 객체 형태로 store에 저장했으니 접근할 때 key값들을 잘 따져서 접근해야 한다.
3. dispatch 사용하기
const dispatch = useDispatch();4. action 보내기
const incrementHandler = () => {
  dispatch(counterActions.increment());
}

return (
  <button onClick={incrementHandler} />
)