첫 주제로는 애니메이션을 선정했습니다. 앱을 만들면서 적절한 애니메이션을 적용하는 것이 쉽지 않더라구요. 이번 시간에는 애니메이션의 기초에 대해 알아보겠습니다.
Animation
필요한 이유
- 애니메이션이 없다면 앱이 딱딱하게 느껴질 수 있습니다. 애니메이션으로 앱의 사용성을 개선할 수 있습니다.
- 애니메이션이 있다면 사용자들이 몰입도가 높아집니다!
정의
시간이 지남에 따라 View의 상태가 바뀌는 것을 의미합니다.
animation의 3요소
- 시간: view의 변화가 얼마나 오래 지속될 것인가?
- 끝: 애니메이션이 끝났을 때 최종적인 view의 상태
- 값: 얼마나 많이 view가 변화할 것인가? (ex. 이동 거리, 확대 배율)
animation API
UIView.animate(withDuration: 1.0, // 애니메이션의 지속시간
               delay: 1.0, // 애니메이션이 시작하기 전에 기다릴 시간
               options: .curveEaseInOut, // 애니메이션 옵션
               animations: {}, // 애니메이션 내용
               completion: { _ in return } // 애니메이션이 끝나면 실행할 클로저
)
실습 준비
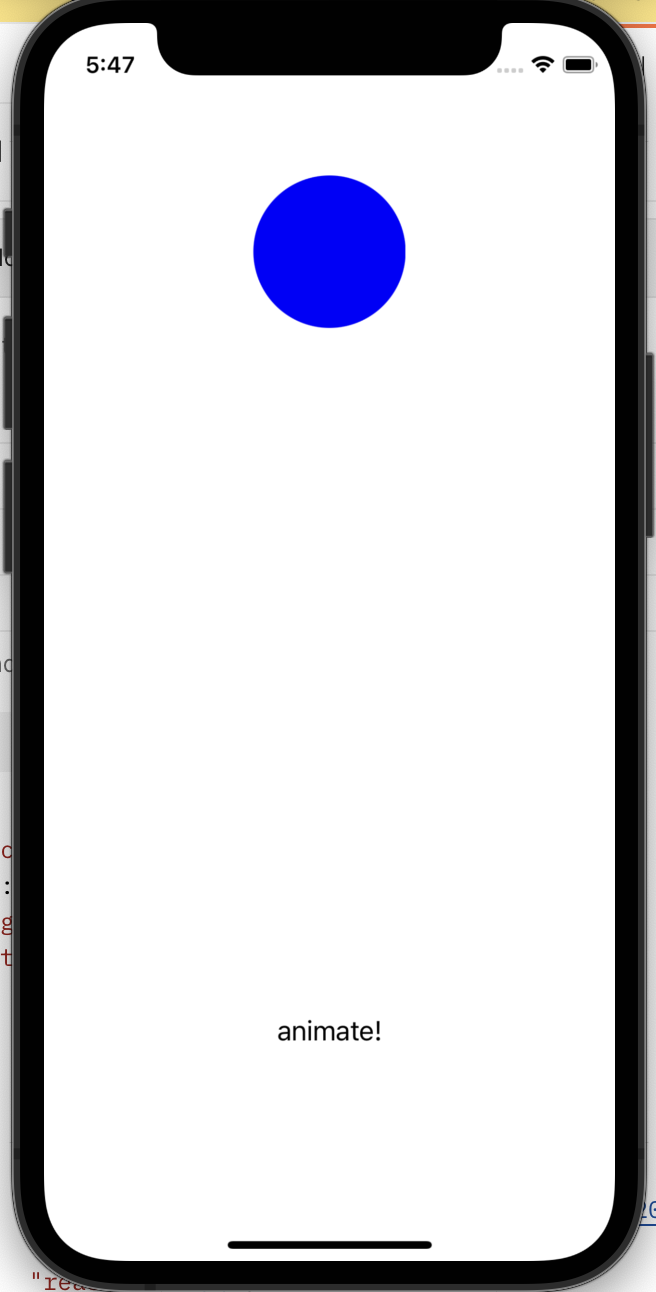
애니메이션의 대상이 되는 파란색 원 1개와 애니메이션을 시작하기 위한 버튼을 하나 준비합니다.
import UIKit

class VC1: UIViewController {

    // MARK: Properties

		// 파란색 원
    let circle: UIView = {
        let view = UIView()
        view.frame.size = CGSize(width: 100, height: 100)
        view.layer.cornerRadius = 100 / 2
        view.backgroundColor = .blue
        return view
    }()

		// 애니메이션 버튼
    let animationButton: UIButton = {
        let button = UIButton()
        button.setTitle("animate!", for: .normal)
        button.setTitleColor(.black, for: .normal)
        button.addTarget(self, action: #selector(animateCircle), for: .touchUpInside)
        return button
    }()

    // MARK: LifeCycle

    override func viewDidLoad() {
        super.viewDidLoad()
        view.backgroundColor = .white
        configureUI()
    }

    // MARK: Selector

    @objc func animateCircle() {
        UIView.animate(withDuration: 1.0, animations: {
            // 애니메이션 정의
        })
    }

    // MARK: Helpers

    func configureUI() {
        view.addSubview(circle)
        circle.frame.origin = CGPoint(x: view.frame.width / 2 - 50, y: 100)

        view.addSubview(animationButton)
        animationButton.translatesAutoresizingMaskIntoConstraints = false
        animationButton.centerXAnchor.constraint(equalTo: view.centerXAnchor).isActive = true
        animationButton.bottomAnchor.constraint(equalTo: view.safeAreaLayoutGuide.bottomAnchor, constant: -100).isActive = true
    }
}
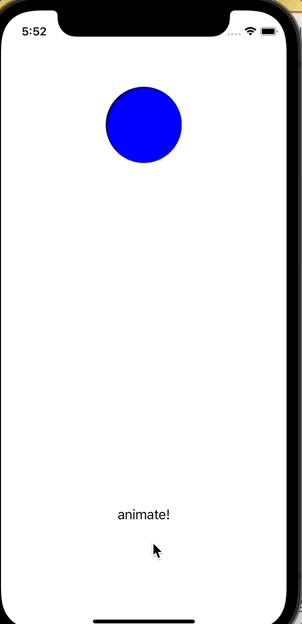
frame으로 애니메이션 만들기
frame은 객체의 절대적 위치와 절대적 크기를 정의합니다. frame은 origin과 size로 구성되어 있는데요. origin은 원점 (좌상단)의 위치를 의미하고 size는 크기를 의미합니다.
frame 값의 origin 값을 변화하면 객체를 이동할 수 있습니다.
@objc func animateCircle() {
        UIView.animate(withDuration: 1.0, animations: {
            self.circle.frame.origin.y = 200
        })
    }
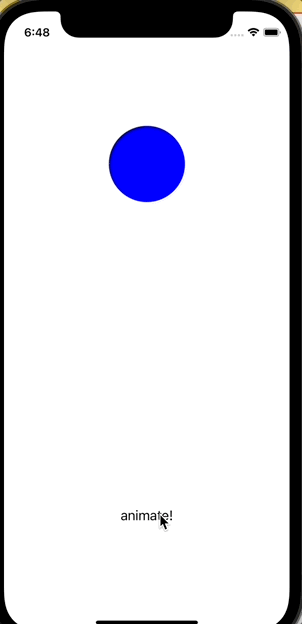
layout constraints로 애니메이션 만들기
실전에는 frame의 객체를 위치하는 경우는 많이 없습니다. 거의 대부분은 다른 객체와의 상대적인 위치를 지정하는 layout constraints를 정의하여 위치를 정의합니다. 따라서 layout constraints를 활용해서 애니메이션을 정의하는 방법도 알아보겠습니다.
⭐️ layout constraints로 애니메이션을 만들기 위해서는 멤버 변수로 애니메이션 이전의 layout constraints를 멤버 변수로 선언해두어야 합니다. 왜냐하면 해당 layout constraints를 deactivate하고 새로운 layout constraints를 적용해야 하기 때문입니다.
let circle: UIView = {
    let view = UIView()
    view.widthAnchor.constraint(equalToConstant: 100).isActive = true
    view.heightAnchor.constraint(equalToConstant: 100).isActive = true
    view.layer.cornerRadius = 100 / 2
    view.backgroundColor = .blue
    return view
}()

lazy var beforeAnimation = self.circle.topAnchor.constraint(equalTo: view.safeAreaLayoutGuide.topAnchor, constant: 100)
// 처음에 화면에 띄우는 헬퍼 함수
func configureUI() {
view.addSubview(circle)
circle.translatesAutoresizingMaskIntoConstraints = false
circle.centerXAnchor.constraint(equalTo: view.centerXAnchor).isActive = true
beforeAnimation.isActive = true
view.addSubview(animationButton)
animationButton.translatesAutoresizingMaskIntoConstraints = false
animationButton.centerXAnchor.constraint(equalTo: view.centerXAnchor).isActive = true
animationButton.bottomAnchor.constraint(equalTo: view.safeAreaLayoutGuide.bottomAnchor, constant: -100).isActive = true
}layout constraints를 활용하는 방식은 frame 방식과는 다릅니다. 먼저 애니메이션 클로저를 구현하기 전에 적용해야 할 layout constraints들을 적용해 둡니다. 취소할 layout constraints를 멤버 변수로 빼놓은 이유는 아래 셀렉터 함수에서 접근하기 위해서 입니다. 기존의 layout constraints와 새로운 layout constraints는 서로 충돌하기 때문에 취소하지 않으면 애니메이션이 실행되지 않습니다.
새로운 layout constraints이 적용되었다고 바로 뷰가 바뀌지는 않습니다. 애니메이션 클로저 내부에서 layoutIfNeeded() 메소드를 통해서 업데이트를 해주어야 합니다.
@objc func animateCircle() {
    beforeAnimation.isActive = false
    circle.topAnchor.constraint(equalTo: view.safeAreaLayoutGuide.topAnchor, constant: 200).isActive = true
    UIView.animate(withDuration: 1.0, animations: {
        self.view.layoutIfNeeded()
    })
}
🚫 간혹 멤버 변수로 따로 빼는 대신에 아래 처럼 똑같은 layout constraints를 다시 적어주고 = false를 함으로서 취소할 수 있다고 생각하시는 분이 있을 수도 있는데요. 이렇게는 안됩니다. 완전히 동일한 내용의 layout constraints를 다시 적용하더라도 다른 메모리 공간에 저장됩니다. 따라서 기존에 true로 설정된 layout constraints가 false가 되지 않습니다.
@objc func animateCircle() {
    circle.topAnchor.constraint(equalTo: view.safeAreaLayoutGuide.topAnchor, constant: 100) = false
    circle.topAnchor.constraint(equalTo: view.safeAreaLayoutGuide.topAnchor, constant: 200) = true
    UIView.animate(withDuration: 1.0, animations: {
        self.view.layoutIfNeeded()
    })
}
몇가지 응용 애니메이션
기본 애니메이션 외에도 몇가지 특수한 애니메이션 API를 제공합니다. 여기서는 간단하게 소개만 하겠습니다. 각 parameter가 어떤 의미인지는 공식 문서를 참고해주시기 바랍니다.
스프링 애니메이션
@objc func animateCircle() {
    beforeAnimation.isActive = false
    circle.topAnchor.constraint(equalTo: view.safeAreaLayoutGuide.topAnchor, constant: 200).isActive = true
    UIView.animate(withDuration: 1.0,
        delay: 0.2,
        usingSpringWithDamping: 0.2,
        initialSpringVelocity: 2,
        animations: {
            self.view.layoutIfNeeded()
        })
}
뒤집기 애니메이션 추가하기
animation이 아니라 transition이라는 API 안에 애니메이션을 넣어서 활용할 수 있습니다.
@objc func animateCircle() {
        beforeAnimation.isActive = false
        circle.topAnchor.constraint(equalTo: view.safeAreaLayoutGuide.topAnchor, constant: 200).isActive = true
        UIView.transition(with: circle,
            duration: 1,
            options: .transitionFlipFromLeft,
            animations: { self.view.layoutIfNeeded() },
            completion: nil)
    }
연속 애니메이션
타이머를 이용해서 하나의 애니메이션이 끝나면 다음 애니메이션이 이어서 실행되도록 해보겠습니다.
completion parameter 이용하기
animate method에 completion은 애니메이션이 끝나고 나서 실행할 클로저를 정의하는 parameter입니다. 여기에 또다른 애니메이션을 넣으면 연속적으로 애니메이션을 실행할 수 있습니다.
@objc func animateCircle() {
    beforeAnimation.isActive = false
    circle.topAnchor.constraint(equalTo: view.safeAreaLayoutGuide.topAnchor, constant: 200).isActive = true
    UIView.animate(withDuration: 1.0, animations: { self.view.layoutIfNeeded() },
        completion: { _ in
        self.beforeAnimation2.isActive = false
        self.circle.centerXAnchor.constraint(equalTo: view.centerXAnchor, constant: 100).isActive = true
        UIView.animate(withDuration: 1.0, animations: { self.view.layoutIfNeeded() })
    })
}
타이머 이용하기 (DispatchQueue.main.asyncAfter)
타이머를 사용한 방법입니다. 첫번째 애니메이션 지속시간이 지난 이후에 다른 애니메이션을 이어서 실행하게 합니다.
@objc func animateCircle() {
    beforeAnimation.isActive = false
    circle.topAnchor.constraint(equalTo: view.safeAreaLayoutGuide.topAnchor, constant: 200).isActive = true
    UIView.animate(withDuration: 1.0, animations: { self.view.layoutIfNeeded() })
    DispatchQueue.main.asyncAfter(deadline: .now() + 1) {
        self.beforeAnimation2.isActive = false
        self.circle.centerXAnchor.constraint(equalTo: self.view.centerXAnchor, constant: 100).isActive = true
        UIView.animate(withDuration: 1.0, animations: { self.view.layoutIfNeeded() })
   }
}
마치며...
story board에서 outlet으로 가져온 layout constraints를 가지고 애니메이션은 많이 만들어 봤는데 코드로 정의한 layout constraints로는 처음 만들어 보는데 중간에 시행착오가 많았습니다. 역시 코드는 직접 짜보고 실행해보면서 느는 것 같네요.
더 멋진 애니메이션을 만드는 그 날까지 열심히 해보겠습니다.
