
출처
이걸 보고 정리했습니다!
생활코딩 CSS : 이 영상들을 보고 글을 썼습니다.
https://opentutorials.org/course/2418
CSS
웹페이지를 꾸며주는 언어
HTML과 CSS가 만나는 법
<!DOCTYPE html>
<html>
  <head>
    <!--html문법-->
    <style>
      h2 {
        color: blue; /*CSS문법*/
      }
    </style>
  </head>
  <body>
    <!--아래 코드는 html문법이고, color:red만 CSS문법이다.-->
    <h1 style="color: red">Hello World</h1>
    <h2>Hello World</h2>
  </body>
</html>
선택자와 선언
어떤 태그를 디자인하기 위해서는 디자인하려는 태그를
1. 선택하고(선택자)
2. 선택한 대상에게 효과를 줘야 함(선언)

<!DOCTYPE html>
<html>
  <head>
    <style>
        li{
            color:red;
            text-decoration:underline;
        }
    </style>

  </head>
  <body>
    <ul>
        <li>HTML</li>
        <li>CSS</li>
        <li>JavaScript</li>
    </ul>
  </body>
</html>
선택자의 타입들
(1) 태그 선택자
효과를 적용하기 위해 태그를 선택한다.
li{color:red;} : li태그를 모두 선택하는 선택자
(2) 아이디 선택자
#selector{} : 아이디가 selector인 태그에 대해 효과가 적용된다.
<!DOCTYPE html>
<html>
  <head>
    <style>
      li {
        color: red;
        text-decoration: underline;
      }
      #select { /*아이디가 select인 태그에 대해 효과 적용됨*/
        font-size: 50px;
      }
    </style>
  </head>
  <body>
    <ul>
      <li>HTML</li>
      <li id="select">CSS</li>
      <li>JavaScript</li>
    </ul>
  </body>
</html>
(3) 클래스 선택자
<!DOCTYPE html>
<html>
  <head>
    <style>
      li {
        color: red;
        text-decoration: underline;
      }
      #select {
        font-size: 50px;
      }
      .deactive { /*class 명이 deactive인 태그에 대해 효과 적용*/
        text-decoration: line-through;
      }
    </style>
  </head>
  <body>
    <ul>
      <li class="deactive">HTML</li>
      <li id="select">CSS</li>
      <li class="deactive">JavaScript</li>
    </ul>
  </body>
</html>
class는 두 개 이상의 태그에 대해 CSS 효과를 줄 때 사용한다. (그룹핑)
id는 같은 값을 가진 태그가 존재할 수 없다.
클래스 선택자는 같은 태그명에만 적용할 필요는 없다.
<h1 class="eleve">something</h1>
<li class="eleve">list</li>
(4) 부모자식 선택자
어떤 태그의 하위에 있는 태그를 선택하고 싶을 때는 더 복합적인 선택자를 사용하게 된다.
<!DOCTYPE html>
<html>
  <head>
    <style>
        /*ul밑에 있는 모든 태그를 선택*/
      ul li{ /*조상자손선택자*/
        color:red;
      }
      /*직계자손인 태그에 대해서만 효과를 줄 때 ">"사용*/
      #lecture>li{ /*부모자식선택자*/
        border:1px solid red;
        /*color속성은 상속의 개념으로 인해 직계뿐만 아니라 더 밑 자손에게도 영향을 미침*/
      }
      ul,ol{
        /*콤마로 두 개의 선택자를 지정해줄 수 있다*/
        background-color: powderblue;
      }
    </style>
  </head>
  <body>
    <ul>
      <li>HTML</li>
      <li>CSS</li>
      <li>JavaScript</li>
    </ul>
    <ol id="lecture">
      <li>HTML</li>
      <li>CSS
        <ol>
          <li>selector</li>
          <li>declaration</li>
        </ol>
      </li>
      <li>JavaScript</li>
    </ol>
  </body>
</html>
선택자 팁
셀렉터를 수련할 수 있는 방법
CSS Diner :CSS 선택자를 게임의 형식을 통해서 익힐 수 있는 사이트
http://flukeout.github.io/
CheatSheet : 구글 이미지 서치로 맘에 드는 커닝페이퍼를 다운 받아 보세요!
(5) 가상 클래스 선택자
클래스 선택자는 아니지만 엘리먼트들의 상태에 따라서 마치 클래스 선택자처럼 여러 엘리먼트를 선택할 수 있다는 점에서 이름이 붙었다.
<!DOCTYPE html>
<html>
  <head>
    <meta charset="utf8">
    <style>
        a:link{
            color:black;
        }
        a:visited{
            color:red;
        }
       a:active{
        color:green;
       }
       a:hover{
        color:yellow;
       }
       a:focus{
        color:white;
       }
       input:focus{
        background-color: black;
       }
    </style>
  </head>
  <body>
    <a href="https://opendfadl.drg">방문함</a>
    <a href="dafd.adf">방문안함</a>
    <input type="text">
  </body>
</html>
링크와 관련된 가상 클래스 선택자
- link : 방문한 적이 없는 링크
- visited : 방문한 적이 있는 링크
- hover : 마우스를 롤오버 했을 때
- active : 마우스를 클릭했을 때
위의 선택자는 순서대로 지정하는 것이 좋다. 특히 visited의 경우는 보안상의 이유로 아래와 같은 속성만 변경 가능color
background-color
border-color
outline-color
The color parts of the fill and stroke properties
다양한 선택자들
타이포그래피
font-size
글꼴의 크기를 지정. 주요 단위로는 px, em, rem이 있다.
- rem: html태그에 적용된 font-size의 영향을 받는다. html태그의 폰트크기에 따라서 상대적으로 크기가 결정되기 때문에 이해하기 쉽다. 가장 바람직한 단위로 사용을 권장함.
- px: 모니터상의 화소 하나의 크기에 대응되는 단위. 고정된 값이기 때문에 이해하기 쉽지만 사용자가 글꼴의 크기를 조정할 수 없기 때문에 가급적 사용하지 않는 것이 좋다.
- em: 부모태그의 영향을 받는 상대적인 크기. 부모의 크기에 영향을 받기 때문에 파악하기가 어렵다. rem이 등장하면서 이 단위 역시 사용이 권장되지 않는다.
<!DOCTYPE html>
<html>
  <head>
    <style>
      #px{font-size:16px;}
      #rem{font-size:1rem;}
    </style>
  </head>
  <body>
    <div id="px">PX</div>
    <div id="rem">REM</div>
  </body>
</html>
rem은 사용자가 폰트크기를 변경할 수 있다! px는 고정임
color
글꼴의 컬러를 지정하는 방법
color name으로 지정하는 법이 있고 hex로 지정하는 법, rgb로 지정하는 법이 있다.
컬러의 종류를 참고할 수 있는 페이지
<!DOCTYPE html>
<html>
  <head>
    <style>
      h1{color:#00FF00;}
      h1{color:red;}
      h1{color:rgb(255, 0, 0);}
    </style>
  </head>
  <body>
    <h1>Hello world</h1>
  </body>
</html>
text-align
텍스트를 정렬하는 속성
<!DOCTYPE html>
<html>
  <head>
    <style>
      p{
        text-align: justify;
        border:1px solid gray;
      }
    </style>
  </head>
  <body>
    <p>
      Lorem ipsum dolor sit amet, consectetur adipiscing elit. Cras accumsan iaculis tristique. Pellentesque eu erat mattis est semper condimentum. Nunc sed facilisis turpis. Mauris vulputate, purus in suscipit accumsan, dolor lorem elementum mi, non congue metus urna vitae tortor.

Vestibulum interdum tellus sed tellus pretium vulputate. Vestibulum a mattis ante. Ut at metus eget eros dictum tristique. Proin sodales nulla eget enim pulvinar imperdiet. Aliquam et congue quam. Duis

Donec placerat felis in elementum ullamcorper. Duis tellus nunc, eleifend non molestie eget, ornare ut risus. Morbi sit amet nunc ante. Donec vestibulum tortor nec massa vestibulum suscipit. Quisque faucibus pulvinar erat, vitae gravida tortor commodo vitae.

In hac habitasse platea dictumst. Maecenas congue arcu nulla, vel pharetra mauris condimentum vel. Quisque sit amet sapien arcu. Vestibulum eu consectetur ante, vel iaculis justo. Proin in ipsum vel eros auctor rhoncus sed vel lacus. Vestibulum suscipit dolor

Integer commodo varius ornare. Vivamus lacus urna, scelerisque nec lectus porta, interdum commodo dolor. Curabitur sagittis diam quis tellus semper commodo. Ut non orci consectetur, cursus urna et,
    </p>
  </body>
</html>
text-align의 값으로 쓰이는 것
- left : 왼쪽 정렬
- right : 오른쪽 정렬
- center : 가운데 정렬
- justify : 텍스트가 많을 때 왼쪽과 오른쪽이 공평하게 화면을 차지하게 된다
font
폰트와 관련된 이런저런 속성
(1) font-family
서체를 지정하는 속성
h1{
    font-family: "Times New Roman", Times, serif;
}
h1 태그를 Times New Roman 서체로 지정. 그런데 사용자의 컴퓨터에 폰트가 없으면 Times를 사용하게 된다.
이때 마지막 폰트는 포괄적인 폰트로 지정한다.
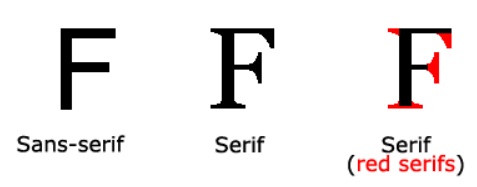
serif (장식이 있는 폰트)
sans-serif 장식이 없는 폰트
cursive (흘림체)
fantasy
monospace (고정폭)
(2) font-weight
폰트의 두께를 나타냄. 대체로 bold만 기억하면 된다.
h1{
    font-weight: bold;
}
(3) line-height
행과 행 사이의 간격을 지정. 기본 값은 normal로 수치로는 1.2에 해당. 이 수치를 기준으로 간격을 지정하면 된다. 값이 1.2라면 현재 엘리먼트 폰트 크기의 1.2배만큼 간격을 준다는 의미.
p{
    line-height: 1.3;
}
(4)font
폰트와 관련된 여러 속성을 축약형으로 표현하는 속성. 형식은 아래와 같고, 순서를 지켜서 기술해야 한다.
font: font-style font-variant font-weight font-size/line-height font-family|caption|icon|menu|message-box|small-caption|status-bar|initial|inherit;
이 중에서 font-size와 font-size와 font-family는 필수로 포함되어야 하는 정보!
h1{
    font: 15px arial, sans-serif;
}
<!DOCTYPE html>
<html>
<head>
<style>
#type1{
font-size:5rem;
font-family: arial, verdana, "Helvetica Neue", serif;
font-weight: bold;
line-height: 2;
}
#type2{
font:bold 5rem/2 arial, verdana, "Helvetica Neue", serif;
}
</style>
</head>
<body>
<p id="type1">
Hello world<br>
Hello world
</p>
<p id="type2">
Hello world<br>
Hello world
</p>
</body>
</html>서체
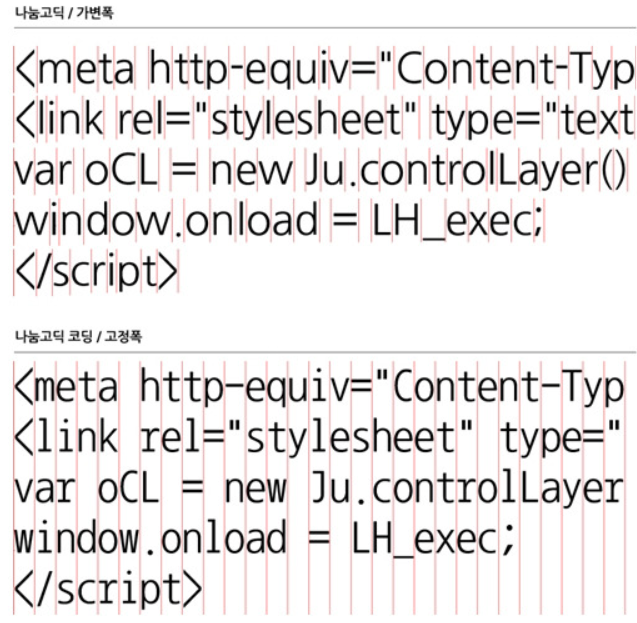
고정폭과 가변폭
serif vs sans serif
serif는 글꼴에서 사용하는 장식.
웹폰트
사용자가 가지고 있지 않은 폰트를 웹페이지에서 사용할 수 있는 방법. 폰트를 서버에서 다운로드 하는 방식
<!DOCTYPE html>
<html>
  <head>
    <link href="https://fonts.googleapis.com/css?family=Indie+Flower|Londrina+Outline|Open+Sans+Condensed:300" rel="stylesheet">
    <style>
      #font1{
        font-family: 'Open Sans Condensed', sans-serif;
      }
      #font2{
        font-family: 'Indie Flower', cursive;
      }
    </style>
  </head>
  <body>
    <p id="font1">
      Lorem ipsum dolor sit amet, consectetur adipiscing elit. Fusce facilisis lacus eu ex rhoncus pretium. Sed vestibulum risus pharetra, consequat nibh ac, ornare nunc. Nunc eu dui eget lorem aliquet finibus.
    </p>
    <p id="font2">
      Quisque nec arcu felis. Vestibulum gravida, augue eu facilisis tempus, neque erat tincidunt nunc, consequat ultrices felis urna eu augue. Nulla ut urna purus. Curabitur ultricies rutrum orci malesuada tempor.
    </p>
  </body>
</html>