
해당 글은 Jack Herrington의 React Streaming In Depth: NextJS! Remix! DIY! 를 실습한 결과를 바탕으로 작성되었습니다.
Overview
이번 시간에는 다소 늦었지만 React 18 Streaming 에 대해 글을 작성해보려고 합니다. 여기에는 SSR, Suspense, Hydration 과 같은 중요한 개념이 포함되어있습니다. 그만큼 핵심적인 내용이지만 다소 어려운 측면도 있습니다. 아직 저도 제대로 이해한건지 확신이 들진 않지만 그래도 아는만큼 작성해보겠습니다. 틀리거나 부족한 내용이 있을 수 있으니 참고 부탁드립니다. 🙏
Our Example Project - Next.js
간단하게 Next.js 예시 프로젝트를 하나 만들어보겠습니다.
기본적으로 SSR이 적용되어 Comments 목록 외에는 사용자가 바로 볼 수 있습니다.

그리고 나서 이후에 Comments 목록이 제대로 보이는 것을 알 수 있는데요. 이번 시간 핵심은 바로 이겁니다.
중요한 내용이나 간단한 내용은 빠르게 보일 수 있도록 만들고, 덜 중요한 내용이나 오래걸리는 작업에 대해서는 그 부분만 느리게 보여주도록 만드는 방법!! 사용자 경험에 있어서 굉장히 중요할 것입니다. 사용자 입장에서는 아무것도 안보였다가 보이는 것보다 처음에 뭐라도 보이고 이후에 데이터가 보이는 편이 더 낫기 때문입니다.
그런다면 이런 동작은 과연 어떻게 가능한 걸까요?
// pages.tsx
export default async function Home() {
  const description = (await fetchDescription()) as string;

  return (
    <>
      <header>Header</header>

      <h2>Product Description</h2>
      <p>{description}</p>

      <h2>Comments</h2>
      <Suspense fallback={<div>Loading...</div>}>
        <Comments />
      </Suspense>

      <footer>Footer</footer>
    </>
  );
}
물론 내부적으로 Suspense를 사용했습니다. 근데 단순히 Suspense를 사용했으니 이런 동작이 가능한걸까요? 이를 알아보기 위해 DIY (Do It Yourself) 프로젝트를 만들어보도록 하겠습니다.
DIY Project Setup
express 를 통한 ssr 구현
react 18과 express를 사용해서 직접 SSR 환경을 구축해보도록 하겠습니다. 일단, express 서버를 띄워주는 코드를 작성해줍니다.
// server.js
const express = require("express");
const render = require("./server/render").default;

const app = express();
app.get("/", (_req, res) => {
  render(res);
});
app.use(express.static("build"));
app.use(express.static("public"));

const PORT = process.env.PORT || 3000;
app.listen(PORT, () => {
  console.log(`Serving at http://localhost:${PORT}/`);
});
다음으로 render 코드를 살펴보겠습니다. renderToString 이 핵심이라고 볼 수 있습니다. Next.js 도 사실 내부적으로 "react-dom/server"를 사용하고 있으니까요. (참고)
// server/render.js
import * as React from "react";
import { renderToString } from "react-dom/server";

import Html from "../src/Html";
import App from "../src/App";

const fetchDescription = () =>
  new Promise((resolve) =>
    setTimeout(() => resolve("Product information ready for SEO"), 250)
  );

const commentsFetch = () =>
  new Promise((resolve) =>
    setTimeout(() => resolve(["Comment 1", "Comment 2", "Comment 3"]), 2000)
  );

async function render(res) {
  const description = await fetchDescription();
  const comments = await commentsFetch();

  res.send(
    renderToString(
      <Html description={description} comments={comments}>
        <App description={description} comments={comments} />
      </Html>
    )
  );
}

export default render;
react-dom/server - renderToString
참고 : https://react.dev/reference/react-dom/server/renderToString
react 공식문서를 살펴보면 핵심을 크게 2가지로 볼 수 있습니다.
- renderToString은 React 트리를 HTML 문자열로 렌더링합니다.
- renderToString은 streaming 또는 데이터 waiting를 지원하지 않습니다. 대안을 참조하십시오.
React 트리를 HTML 문자열로 렌더링 한다는 점에서 서버에서 리액트 코드를 pre-rendering 하고 있다는 사실과 streaming은 지원하지 않는다는 사실입니다.
babel-node 를 이용해 서버 실행
그리고 나서 babel과 babel-node를 통해 서버를 실행시켜봅니다.
// .babelrc
{
  "ignore": ["server.js", "node_modules"],
  "presets": [
    [
      "@babel/preset-env",
      {
        "targets": {
          "node": 14
        }
      }
    ],
    "@babel/preset-react"
  ]
}
// package.json
"scripts": {
"server:dev": "babel-node server.js"
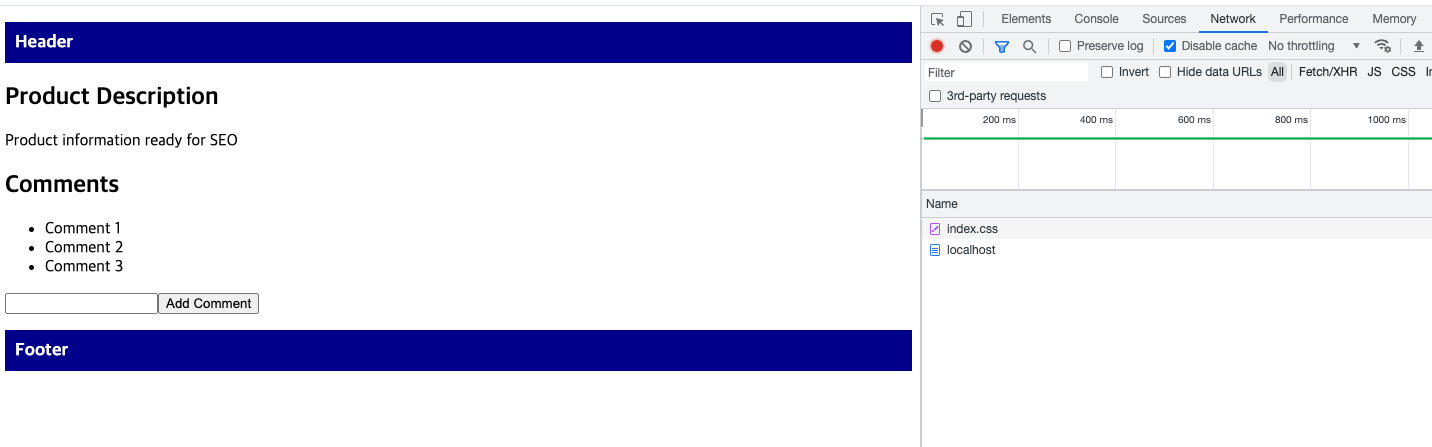
}일단 문제없이 잘 나오긴 하는군요. 다만, js 코드가 없다보니 빈 껍데기라고 볼 수 있습니다. Comment를 추가하려고 해도 할 수 없습니다.
Adding Client JS
참고 : https://react.dev/reference/react-dom/client/hydrateRoot
"react-dom/client"의 hydrateRoot을 사용하면 이전에 react-dom/server에 의해 HTML 콘텐츠가 생성된 브라우저 DOM 노드 내의 React 구성 요소를 표시할 수 있습니다. hydrateRoot를 호출하여 서버 환경에서 React가 이미 만들어둔 HTML에 React를 “붙입니다(attach)”.
결국 이는 hydration 이랑 연관이 있습니다.
웹 개발에서 hydration 또는 rehydration은 정적 hosting이나 SSR서버에서 받은 정적 HTML 웹 페이지를 동적 HTML 웹 페이지(이벤트 헨들러를 연결함으로써)로 바꿔주는 기술을 말합니다. - hydration wiki
즉, 서버에서 pre-rendering한 결과와 클라이언트 번들된 JS 파일과 서로 매칭(hydration)이 되면서 이벤트 처리가 가능해진다고 보면 됩니다. 어렵네요... 😂
// src/index.js
import React from "react";
import { hydrateRoot } from "react-dom/client";

import App from "./App";

hydrateRoot(
  document.getElementById("app"),
  <App comments={[]} description={""} />
);
그리고 나서 webpack.config.js를 통해 번들링 해줍니다.
const path = require("path");

module.exports = {
  mode: "development",
  entry: "./src/index.js",
  output: {
    path: path.resolve(__dirname, "./build"),
    filename: "main.js",
  },
  resolve: {
    extensions: [".jsx", ".js"],
  },
  module: {
    rules: [
      {
        test: /\.m?js/,
        type: "javascript/auto",
        resolve: {
          fullySpecified: false,
        },
      },
      {
        test: /\.js$/,
        use: "babel-loader",
        exclude: /node_modules/,
      },
    ],
  },
};
번들된 결과는 main.js이므로 직접 Html.js에서 script 태그를 추가해줍니다.
// src/Html.js
export default ({ children, comments, description }) => {
  return (
    <html>
      <head>
        <link rel="stylesheet" href="/index.css" />
      </head>
      <body>
        <div id="app">{children}</div>
      </body>
      <script src="/main.js"></script> // 임의로 추가. 클라이언트 빌드된 결과물
    </html>
  );
};
마지막으로 클라이언트 환경과 서버 환경을 동시에 실행 시켜줍니다.
"scripts": {
  "dev": "concurrently \"pnpm run client:dev\" \"pnpm run server:dev\"",
  "client:dev": "webpack --config webpack.config.js --watch",
  "server:dev": "babel-node server.js"
},
결과를 보니 에러가 발생했습니다.
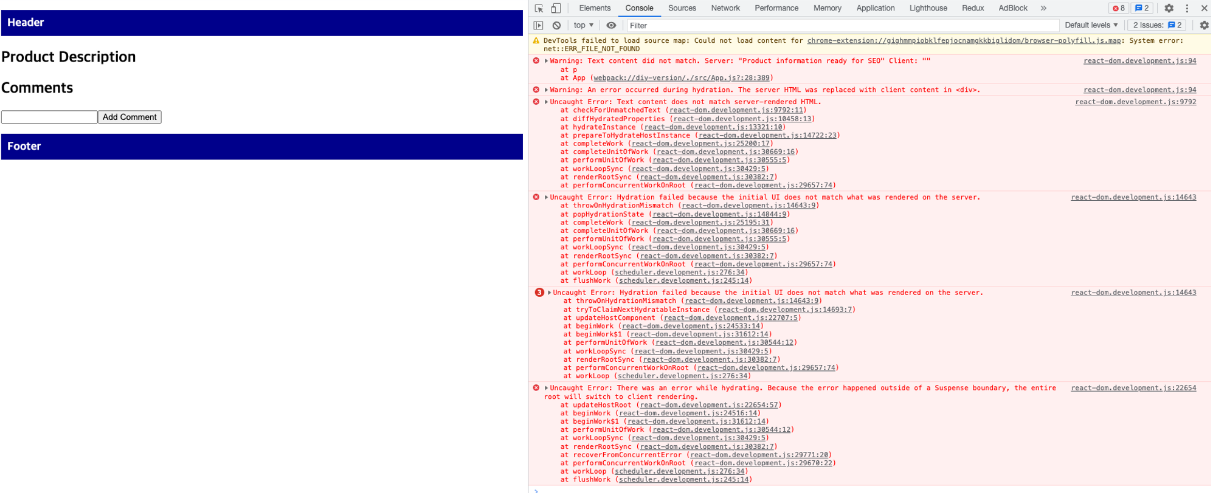
Hydration 에러 수정
에러를 좀 더 자세히 살펴보니 Hydration failed에 관한 에러입니다. 서버에서 렌더링된 결과와 초기 UI가 서로 매칭되지 않아서 발생했다고 하네요. 무슨 의미일까요?

서버에서는 분명 이렇게 2초 후에 보니까 잘 넘어오는거 같습니다.

서버에서 html은 잘 넘겨줬는데 그 이후 js와의 하이드레이션 과정에서 뭔가 문제가 생긴걸까요? main.js를 빼니까 에러가 없어지긴 합니다.
현재 문제는 클라이언트 사이드 코드에서는 comments 또는 descriptoion을 가지지 않기 때문에 발생합니다. index.tsx 코드를 보면 App 컴포넌트에 comments, descriptoion 데이터를 명시해주지 않았습니다.
// src/index.tsx
hydrateRoot(
  document.getElementById("app"),
  <App comments={[]} description={""} />
);
그렇기 때문에 서버와 클라이언트 사이의 불일치가 발생해서 hydration 에러가 발생했습니다. 이를 일치시켜볼까요? 서버에서 직접 window.__data 라는 전역객체에 comments, descriptoion 데이터를 넘겨주었습니다.
export default ({ children, comments, description }) => {
  return (
    <html>
      <head>
        <link rel="stylesheet" href="/index.css" />
      </head>
      <body>
        <div id="app">{children}</div>
      </body>
      <script
        dangerouslySetInnerHTML={{
          __html: `window.__data = ${JSON.stringify({
            description,
			comments
          })};`,
        }}
      ></script>
      <script src="/main.js"></script>
    </html>
  );
};
클라이언트에서는 window.__data 라는 전역객체를 통해 데이터를 전달받아서 사용할 수 있습니다.
hydrateRoot(
document.getElementById("app"),
<App comments={window.__data.comments} description={window.__data.description} />
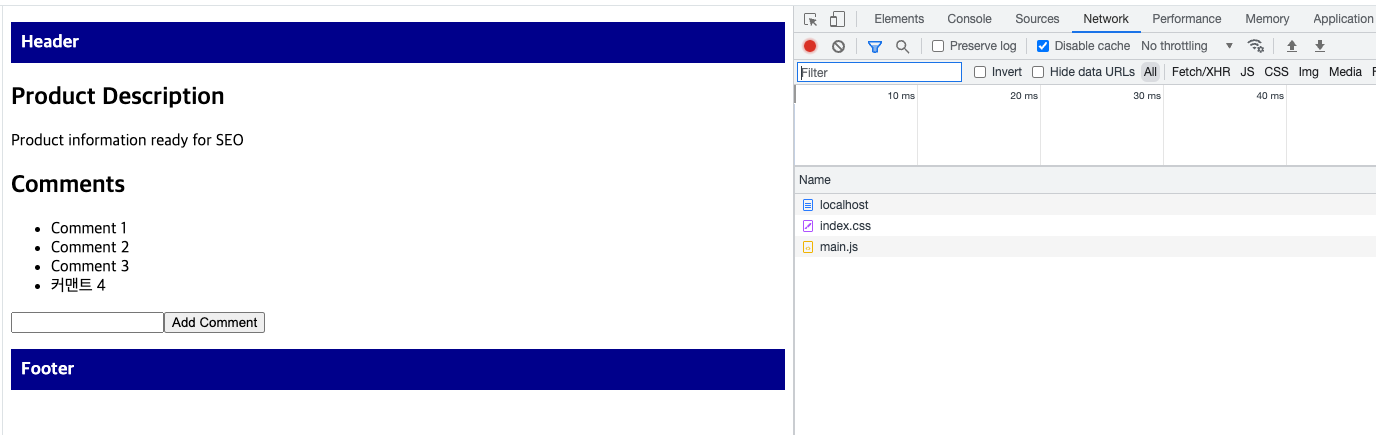
);실행 시켜보면 이제 hydration 에러 없이 커멘트 추가도 문제 없이 동작합니다.
이렇듯 SSR은 두가지 환경을 고려해야 합니다.
또한, Next.js에서 window.__NEXT_DATA__ 라는 script도 결국 위와 동일한 이유로 사용되는게 아닐까 싶습니다. 여러 글을 보건데 __NEXT_DATA__ 가 없다면 hydration이 제대로 이뤄지지 않는다는 것을 알 수 있고, 서버와 클라이언트 사이의 context 를 유지시켜 주기 위해 데이터를 클라이언트에 넘겨주기 위해 사용할 때 사용된다는 것입니다.
아무튼 hydration은 마냥 좋은게 아니라는 겁니다. 위와 같은 상황도 고려해야 하고, hydration 자체에서 리소스를 사용하기 때문입니다. 그래서 hydration을 까는 글도 있고, Qwik 라는 새 프레임워크는 zero hydration을 통해 더 빠른 처리를 가능케 했다고 하네요. - 참고, 참고2
Streaming Render
renderToPipeableStream
지금까지는 comments 때문에 2초간 딜레이 후 페이지가 나오는데요. 이를 해결해보도록 하겠습니다. renderToString를 renderToPipeableStream로 교체하도록 합니다.
renderToPipeableStream는 React 18에서 소개되었으며 이게 이번 시간에 사실상 핵심이라고 볼 수 있습니다.
renderToPipeableStream renders a React tree to a pipeable Node.js Stream. - 공식문서
React 트리를 파이프 가능한 Node.js Stream으로 렌더링합니다. 다른 옵션도 많이 있지만 여기서는 onShellReady에 대해서만 처리해주도록 하겠습니다.
const stream = renderToPipeableStream(
    <Html description={description} comments={comments}>
      <App description={description} comments={comments} />
    </Html>,
    {
      onShellReady() {
        stream.pipe(res);
      },
    }
  );
그리고 Html.js에서 main script는 없애고, comments도 제거해줍니다.
import * as React from "react";

export default ({ children, comments, description }) => {
  return (
    <html>
      <head>
        <link rel="stylesheet" href="/index.css" />
      </head>
      <body>
        <div id="app">{children}</div>
      </body>
      <script
        dangerouslySetInnerHTML={{
          __html: `window.__data = ${JSON.stringify({
            description,
          })};`,
        }}
      ></script>
    </html>
  );
};
comments 때문에 전체가 2초간 딜레이 되는 문제를 해결하기 위해 일단 commentsFetch에 await을 제거해줍니다.
 async function render(res) {
  const description = await fetchDescription();
  const comments = commentsFetch();  // await 제거

  const stream = renderToPipeableStream(
    <Html description={description} comments={comments}>
      <App description={description} comments={comments} />
    </Html>,
    {
      onShellReady() {
        stream.pipe(res);
      },
    }
  );
}
use hook을 사용하면 promise 을 인수로 전달하여 데이터를 비동기식으로 가져올 수 있습니다.
// src/App.js
import * as React from "react";
import { useState, use } from "react";

function Comments({ comments: commentsPromise }) {
  const [comment, setComment] = useState("");
  const [comments, setComments] = useState(use(commentsPromise));
	...
마지막으로 Suspense를 사용해주었습니다.
export default function App(props) {
  return (
    <>
      <header>Header</header>

      <h2>Product Description</h2>
      <p>{props.description}</p>

      <h2>Comments</h2>
      <Suspense fallback={<div>Loading...</div>}>
        <Comments comments={props.comments} />
      </Suspense>

      <footer>Footer</footer>
    </>
  );
}
신기하게도 js 파일 없이도 Loading... 이었다가 실제 데이터로 바뀌는 것을 알 수 있습니다. 🤔

이게 어떻게 가능한걸까?
아래처럼 curl —no-buffer로 요청을 해보면, 처음에 바로 요청이 오고, 2초 후에 한번 더 데이터가 날라오는 것을 알 수 있습니다. 이건 renderToPipeableStream를 사용해서 streaming 효과라고 볼 수 있겠네요.
curl --no-buffer http://localhost:3000
좀 더 자세히 살펴보기 위해 요청 결과를 pbcopy를 통해 클립보드에 복사해줍니다.
❯ curl http://localhost:3000 | pbcopy
  % Total    % Received % Xferd  Average Speed   Time    Time     Time  Current
                                 Dload  Upload   Total   Spent    Left  Speed
100  1121    0  1121    0     0    496      0 --:--:--  0:00:02 --:--:--   497
새 파일을 생성 후 vscode Format Document 를 통해 알아보기 쉽게 해주었습니다.
<!DOCTYPE html>
<html>
  <head>
    <link rel="preload" as="style" href="/index.css" />
    <link rel="stylesheet" href="/index.css" />
  </head>
  <body>
    <div id="app">
      <header>Header</header>
      <h2>Product Description</h2>
      <p>Product information ready for SEO</p>
      <h2>Comments</h2>
      <!--$?--><template id="B:0"></template>
      <div>Loading...</div>
      <!--/$-->
      <footer>Footer</footer>
    </div>
    <script>
      window.__data = { description: "Product information ready for SEO" };
    </script>
    <div hidden id="S:0">
      <div>
        <ul>
          <li>Comment 1</li>
          <li>Comment 2</li>
          <li>Comment 3</li>
        </ul>
        <input type="text" value="" /><button>Add Comment</button>
      </div>
    </div>


    <script>
      $RC = function (b, c, e) {
        c = document.getElementById(c);
        c.parentNode.removeChild(c);
        var a = document.getElementById(b);
        if (a) {
          b = a.previousSibling;
          if (e) (b.data = "$!"), a.setAttribute("data-dgst", e);
          else {
            e = b.parentNode;
            a = b.nextSibling;
            var f = 0;
            do {
              if (a && 8 === a.nodeType) {
                var d = a.data;
                if ("/$" === d)
                  if (0 === f) break;
                  else f--;
                else ("$" !== d && "$?" !== d && "$!" !== d) || f++;
              }
              d = a.nextSibling;
              e.removeChild(a);
              a = d;
            } while (a);
            for (; c.firstChild; ) e.insertBefore(c.firstChild, a);
            b.data = "$";
          }
          b._reactRetry && b._reactRetry();
        }
      };
      $RC("B:0", "S:0");
    </script>
  </body>
</html>
해당 결과를 보니 특이한 부분이 몇가지 보입니다.
<template id="B:0"></template><div hidden id="S:0">부분 부터가 사실상 2초 이후에 넘어오는 부분입니다.
결국에는 B:0 부분에는 초기에 Loading…을 보여줬다가 이후에 S:0으로 교체해준다는 의미로 보입니다. 와... 사실은 이렇게 동작했던거군요. 👍
Adding Interactivity
마찬가지로 여기에 클라이언트 js를 다시 추가해보겠습니다. 에러가 발생하네요.
<script src="/main.js"></script>caught Error: An unsupported type was passed to use(): undefined
comments를 Promise로 직접 데이터를 넣어주도록 합니다.
import React from "react";
import { hydrateRoot } from "react-dom/client";

import App from "./App";

const comments = new Promise((resolve) => {
  window.setComments = (comments) => resolve(comments);
});

hydrateRoot(
  document.getElementById("app"),
  <App comments={comments} description={window.__data.description} />
);
그리고 나서 이렇게 작성해줍니다. 흠... 역시 어렵네요.
import * as React from "react";
import { Suspense, use } from "react";

function CommentsScript({ comments: commentsPromise }) {
  const comments = use(commentsPromise);

  return (
    <script
      dangerouslySetInnerHTML={{
        __html: `window.setComments(${JSON.stringify(comments)})`,
      }}
    />
  );
}

export default ({ children, comments, description }) => {
  return (
    <html>
      <head>
        <link rel="stylesheet" href="/index.css" />
      </head>
      <body>
        <div id="app">{children}</div>
      </body>
      <script
        dangerouslySetInnerHTML={{
          __html: `window.__data = ${JSON.stringify({
            description,
          })};`,
        }}
      ></script>
      <script src="/main.js"></script>
      <Suspense fallback={<script></script>}>
        <CommentsScript comments={comments} />
      </Suspense>
    </html>
  );
};마치면서
Reat18에서는 Suspense를 통해 Streaming HTML와 Selective Hydration을 사용할 수 있고, 어떠한 문제를 해결할 수 있는지 살펴봤습니다. 굉장히 흥미로운 내용이면서 조금이나마 어떻게 동작하는지 알 수 있어서 좋은 시간이었습니다. 아직 미흡한 부분이 있지만요...
참고자료
- React Streaming In Depth: NextJS! Remix! DIY!
- https://react.dev/reference/react-dom/server/renderToString
- https://react.dev/reference/react-dom/client/hydrateRoot
- https://helloinyong.tistory.com/315
- https://www.howdy-mj.me/next/hydrate
- https://github.com/Road-of-CODEr/we-hate-js/blob/master/Front-End/Next.js/buildSystem/autoGenFiles.md
- https://stackoverflow.com/questions/69396462/how-to-remove-next-data-from-dom-in-nextjs
- https://react.dev/reference/react-dom/server/renderToPipeableStream
- https://github.com/reactwg/react-18/discussions/37
- https://blog.mathpresso.com/suspense-ssr-architecture-in-react-18-ec75e80eb68d


잘읽었습니다:)