감상 버튼을 누르면 메인 화면에서 해당 리스트 색상 변화주기
- Detail 컴포넌트에서 감상 버튼 생성
- 전역 데이터(버킷리스트) 배열화
- 전역 데이터 가져오기
- Styled-componenets에 함수 적용
감상 버튼 누를 때마다 프로그래스바에 진척도 보여주기
- Progress 컴포넌트 생성
- 전역 데이터 가져오기
- 프로그래스바에 사칙연산 함수 적용
- Styled-components에 함수 및 애니메이션 적용
1.데이터 형식 바꾸기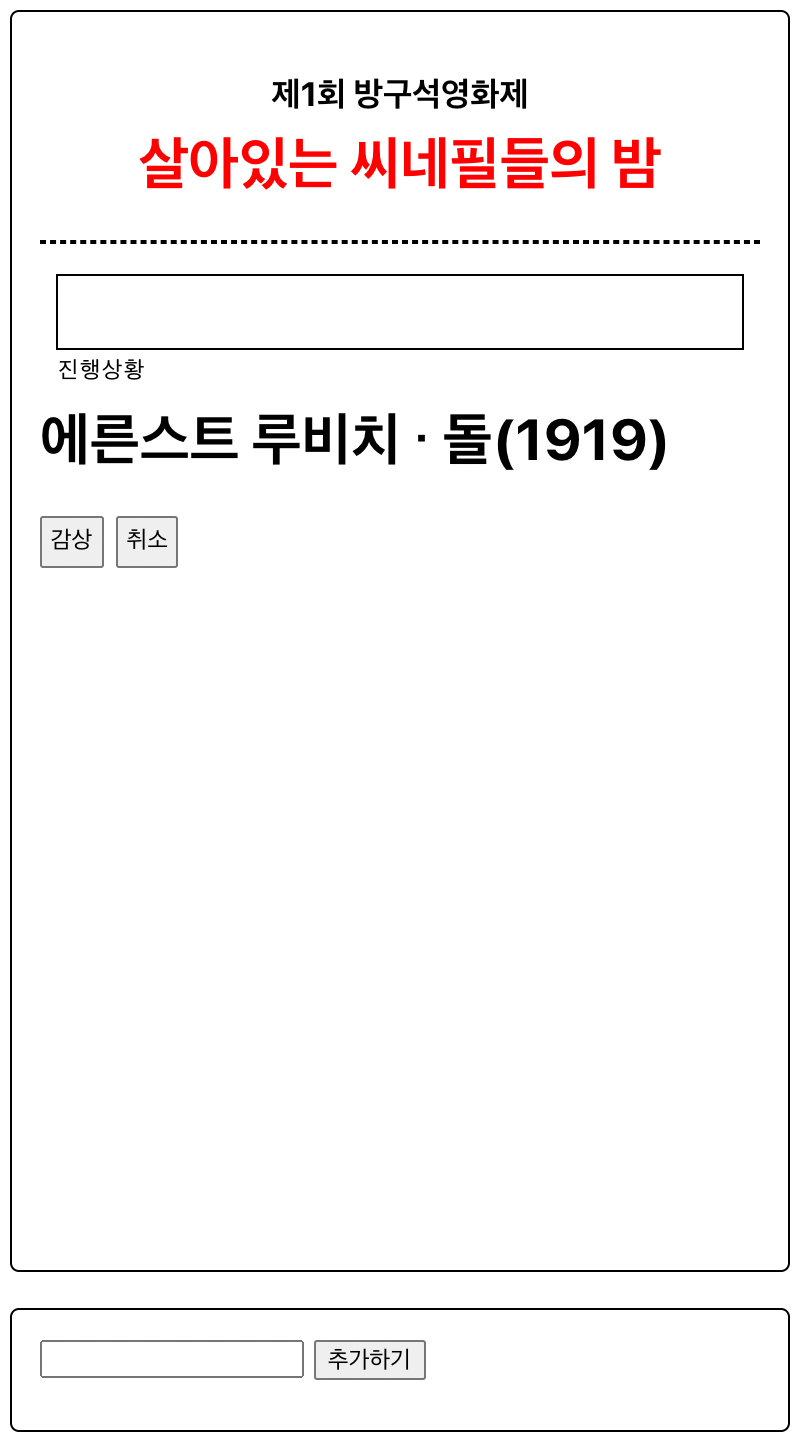
Detail.js
    return (
        <div>
            <h1 onClick={() => {
                props.history.push("/");
            }}>{bucket_list[bucket_index]}</h1>
            <Button>감상</Button>
            <Button onClick={() => {
                console.log("취소");
                dispatch(deleteBucket(bucket_index));
                history.goBack();
            }}>취소</Button>
        </div>
    );
}
감상 버튼에 들어가는 onClick 함수는 클릭시 데이터 정보가 감상완료(true)로 바껴아 한다.
redux/modules/bucket.js
const initialState = {
    list: [ "에른스트 루비치 ・ 돌(1919)", "프리츠 랑 ・ 메트로폴리스(1927)", "루이스 마일스톤 ・ 서부 전선 이상 없다(1930)", "에드먼드 굴딩 ・ 나이트메어 앨리(1947)" ],
};
그러나 기존의 initialState는 텍스트로만 이루어져 있기 때문에 true/false를 판별할 수 없다. 이 배열을 딕셔너리로 바꿔주는 작업부터 해야 한다.
const initialState = {
    list: [
        { title: "에른스트 루비치 ・ 돌(1919)", watched: false },
        { title: "프리츠 랑 ・ 메트로폴리스(1927)", watched: false },
        { title: "루이스 마일스톤 ・ 서부 전선 이상 없다(1930)", watched: false },
        { title: "에드먼드 굴딩 ・ 나이트메어 앨리(1947)", watched: false },
    ],
};
감상버튼을 누르기 전까지는 감상하지 않은 상태이므로 기본값은 false로 통일한다.
BucketList.js
위 과정을 마치면 에러가 발생한다.
const BucketList = (props) => {
    const history = useHistory();
    const my_lists = useSelector((state) => state.bucket.list);

    return (
        <ListStyle>
            {my_lists.map((list, index) => {
                return (
                    <ItemStyle watched={list.watched}
                    className="list_item" key={index} onClick={() => {
                        history.push("/detail/"+index);
                    }}>
                            {list}
                    </ItemStyle>
                );
            })}
        </ListStyle>
    );
};
바로 {list} 때문이다. initialState의 list가 텍스트로만 이루어져 있을 땐 {list}만 입력해도 문제없이 출력되지만 딕셔너리일 때는 텍스트에 해당되는 title을 적어야 한다. 즉, {list.title}이 되어야 한다.
마찬가지로 Detail.js의 <h1 onClick={() => {props.history.push("/");}}>{bucket_list[bucket_index]}</h1> 이 부분 역시 {bucket_list[bucket_index]}.title로 수정해야 한다.
2. 리덕스 데이터 바꾸기
redux/modules/bucket.js
- 액션 타입
const UPDATE = "bucket/UPDATE";
- 액션 생성 함수
export function updateBucket(bucket_index) {
    return { type: UPDATE, bucket_index };
}
- 리듀서
        case "bucket/UPDATE": {
            console.log("감상완료");
            console.log(state, action);

            return state;
        }
감상 버튼의 onClick이 디스패치를 일으켜야 하므로 bucket.js에서 필요한 함수를 생성해준다.
Detail.js
import { deleteBucket, updateBucket } from "./redux/modules/bucket";
.
.
.
    return (
        <div>
            <Button onClick={() => {
                dispatch(updateBucket(bucket_index));
            }}>감상</Button>
        .
        .
        .
}onClick에 디스패치를 연결 후 감상 버튼을 눌렀을 때 리듀서에 적은 콘솔이 뜬다면 바꿔줘야 하는 내용을 리듀서에 추가하면 된다. 변경 내용은 console.log(state, action);을 참조한다.
console.log(state, action);
🔽{list: Array(4)}
	🔽list: Array(4)
		▶️ 0: {title: '에른스트 루비치 ・ 돌(1919)', watched: false}
		▶️ 1: {title: '프리츠 랑 ・ 메트로폴리스(1927)', watched: false}
		▶️ 2: {title: '루이스 마일스톤 ・ 서부 전선 이상 없다(1930)', watched: false}
		▶️ 3: {title: '에드먼드 굴딩 ・ 나이트메어 앨리(1947)', watched: false}
			length: 4
		▶️ [[Prototype]]: Array(0)
	▶️ [[Prototype]]: Object
🔽{type: 'bucket/UPDATE', bucket_index: '2'}
	bucket_index: "2"
	type: "bucket/UPDATE"
▶️ [[Prototype]]: Object
bucket_index와watched: false를 이용해서case에 새로운 변수를 생성한다.
        case "bucket/UPDATE": {
            const new_bucket_list = state.list.map((l, idx) => {
                if (parseInt(action.bucket_index) === idx) {
                    return { ...l, watched: true };
                }else{
                    return l;
                }
            });
            console.log({ list: new_bucket_list });
            return { list: new_bucket_list };
}state에 넣어줄 새로운 데이터를 new_bucket_list라는 이름으로 지정한 상태다.
버킷리스트의 인덱스와 Detail 컴포넌트가 해당되는 리스트의 인덱스가 일치하면 watched의 값을 true로 바꿔주게 되는데 이 데이터가 new_bucket_list에 저장된다.
l은 개별적인 리스트로 { ...l, watched: true };을 return 하면 다른 데이터는 그대로 들어오게 된다.
여기서 잠깐!
action.bucket_index = 문자형
idx = 숫자형
형을 비교 대상에 포함하는
===은 문자열과 숫자열의 비교에 사용할 수 없다.
- 해결방법
(parseInt(action.bucket_index) === idx)
형 변환 함수parseInt를 사용((action.bucket_index) == idx)
형 비교를 제외한==등호 사용
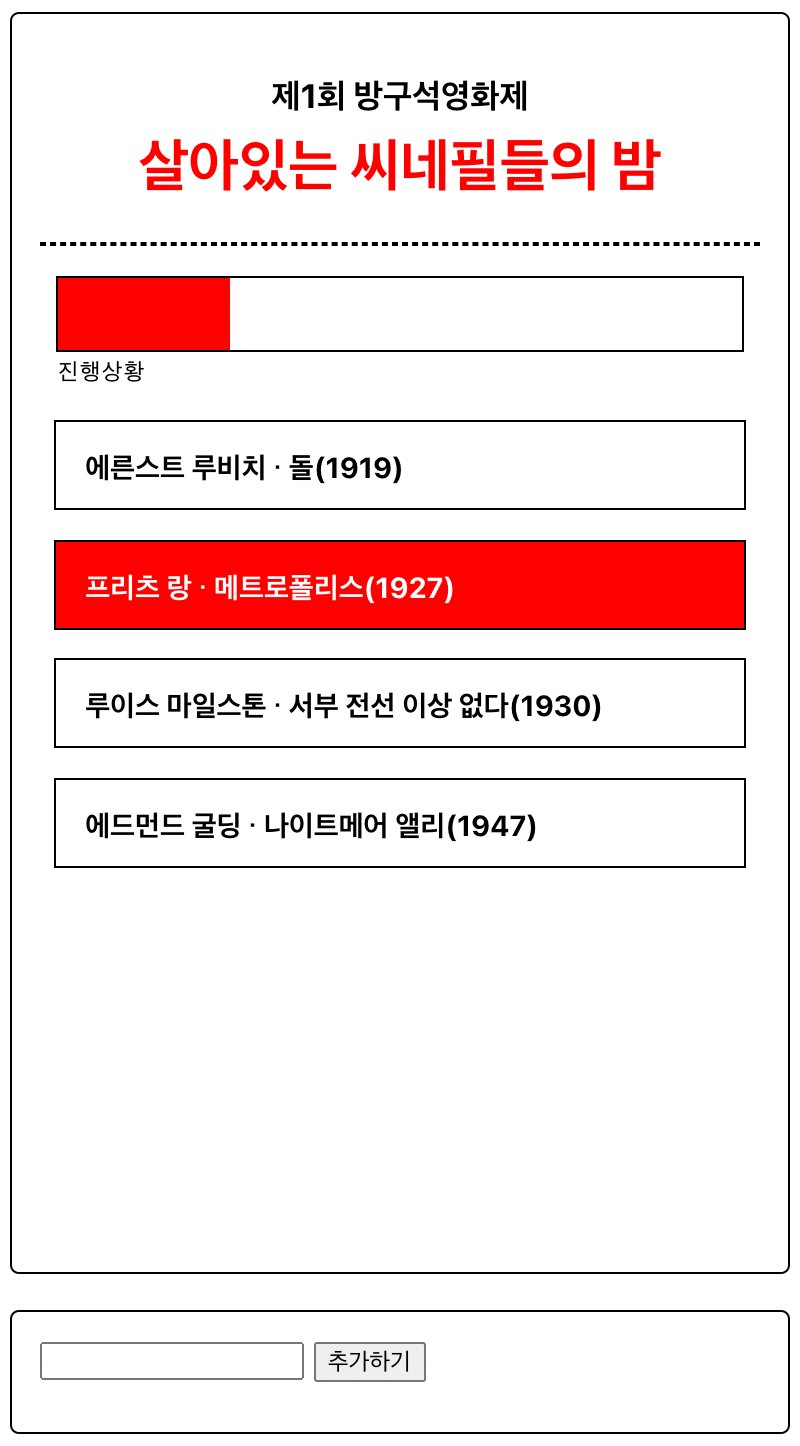
3.버킷리스트 색 바꾸기
BucketList.js
    return (
        <ListStyle>
            {my_lists.map((list, index) => {
                return (
                    <ItemStyle watched={list.watched}
                    className="list_item" key={index} onClick={() => {
                        history.push("/detail/"+index);
                    }}>
                            {list.title}
                    </ItemStyle>
                );
            })}
        </ListStyle>
);bucket.js의 initialState에서 true/false 여부를 나타내는 watched를 <ItemStyle>에 넣어줬다. 이제 이것을 styled-components에 상태값 props로 념겨줄 것이다.
const ItemStyle = styled.div`
background-color: ${(props) => props.watched? "red" : "white"};
color: ${(props) => props.watched? "white" : "black"};
`;$를 사용해서 props를 불러온 후 삼항 조건 연산자를 사용해 색상을 변경해주면 끝!
4. 프로그래스바 달기
✔️ 버킷리스트의 감상(true) %에 맞게 프로그래스바가 서서히 증가하는 애니메이션을 넣어주자!
Progress.js
const Progress = (props) => {
    return (
      <ProgressBar>
        <Highlight />
      </ProgressBar>
      )
}

const ProgressBar = styled.div`
width: 380px;
height: 40px;
border: 1px solid black;
margin: 0 auto;
margin-bottom: 30px;
`;

const Highlight = styled.div`
width: 50%;
height: 40px;
background: red;
transition: 1s;
`;
우선 Progress.js를 만든 뒤 App.js에 넣어준다.
다시 Progress 컴포넌트로 돌아와 <div> 프로그래스바를 생성한 후 적절한 style을 넣어준다. 배경과 진척도는 서로 다른 색상이어야 하므로 <ProgressBar>와 <Highlight>로 분리시켜주었다.
<Highlight>의 width를 50%로 지정해주지만 이 부분은 버킷리스트의 감상 갯수에 맞춰서 유동적으로 변해야 하는 구간이다. 그래서 width를 지정하기에 앞서 버킷리스트의 감상 갯수를 먼저 구해야 한다.
import { useSelector } from "react-redux";

const Progress = (props) => {
    const bucket_list = useSelector((state) => state.bucket.list);
    console.log(bucket_list);
  .
  .
}useSelector를 사용해 리덕스 데이터를 가져온다. 여기서 가져오는 데이터는 감상여부가 반영된 new_bucket_list다.
    let count = 0;
    bucket_list.map((b, idx) => {
        if(b.watched){
            count ++;
        }
    })
반복문 map을 사용해서 감상 갯수를 색출한다. (b.watched)가 ture라면 count를 하나씩 추가하도록 설정했다.
    return (
        <ProgressBar>
            <Highlight width={(count / bucket_list.length) * 100 + "%"}  />
        </ProgressBar>
    )
}

const Highlight = styled.div`
width: ${(props) => props.width};
height: 40px;
background: red;
transition: 1s;
`;
위에서 색출해낸 감상 갯수를 토대로 %를 계산해주면 된다. 감상갯수/전체 × 100 공식을 <Highlight>에 그대로 적용시키면 된다. 버킷리스트 색 바꾸기와 마찬가지로 styled-components로 props를 넘겨주면 끝.
단, 이 공식을 퍼센트 단위로 인식하기 위해선 문자열 %를 추가해야 한다. 혹은 styled-components에서 width: ${(props) => props.width}%;로 적는 것도 가능하다.
애니메이션은 단순한 효과를 사용하기 때문에 keyframes 대신 transition을 사용한다. duration 옆에 width 등 다른 속성을 적으면 해당 속성에만 적용되지만 아무것도 적지 않으면 모든 속성에 적용된다.