
앱을 만들다보면 반복되는 뷰들이 있다.
예를 들어, 여러개의 명함을 보여주고 싶다면 하나의 명함을 보여주기 위해 사진이 들어가는 이미지뷰, 이름이 들어가는 텍스트뷰, 휴대폰 번호가 있는 텍스트뷰 등등..많은 요소가 필요하다. 커스텀 뷰를 만들지 않고 개별적으로 레이아웃 안에 붙여넣기를 한다면 코드도 깔끔하지않고 원하는 것을 보여주기가 쉽지않다.
이럴때 커스텀뷰(CustomView)를 사용하면 코드의 재사용성을 높여준다.
결과물
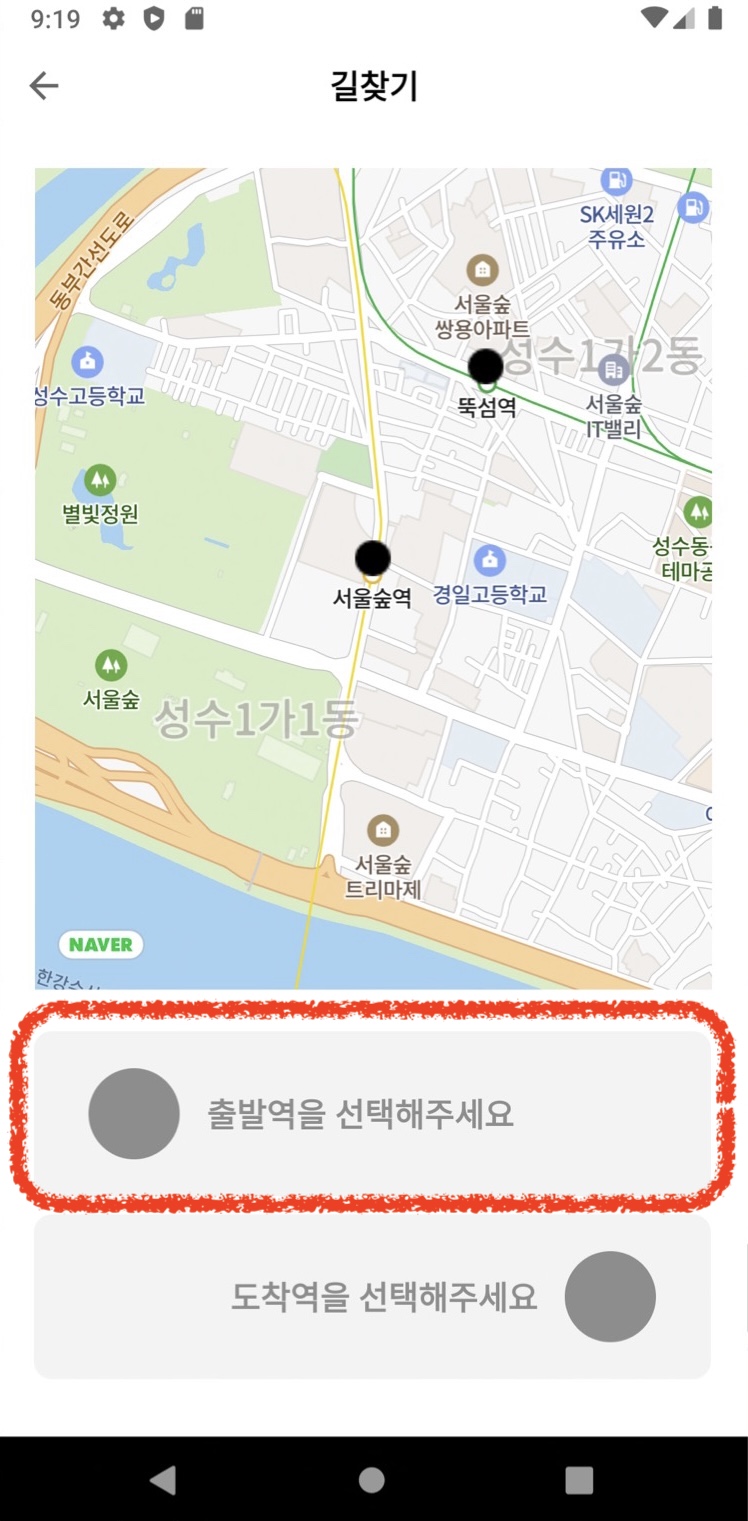
아래 이미지에서 선택되어진 출발역과 도착역을 CustomView로 만들었다. 빨간색으로 크레파스칠 된 부분이 CustomView하나에 해당한다.
구현하기
attrs.xml
/app/res/values 디렉토리에 attrs.xml 파일을 만든다. 여기서 설정하는 속성값은 내가 커스텀뷰를 생성할때 새로 정의하고 싶은 값을 설정한다. name은 나중에 이 리소스를 갖다쓸때 필요한 이름이다.
<?xml version="1.0" encoding="utf-8"?>
<resources>
    <declare-styleable name="place_layout">
        <attr name="imageSrc" format="reference|integer" />
        <attr name="text" format="reference|string" />
        <attr name="textColor" format="reference|integer"/>
    </declare-styleable>

</resources>
customview.xml
/app/src/layout 디렉토리에 커스텀뷰의 레이아웃을 정의하는 파일을 생성한다. 파일 이름은 무엇이든 상관없다.
<?xml version="1.0" encoding="utf-8"?>
<LinearLayout xmlns:android="http://schemas.android.com/apk/res/android"
    android:id="@+id/linear_layout"
    android:layout_width="match_parent"
    android:layout_height="wrap_content"
    android:background="@drawable/gray_rounded_rectangle"
    android:orientation="horizontal"
    android:layoutDirection="ltr"
    android:padding="20dp">

    <ImageView
        android:id="@+id/circle_image_view"
        android:layout_width="50dp"
        android:layout_height="50dp"
        android:layout_marginStart="10dp"
        android:layout_marginEnd="10dp"
        android:src="@drawable/gray_circle" />

    <TextView
        android:id="@+id/place_text_view"
        android:layout_width="0dp"
        android:layout_height="match_parent"
        android:layout_weight="1"
        android:layout_margin="5dp"
        android:gravity="center_vertical"
        android:textColor="@color/gray"
        android:textStyle="bold"
        android:textSize="18sp" />

</LinearLayout>
CustomView.kt
주석을 참고한다.
디폴트 설정은 아무것도 설정되지 않았을 경우 커스텀뷰의 속성이다.
디폴트 설정 밑으로 설정을 변경할 수 있는 함수다.
reverseView() 함수는 결과물에서 "도착역을 선택해주세요"의 커스텀뷰처럼 원래 layout 안의 요소의 위치를 바꾼것이다.
class CustomView : LinearLayout {

    lateinit var layout: LinearLayout
    lateinit var textView: TextView
    lateinit var imageView: ImageView

    constructor(context: Context?): super(context!!) {
        init(context)
    }

    constructor(context: Context?, attrs: AttributeSet?): super(context!!, attrs) {
        init(context)
        getAttrs(attrs)
    }

    // 초기화
    private fun init(context: Context?) {
        val view = LayoutInflater.from(context).inflate(R.layout.customview, this, false)
        addView(view)

        layout = findViewById(R.id.linear_layout)
        textView = findViewById(R.id.place_text_view)
        imageView = findViewById(R.id.circle_image_view)
    }

    private fun getAttrs(attrs: AttributeSet?) {
        val typeArray = context.obtainStyledAttributes(attrs, R.styleable.place_layout)
        setTypeArray(typeArray, attrs)
    }


    //디폴트 설정
    private fun setTypeArray(typedArray: TypedArray,  attrs: AttributeSet?) {

        val imgResId = typedArray.getResourceId(
            R.styleable.place_layout_imageSrc,
            R.drawable.ic_launcher_foreground
        )
        imageView.setImageResource(imgResId)

        val textColor = typedArray.getColor(R.styleable.place_layout_textColor, 0)
        textView.setTextColor(textColor)

        val text = typedArray.getText(R.styleable.place_layout_text)
        textView.text = text

        typedArray.recycle()
    }

    // circle_image_view의 src 변경
    fun setImageSrc(redID: Int) {
        imageView.setImageResource(redID)
    }

    // place_text_view의 text 변경
    fun setText(string: String) {
        textView.text = string
    }

    // place_text_view의 textColor 변경
    fun setTextColor(redID: Int) {
        textView.setTextColor(redID)
    }

    // linear_layout의 내부 요소 위치 반전
    fun reverseView() {
        layout.layoutDirection = View.LAYOUT_DIRECTION_RTL
        textView.textDirection = View.TEXT_DIRECTION_RTL
    }


}
참고
마치며
CustomView클래스를 생성할때 생성자를 @JvmOverloads를 사용하여 정의하는 것을 해봐야겠다

Android Developer