사전작업으로, 이전 Forge 설치하기를 선행해야 한다.
Forge 앱 만들기
- 앱을 만들려하는 디렉터리로 이동한다.
- forge create 명령어로 앱을 만든다.
forge create

? Enter a nme for your app: hello-world-app		//앱 이름을 입력합니다(최대 50자)
? Select a category: Show All					//UI kit 선택
? Select a template: jira-issue-panel-ui-kit //jira-issue-panel 선택- 만들어진 hello-world-app 디렉토리에는 아래와 같은 파일이 생성된다.
hello-world-app
|-- src
	> index.jsx 		//앱의 화면으로 출력되는 파일
|-- manifest.yml		//앱의 이름, ID, 권한 등 모듈 설정 파일
|-- package.json		//node.js 모듈 패키지 관리 파일
|-- package-lock.json	//의존성 트리 정보 기록
|-- README.md			//앱의 정보를 담은 텍스트 파일

(위 파일들에서 당장 사용하는 중요한 파일은 index.jsx와 manifest.yml 이다.)
패널 제목 변경
위의 앱을 만들 때 지정했던 jira-issue-panel 템플릿은 자동으로 패널의 title을 앱의 이름으로 정의한다.
이부분을 수정하려면 manifest.yml을 열어 title을 수정하면 된다.
여기서는 title을 hello-world-app에서 Forge app for Mia 변경한다.
modules:
  'jira:issuePanel':
    - key: hello-world-app-hello-world-panel
      function: main
      title: Forge app for Mia		//변경
      icon: https://developer.atlassian.com/platform/forge/images/issue-panel-icon.svg
  function:
    - key: main
      handler: index.run
app:
  id: '각자만의 앱 ID'
Jira에 앱 설치
자 이제 우리가 만든 아주 기본적인 앱을 Jira 사이트에 설치해보려 한다.
명령어 forge deploy는 우리가 만든 코드를 컴파일하고, 배포해준다.
컴파일 오류 내역도 표기한다.
- hello-world-app 최상위 디렉토리에서 앱을 배포
forge deploy- 배포한 앱을 Jira에 설치
forge install- install 명령어를 사용하면 어떤 제품, 사이트에 설치를 진행할지 여부를 묻는다.
Select the product your app uses.
? Select a product: Jira
Enter your site. For example, your-domain.atlassian.net
? Enter the site URL: https://각자만든지라.atlassian.net/
Installing your app onto an Atlassian site.
Press Ctrl+C to cancel.
Your app will be installed with the following scopes:
- read:me
? Do you want to continue? Yes
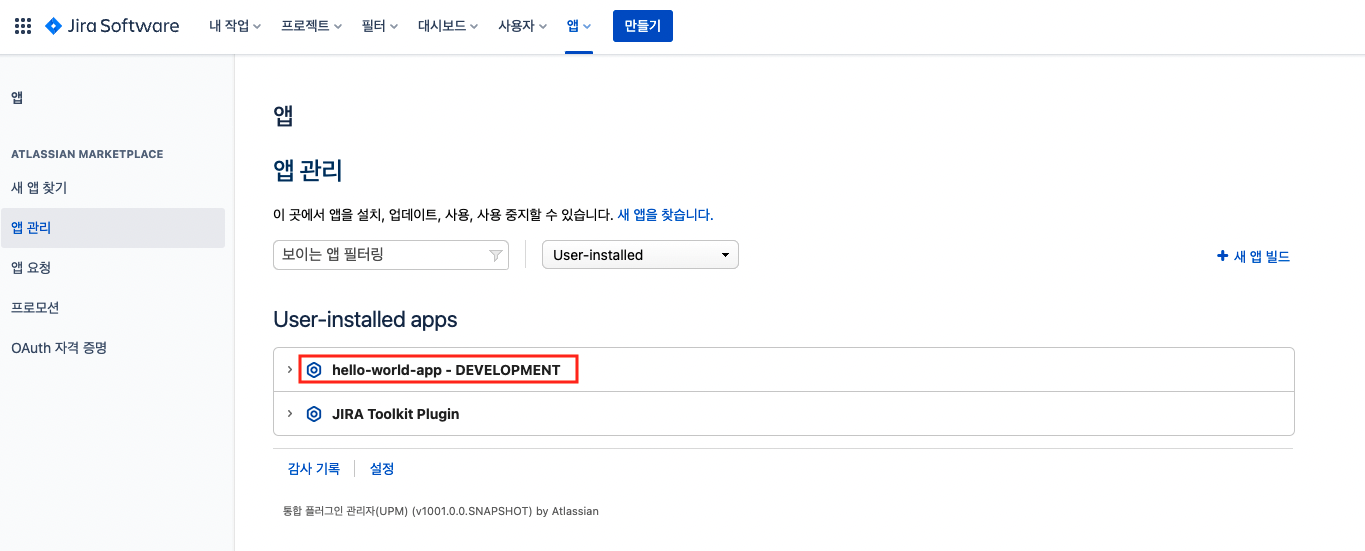
✔ Install complete!이렇게 하면 설치가 완료된 것이고, 우리의 Jira 사이트에 만들 Forge 앱이 설치된 것을 확인 할 수 있다.
그리고 우리가 만든 앱을 사용하려면 Jira 로드맵, 보드 등의 이슈 상세보기에서
앱을 선택하여 확인 할 수 있다.
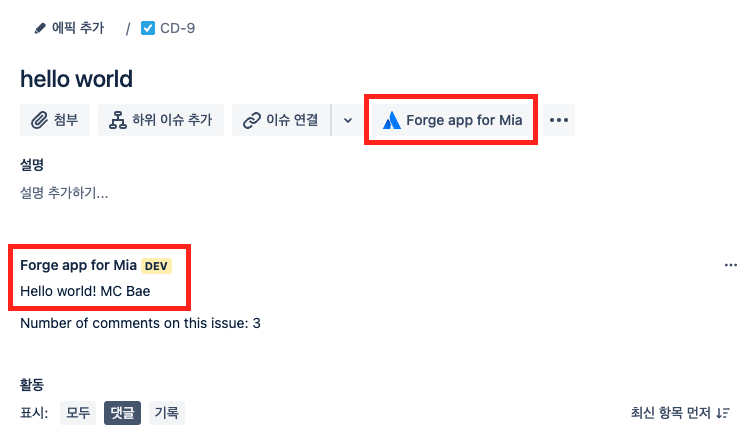
앱의 소스코드 대로 출력이 된다.
import api, { route } from "@forge/api";
import ForgeUI, { render, Fragment, Text, IssuePanel, useProductContext, useState } from "@forge/ui";

const fetchCommentsForIssue = async (issueIdOrKey) => {
  const res = await api
  .asUser()
  .requestJira(route`/rest/api/3/issue/${issueIdOrKey}/comment`);

  const data = await res.json();
  return data.comments;
};

const App = () => {
  const context = useProductContext();
  const [comments] = useState(async () => await fetchCommentsForIssue(context.platformContext.issueKey));

  console.log(`Number of comments on this issue: ${comments.length}`);

  return (
    <Fragment>
      <Text>
          Hello world! MC Bae
        </Text>
      <Text>
          Number of comments on this issue: {comments.length}
      </Text>
    </Fragment>
  );
};

export const run = render(
  <IssuePanel>
    <App />
  </IssuePanel>
);
만약 소스코드를 수정했거나 설정을 바꾸는 등 변경사항이 있으면 forge deploy로 수동 재배포 하면 된다.
앱 자동 배포
forge deploy는 앱을 수동으로 배포할 수 있게 하는 명령어다.
앱을 자동으로 배포하기 위해서는 forge tunnel을 사용하면 된다.
tunnel을 실행하면 다른 명령 실행 할 필요없이 페이지 새로고침만 하면 자동 배포된다.
tunnel 명령어를 사용하려면 Docker을 실행해야한다.
forge tunnel  //명령어 실행

-----출력 내용-----
Running your app locally with Docker. The tunnel displays your usage from everywhere
the app in the development environment is installed.
Press Ctrl+C to cancel.

Checking Docker image... 100%
Your Docker image is up to date.

Listening for requests on local port 37363...

Reloading code...
App code reloaded.
----------------
이제 tunnel을 통한 docker가 실행되는 동안에는 코드가 변경되더라도 자동으로 배포가 진행된다.
tunnel은 Ctrl+c로 닫을 수 있다.

꾸준한 성장