KA 테이블
- KA 테이블은 테이블 구현을 더욱 쉽게 만들어준다.
구현 과정
1. KA 테이블 다운로드 및 import
npm install ka-tableimport React, { useState } from "react";
import { ITableProps, kaReducer, Table } from "ka-table";
import { DataType } from "ka-table/enums";
import { DispatchFunc } from "ka-table/types";2. Table을 정의해준다.
const TableDemo: React.FC = () => {
const [tableProps, changeTableProps] = useState(tablePropsInit);
const dispatch: DispatchFunc = (action) => {
changeTableProps((prevState: ITableProps) => kaReducer(prevState, action));
};
return (
<Table
{...tableProps}
dispatch={dispatch}
/>
);
};
export default TableDemo;
- KA 테이블은 tableProps라는 state를 이용하여 table을 꾸미게 되는 방식이다.
3. 먼저, tableProps에 초기값을 정해주어야 한다.
-> 초기값을 정해주기 위한 함수를 만든다.
-> 이곳에는 당연히 행, 열에 무엇이 들어갈지를 정의한다.
- tablePropsInit의 기본적인 틀
const tablePropsInit: ITableProps = {
columns: [{}],
data: dataArray,
rowKeyField: 'id'
}- columns : 열에 들어갈 내용 정의
columns: [
{
key: "column1-1",
width: 150,
field: "column1",
title: "희망부서 1",
dataType: DataType.String,
style: { textAlign: "center" },
},
{
key: "column1-2",
width: 150,
field: "column1",
title: "희망부서 2",
dataType: DataType.String,
style: { textAlign: "center" },
},
{
key: "column2",
width: 150,
field: "column2",
title: "희망부서 3",
dataType: DataType.String,
style: { textAlign: "center" },
},
{
key: "column9",
width: 107,
title: "조치",
dataType: DataType.String,
style: { textAlign: "center" },
}
]- data : 각 열에 해당하는 내용이 뭐가 들어갈지 정의
- dataArray라는 함수를 따로 빼서 만들었다.
data: dataArray,const dataArray = Array(10)
.fill(undefined)
.map((_, index) => ({
column1: "Aromatic1Unit",
column2: "Aromatic2Unit",
id: index,
}));- rowKeyField : 행을 식별하기 위해서 사용되는 필드
rowKeyField: "id",- tablePropsInit 총 코드
const tablePropsInit: ITableProps = {
columns: [
{
key: "column1-1",
width: 150,
field: "column1",
title: "희망부서 1",
dataType: DataType.String,
style: { textAlign: "center" },
},
{
key: "column1-2",
width: 150,
field: "column1",
title: "희망부서 2",
dataType: DataType.String,
style: { textAlign: "center" },
},
{
key: "column2",
width: 150,
field: "column2",
title: "희망부서 3",
dataType: DataType.String,
style: { textAlign: "center" },
},
{
key: "column9",
width: 107,
title: "조치",
dataType: DataType.String,
style: { textAlign: "center" },
},
],
data: dataArray,
rowKeyField: "id",
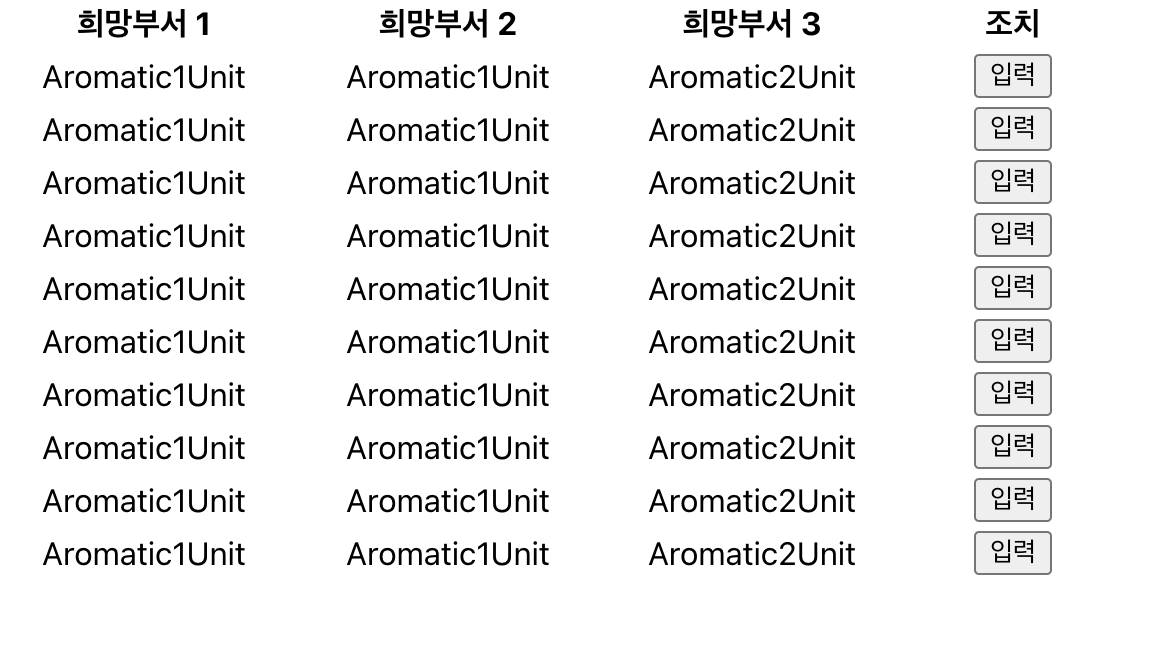
};4. 버튼을 만드려면 따로 childComponents를 이용하여 처리해주어야 한다.
-> 버튼 말고도 그냥 내용을 입력하기 위해서 사용해도 됨!
-> table에 속성 값으로 넣으면 끝
<Table
{...tableProps}
childComponents={{
cellText: {
content: (props) => {
switch (props.column.key) {
case "column9":
return <button>입력</button>;
}
},
},
}}
dispatch={dispatch}
/>총 코드
import "./Demo.scss";
import React, { useState } from "react";

import { ITableProps, kaReducer, Table } from "ka-table";
import { DataType } from "ka-table/enums";
import { DispatchFunc } from "ka-table/types";
const dataArray = Array(10)
  .fill(undefined)
  .map((_, index) => ({
    column1: "Aromatic1Unit",
    column2: "Aromatic2Unit",
    id: index,
  }));
const tablePropsInit: ITableProps = {
  columns: [
    {
      key: "column1-1",
      width: 150,
      field: "column1",
      title: "희망부서 1",
      dataType: DataType.String,
      style: { textAlign: "center" },
    },
    {
      key: "column1-2",
      width: 150,
      field: "column1",
      title: "희망부서 2",
      dataType: DataType.String,
      style: { textAlign: "center" },
    },
    {
      key: "column2",
      width: 150,
      field: "column2",
      title: "희망부서 3",
      dataType: DataType.String,
      style: { textAlign: "center" },
    },
    {
      key: "column9",
      width: 107,
      title: "조치",
      dataType: DataType.String,
      style: { textAlign: "center" },
    },
  ],
  data: dataArray,
  rowKeyField: "id",
};
const TableDemo: React.FC = () => {
const [tableProps, changeTableProps] = useState(tablePropsInit);
const dispatch: DispatchFunc = (action) => {
changeTableProps((prevState: ITableProps) => kaReducer(prevState, action));
};
return (
    <Table
      {...tableProps}
      childComponents={{
        cellText: {
          content: (props) => {
            switch (props.column.key) {
              case "column9":
                return <button>입력</button>;
            }
          },
        },
      }}
      dispatch={dispatch}
    />
);
};
export default TableDemo;
더 많은 기능
- key 값이 중복될 경우, key 값은 달라야 하기 때문에 field를 이용한다.

Hello Velog