Spring에서 Get 요청시 파라미터가 많다면 대부분 아래와 같은 형태로 객체로 wrapping 해서 사용하는 경우가 많습니다.
TestController.class
@RestController
@RequestMapping("/test")
public class TestController {

    @GetMapping
    public TestResultVo getTestResultVo(CustomParameter parameter) {
        // 중략
    }
}
최근 트렌드를 보면 외부에서 요청한 파라미터에 대해서 immutable 하게 사용 하는 경우가 많습니다.
CustomParameter.class 에 Lombok 의 @Getter 와 파라미터가 비어있는지 검증하는 메서드를 추가 한 후에 제대로 주입이 되는지 테스트를 진행 해보겠습니다.
CustomParameter.class
@Getter
public class CustomParameter {
    private String email;
    private String password;

		public boolean havaNotParameters() {
        return email == null && password == null;
    }
}
TestController.class
@RestController
@RequestMapping("/test")
public class TestController {

    @GetMapping
    public TestResultVo getTestResultVo(CustomParameter parameter) {
        if (parameter.havaNotParameters()) {
            throw new RuntimeException("파라미터가 주입되지 않음");
        }
        return null;
    }
}
파라미터인 email 과 password 가 전부 null 이면 RuntimeException 이 발생하게 구현했습니다.
아래는 Junit5를 이용한 테스트 코드 입니다.
TestControllerTest.class
@WebMvcTest(controllers = TestController.class)
class TestControllerTest {
@Autowired
private MockMvc mockMvc;
@Test
@DisplayName("Get 테스트")
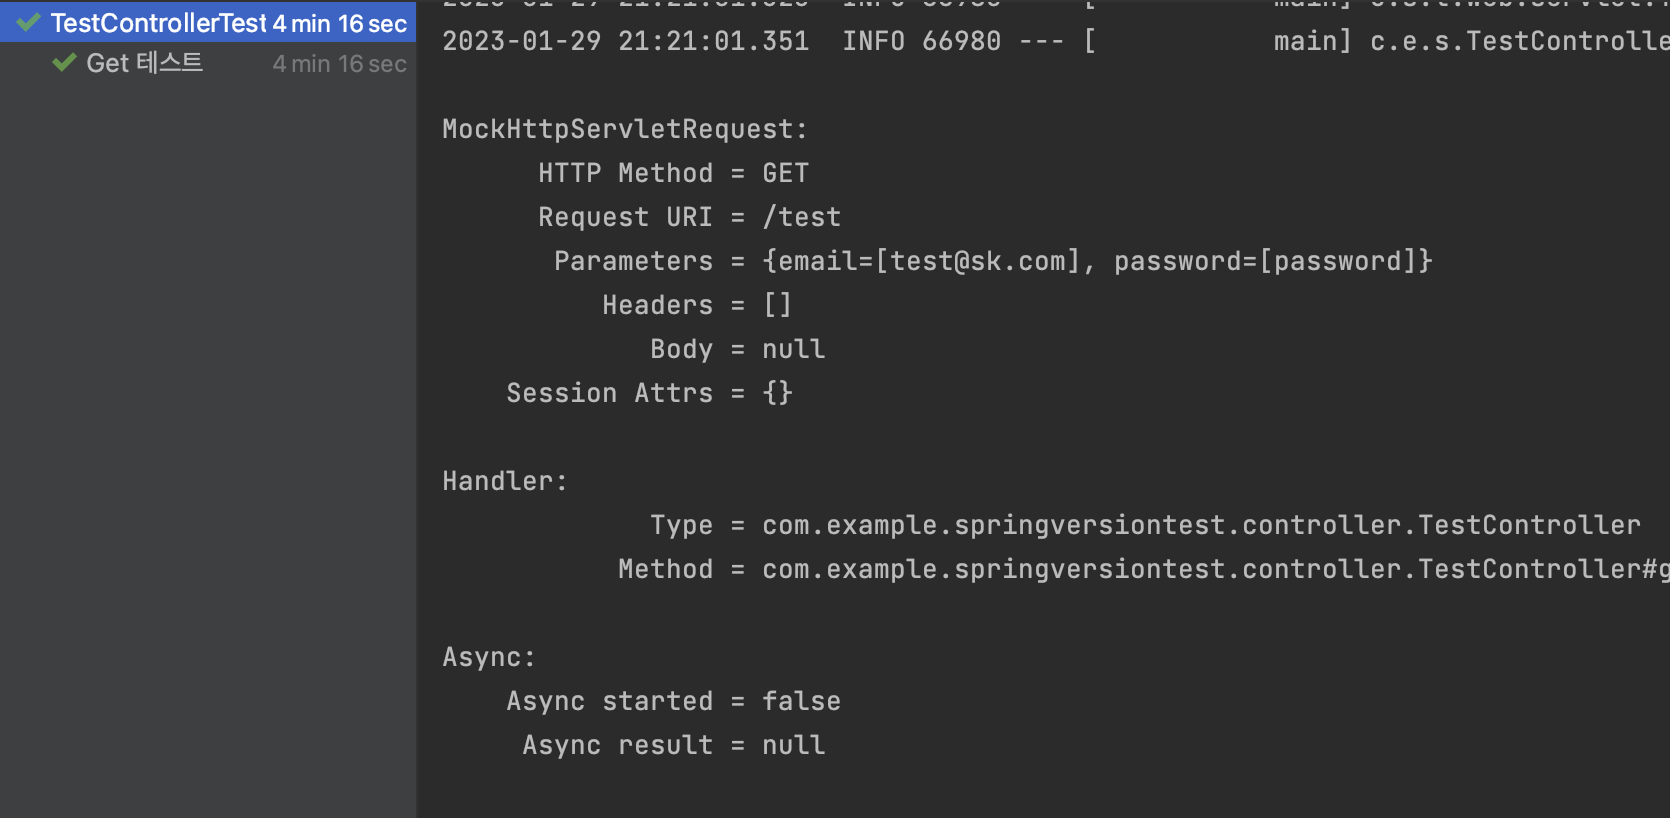
void getTestResultVoTest() throws Exception {
MultiValueMap<String, String> parameter = new LinkedMultiValueMap<>();
parameter.add("email","test@sk.com");
parameter.add("password","password");
mockMvc.perform(get("/test")
.params(parameter))
.andDo(print())
.andExpect(status().isOk());
}
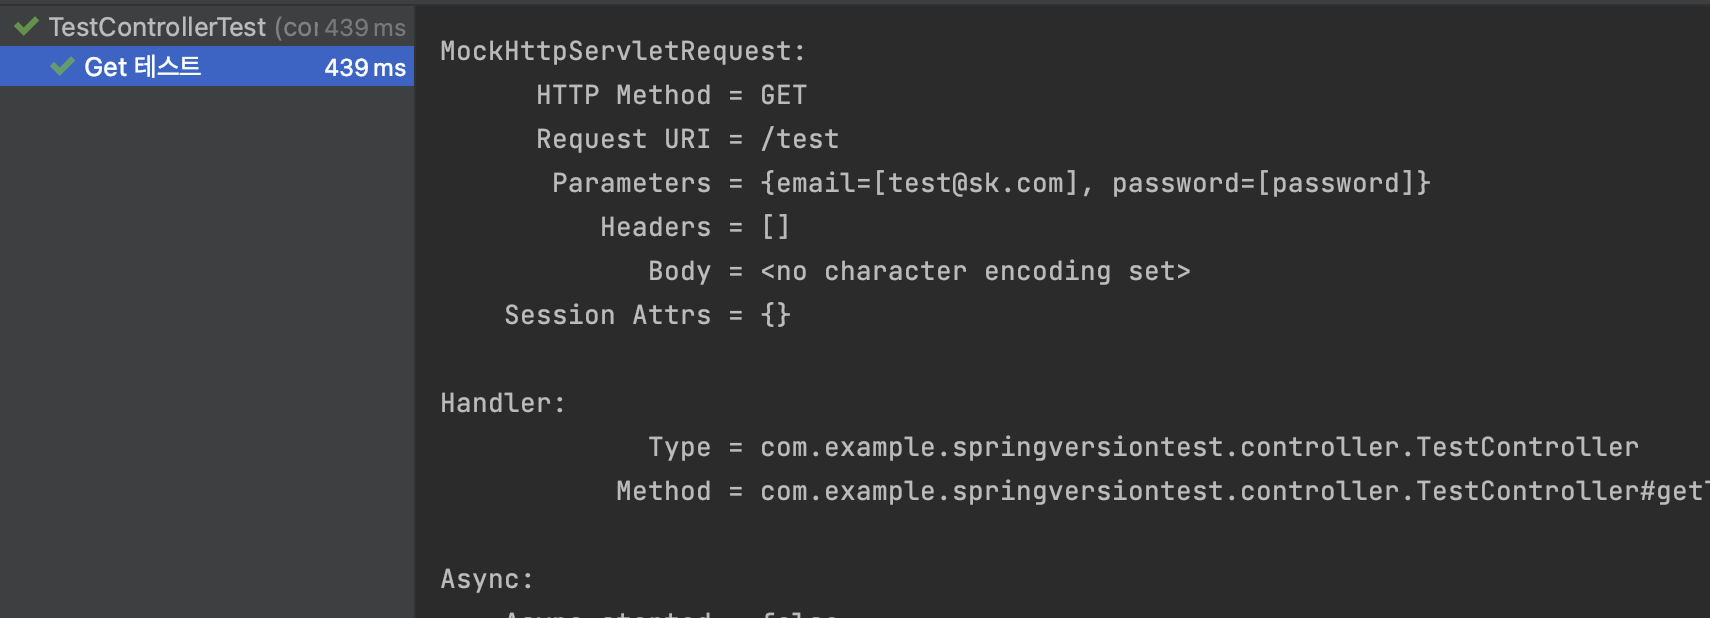
}테스트 코드를 실행하고 나서 결과를 보면 아래와 같이 RuntimeException 이 발생합니다.
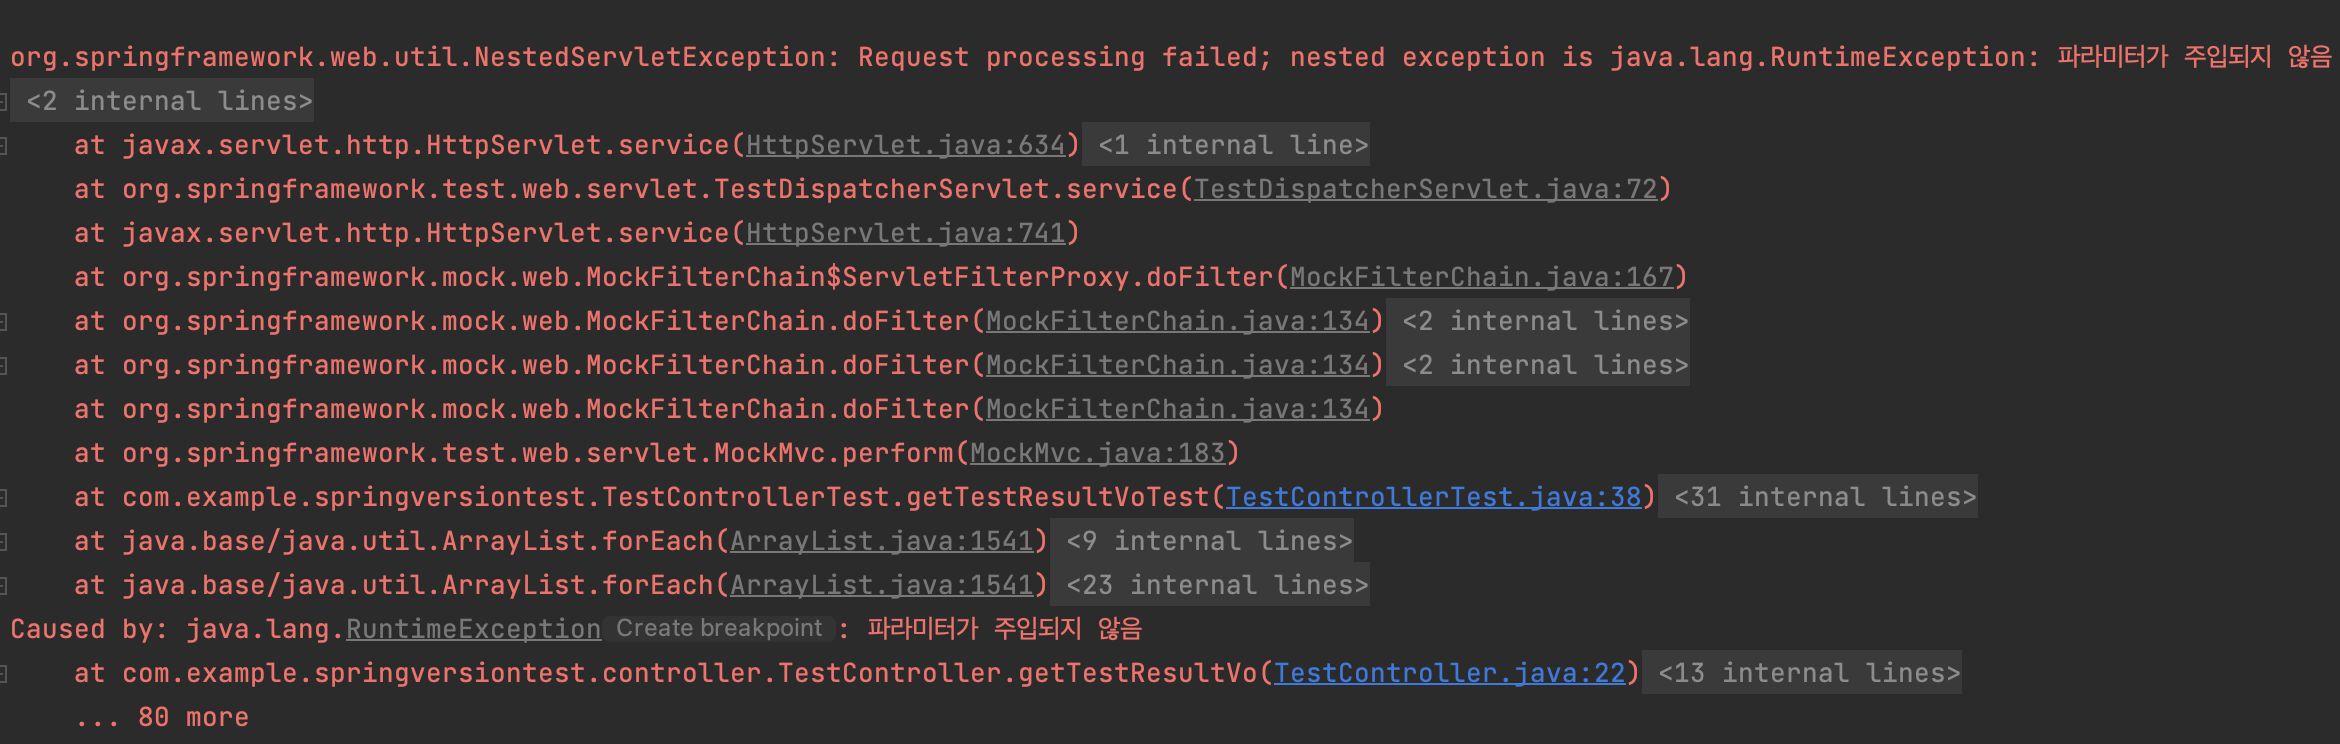
왜 이런 일이 발생하는 걸까요?
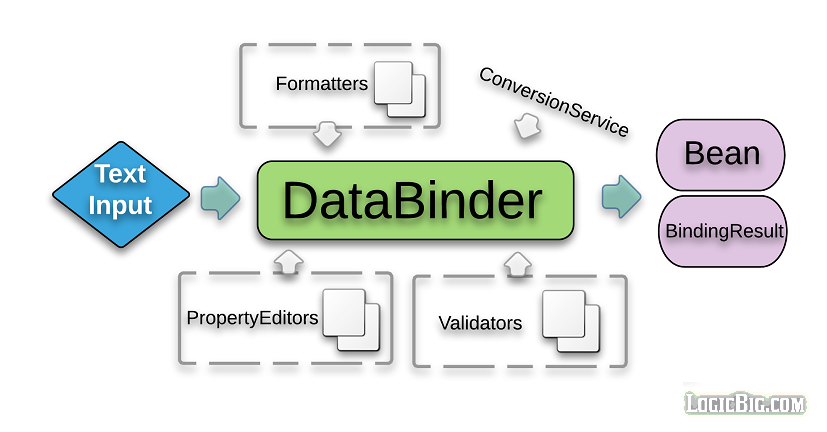
기본적으로 Spring은 Query Parameter에 대한 값을 객체에 binding 할때에 Setter, Constructor 방식을 사용합니다.
스프링은 해당 기능을 WebDataBind.class 를 통해서 처리하고 있는데 이 클래스는 DataBinder.class 를 상속 받고 있습니다.
public class WebDataBinder extends DataBinder {
								// 중략....
}
DataBinder.class 를 하나씩 내려가면서 확인해보면 initBeanPropertyAccess() 를 호출 합니다.
public class DataBinder implements PropertyEditorRegistry, TypeConverter {
												// 중략....

		// Initialize standard JavaBean property access for this DataBinder.
		// This is the default; an explicit call just leads to eager initialization.
		public void initBeanPropertyAccess() {
				Assert.state(this.bindingResult == null,
						"DataBinder is already initialized - call initBeanPropertyAccess before other configuration methods");
				this.bindingResult = createBeanPropertyBindingResult();
		}
												// 중략....
}
메서드의 주석을 확인해 보면 standard JavaBean property access 로 초기화 하는 모습을 볼 수 있습니다.
이를 통해 생성자 혹은 Setter 방식을 사용 한다는 것을 유추 해 볼 수 있습니다.
그렇기 때문에 해당 요청에서 값을 주입 받기 위해서는 CustomParameter.class 에는 Setter 또는 모든 필드 값을 파라미터로 받는 생성자가 있어야 주입 받을 수 있습니다.
CustomParameter.class
@Setter // @Setter 또는 @AllArgsConstructor
public class CustomParameter {

    private String email;

    private String password;

}
위와 같이 수정을 하고 테스트를 진행하면 아래와 같이 테스트가 통과하는 모습을 볼 수 있습니다.
그런데 이상하게도 Post 요청에서는 Getter 혹은 생성자가 없어도 Binding 되는 모습을 볼 수 있습니다.
한번 확인해 볼까요?
TestControllerTest.class
@RestController
@RequestMapping("/test")
public class TestController {

    @GetMapping
    public TestResultVo getTestResultVo(CustomParameter parameter) {
        if (parameter.havaNotParameters()) {
            throw new RuntimeException("파라미터가 주입되지 않음");
        }
        return null;
    }

    @PostMapping
    public TestResultVo postTestResultVo(@RequestBody CustomParameter parameter) {
        if (parameter.havaNotParameters()) {
            throw new RuntimeException("파라미터가 주입되지 않음");
        }
        return null;
    }
}
위와 같이 post 요청을 받기 위한 api 하나를 추가해 봅니다.
그리고 CustomParameter 에 추가했던 Setter 와 생성자를 지워주세요!
TestControllerTest.class
@WebMvcTest(controllers = TestController.class)
class TestControllerTest {
@Autowired
private MockMvc mockMvc;
@Test
@DisplayName("Get 테스트")
void getTestResultVoTest() throws Exception {
MultiValueMap<String, String> parameter = new LinkedMultiValueMap<>();
parameter.add("email","test@sk.com");
parameter.add("password","password");
mockMvc.perform(get("/test")
.params(parameter))
.andDo(print())
.andExpect(status().isOk());
}
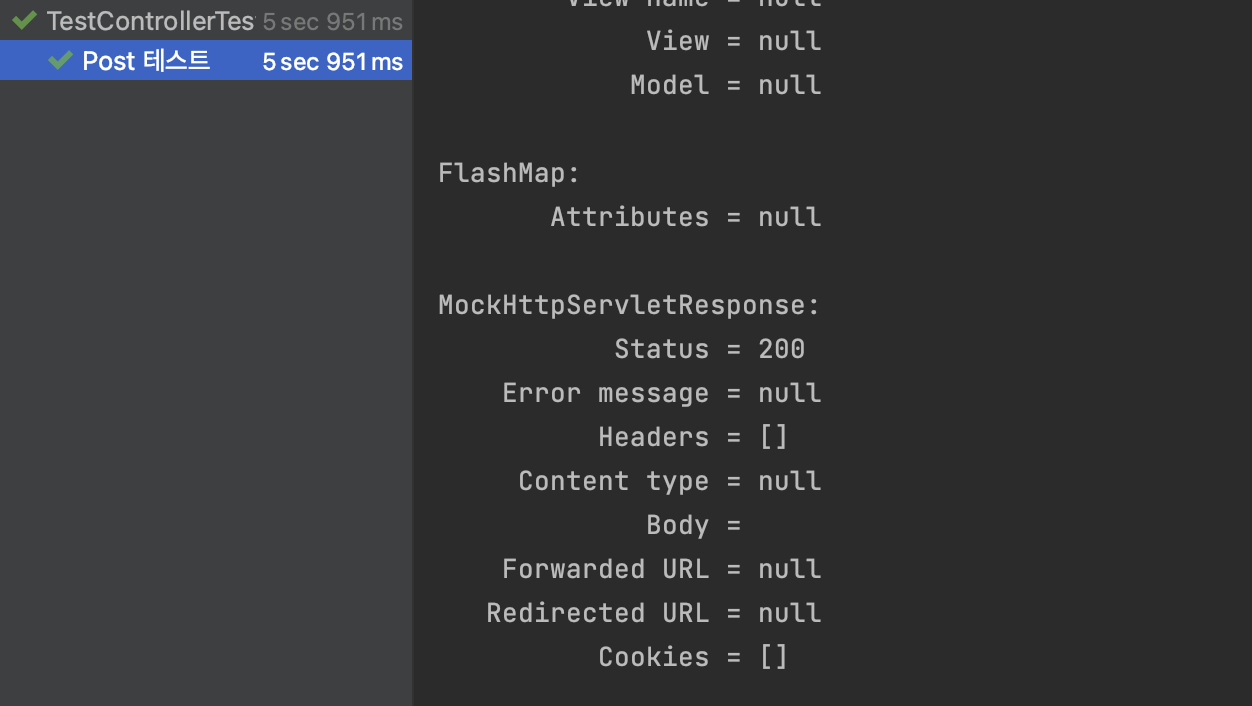
@Test
@DisplayName("Post 테스트")
void postTestResultVoTest() throws Exception {
String bodyData = "{\"email\" : \"test@sk.com\", \"password\" : \"password\"}";
mockMvc.perform(post("/test")
.contentType(MediaType.APPLICATION_JSON)
.content(bodyData))
.andDo(print())
.andExpect(status().isOk());
}
}Json 형태로 body 에 넣어서 요청을 해보겠습니다.

Post 요청에 대해서는 Setter 혹은 생성자가 필요가 없군요!
그 이유는 Spring 에서는 Json 에 대한 변환 작업을 Jackson 기반의 HttpMessageConverter 를 사용하고 있기 때문입니다.
확인을 위해서 org.springframework.http.converter.json 패키지에 있는 아래 클래스를 확인해 봅시다.
AbstractJackson2HttpMessageConverter.class
public abstract class AbstractJackson2HttpMessageConverter extends AbstractGenericHttpMessageConverter<Object> {

																	// 중략...

private Object readJavaType(JavaType javaType, HttpInputMessage inputMessage) throws IOException {
		try {
			if (inputMessage instanceof MappingJacksonInputMessage) {
				Class<?> deserializationView = ((MappingJacksonInputMessage) inputMessage).getDeserializationView();
				if (deserializationView != null) {
					return this.objectMapper.readerWithView(deserializationView).forType(javaType).
							readValue(inputMessage.getBody());
				}
			}
			return this.objectMapper.readValue(inputMessage.getBody(), javaType);
		}
		catch (MismatchedInputException ex) {  // specific kind of JsonMappingException
			throw new HttpMessageNotReadableException("Invalid JSON input: " + ex.getOriginalMessage(), ex, inputMessage);
		}
		catch (InvalidDefinitionException ex) {  // another kind of JsonMappingException
			throw new HttpMessageConversionException("Type definition error: " + ex.getType(), ex);
		}
		catch (JsonMappingException ex) {  // typically ValueInstantiationException
			throw new HttpMessageConversionException("JSON conversion problem: " + ex.getOriginalMessage(), ex);
		}
		catch (JsonProcessingException ex) {
			throw new HttpMessageNotReadableException("JSON parse error: " + ex.getOriginalMessage(), ex, inputMessage);
		}
	}
																	// 중략...
}
자세하게 알아보기는 힘들겠지만 read 메서드를 하나씩 훓터 내려가면 위 readJavaType 메서드를 호출 하는것을 볼 수 있습니다.
return this.objectMapper.readValue(inputMessage.getBody(), javaType);`내부적으로 objectMapper 가 body에 있는 값을 읽어 변경해 주고 있으므로 생성자나 혹은 Setter가 필요 없게 되는 것입니다.
자 그러면 본론으로 돌아와서 Get 요청에서 객체로 데이터를 binding 받을때 어떻게 immutable 하게 사용 할 수 있을까요?
다행이 해당 기능을 담당하고 있는 DataBinder.class 에서 필드에 바로 접근 할 수 있게 해주는 기능을 지원하고 있습니다.
public class DataBinder implements PropertyEditorRegistry, TypeConverter {
												// 중략....
		//Initialize direct field access for this DataBinder, as alternative to the default bean property access.
		public void initDirectFieldAccess() {
				Assert.state(this.bindingResult == null,
						"DataBinder is already initialized - call initDirectFieldAccess before other configuration methods");
				this.bindingResult = createDirectFieldBindingResult();
		}
												// 중략....
}
주석을 해석해서 확인해 보면 기본 bean 속성 액세스 대신 이 DataBinder에 대한 직접 필드 액세스를 초기화합니다. 라고 되어 있습니다.
내부 코드를 확인해 보면 DirectFieldAccessor.class 에 도달하게 됩니다.
public class DirectFieldAccessor extends AbstractNestablePropertyAccessor {
															// 중략....
	@Override
	@Nullable
	protected FieldPropertyHandler getLocalPropertyHandler(String propertyName) {
		FieldPropertyHandler propertyHandler = this.fieldMap.get(propertyName);
		if (propertyHandler == null) {
			Field field = ReflectionUtils.findField(getWrappedClass(), propertyName);
			if (field != null) {
				propertyHandler = new FieldPropertyHandler(field);
				this.fieldMap.put(propertyName, propertyHandler);
			}
		}
		return propertyHandler;
	}

															// 중략....
}
내부적으로 ReflectionUtils.class 를 이용하여 리플렉션을 사용하는 것을 확인 할 수 있습니다.
리플렉션을 통해서 값을 주입하기 때문에 setter와 생성자가 필요 없다는 것을 알게 되었습니다.
사용하는 쪽에서는 그냥제공해 주는 기능을 사용 하면 되겠습니다.
모든 컨트롤러에서 사용할 수 있게 아래와 같은 코드를 작성합니다.
TestControllerAdvice.class
@ControllerAdvice
public class TestControllerAdvice {

    @InitBinder
    public void initBinder(WebDataBinder binder) {
        binder.initDirectFieldAccess();
    }
}
그리고 나서 다시 테스트를 수행해 봅시다.
성공적으로 테스트가 성공하는 모습을 볼 수 있습니다.
또 다른 방법으로 프로젝트에서 Java 14 버전 이상을 사용하고 있다면 Record 를 사용하는 것도 방법입니다.
여기에서 Record 에 대한 설명을 자세히 할 수는 없겠지만 Record 키워드가 붙은 클래스는 데이터 클래스로써 불변이기 때문에 위와 같은 Binder 에 대한 수정 없이 불변 객체로 사용 할 수 있습니다.
CustomParameter 클래스를 아래와 같이 변경 해봅시다.
CustomParameter.class
public record CustomParameter(
        String email,
        String password
) {
    public boolean havaNotParameters() {
        return email == null && password == null;
    }
}
Binder의 설정 없이 테스트를 실행해 보면 성공하는 것을 볼 수 있습니다.