
O-RAN은 'Open Radio Access Network'의 약자로 각 회사의 무선 통신 장비를 표준화된 spec과 설계를 통하여 사용자에게 일관된 인터페이스와 상호 운용 가능성을 제공해주는 프로젝트이다. 특히 O-RAN SC는 기존 통신 장비에서는 제공하기 힘든 지능화된 SW와 설치 편의성을 제공해주며, 폐쇄적이던 통신 SW을 탈피하는 아키텍처를 가진다.
솔직히 잘 모르겠다. 그냥 재밌는 SW프로젝트라고 생각하면 된다.
O-RAN SC project는 여러 개의 project들로 구성되어있는데 Near-RT RIC, Non-RT RIC, SMO, AIMLFW 등등의 project들이있다. 재밌는 것은 통신 도메인 기반의 project지만, 통신에 대한 지식, spec 보다도 SW적인 요소에 대한 이해도를 필요로 한다는 것이다.
오늘은 AIMLFW 환경을 설정해보도록 하자.
https://docs.o-ran-sc.org/projects/o-ran-sc-aiml-fw-aimlfw-dep/en/latest/
위 page에서 자세하게 배포 방법에 대해 알려주고 있다. 통신 도메인에서는 보기 힘들 정도로 자세한 docs이다
1. 설치 전 준비

먼저, ubuntu22를 준비하도록 하자.
https://github.com/o-ran-sc/aiml-fw-aimlfw-dep/blob/master/tools/kubernetes/install_k8s.sh
가장 먼저 실행되는 kubernetes 설치 스크립트만 봐도 ubuntu-debian 계열을 상정하고 스크립트가 만들어진 것을 볼 수 있다. 또한, ubuntu20 버전도 위 script를 실행할 시에 error가 발생할 가능성이 있으니 ubuntu22로 준비하도록 하자.
ubuntu22가 준비되었다면 git, helm을 설치해주도록 하자.
sudo apt update
sudo apt install git-all
sudo apt install helm
이제 aiml-fw-aimlfw-dep code를 받도록 하자. 여기에 설치 스크립트들이 있다.
git clone https://github.com/o-ran-sc/aiml-fw-aimlfw-dep.git
cd aiml-fw-aimlfw-dep/
다음으로 sudo 계정으로 접속하도록 하자.
sudo -i앞으로 설치할 kubernetes관련 script들을 sudo가 아니면 실행되지 않을 것들이 많기 때문이다.
2. 설치
이제 설치를 진행해보도록 하자.
bin/install_traininghost.sh다음의 스크립트를 실행시키면, 가장 처음에 containerd, kubernetes v1.28이 자동 설치되고, nerdctl, kustomize도 설치된다. 이렇게 깔끔히 정리하기 쉽지않은데 아주 속이 편안했다.
다음으로 nfs-provisioner가 설치되고, leofs pod가 올라올 때까지 wait상태에 빠질 것이다. 꽤 오랜 시간이 필요하므로, 다른 terminal을 열고 주기적으로 확인해보도록 하자.
watch kubectl get po -A필자의 경우, 이런 상태에서 hang이 걸렸었다.
NAMESPACE     NAME                                               READY   STATUS    RESTARTS   AGE
default       nfs-subdir-external-provisioner-7484d5b48d-rg99c   0/1     Pending   0          7m15s
kube-system   calico-kube-controllers-55fc758c88-b5v7t           1/1     Running   0          12m
kube-system   calico-node-v6x4q                                  1/1     Running   0          12m
kube-system   coredns-57575c5f89-77wzh                           1/1     Running   0          12m
kube-system   coredns-57575c5f89-cqqn7                           1/1     Running   0          12m
kube-system   etcd-ubuntu20                                      1/1     Running   31         12m
kube-system   kube-apiserver-ubuntu20                            1/1     Running   32         12m
kube-system   kube-controller-manager-ubuntu20                   1/1     Running   0          12m
kube-system   kube-proxy-z9x9r                                   1/1     Running   0          12m
kube-system   kube-scheduler-ubuntu20                            1/1     Running   31         12m
kubeflow      leofs-55c5d65586-q49vq                             0/1     Pending   0          53s
??!

ContainerCreating 상태도 아니고 Pending이면 무언가가 잘못된 것이다. 이럴 때는 kubectl describe로 문제를 찾아보도록 하자.
kubectl describe pod nfs-subdir-external-provisioner-7484d5b48d-rg99c

Name:           nfs-subdir-external-provisioner-7484d5b48d-rg99c
Namespace:      default
Priority:       0
Node:           <none>
...
Events:
  Type     Reason            Age                   From               Message
  ----     ------            ----                  ----               -------
  Warning  FailedScheduling  2m2s (x2 over 7m26s)  default-scheduler  0/1 nodes are available: 1 node(s) had untolerated taint {node-role.kubernetes.io/master: }. preemption: 0/1 nodes are available: 1 Preemption is not helpful for scheduling.
아하? master node에 대한 taint가 설정되어 있어서, master node에 pod를 배치시키지 못하고 있는 상태였다. 필자의 경우 다음의 명령어로 해결하였다.
kubectl taint node ubuntu20 node-role.kubernetes.io/master:NoSchedule-install_traininghost.sh script에서는 아래와 같이 taint를 지워줬는데, 필자의 경우는 아마 이전에 설치했었던 kubernetes 설정과 충돌해서 이런 것 같다.
kubectl taint nodes --all node-role.kubernetes.io/control-plane-대부분 정상적으로 설치될 것으로 예상된다.
이후, 꽤 오랜 시간을 설치해야한다. kubernetes 환경 상 pod들이 죽고, 살아나는 것은 큰 일이 아니므로 CrashLoopBackOff가 발생해도 설치를 중단하지 말도록 하자.
kubeflow metadata-grpc-deployment-6fc8546b5-5msb7 0/1 CrashLoopBackOff 6 (18s ago) 9m2s끈기와 인내심을 가지고 기다리다보면, 설치가 완료된다.
...
...Successfully got an update from the "local" chart repository
...Successfully got an update from the "nfs-subdir-external-provisioner" chart repository
...Successfully got an update from the "bitnami" chart repository
Update Complete. ⎈Happy Helming!⎈
Saving 1 charts
Downloading aimlfw-common from repo http://127.0.0.1:8879/charts
2024-07-16T20:55:58.578+0900	INFO	[16] Request served	{"path": "/charts/charts/aimlfw-common-1.0.0.tgz", "comment": "", "clientIP": "127.0.0.1", "method": "GET", "statusCode": 200, "latency": "96.209µs", "reqID": "2f9201e7-640e-47d9-9aaa-4a7ce919065a"}
Deleting outdated charts
Installing modelmgmtservice
NAME: modelmgmtservice
LAST DEPLOYED: Tue Jul 16 20:55:58 2024
NAMESPACE: default
STATUS: deployed
REVISION: 1
TEST SUITE: None
root@ubuntu20:~/oran/aiml-fw-aimlfw-dep#
3. pod 확인
제대로 설치되었는 지 확인해보도록 하자.
kubectl get po -A

NAMESPACE      NAME                                               READY   STATUS    RESTARTS      AGE
default        nfs-subdir-external-provisioner-7484d5b48d-rg99c   1/1     Running   0             60m
kube-system    calico-kube-controllers-55fc758c88-b5v7t           1/1     Running   0             66m
kube-system    calico-node-v6x4q                                  1/1     Running   0             66m
kube-system    coredns-57575c5f89-77wzh                           1/1     Running   0             66m
kube-system    coredns-57575c5f89-cqqn7                           1/1     Running   0             66m
kube-system    etcd-ubuntu20                                      1/1     Running   31            66m
kube-system    kube-apiserver-ubuntu20                            1/1     Running   32            66m
kube-system    kube-controller-manager-ubuntu20                   1/1     Running   0             66m
kube-system    kube-proxy-z9x9r                                   1/1     Running   0             66m
kube-system    kube-scheduler-ubuntu20                            1/1     Running   31            66m
kubeflow       cache-deployer-deployment-9b867dd9d-lm6kz          1/1     Running   0             47m
kubeflow       cache-server-b8c959df8-qvzmc                       1/1     Running   0             47m
kubeflow       leofs-55c5d65586-q49vq                             1/1     Running   0             54m
kubeflow       metadata-envoy-deployment-6975f9cfdc-8g6tz         1/1     Running   0             47m
kubeflow       metadata-grpc-deployment-6fc8546b5-5msb7           1/1     Running   7 (38m ago)   47m
kubeflow       metadata-writer-788d4d7f48-mgcrp                   1/1     Running   3 (35m ago)   47m
kubeflow       minio-6d6d45469f-9l6hp                             1/1     Running   0             47m
kubeflow       ml-pipeline-58cd4c4876-n7m4x                       1/1     Running   1 (42m ago)   47m
kubeflow       ml-pipeline-persistenceagent-5fd65c7b47-pfkfm      1/1     Running   1 (41m ago)   47m
kubeflow       ml-pipeline-scheduledworkflow-798447d55c-9wsxg     1/1     Running   0             47m
kubeflow       ml-pipeline-ui-c974b5f9b-79p5l                     1/1     Running   0             47m
kubeflow       ml-pipeline-viewer-crd-67bb574c84-cb8ck            1/1     Running   0             47m
kubeflow       ml-pipeline-visualizationserver-8677c5887b-nxpnp   1/1     Running   0             47m
kubeflow       mysql-6878bbff69-8kzqt                             1/1     Running   0             47m
kubeflow       workflow-controller-7f566bfbf4-52pkw               1/1     Running   0             47m
traininghost   aiml-dashboard-76f5b94bf6-z84ld                    1/1     Running   0             36m
traininghost   aiml-notebook-7ffd449456-jzsd5                     1/1     Running   0             35m
traininghost   cassandra-0                                        1/1     Running   0             37m
traininghost   data-extraction-7579449cd9-v9rqr                   1/1     Running   0             36m
traininghost   kfadapter-794d7bcdc7-hjs4v                         1/1     Running   0             36m
traininghost   modelmgmtservice-585d758876-5hqfx                  1/1     Running   0             35m
traininghost   tm-cc4cf8496-qvlst                                 1/1     Running   0             36m
traininghost   tm-db-postgresql-0                                 1/1     Running   0             46m
모두 다 Running상태라면 성공한 것이다.
마지막으로 service들이 정상적으로 동작하는 지 눈으로 확인해보자. NodePort로 열린 service에 접근할 수 있는 지 확인해보도록 하자.
kubectl get service -A
NAMESPACE      NAME                              TYPE        CLUSTER-IP       EXTERNAL-IP   PORT(S)                               AGE
default        kubernetes                        ClusterIP   10.96.0.1        <none>        443/TCP                               70m
kube-system    kube-dns                          ClusterIP   10.96.0.10       <none>        53/UDP,53/TCP,9153/TCP                70m
kubeflow       cache-server                      ClusterIP   10.109.153.249   <none>        443/TCP                               51m
kubeflow       leofs                             NodePort    10.103.174.169   <none>        8080:32080/TCP                        58m
kubeflow       metadata-envoy-service            ClusterIP   10.102.56.54     <none>        9090/TCP                              51m
kubeflow       metadata-grpc-service             ClusterIP   10.102.119.113   <none>        8080/TCP                              51m
kubeflow       minio-service                     ClusterIP   10.103.156.156   <none>        9000/TCP                              51m
kubeflow       ml-pipeline                       ClusterIP   10.108.139.67    <none>        8888/TCP,8887/TCP                     51m
kubeflow       ml-pipeline-ui                    ClusterIP   10.104.120.107   <none>        80/TCP                                51m
kubeflow       ml-pipeline-visualizationserver   ClusterIP   10.101.6.161     <none>        8888/TCP                              51m
kubeflow       mysql                             ClusterIP   10.103.80.148    <none>        3306/TCP                              51m
traininghost   aiml-dashboard                    NodePort    10.107.94.17     <none>        32005:32005/TCP                       39m
traininghost   aiml-notebook                     NodePort    10.108.208.101   <none>        18888:32088/TCP                       39m
traininghost   cassandra                         ClusterIP   10.98.204.41     <none>        9042/TCP,8080/TCP                     41m
traininghost   cassandra-headless                ClusterIP   None             <none>        7000/TCP,7001/TCP,7199/TCP,9042/TCP   41m
traininghost   data-extraction                   NodePort    10.104.82.214    <none>        32000:32000/TCP                       40m
traininghost   kfadapter                         ClusterIP   10.105.214.109   <none>        5001/TCP                              40m
traininghost   modelmgmtservice                  NodePort    10.106.24.123    <none>        8082:32006/TCP                        39m
traininghost   tm                                NodePort    10.110.31.244    <none>        32002:32002/TCP                       40m
traininghost   tm-db-postgresql                  ClusterIP   10.98.48.61      <none>        5432/TCP                              50m
traininghost tm-db-postgresql-hl ClusterIP None <none> 5432/TCP 50maiml-dashboard가 32005 port로 열린 것을 볼 수 있다. AIMLFW가 설치된 host IP로 해당 port를 접근해보도록 하자. 가령 192.168.92.204이면 192.168.92.204:32005에 접속하면 된다.
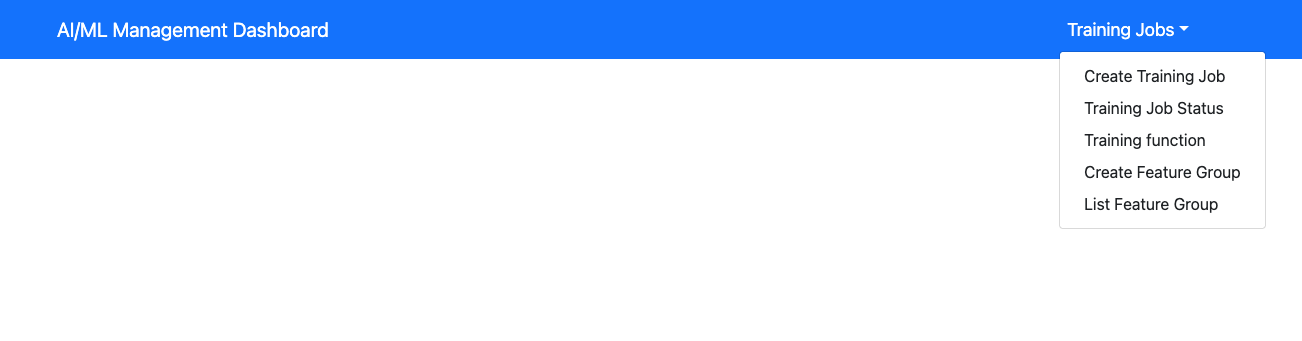
다음의 page가 나올 것이다. Create Training Job을 눌러보면 아래의 page가 나온다.
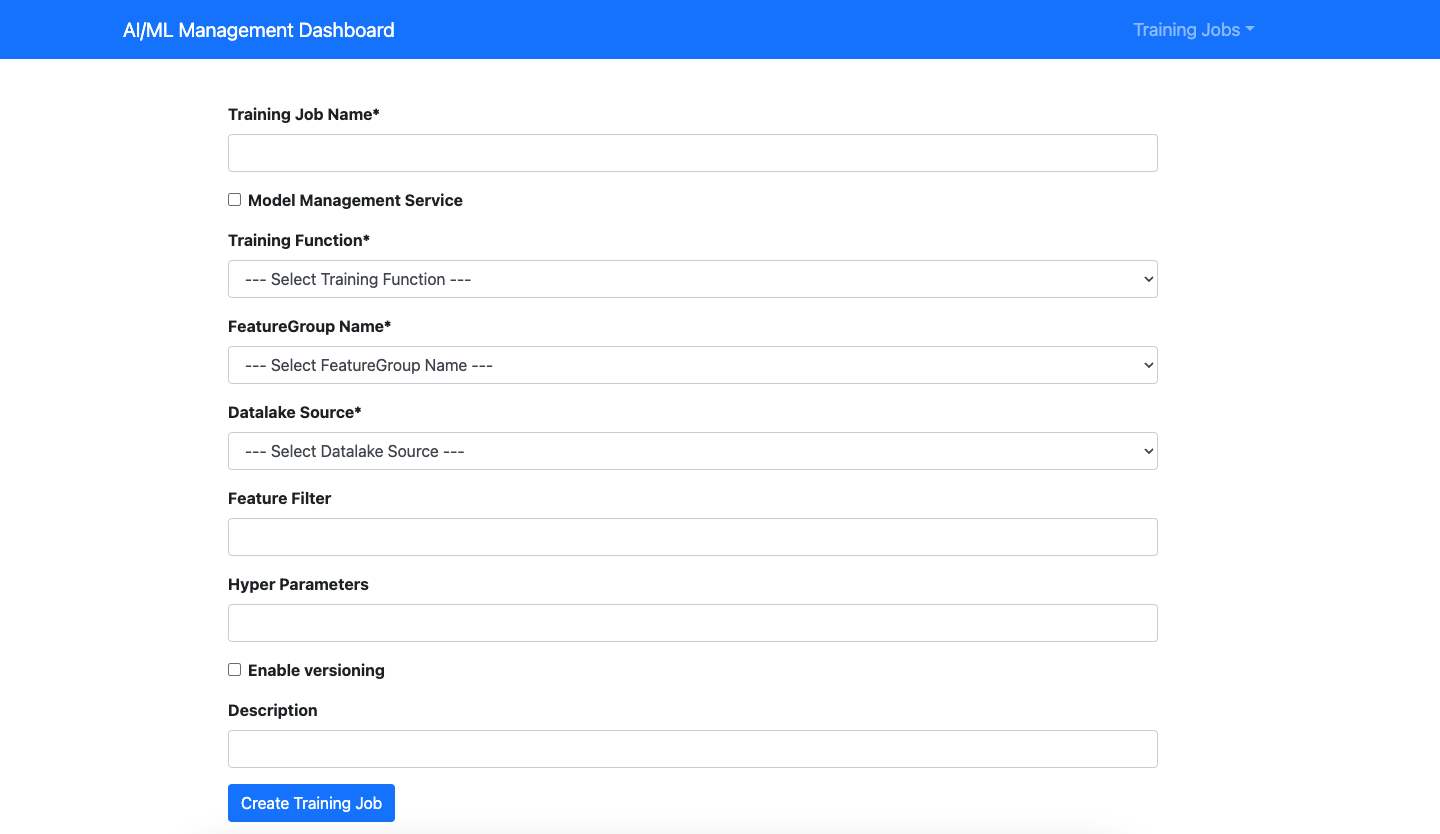
정상적으로 설치된 것을 확인했다. 물론 다른 pod들이 정상 동작한다는 보장은 없지만, 이에 대해서는 추후에 더 확인해보도록 하자.
마지막으로 32088/notebooks/qoe-pipeline.ipynb에도 접속해보도록 하자.
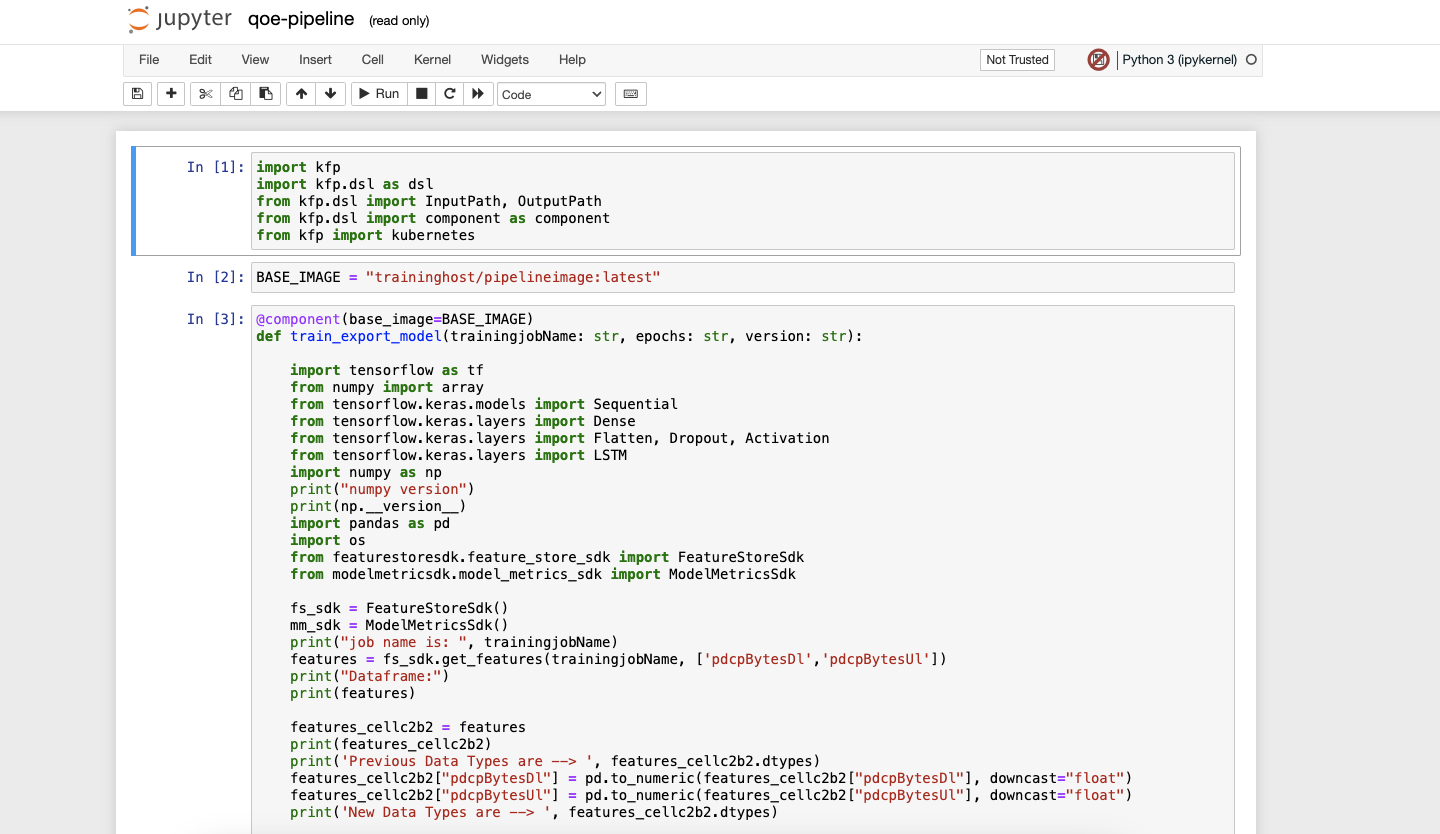
jupyter nodebook도 잘 접속되는 것을 확인하였다.

아뇨
4. InfluxDB 설정
사실 앞부분에서 생략한 과정이 있는데, receipe를 설정하여 influxDB를 datalake로 연결해놓지 않았다.
RECIPE_EXAMPLE/example_recipe_latest_stable.yaml 해당 파일을 확인하면 helm chart value값이 나온다.
traininghost:
  ip_address: <Fill IP of host>
tm:
  image:
    repository: nexus3.o-ran-sc.org:10002/o-ran-sc/aiml-fw-awmf-tm-docker
    pullPolicy: IfNotPresent
    # Overrides the image tag whose default is the chart appVersion.
    tag: "2.0.0"
  pipelines: {"timeseries": "qoe_pipeline_h_release"}

...

datalake:
  influxdb:
    host: <Fill IP of datalake>
    port: <Fill port of datalake>
    orgname: <Fill org name configured in datalake>
    bucket: <Fill bucket info of data in datalake>
    token:  <Fill token info to access data>
...Fill부분을 채워넣어야 하는데, 먼저 채워넣을 수 있는 부분은 ip_address로 localhost나 aimlfw가 배포된 node의 IP를 넣어주면 된다.
traininghost:
  ip_address: localhost
tm:
  ...
이렇게 넣어주었다.
다음으로 influxDB에 관련된 설정값들은 influxDB를 배포한 다음 확인할 수 있다.
helm repo add bitnami https://charts.bitnami.com/bitnami
helm install my-release bitnami/influxdb --version 5.13.5
잘 배포되었는 지 확인해보도록 하자.
 kubectl get po
NAME                                               READY   STATUS    RESTARTS   AGE
my-release-influxdb-5d5d95cf8b-vpgg7               1/1     Running   0          171m
nfs-subdir-external-provisioner-7484d5b48d-rg99c   1/1     Running   0          4h32m
my-release-influxdb-5d5d95cf8b-vpgg7 pod가 잘 배포되었다. 이제 이 pod에 있는 influx cli로 token값을 가져와보도록 하자.
kubectl exec -it my-release-influxdb-5d5d95cf8b-vpgg7 -- cat bitnami/influxdb/influxd.bolt | tr -cd "[:print:]"

Ih\x@0d5aea2c2f026000{"id":"0d5aea2c2f026000","token":"W8SyiYioyRCKPP4DVMWd","status"...token값만 알면 되기 때문에 맨 앞만 보면된다. 필자의 경우 "W8SyiYioyRCKPP4DVMWd"가 token값이었다.
다음으로 influxDB에 bucket을 만들도록하자. SQL에서의 table정도로 생각하면 된다.
export INFLUXDB_TOKEN=W8SyiYioyRCKPP4DVMWd
kubectl exec -it my-release-influxdb-5d5d95cf8b-vpgg7 -- influx bucket create -n UEData -o primary -t ${INFLUXDB_TOKEN}

ID			Name	Retention	Shard group duration	Organization ID		Schema Type
f78124bd87f69df5	UEData	infinite	168h0m0s		c35659312f917dac	implicit
위의 token값을 이용하여 UEData bucket을 만들고 org는 primary로 설정한 것이다.
이제 influxDB를 외부에서 접근할 수 있도록 service를 열어주도록 하자.
kubectl port-forward svc/my-release-influxdb 8086:80868086 port가 외부로 포워딩되기 때문에, 다른 app들도 우리 cluster의 influxdb에 접근할 수 있게 되었다.
다음으로 influxDB를 사용하는 실제 app을 배포해보도록 하자.
git clone -b f-release https://gerrit.o-ran-sc.org/r/ric-app/qp
cd qp
라이브러리 설치를 위해 venv를 설정해주고 다음의 package를 설치하자.
sudo -i
python3 -m venv .venv
source .venv/bin/activate
pip3 install pandas
pip3 install influxdb_client

cd ./qp
qp direcotry를 보면 insert.py 파일이 있을 것이다. 다음과 같이 바꾸도록 하자.
- insert.py
import pandas as pd
from influxdb_client import InfluxDBClient, Point
from influxdb_client.client.write_api import SYNCHRONOUS
import datetime

org="primary"
token="W8SyiYioyRCKPP4DVMWd"
bucket="UEData"

class INSERTDATA:

   def __init__(self):
        self.client = InfluxDBClient(url= "http://localhost:8086", token=token, org=org)


def explode(df):
     for col in df.columns:
             if isinstance(df.iloc[0][col], list):
                     df = df.explode(col)
             d = df[col].apply(pd.Series)
             df[d.columns] = d
             df = df.drop(col, axis=1)
     return df


def jsonToTable(df):
     df.index = range(len(df))
     cols = [col for col in df.columns if isinstance(df.iloc[0][col], dict) or isinstance(df.iloc[0][col], list)]
     if len(cols) == 0:
             return df
     for col in cols:
             d = explode(pd.DataFrame(df[col], columns=[col]))
             d = d.dropna(axis=1, how='all')
             df = pd.concat([df, d], axis=1)
             df = df.drop(col, axis=1).dropna()
     return jsonToTable(df)


def time(df):
     df.index = pd.to_datetime(pd.date_range(start=datetime.datetime.utcnow(), freq='10ms', periods=len(df)))
     df['measTimeStampRf'] = df['measTimeStampRf'].apply(lambda x: str(x))

     return df


def populatedb():
     df = pd.read_json('cell.json.gz', lines=True)
     df = df[['cellMeasReport']].dropna()
     df = jsonToTable(df)
     df = time(df)
     db = INSERTDATA()
     write_api = db.client.write_api(write_options=SYNCHRONOUS)
     write_api.write(bucket="UEData",record=df, data_frame_measurement_name="liveCell",org=org)
     query_api = db.client.query_api()
     query = f'from(bucket: "{bucket}") |> range(start: -10000d)'
     result = query_api.query(org=org, query=query)
     results = []
     for table in result:
        for record in table.records:
            results.append((record.get_field(), record.get_value()))
     print(results)

print("---start algorithm----")
populatedb()
print("---end algorithm----")
가장 상단의 token값만 각자의 token값으로 변경하면 된다.
python3 ./insert.py

---start algorithm----
[('availPrbDl', 45), ('availPrbDl', 91), ('availPrbDl', 273), ('availPrbDl', 53), ('availPrbDl', 1), ('availPrbDl', 224),
...
실행해보면 데이터가 와르르 나오면 성공이다.
마지막으로, 우리의 RECIPE를 완성해놓도록 하자.
- aiml-fw-aimlfw-dep/RECIPE_EXAMPLE/example_recipe_latest_stable.yaml
traininghost:
  ip_address: localhost
...

datalake:
  influxdb:
    host: localhost
    port: 8086
    orgname: primary
    bucket: UEData
    token:  W8SyiYioyRCKPP4DVMWd
이 역시 token값만 개인의 값으로 바꾸면 된다. 적용하는 방법은 다음과 같다.
bin/uninstall.sh
bin/install.sh -f RECIPE_EXAMPLE/example_recipe_latest_stable.yamluninstall을 하면 해당 RECEIPE의 component들만 내려가게된다. install할 때는 RECEIPE 파일을 -f옵션으로 지정해주어 옵션을 적용시키도록 하면 된다.
kubectl get po -n traininghost
NAME                                READY   STATUS    RESTARTS   AGE
aiml-dashboard-76f5b94bf6-zw924     1/1     Running   0          161m
aiml-notebook-7ffd449456-2ntph      1/1     Running   0          161m
cassandra-0                         1/1     Running   0          4h29m
data-extraction-7579449cd9-d7r8c    1/1     Running   0          161m
kfadapter-794d7bcdc7-7nx56          1/1     Running   0          161m
modelmgmtservice-585d758876-mb656   1/1     Running   0          161m
tm-cc4cf8496-zmvg5                  1/1     Running   0          161m
tm-db-postgresql-0 1/1 Running 0 4h38mcassandra와 tm-db-postgresql이외의 다른 component들이 다시 내려갔다가 올라오는 것이다. 즉, 해당 RECEIPE 파일에 변동사항이 생긴다면 한 번씩 uninstall, install script 과정을 해주어야 한다는 것이다.

오늘 하루 끝... 잘못된 설정이나, 생략된 부분이 있다면 피드백 부탁드리겠습니다.

감사합니다! 큰 도움이 되었습니다