📅 달력 화면 만들기
필요한 라이브러리
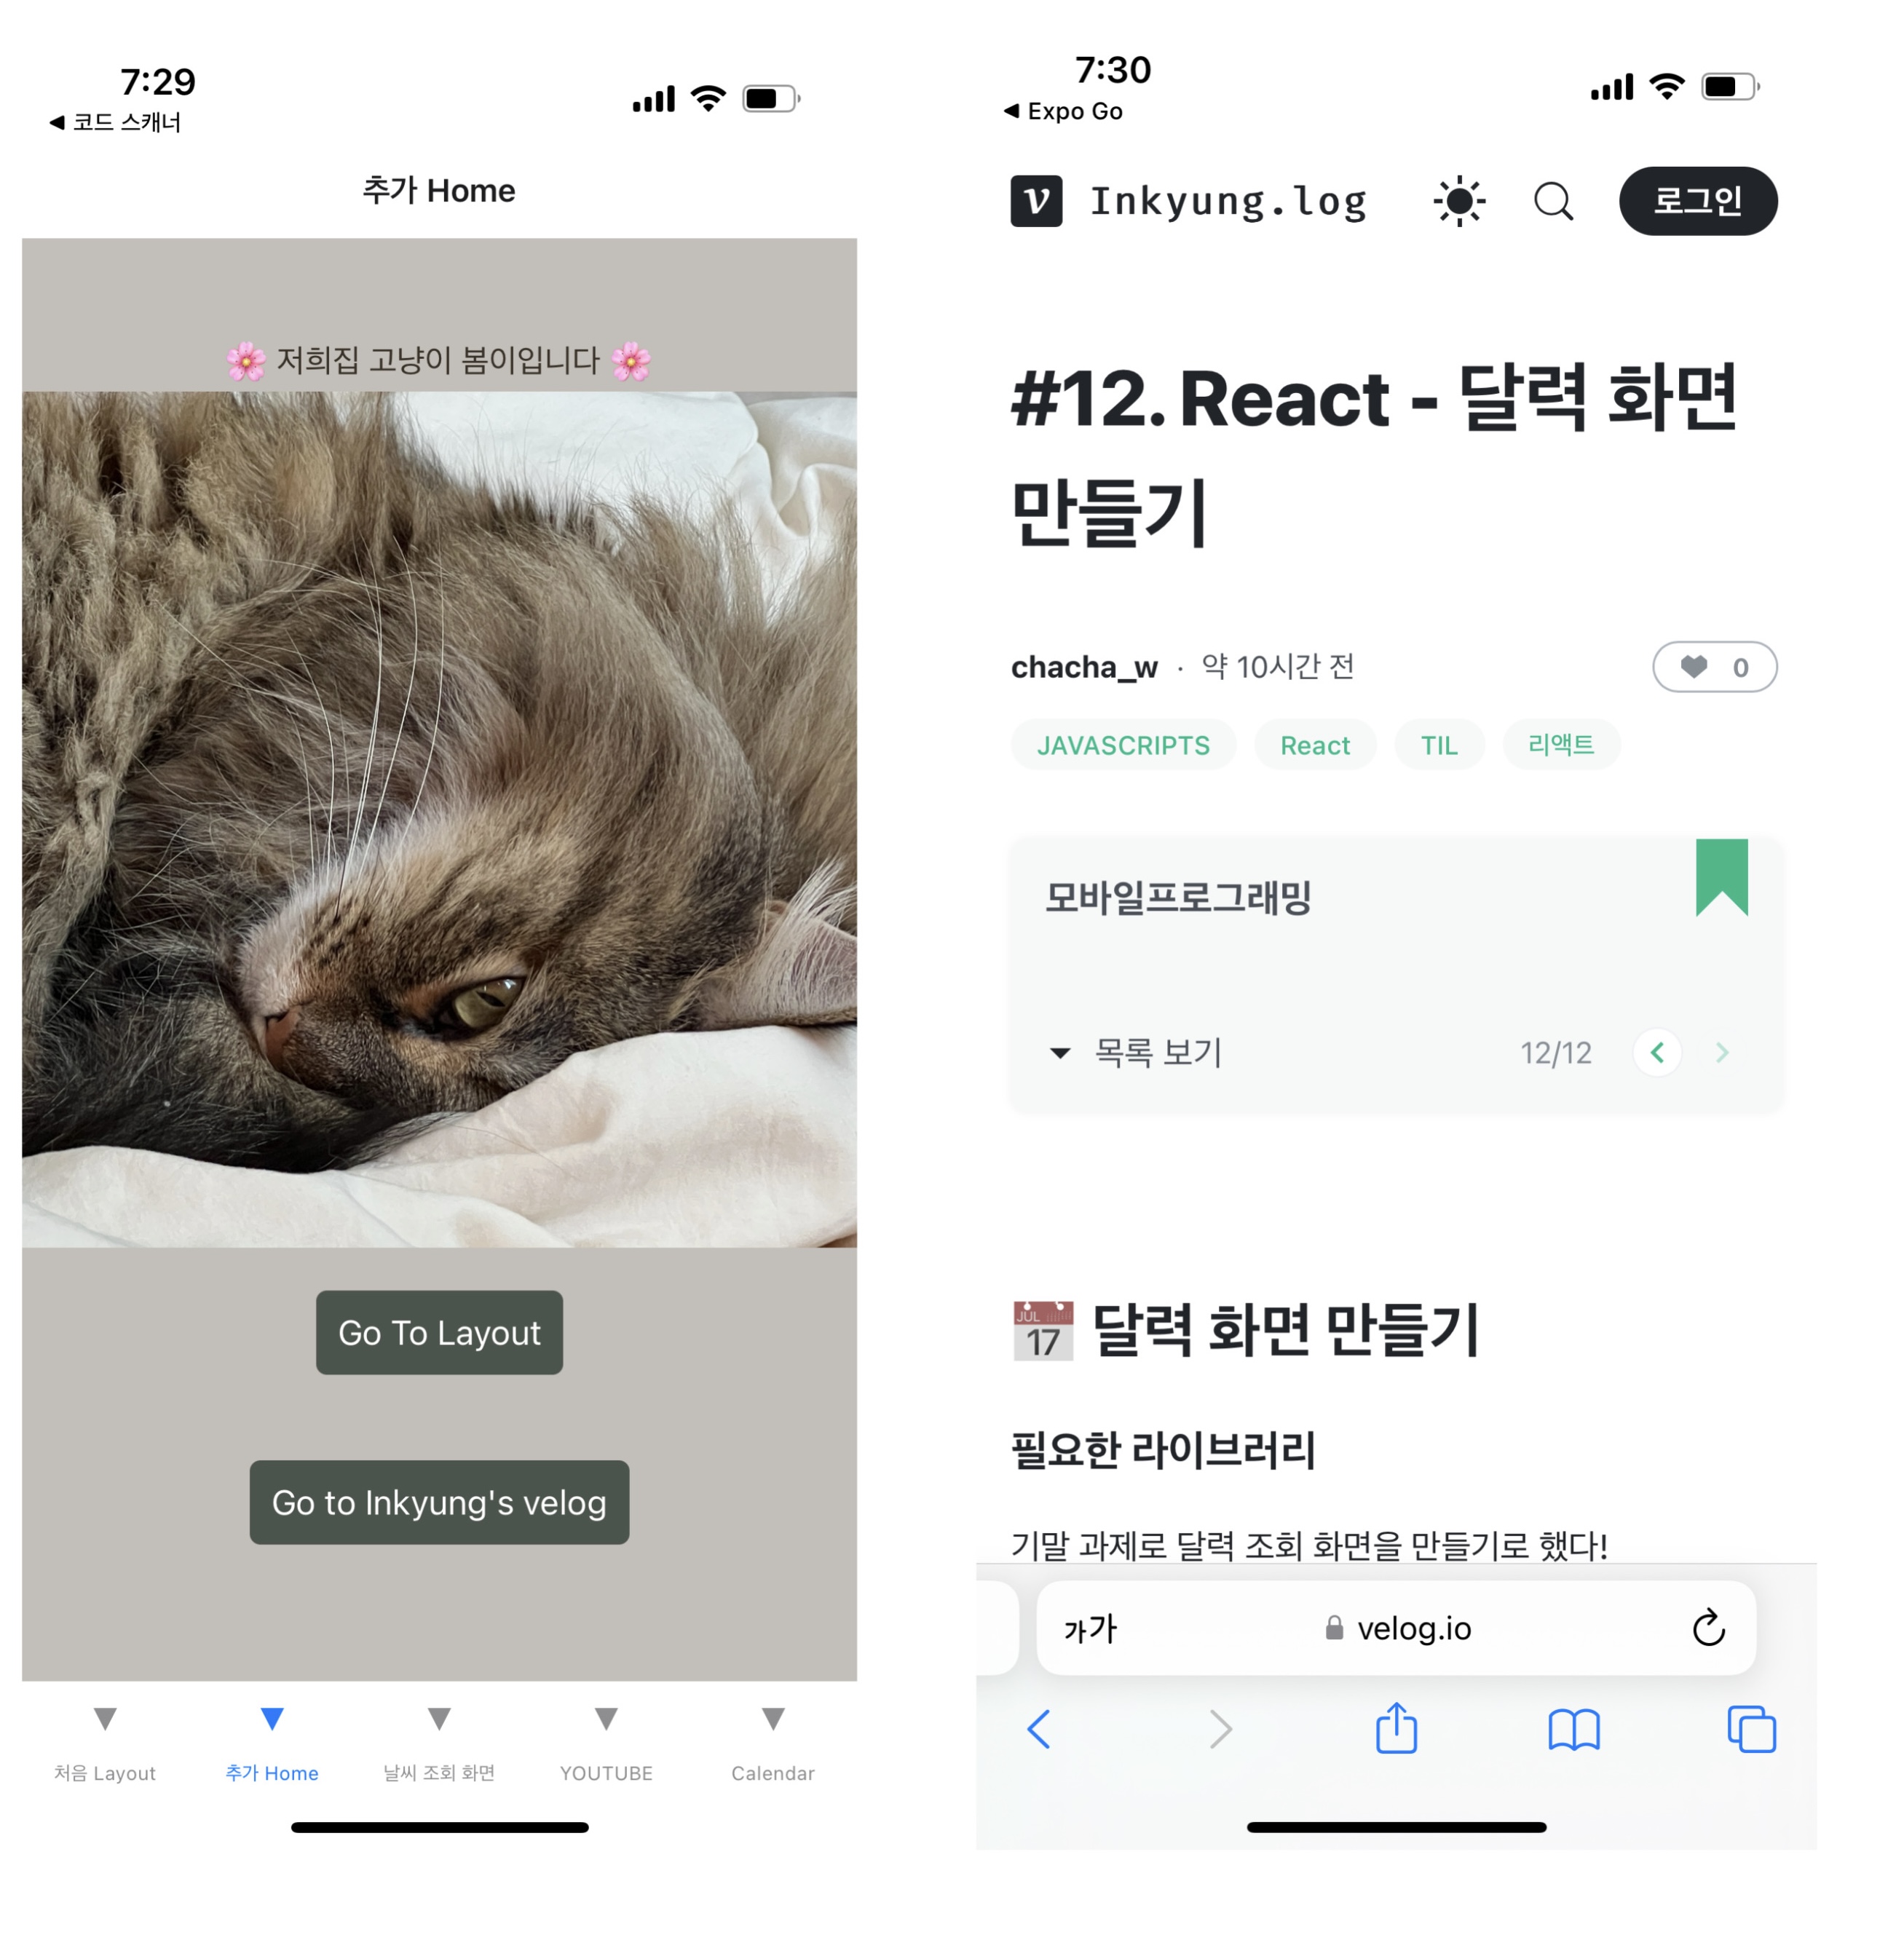
기말 과제로 달력 조회 화면을 만들기로 했다!
react-native-calendars 라는 라이브러리가 있어서 가져다 쓰기로 하고 우선 필요한 것들 설치
date-fns는 날짜를 표시하기 위해 필요한 라이브러리이다. format을 import해와야하기 때문!
npm install --save react-native-calendarsnpm install date-fns
기본 structure
기본적인 화면은 이렇게 구성한다
import React from "react";
import { View } from "react-native";
import { Calendar } from "react-native-calendars";

const CalendarView = (props) => {


  return (
    <View style = {{marginTop: 100}}>
      <Calendar/>
    </View>
  )
}

export default CalendarView;
그리고 MainTabNavigator에도 스크린 추가해서 연결해주면
import CalendarView from '../screens/CalenderView';

 <Nav.Screen name = "Calendar" component={CalendarView} options={{title: 'Calendar'}}/>
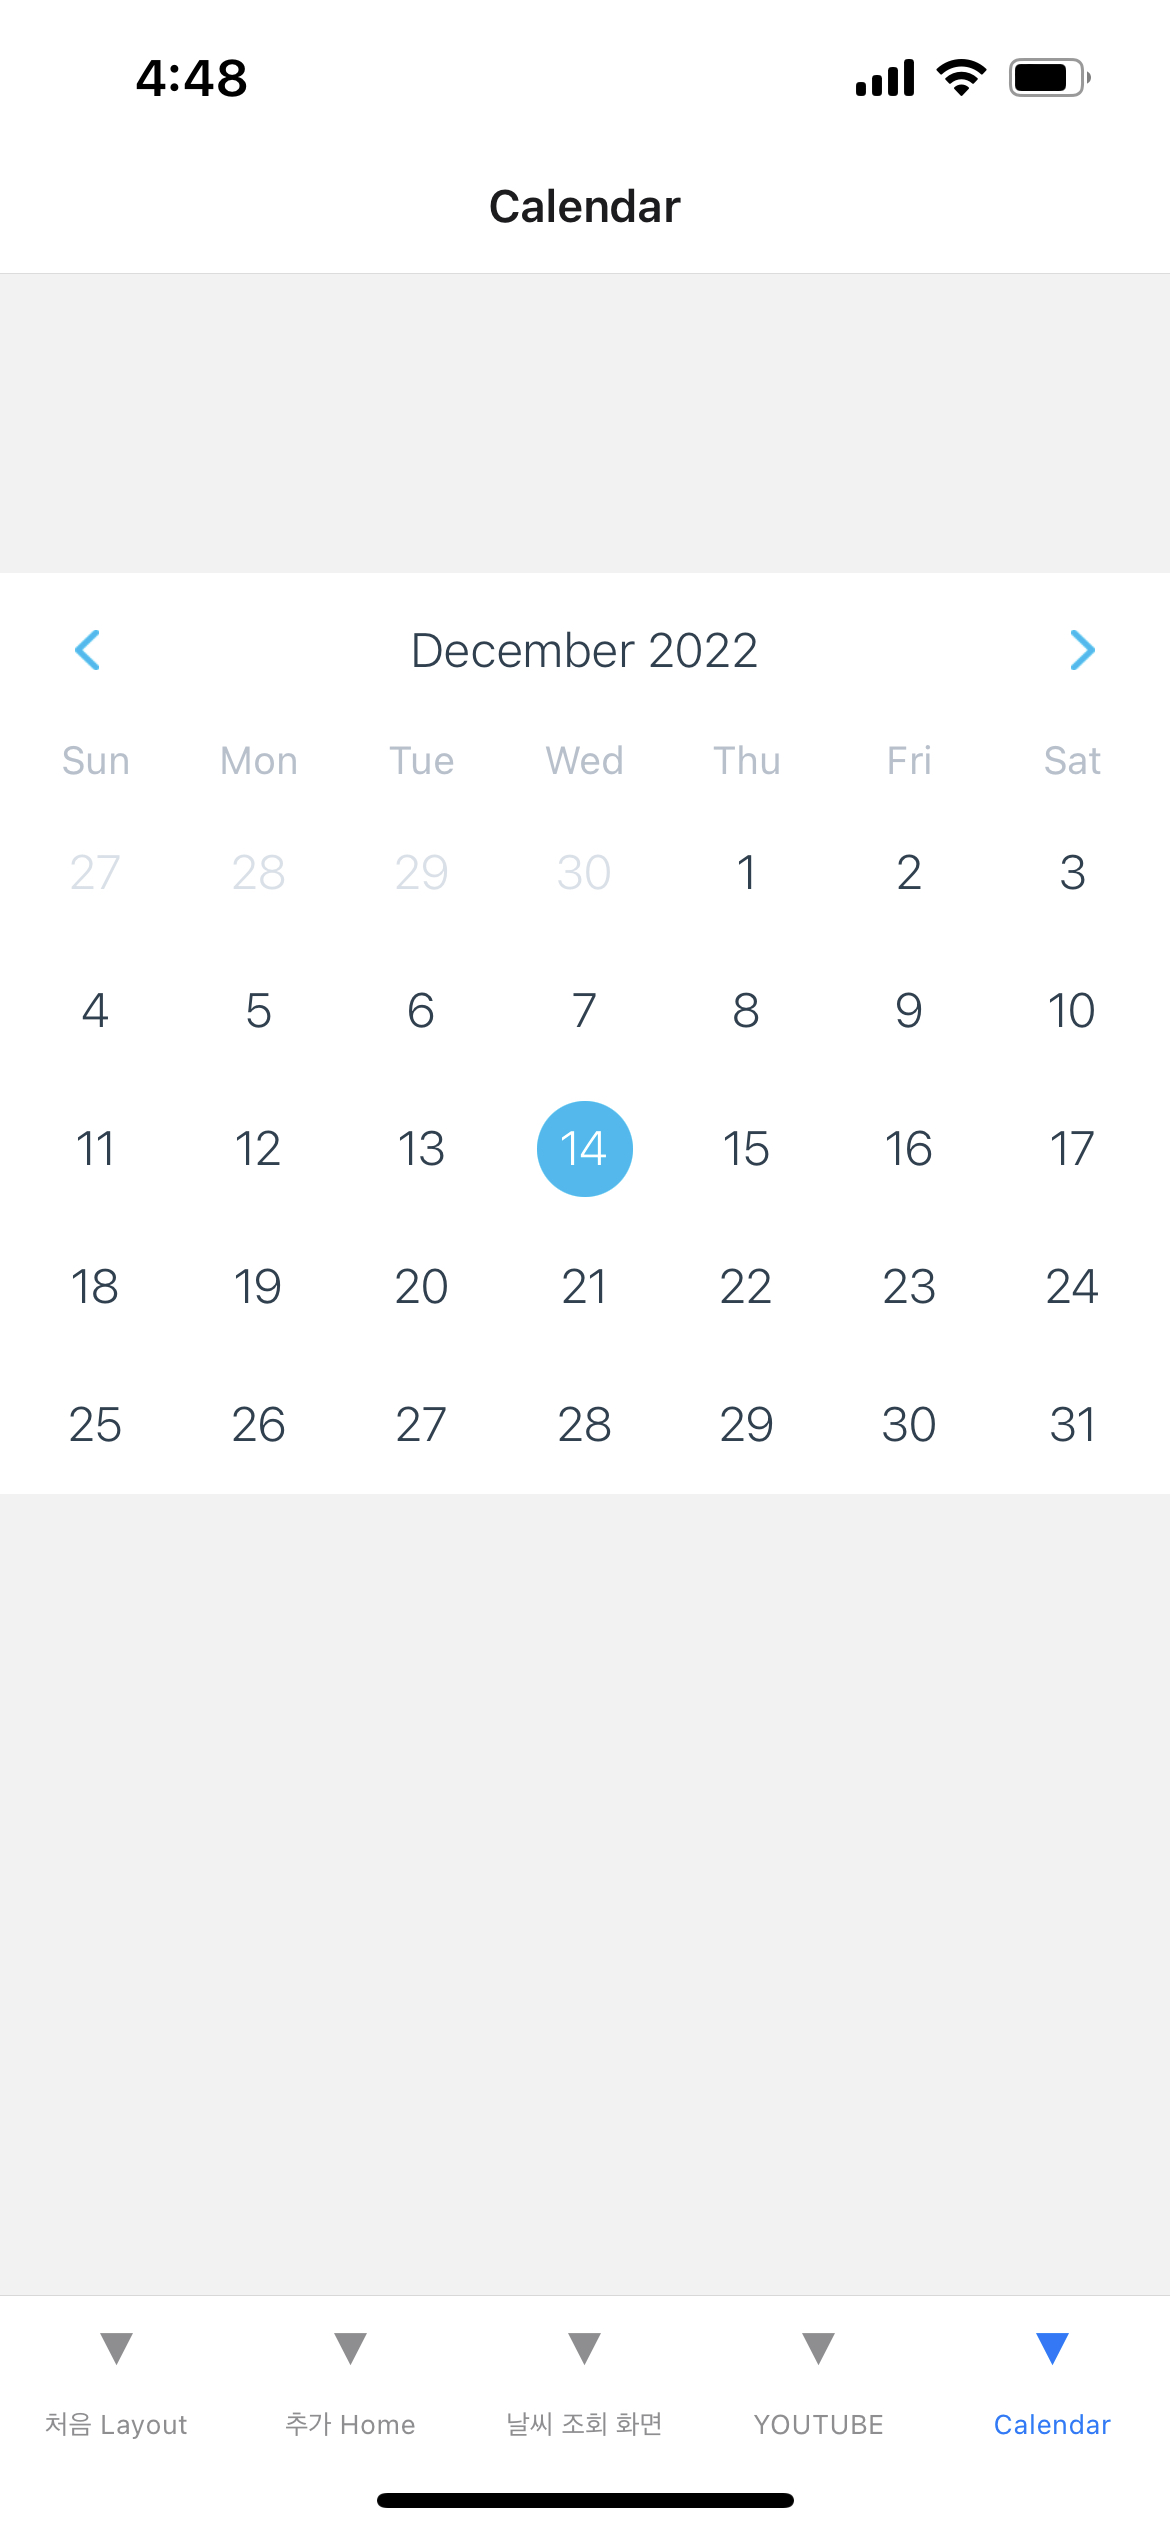
✨✨✨짜잔✨✨✨
새로운 탭이 생기면서 화면 전환이 된다!!
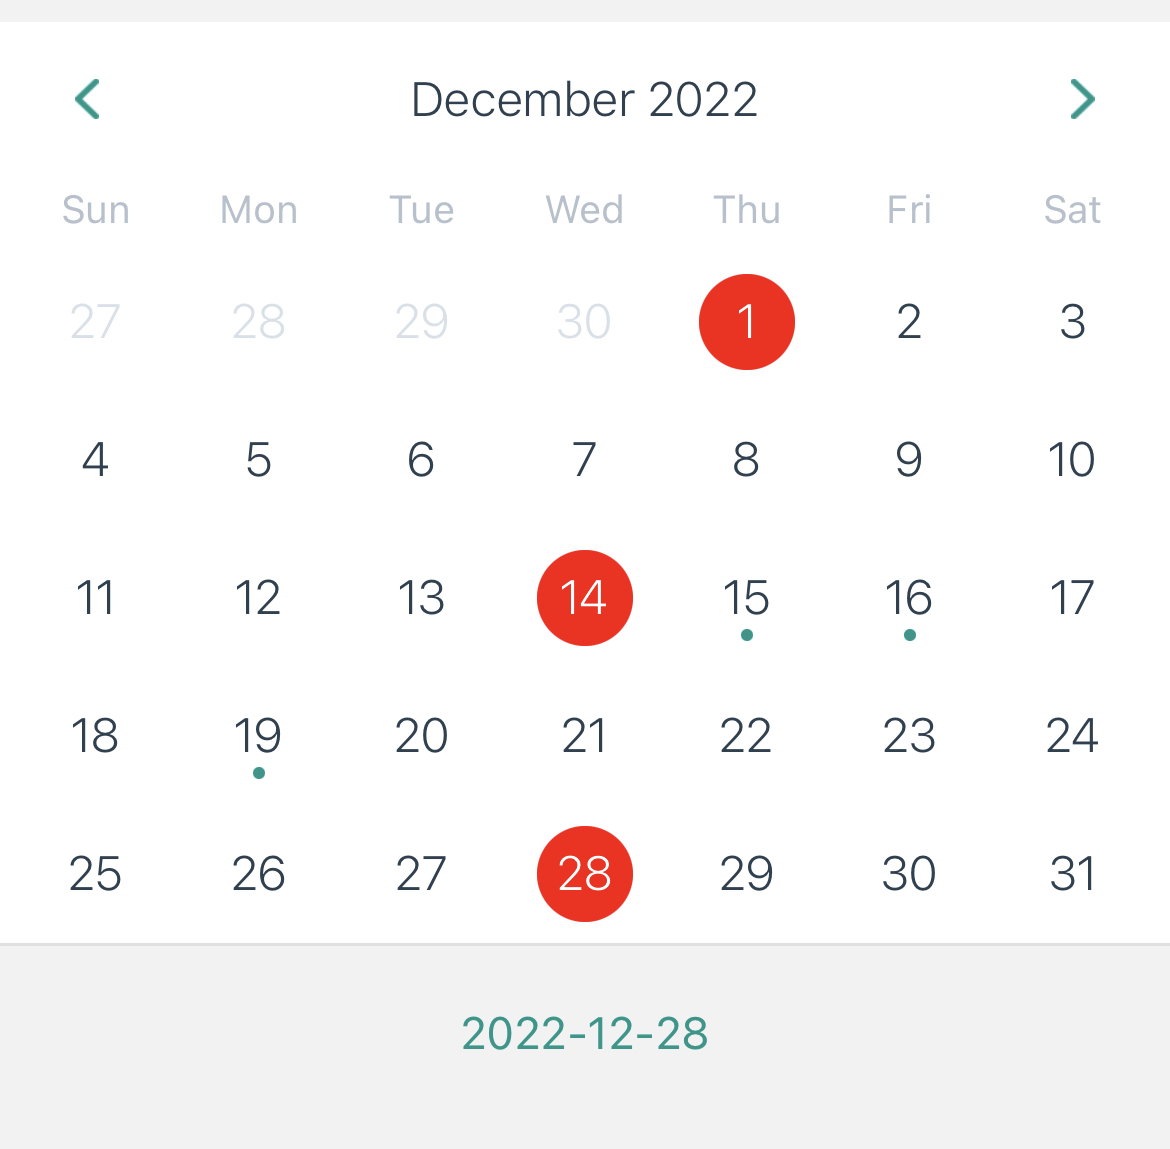
일정 추가
일정이 있거나 특별한 날에 마킹을 추가하고 theme의 Props를 통해 색을 바꿀 수 있다
- 시험이 있는 날과 내 생일에 추가를 해보기
const markedDates = {
'2022-12-01': { selected: true }, // 내 생일ㅎㅎ
'2022-12-15': { marked: true },
'2022-12-16': { marked: true },
'2022-12-19': { marked: true }
}
return (
<Calendar
style={styles.calendar}
markedDates={markedDates}
theme={{
selectedDayBackgroundColor: 'red',
arrowColor: 'blue',
dotColor: 'green',
todayTextColor: 'yellow',
}} />
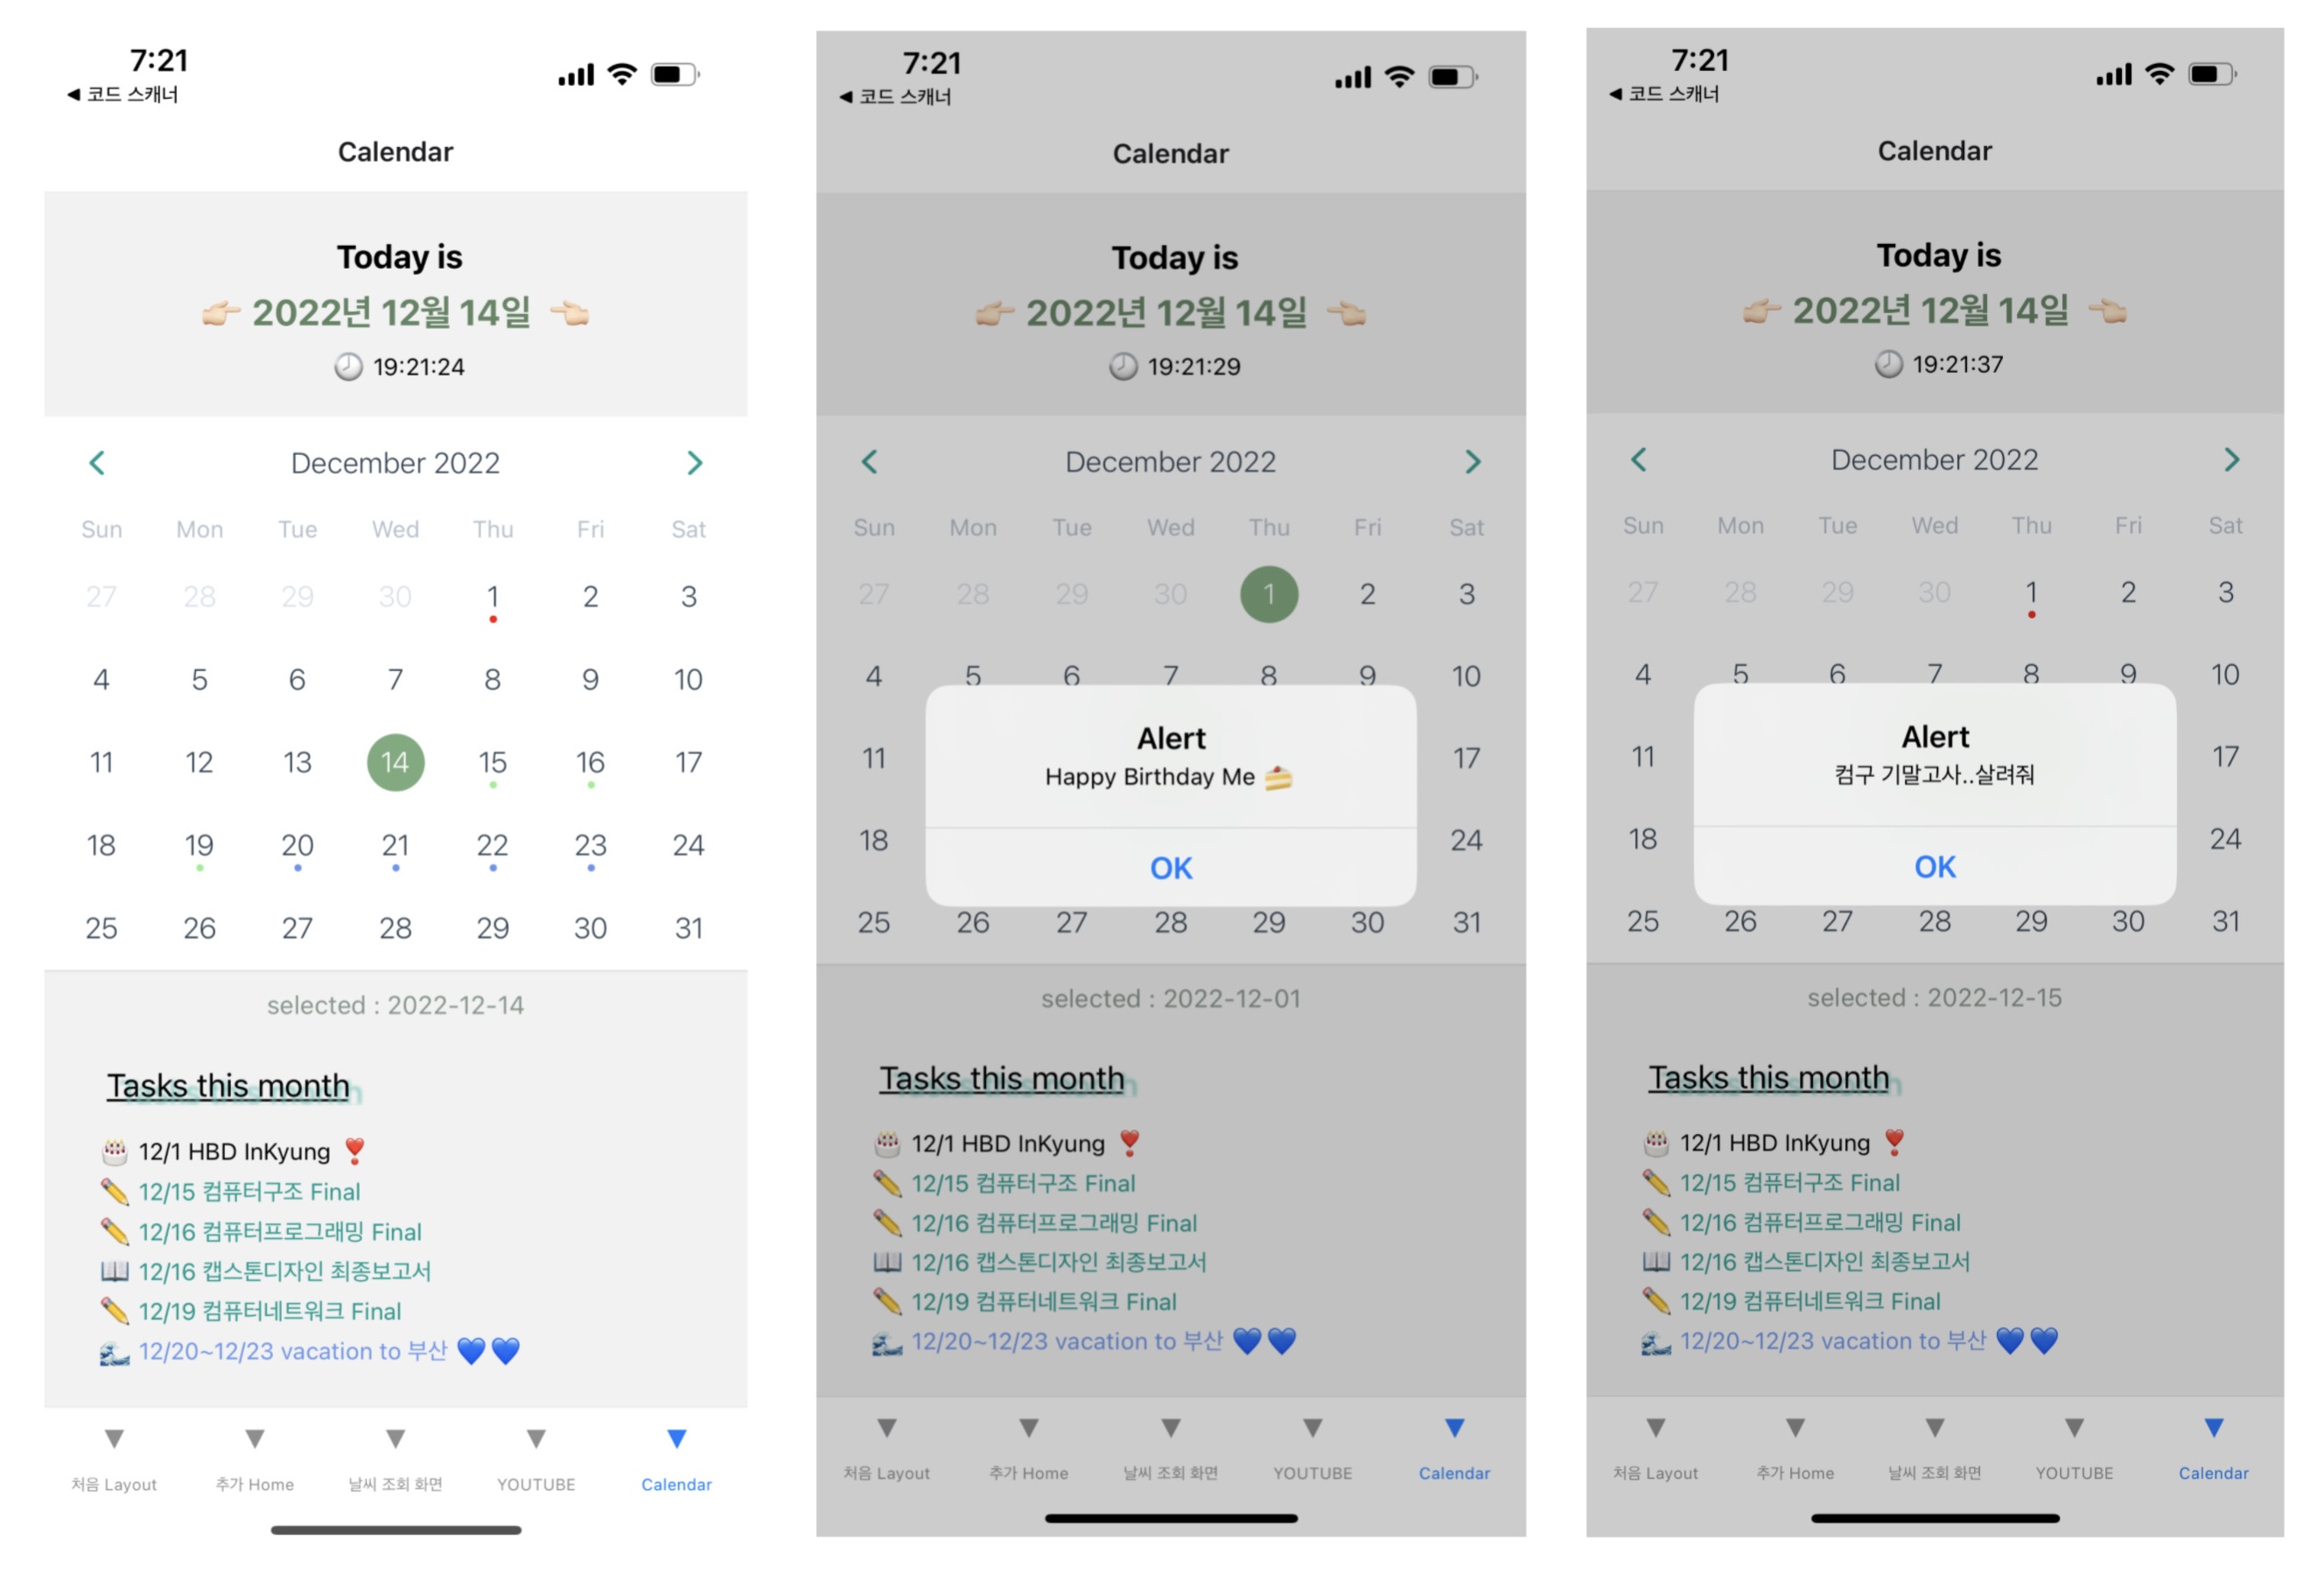
);onPress - selectedDay 연결
선택된 날짜에 마킹 표시를 하고 화면에 표시해보기
먼저 const로 선언을 해준다
const [selectedDate, setSelectedDate] = useState(format(new Date(), "yyyy-MM-dd"));

const markedSelectedDates = {
    ...markedDates,       // 기존의 markedDate
    [selectedDate]: {
      selected: true,
      marked: markedDates[selectedDate]?.marked,
    }
  }
그리고 view에 onDayPress => 로그 찍기, 날짜 선택을 하면 이렇게 나온다
<View>
     <Calendar style={styles.calendar}
       markedDates={markedSelectedDates}
       theme={{
         selectedDayBackgroundColor: 'red',
         arrowColor: '#009688',
         dotColor: '#009688',
         todayTextColor: '#00adf5'
       }}
       onDayPress={(day) => {
         console.log('selected day', day),       // 선택된 날짜 log 찍기
         setSelectedDate(day.dateString)        // 선택된 날짜 marked
       }}
     />
     <Text style={styles.text}>{ selectedDate } </Text>
   </View>

📌 기능들 활용해서 다른 것들도 추가해보기!
- 현재 날짜/시간 표시 - 시간은 실시간으로 동적 연결!!
- 선택된 날짜 표시
- 중요 일정 alert
🔗 외부 링크 기능
우선 홈 화면에 버튼을 새로 만들고 이 페이지로 이동하도록 연결해보았다
expo install expo-linking
expo-linking 이라는 기능을 활용하기 위해 위 모듈 설치
npm install @react-navigation/stack재설치
그런데 기존의 navigation이랑 충돌이 나는건지.. 자꾸 오류가 나서 stack navigation 다시 설치하고 해주니 잘 된다이유가 뭘까...🤔
그리고 expo guide를 보면 import 하고 사용하라는데 import * as Linking from 'expo-linking';
이미 expo-linking을 설치해서 그런가 syntax 오류가 난다
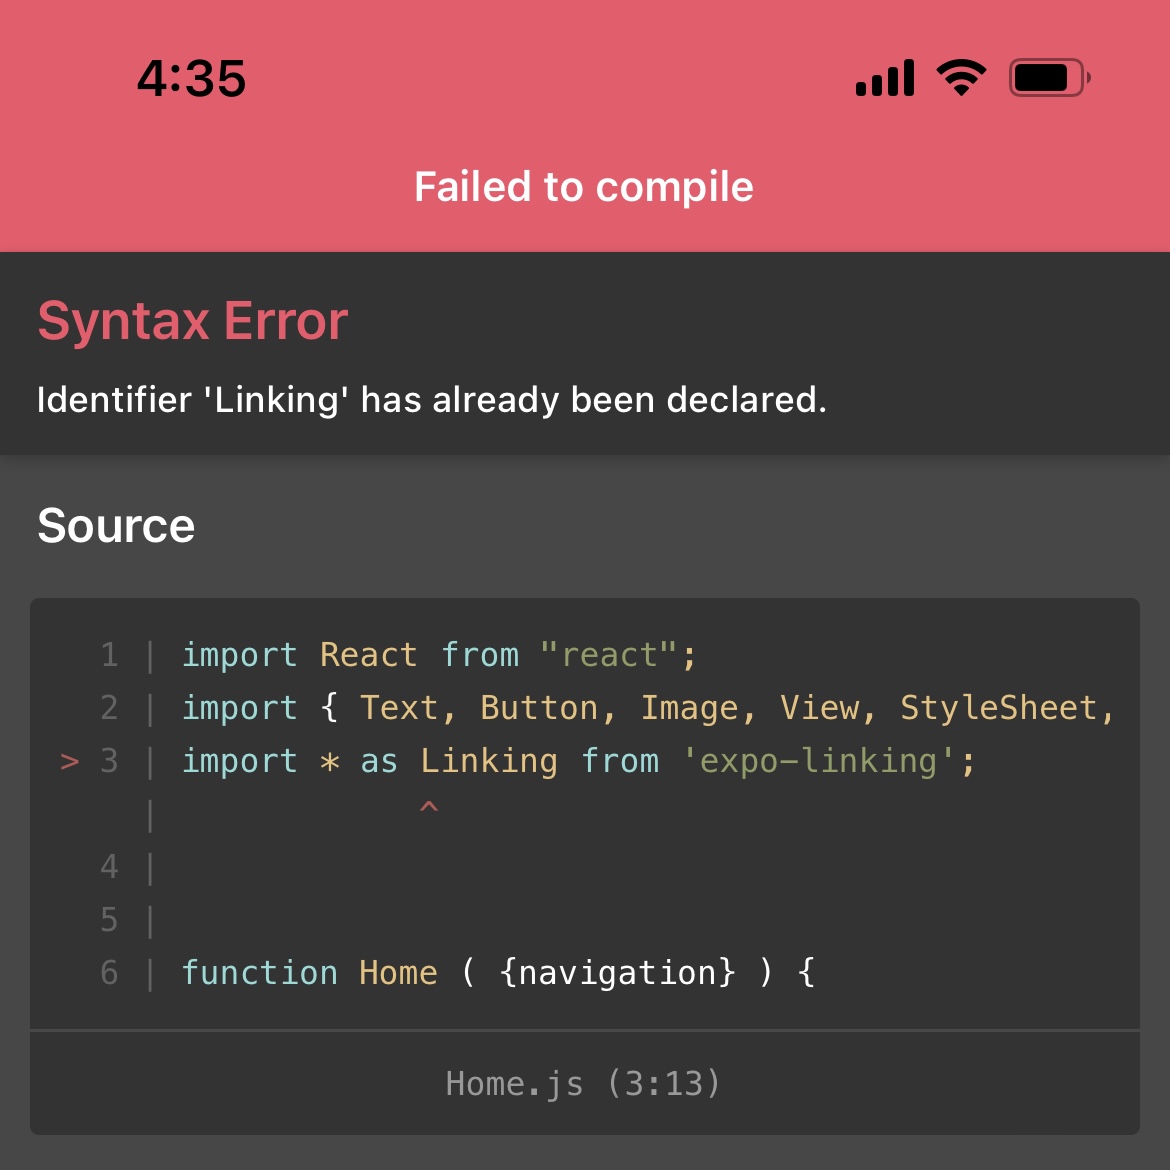
아마 둘 중 하나일 듯 싶다...
- expol-linking 설치, stack navigation 재설치
- import 해서 바로 가져다 쓰기
share를 import 하고 쓰니 환경 설정 없이도 url 이동이 된다!!
어쨌든 블로그 화면으로 잘 이동한다~!~!~