DAY 3-CSS Variables
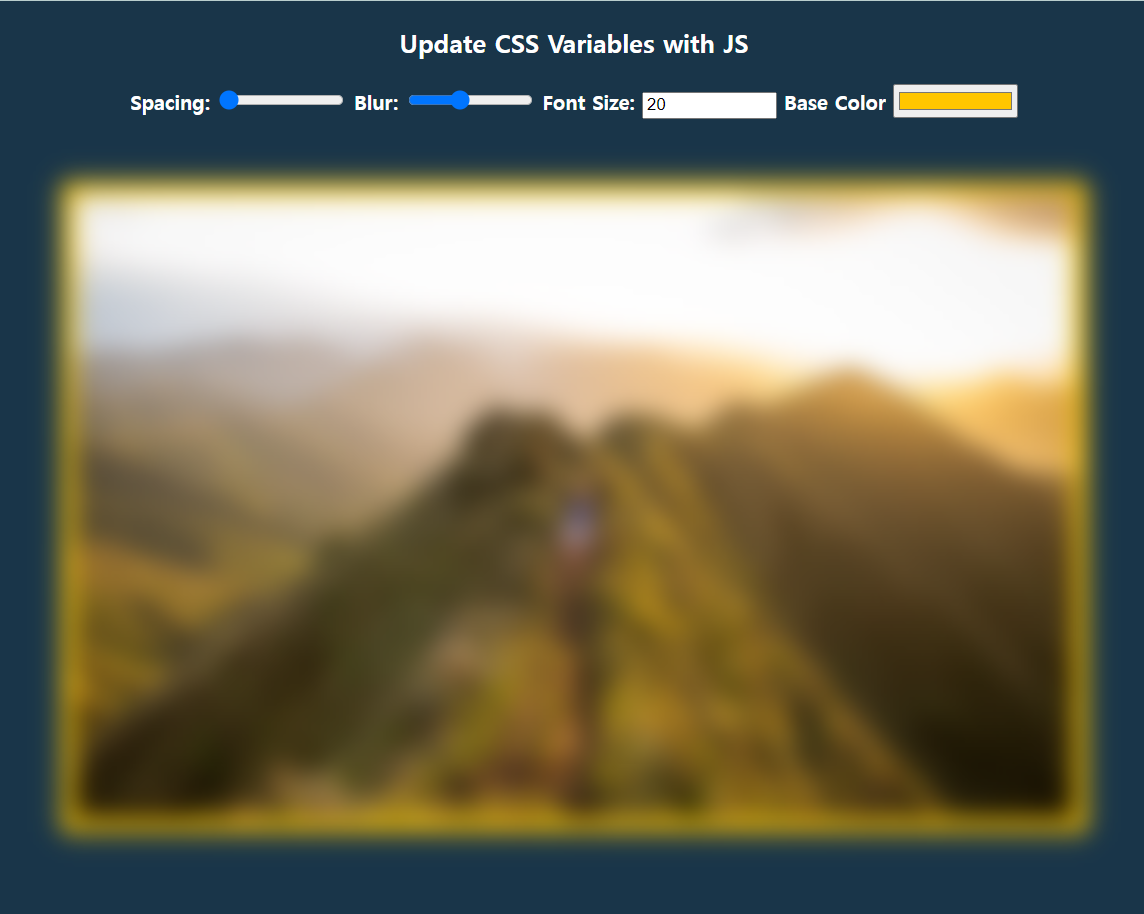
기본 구현 사항: spacing, blur, base color를 사용자의 입력을 받아 변경
1) 페이지 전역으로 적용될 색상, 이미지 프레임의 간격(두께), 이미지의 흐림 정도의 default 값을 전역 변수 선언 후 할당
- :root 클래스는 전역 CSS 변수 선언에 사용 가능함
:root {
    --base: #ffc600;
    --spacing: 10px;
    --blur: 10px;
    --fontSize: 20px;
}
2) 이미지(img)에 padding, background, filter(blur) 속성에 각각 var() 함수를 사용하여 --spacing, --base, --blur로 값을 할당
img {
	padding: var(--spacing);
	background: var(--base);
	filter: blur(var(--blur));
}
3) JS 파일에서, document.querySelectorAll()을 통해 controls 클래스 내 모든 input들을 inputs 변수에 할당
const inputs = document.querySelectorAll(".controls input");4) handleUpdate 함수생성 -> inputs 변수에 포함된 모든 input에 handleUpdate 함수를 listen 시키기-> change, mousemove 이벤트 발생 시 함수를 실행하도록
const inputs = document.querySelectorAll(".controls input");

function handleUpdate() {}

inputs.forEach((input) => {
  input.addEventListener("change", handleUpdate);
});

inputs.forEach((input) => {
  input.addEventListener("mousemove", handleUpdate);
});
5) input이 변화함에 따라, input의 value로 --base, --spacing, --blur의 값을 update 해줘야 한다.
- 그런데 이 때, --base를 제외한 두 변수 --spacing과 --blur, 즉, padding과 filter 속성에는 숫자 뒤에 단위(px)가 붙어야 함
- 따라서 해당 두 요소를 제어하는 input 태그에는 data 속성을 사용하여(data-sizing = "px") value 뒤에 붙일 단위를 포함해둠
- 이 접미사를 suffix 라는 변수에 할당하기 위해, this.dataset.sizing에 접근 후 할당
- 이 때, 색상을 제어하는 input의 경우, 접미사가 없으므로 data 속성도 넣어두지 않음 -> 이런 경우를 위해 ||(or 연산자)를 사용하여 빈 문자열을 할당
const inputs = document.querySelectorAll(".controls input");

function handleUpdate() {
  const suffix = this.dataset.sizing || "";
}

inputs.forEach((input) => {
  input.addEventListener("change", handleUpdate);
});

inputs.forEach((input) => {
  input.addEventListener("mousemove", handleUpdate);
});
6) document.documentElement.style.setProperty()에 첫번째로 '값을 변화시킬 변수'를, 두번째로는 '그 값+접미사'를 인자로 삽입
const inputs = document.querySelectorAll(".controls input");

function handleUpdate() {
  const suffix = this.dataset.sizing || "";
  document.documentElement.style.setProperty(
    `--${this.name}`,
    this.value + suffix
  );
}

inputs.forEach((input) => {
  input.addEventListener("change", handleUpdate);
});

inputs.forEach((input) => {
  input.addEventListener("mousemove", handleUpdate);
});
내가 추가한 기능: 페이지 제목의 font-size를 제어하는 input을 추가
1) font-size를 입력받을 input 요소 추가: type은 text로 설정하여 직접 숫자로 입력받음
<p class="title">Update CSS Variables with <span class="hl">JS</span></p>

(...생략...)

<label for="fontSize">Font Size:</label>
<input
	id="fontSize"
	type="text"
	name="fontSize"
	value="20"
	data-sizing="px"
/>
2) :root 클래스에 --fontSize 변수 추가 후, 20px를 기본값으로 지정
:root {
	--base: #ffc600;
	--spacing: 10px;
	--blur: 10px;
	--fontSize: 20px;
}
What I Learned
document & documentElement
document와 documentElement를 각각 사용하면서 둘의 차이점이 궁금해졌다.
- document: 웹페이지 그 자체. 웹페이지의 HTML 요소에 접근하기 위해 사용됨
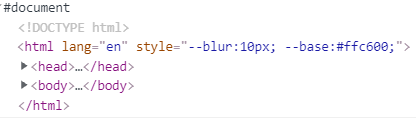
- document.documentElement: 요소를 반환

즉, document는 말 그대로 코드의 처음부터 끝까지, 즉, 태그 바깥에 존재하는 요소( 과 같이)를 포함한 모든 요소들을 통틀어 지칭한다.
document.documentElement는 딱 html 태그와 그 안에 존재하는 것들만을 지칭한다는 차이점이 있다.
HTMLCollection & NodeList
event를 요소들에 listen 시키는 과정에서 forEach() 함수를 사용하는데, 비슷해 보이는 배열 형태의 것(?)들 사이에도 forEach()로 요소 하나하나에 접근할 수 있거나 없을 수 있다는 것을 검색을 통해 알게 되었다.
<div class="hello">
  <div class="hi">안녕</div>
  <div class="hi">안녕</div>
  <div class="hi">안녕</div>
</div>
다음과 같은 코드가 있을 때,
const hiNode = document.querySelectorAll(".hi");
const hiCollection = document.getElementsByClassName("hi");
이렇게 상이한 방식으로 변수에 할당하면
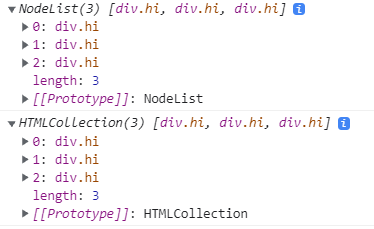
이렇게 querySelectorAll을 이용하면 NodeList가, getElementsByClassName을 사용하면 HTMLCollection이 할당된다.
- 공통점: 두 객체 모두 배열과 유사하며, length 속성, item() 메소드를 동일하게 갖는다.
    const hiNode = document.querySelectorAll(".hi");
    const hiCollection = document.getElementsByClassName("hi");
    console.log(hiNode.item(0));
    console.log(hiCollection.item(0));
이렇게 두 가지 경우 모두 item() 메소드의 인자로 넣은 수를 index로 한 div 요소를 반환한다.
- 차이점: NodeList 객체에서는 forEach() 메소드를 사용하여 객체 내의 요소들 하나하나에 각각 event를 listen 시킬 수 있으나, 해당 메소드를 HTMLCollection에서는 사용이 불가능하다.
- JS30제를 풀면서 getElementBy~ 말고 querySelector~를 계속 써왔었는데, 좀 더 편한 개발을 위해 앞으로도 계속 후자를 애용해야겠다.