Trying Kernel function patch with Character Device Driver
On the last post, where I made patches on en_main.c on the mlnx-ofed-kernel driver, I wanted to test out if the patches would well work.
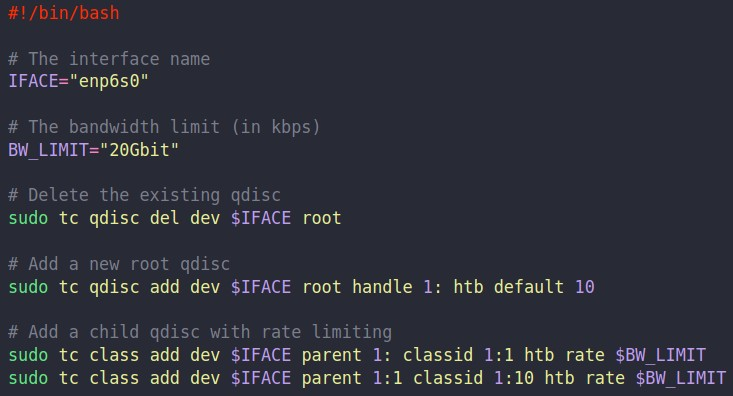
Patches were to execute:
where "how" is in https://velog.io/@brian11hwang/Making-tc-Run
I couldn't try this on the en_main.c, for example in mlnx5e_init() because the tc would be called before the device interface is set well to be prepared to execute tc.
Therefore, I decided to make a simple Character Device Driver to test the execution.
1. What is a Character Device Driver?

A character device driver, in the context of operating systems like Linux, is a type of device driver that handles I/O for character (byte stream) devices. These are devices that can be accessed and read from or written to like a linear stream of bytes, and where there's no built-in concept of how the data is structured.
Examples of character devices include keyboards, mice, and serial ports. The name 'character device' comes from the fact that you typically read or write single characters at a time to them.
The way a character device driver works is that it provides functions for handling system calls for a specific device. The Linux kernel calls these functions when a user-space program performs operations like opening the device, reading from it, writing to it, or closing it. These functions are specified in a file_operations structure that the driver provides.
Here's a simplified example of what this looks like:
struct file_operations fops = {
    .open = my_open,
    .read = my_read,
    .write = my_write,
    .release = my_release,
};
In this case, my_open, my_read, my_write, and my_release are functions provided by the driver that handle opening the device, reading from the device, writing to the device, and closing the device, respectively.
These character device drivers are typically implemented as loadable kernel modules, which are pieces of code that can be loaded and unloaded from the kernel at runtime. This allows for a lot of flexibility - for example, you can add support for a new device to a running system by loading the appropriate driver, without having to reboot or recompile the kernel.
Finally, each character device is represented in the Linux filesystem by a device file, typically located in the /dev directory. These device files are associated with the driver for their device through a major number that identifies the driver, and a minor number that identifies a specific device that the driver handles.
For example, you might have a driver that handles all serial ports on the system, with a major number of 4. The individual serial ports would then be represented by device files with the major number 4 and minor numbers 0, 1, 2, etc., depending on how many serial ports there are.
2. Making the Character Device Driver
mychardev.c :
#include <linux/module.h>
#include <linux/kernel.h>
#include <linux/fs.h>
#include <linux/kmod.h>

#define DEVICE_NAME "mychardev"

static int my_open(struct inode *inode, struct file *file)
{
    printk(KERN_INFO "Device Opened\n");
    return 0;
}

static int my_release(struct inode *inode, struct file *file)
{
    printk(KERN_INFO "Device Closed\n");
    return 0;
}

static struct file_operations fops = {
    .open = my_open,
    .release = my_release,
};

static int __init mychardev_init(void)
{
    int majorNumber;

    majorNumber = register_chrdev(0, DEVICE_NAME, &fops);
    if (majorNumber < 0)
    {
        printk(KERN_ALERT "Failed to register a major number\n");
        return majorNumber;
    }
    printk(KERN_INFO "Registered correctly with major number %d\n", majorNumber);
    // Define interface and bandwidth limit
    char *interface = "enp6s0";
    char *bw_limit = "20Gbit";

    // Define command arrays
    char *argv1[] = {"/sbin/tc", "qdisc", "del", "dev", interface, "root", NULL};
    char *argv2[] = {"/sbin/tc", "qdisc", "add", "dev", interface, "root", "handle", "1:", "htb", "default", "10", NULL};
    char *argv3[] = {"/sbin/tc", "class", "add", "dev", interface, "parent", "1:", "classid", "1:1", "htb", "rate", bw_limit, NULL};
    char *argv4[] = {"/sbin/tc", "class", "add", "dev", interface, "parent", "1:1", "classid", "1:10", "htb", "rate", bw_limit, NULL};

    // Define environment
    static char *envp[] = {
        "HOME=/",
        "PATH=/sbin:/bin:/usr/sbin:/usr/bin",
        NULL};

    // Run the commands
    call_usermodehelper(argv1[0], argv1, envp, UMH_WAIT_PROC);
    call_usermodehelper(argv2[0], argv2, envp, UMH_WAIT_PROC);
    call_usermodehelper(argv3[0], argv3, envp, UMH_WAIT_PROC);
    call_usermodehelper(argv4[0], argv4, envp, UMH_WAIT_PROC);
    return 0;
}

static void __exit mychardev_exit(void)
{
    unregister_chrdev(0, DEVICE_NAME);
    printk(KERN_INFO "Unregistered the device\n");
}

module_init(mychardev_init);
module_exit(mychardev_exit);

MODULE_LICENSE("GPL");
MODULE_DESCRIPTION("A simple character Device Driver");
MODULE_VERSION("0.1");
- The
my_openandmy_releasefunctions are called when the device file is opened and closed, respectively. They don't do anything besides printing a message to the kernel log.
- The
file_operationsstructure is used to tell the kernel which function should be called
when a specific operation on the device file is performed.
- In the
mychardev_initfunction,register_chrdevis called to register a new character device. This function returns a major number that identifies the driver to the kernel. If the function returns a negative value, it indicates an error.
- The
mychardev_exitfunction is used to unregister the character device when the module is removed.
module_initandmodule_exitmacros are used to tell the kernel which functions to call when the module is loaded and unloaded.
- The
MODULE_*macros are used to provide metadata about the module. In this case, we specify that the module's license is GPL, provide a short description of the module, and specify the module's version number.
2.2 Make and Insert Module
To Insert this Module, we will first use the Makefile:
obj-m += mychardev.o
all:
	make -C /lib/modules/$(shell uname -r)/build M=$(PWD) modules
clean:
	make -C /lib/modules/$(shell uname -r)/build M=$(PWD) clean
makeuses a Makefile to compile the C code into a.kofile (kernel object), which can be loaded into the kernel.make -C /lib/modules/$(shell uname -r)/build M=$(PWD) modulesis the command typically used to build a kernel module. Here's a breakdown of this command:
-C /lib/modules/$(shell uname -r)/buildtells make to change to the directory of the currently running kernel's build files before doing anything.M=$(PWD)sets theMvariable to the current directory. This tells the kernel's build system to build the modules in the current directory.modulesis the target that the kernel's build system should build.
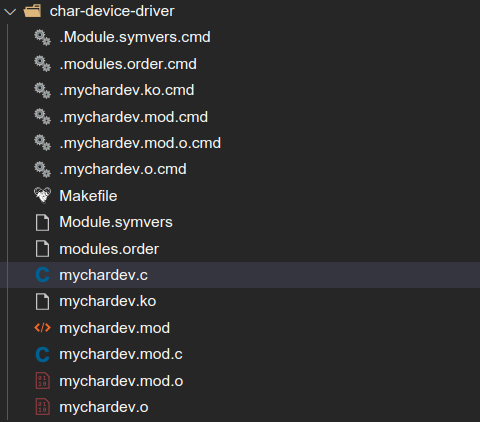
Do make with:
sudo make -j 20And the following files will be made:
Then, insert module via:
sudo insmod mychardev.ko
insmod mychardev.koloads themychardev.komodule into the kernel.- This is a privileged operation and normally can only be performed by the root user.
- The
.kofile passed toinsmodis a binary file that contains the compiled code as well as information about which kernel functions the module uses and which functions it provides.- When
insmodis run, the module's binary code is loaded into the kernel's memory, and the module's initialization function is run.- The initialization function typically sets up any resources the module needs (like device files), registers any functionality the module provides with the appropriate parts of the kernel, and performs any other setup the module needs.
3. Testing
If we check the output using dmesg -T, we can first notice that the "registered ~ " is printed, wihch we made with:
printk(KERN_INFO "Registered correctly with major number %d\n", majorNumber);
Also, the bottom 2 messages are what was shown when I manually did the tc, so it looks good.
Then, I checked the status of tc:

And we could see that the tc was successfully patched.

아주 유용한 정보네요!