SR-IOV on 40G Mellanox NIC ConnectX-3
To configure QoS Over SR-IOV, we have changed our NIC to Mellanox ConnectX-3
1. Prerequisites
First, I had to reinstall ubuntu to downgrade to Ubuntu 18.04
Then, I had to set the boot menu using ctrl+b as below:
2. Install driver
Install the MLNX_OFED driver for Linux that supports SR-IOV:
Mellanox OFED Spec found here
Download & Install driver here
- Do not do ctrl+c or ctrl+d while install!
# Download Driver
wget https://content.mellanox.com/ofed/MLNX_OFED-4.9-6.0.6.0/MLNX_OFED_LINUX-4.9-6.0.6.0-ubuntu18.04-x86_64.iso
#Mount Driver
sudo mkdir /mnt/iso
mount -o loop /share/MLNX_OFED_LINUX-4.2-1.0.0.0-ubuntu16.04-x86_64.iso /mnt/iso
cd /mnt/iso
#Install Driver (srptools not working on x86_64/amd64)
sudo ./mlnxofedinstall --force --without-neohost-backend
#reboot
/etc/init.d/openibd restart
reboot
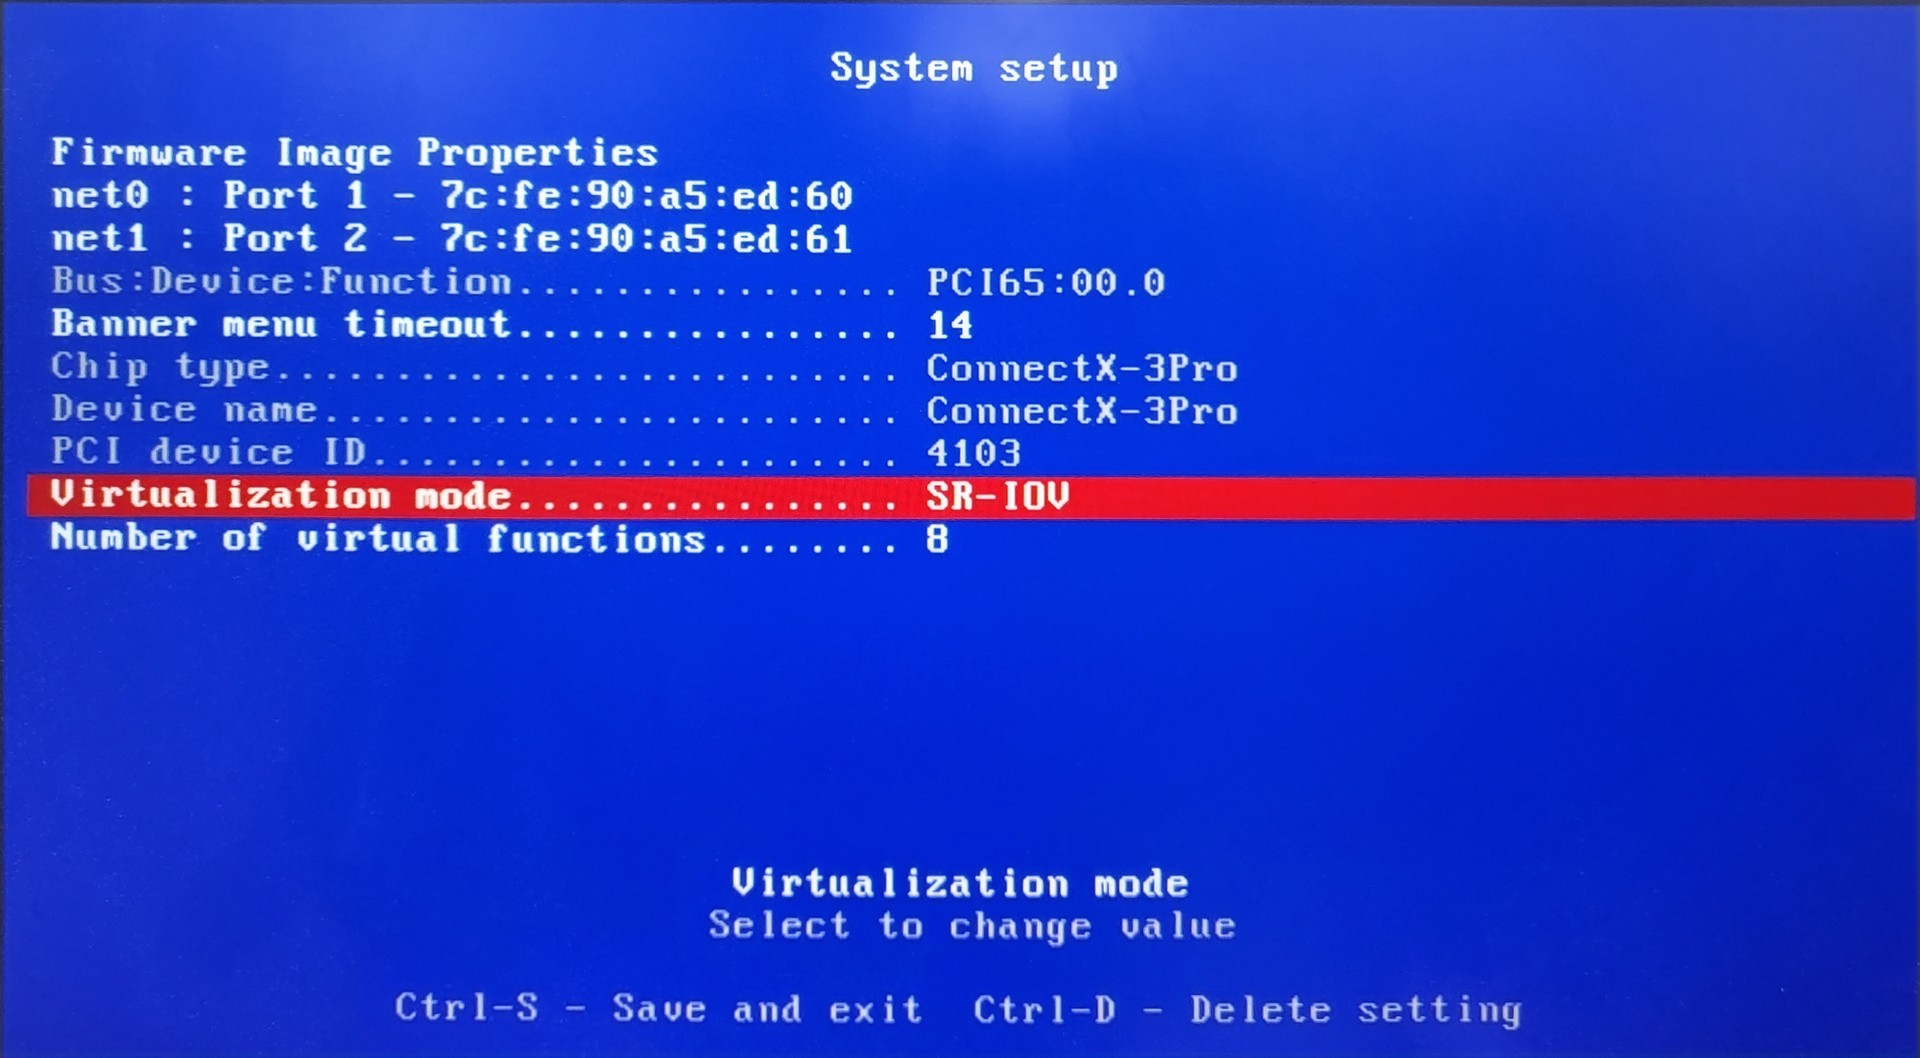
mlxconfig -d <mst_device> s SRIOV_EN=13. Configure SR-IOV
Check and start mst status
#Download mstflint for MST(Mellanox firmware burning application)
sudo apt-get install -y mstflint


mst start
mst status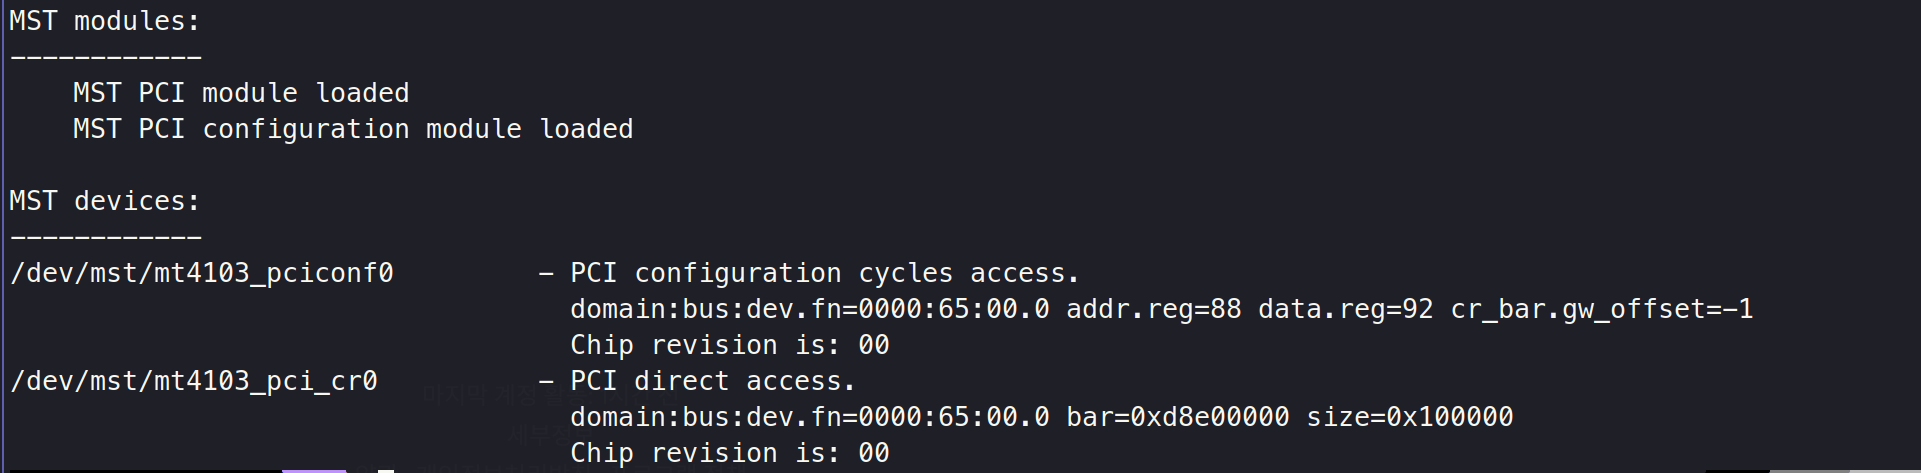
SR-IOV can be enabled and managed by running the mlxconfig tool and setting the SRIOV_EN parameter to "1" without re-burning the firmware.
mlxconfig -d /dev/mst/mt3102_pciconf0 s SRIOV_EN=1
reboot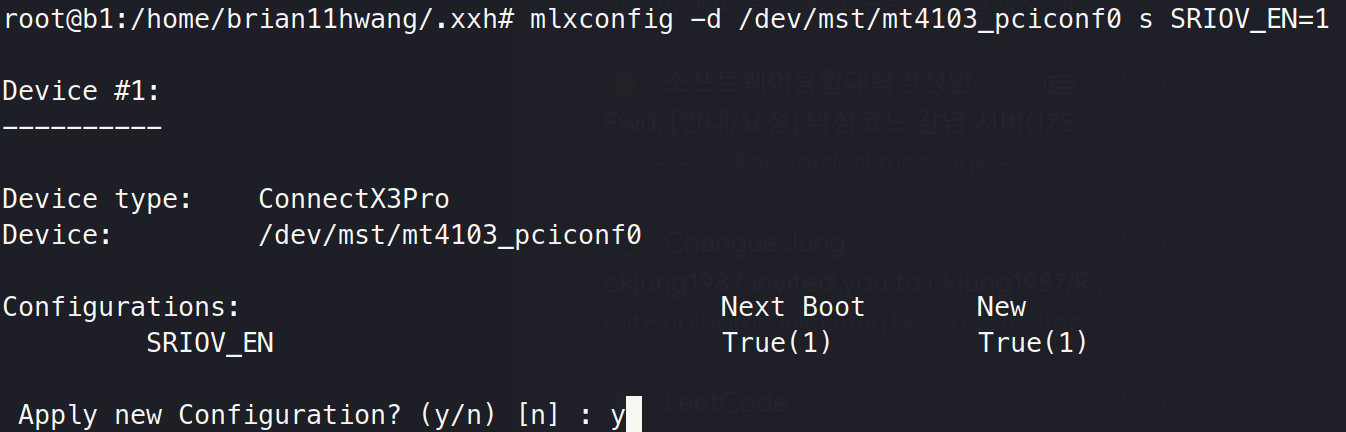
After reboot via
mstflint -dev 65:00.0 dcwe can see:
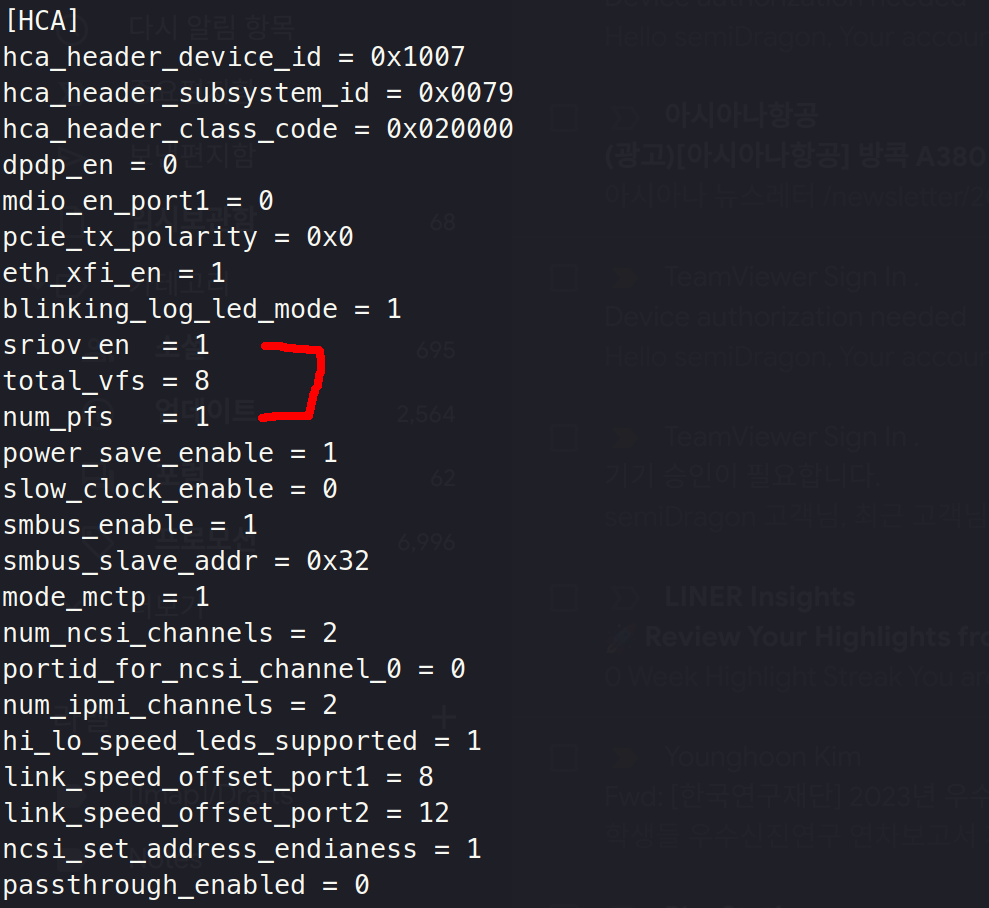
wrap up settings:
ifconfig enp101s0 20.0.1.3 netmask 255.255.255.0

# add at /etc/network/interfaces
auto enp101s0
iface enp101s0 inet static
address 20.0.1.3
netmask 255.255.255.0

#Check Changes
ifconfig -a
Note: At this point, the VFs are not seen via the lspci. Only when SR-IOV is enabled on the MLNX_OFED driver, you will be able to see them.
Lastly, insert options in /etc/modprobe.d/mlx4_core.conf file (add if nonexist)
vim /etc/modprobe.d/mlx4_core.conf

### add
options mlx4_core num_vfs=4 port_type_array=2,2 probe_vf=0


/etc/init.d/openibd restart


reboot
Then, we can see that VFs has been successfully made.

4. Set up KVM
check if KVM is available via:
sudo apt install cpu-checker
sudo kvm-ok
Download needed packages:
sudo apt install -y qemu qemu-kvm libvirt-daemon libvirt-clients bridge-utils virt-managerCheck Successfully installed:
lsmod | grep -i kvm
Download Ubuntu ISO
wget https://releases.ubuntu.com/bionic/ubuntu-18.04.6-desktop-amd64.isoAnd install Ubuntu at virt-manager
5. VM Management
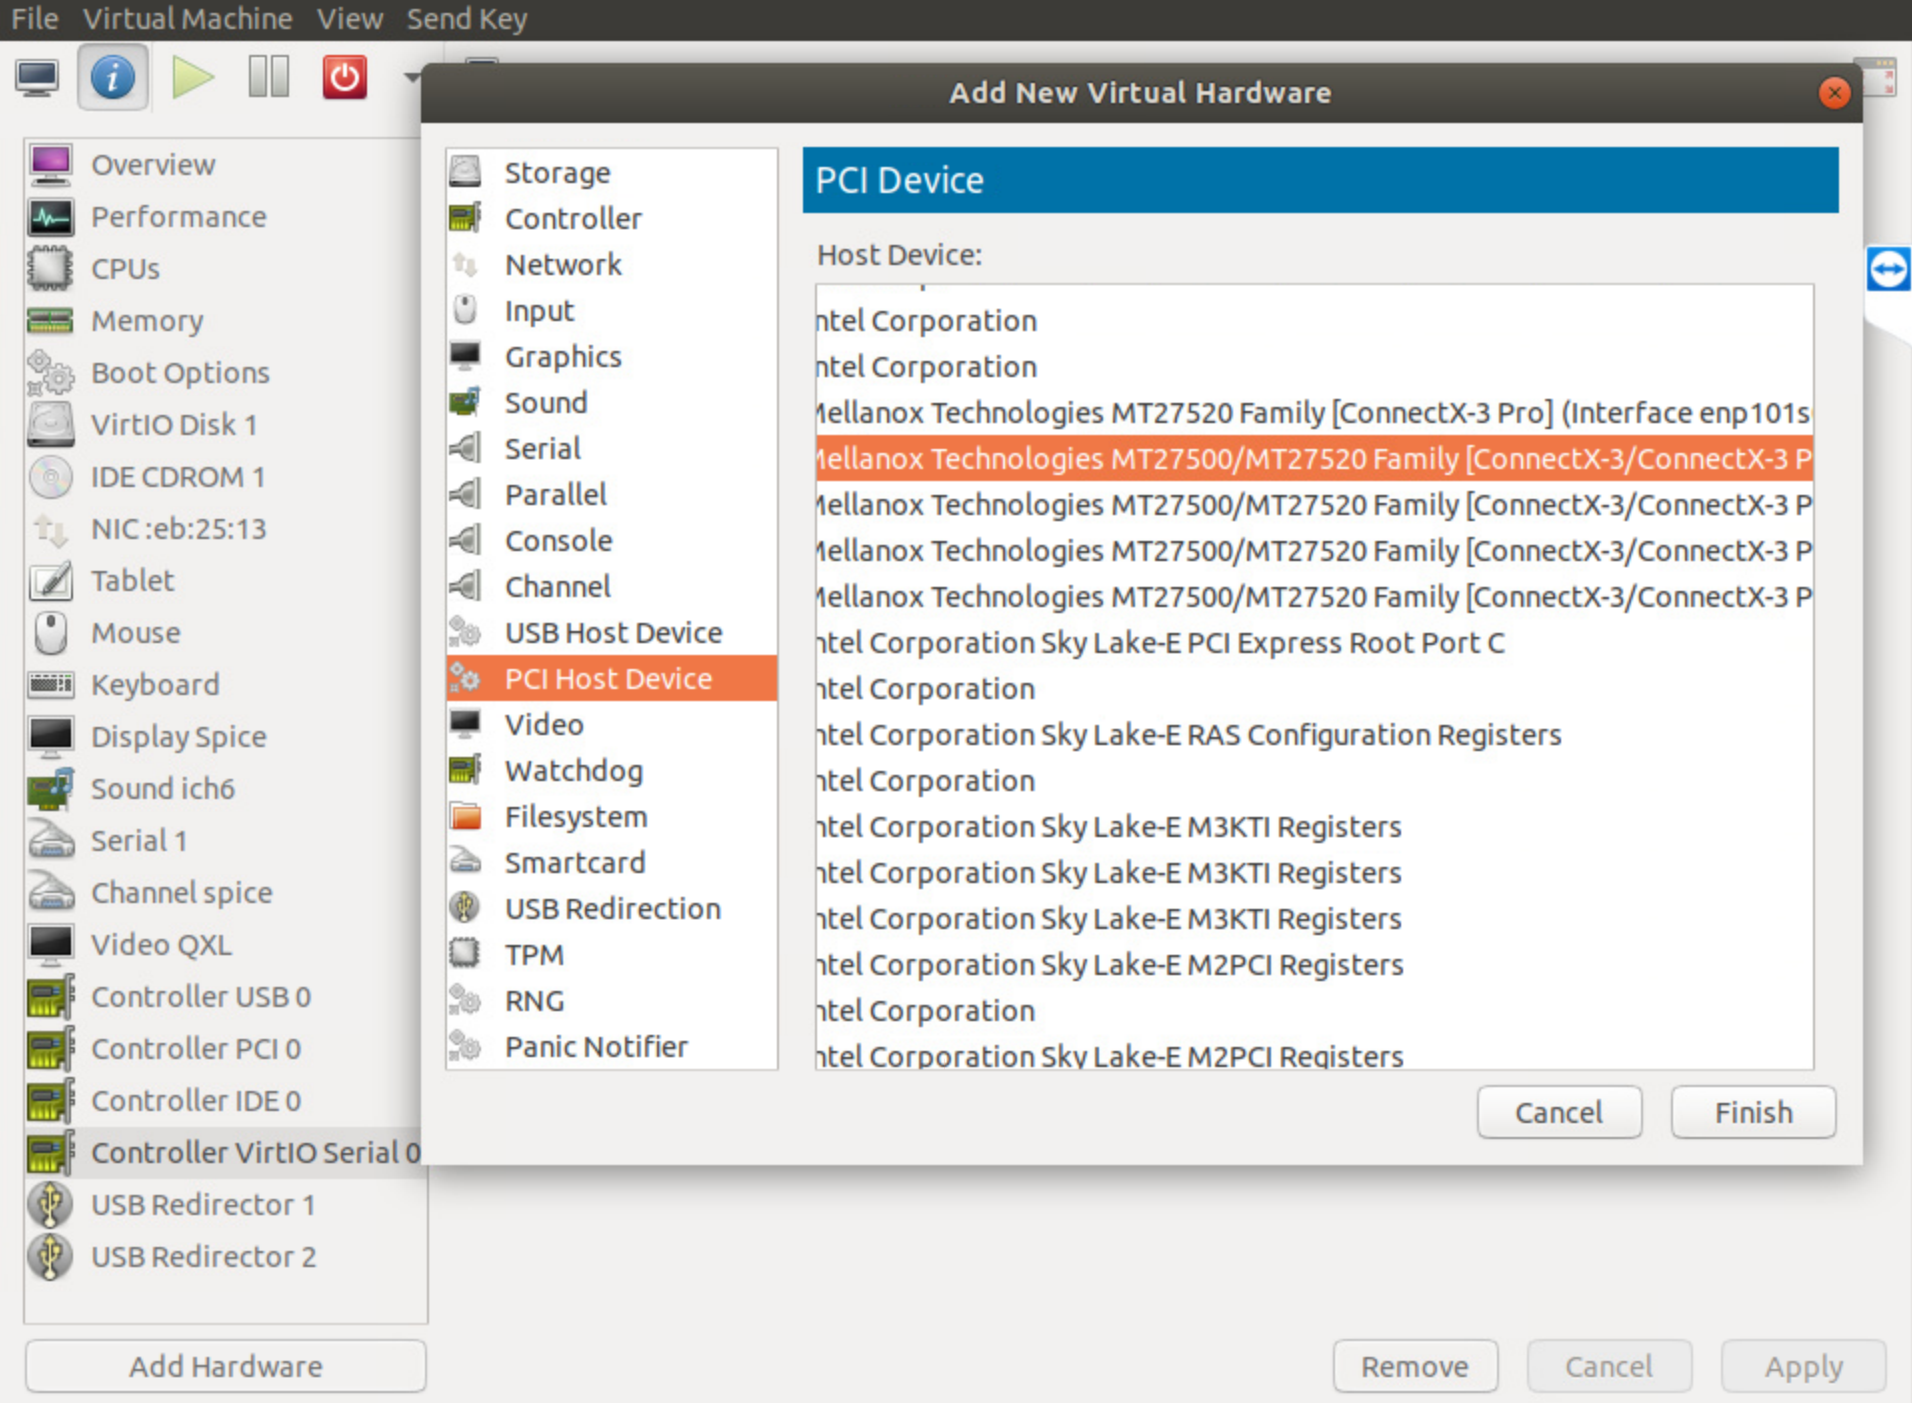
First Add PCI device to VM.
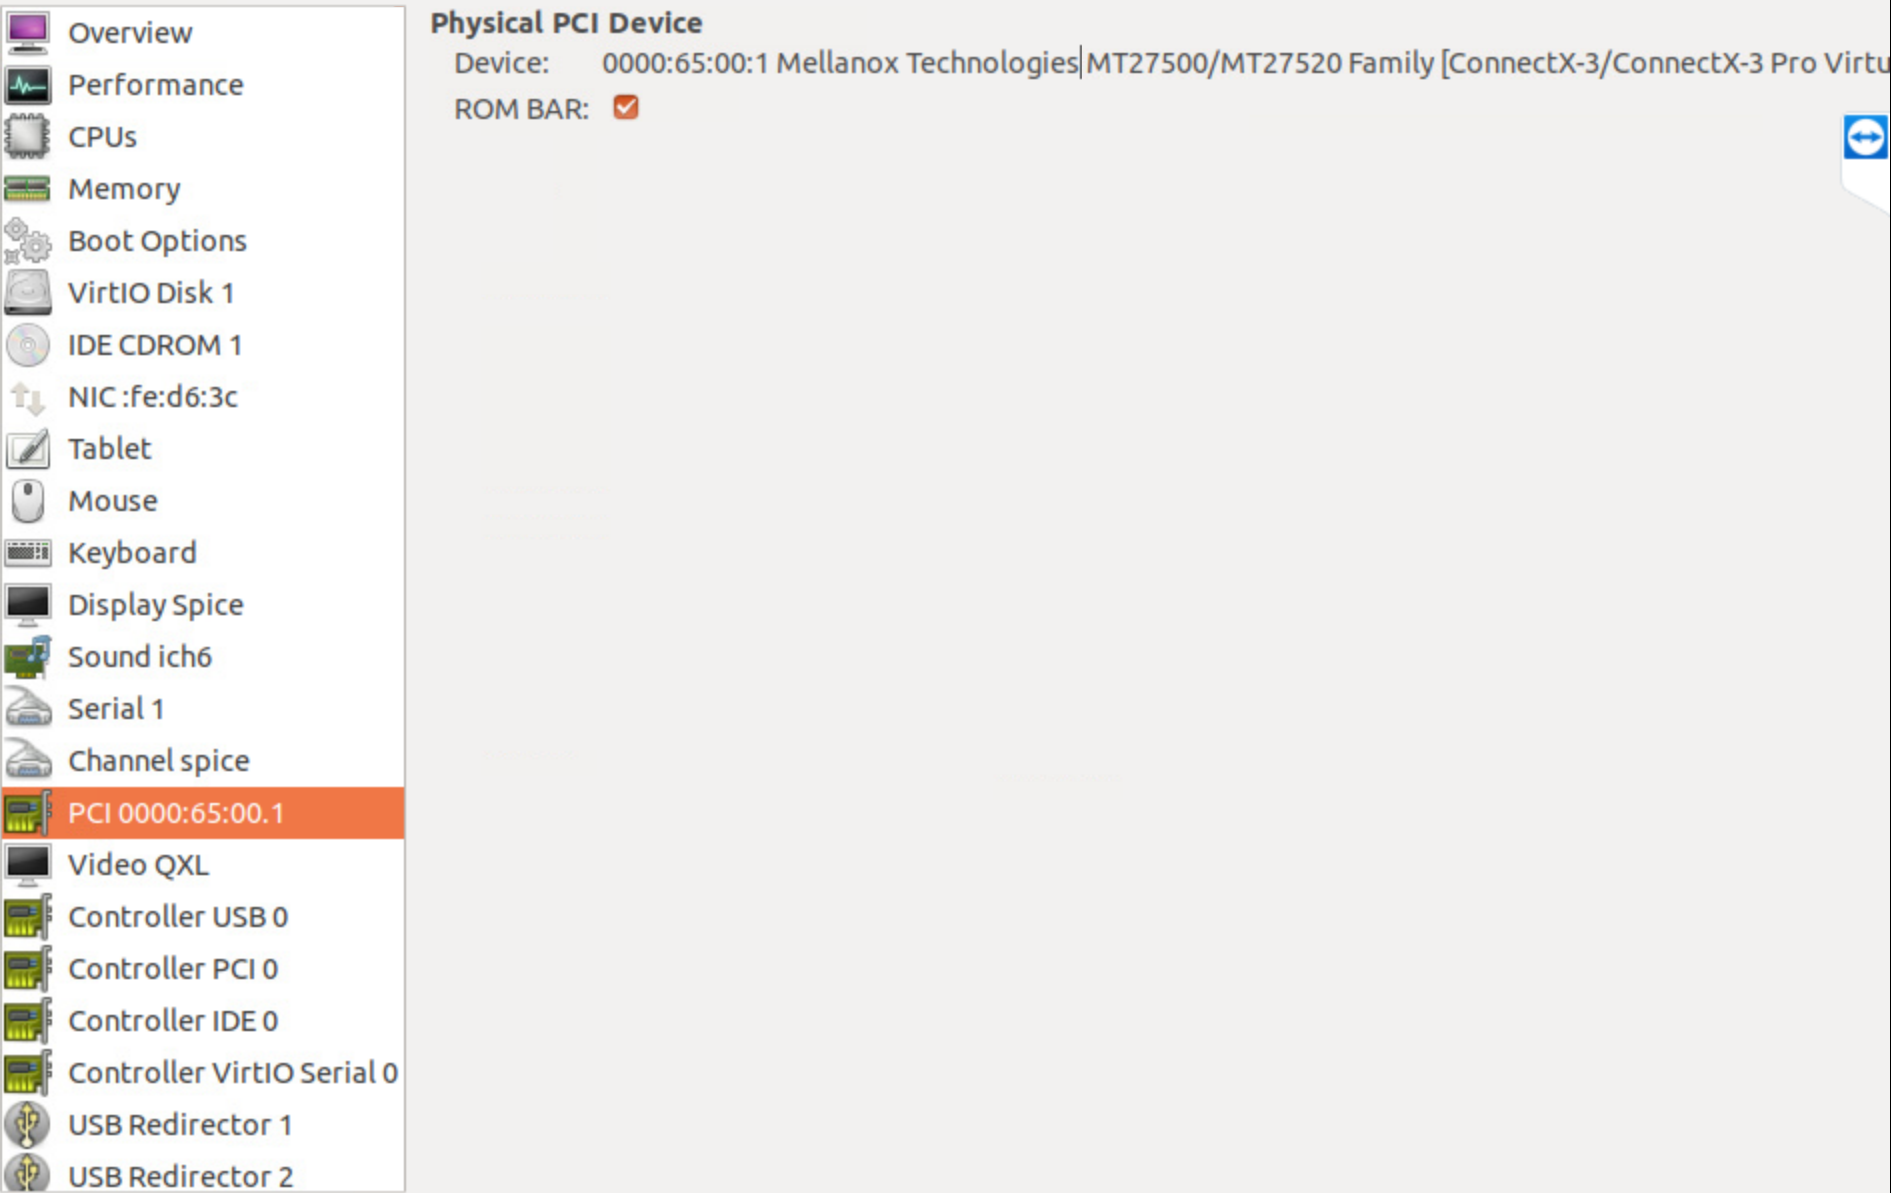
Then after reboot, will be set as below:
Yet after reboot, boot was unavailable due IOMMU was not on.
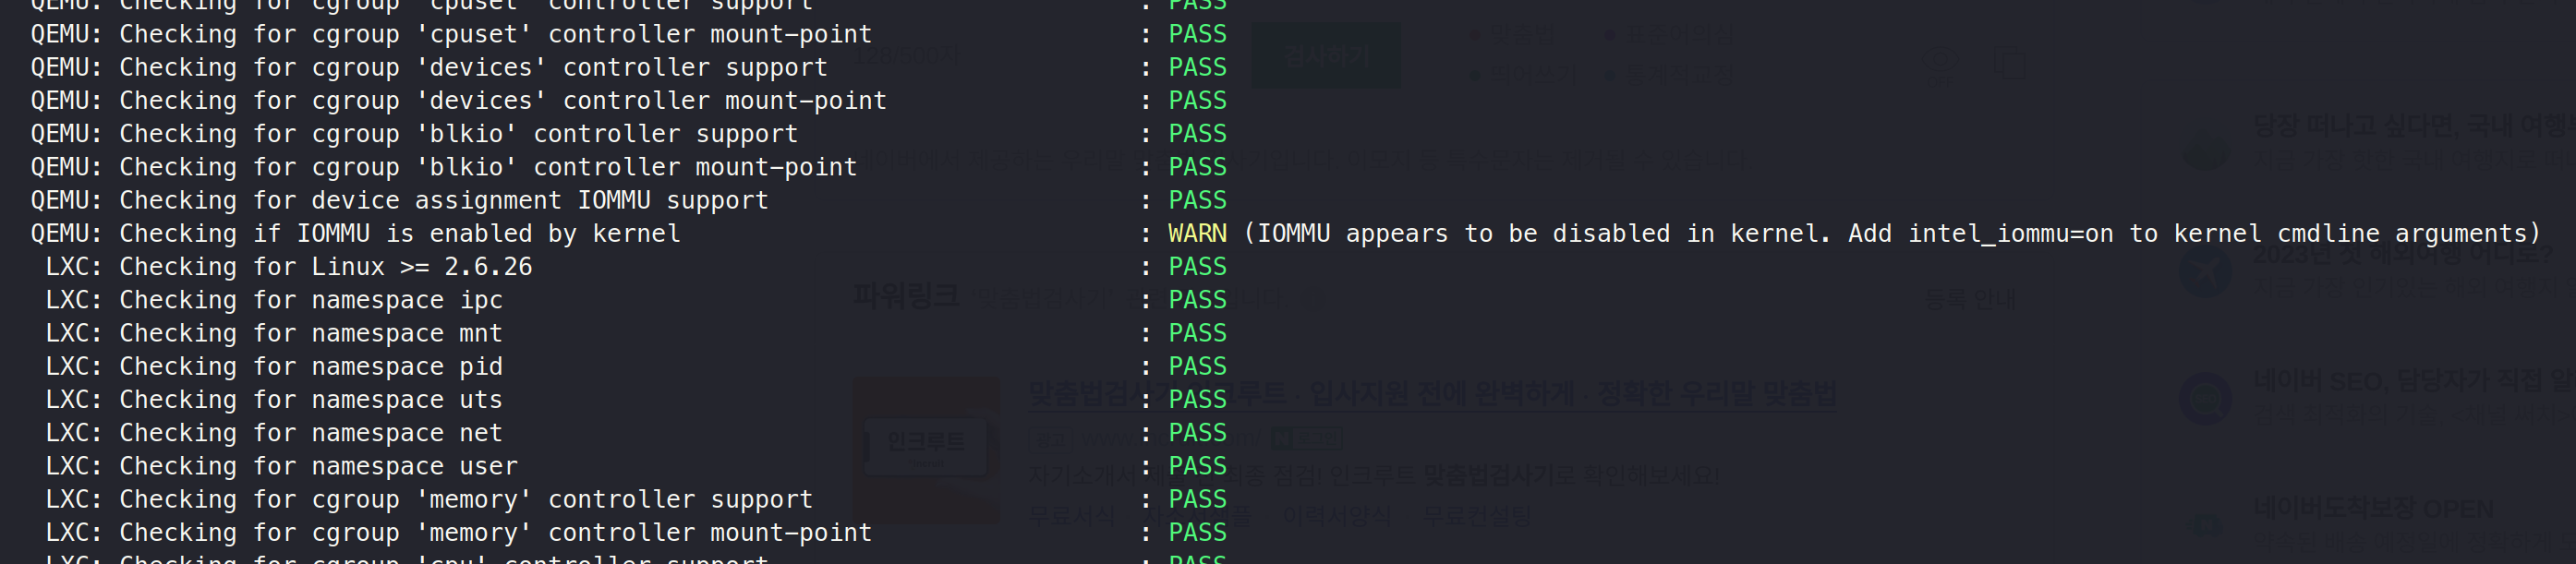
change IOMMU to on via:
vim /etc/default/grub

#add

GRUB_CMDLINE_LINUX="intel_iommu=on"
Then, We can see:
6. Ping Test
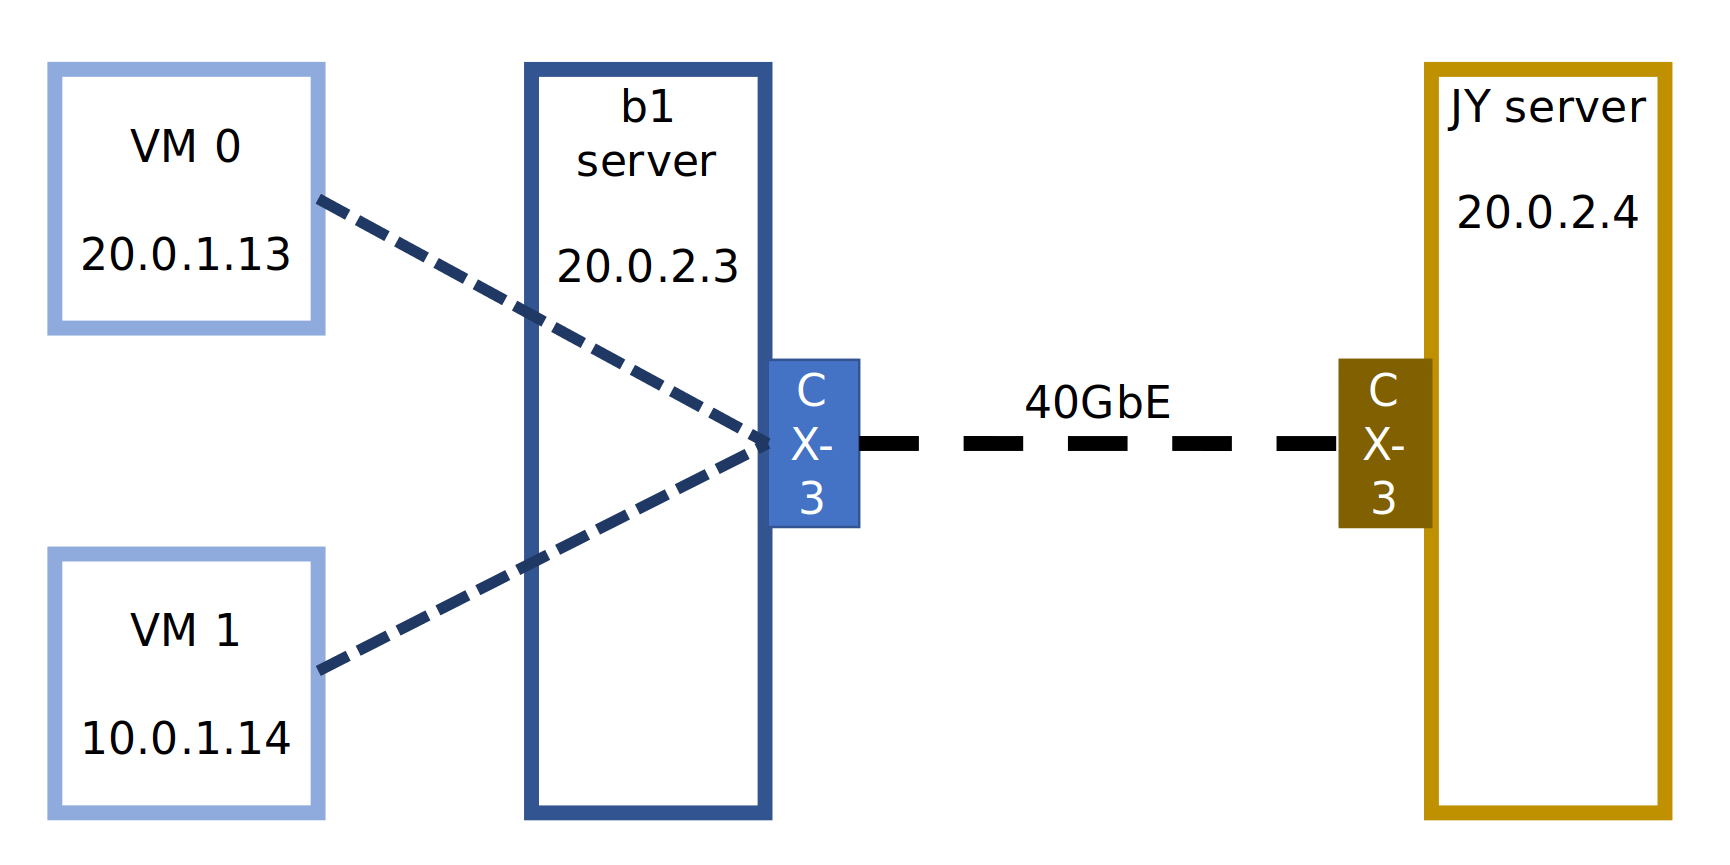
Lastly, I tried a ping test from the VM on b1 to JY to see if things worked correctly.
via
ping -I ens9 20.0.1.4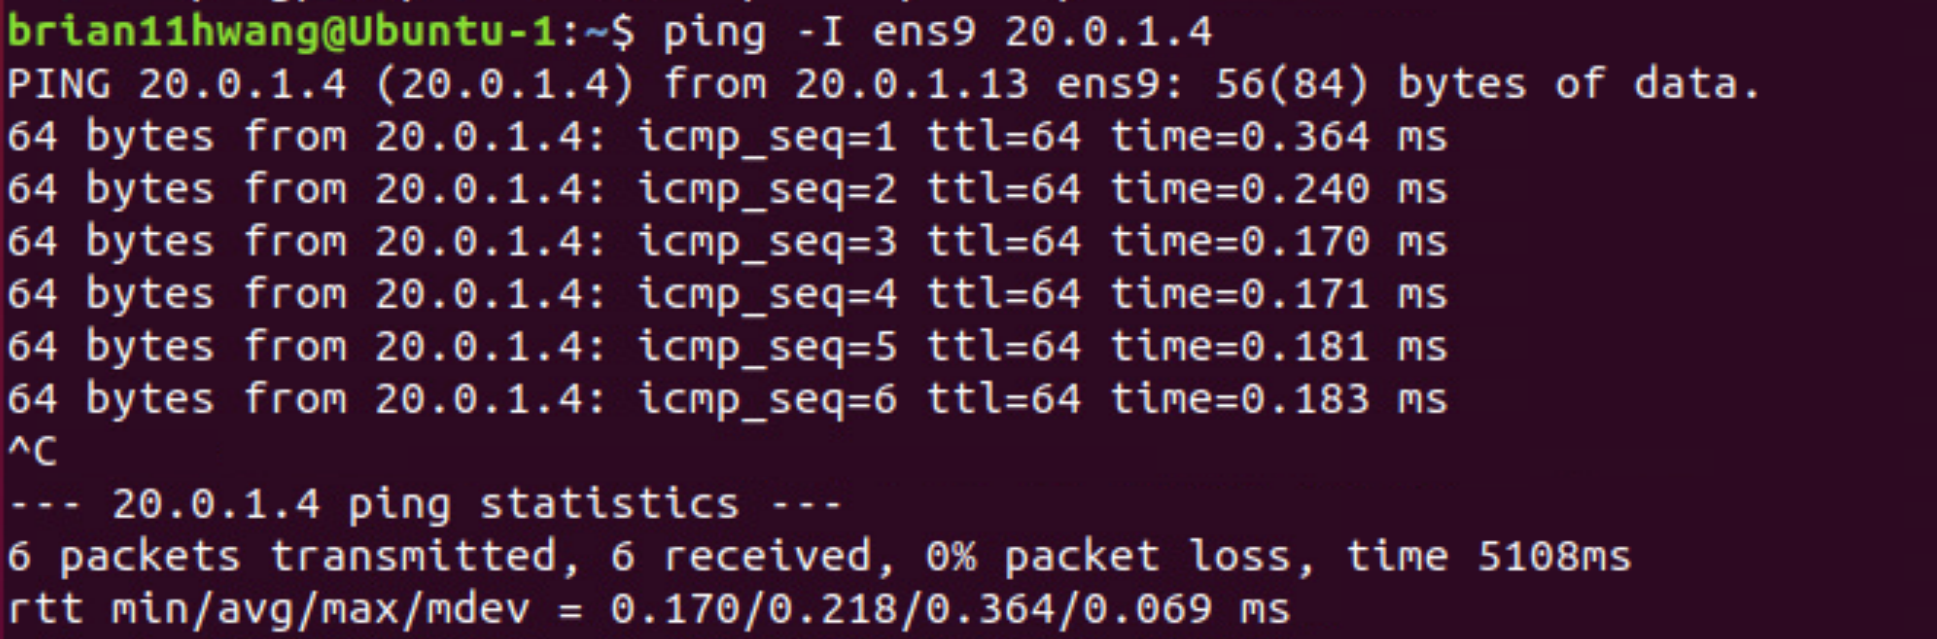
and was successfully recieved from
tcpdump -i enp3s0d1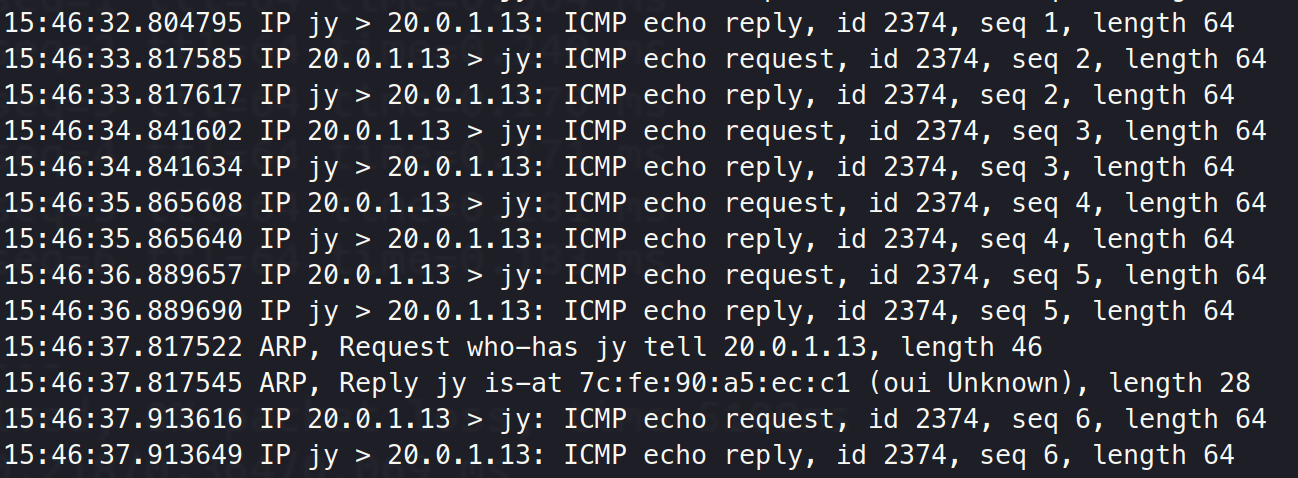
7.Final Diagram
Then resulted Diagram made is as followed: