프로젝트를 진행하다가
Prod, Dev, Local 환경 분리가 필요한 상황이 발생을 하여
환경 분리를 하는것을 공부하였습니다.
프로젝트 구조
main
	java
    resources
    	application.properties
        application-prod.proerties
        application-dev.properties
test
	...
저희 프로젝트에서는 dev, local 환경이 동일시 하기 떄문에 local을 안만들었습니다.
삽질의 연속...
// application-dev.properties
spring.profiles.active=dev
spring.datasource.driverClassName=org.postgresql.Driver
spring.datasource.url=jdbc:postgresql://0.0.0.0:5432/DatabaseName
spring.datasource.username=postgres
spring.datasource.password=
처음에는 구글링에서 spring.profiles.active로 profile설정을 하면 된다고 하여서
property 내용을 이런식으로 작성을 하였고
@Configuration
@PropertySource("classpath:application-dev.properties")
class DatabaseConfig {
    @Value("\${spring.datasource.driverClassName}")
    private lateinit var driverClassName: String

    @Value("\${spring.datasource.url}")
    private lateinit var url : String

    @Value("\${spring.datasource.username}")
    private lateinit var username : String

    @Value("\${spring.datasource.password}")
    private lateinit var password : String

    fun getDriverClassName() : String = driverClassName

    fun getUrl() : String = url

    fun getUsername() : String = username

    fun getPassword() : String = password

    override fun toString(): String {
        return "driverClassName = ${driverClassName}, url = ${url}, username = ${username}, password = ${password}"
    }
}
@SpringBootTest
@ActiveProfiles("dev")
@Transactional
internal class DatabaseConfigTest {
// Database Property를 읽어오는 객체
@Autowired
val test = DatabaseConfig()
// 정말 간단한 Repository
@Autowired
lateinit var testRepository: TestRepository
@Test
fun `read database info`() {
// given
val driverName = test.getDriverClassName()
val url = test.getUrl()
val userName = test.getUsername()
val password = test.getPassword()
// when
println(test.toString())
// then
assertThat(driverName).isNotNull
assertThat(url).isNotNull
assertThat(userName).isNotNull
assertThat(password).isNotNull
}
@Test
fun `Insert Database Check`() {
// given
val testEntity = TestModel()
testEntity.username = "panda"
// when
val newEntity = testRepository.save(testEntity)
// then
println(newEntity.id)
assertThat(newEntity).isNotNull
val existingEntities = testRepository.findByUsername(newEntity.username)
println(existingEntities)
existingEntities.forEach {
println(it.id)
}
assertThat(existingEntities).isNotEmpty
}
}이런식으로 테스트코드를 대충 작성하여 돌려봤는데
에러 또 에러가 발생을 하였다..................
(spring.profiles.active가 invaild 하다는 에러...)
진짜 별의별 짓을 다 했는데
resources를 test 디렉토리 에다가도 복사해보고
@ActiveProfiles말고 @SpringBootTest에서 profile 정하는게 있길래 그것도 써보고 했는데도 에러가 계속 발생을 하였다...
구글링을 진짜 다 뒤졌는데 대부분이 Spring 옛날버전이고 maven 사용한 내용들이고
별다른 해결방법도 없었다.....
그래서 또다른 방법으로 Profile을 정의를 했습니다.
Profile 정의 (드디어 해결!)
// application-dev.properties
spring.datasource.driverClassName=org.postgresql.Driver
spring.datasource.url=jdbc:postgresql://0.0.0.0:5432/DatabaseName
spring.datasource.username=postgres
spring.datasource.password=
@Configuration
@Profile("dev")
class DatabaseConfig {
...
}해결방법은 심플했다.
먼저 invaild된다는 항목을 지워버리고
Profile 정의를 어노테이션을 사용하여 정의를 하였습니다.
이때 @Profile 때문에 자동으로 application-{profile}.proeprty 탐색을 하여
application-dev.property를 찾기때문에
@PropertySource("classpath:application-dev.properties")
이부분을 제거하여도 작동 하는것을 확인했습니다.
사실은 @Profile 를 진작에 알았긴 한데 사용 안했던 이유는
환경별로 Config 클래스를 여러개 정의를 해야되가지고 spring.profiles.active 하나만 가지고 처리를 할수 있으면 편할거같아서 삽질을 했었습니다.
Active Profile
자 이제 Profile들을 정의를 하여 각각의 환경을 분리시켰는데
실제로 실행할떄 원하는 Profile을 선택하는 것을 Active Profile 이라고 합니다.
1. IntelliJ
-
스프링부트 Configurations
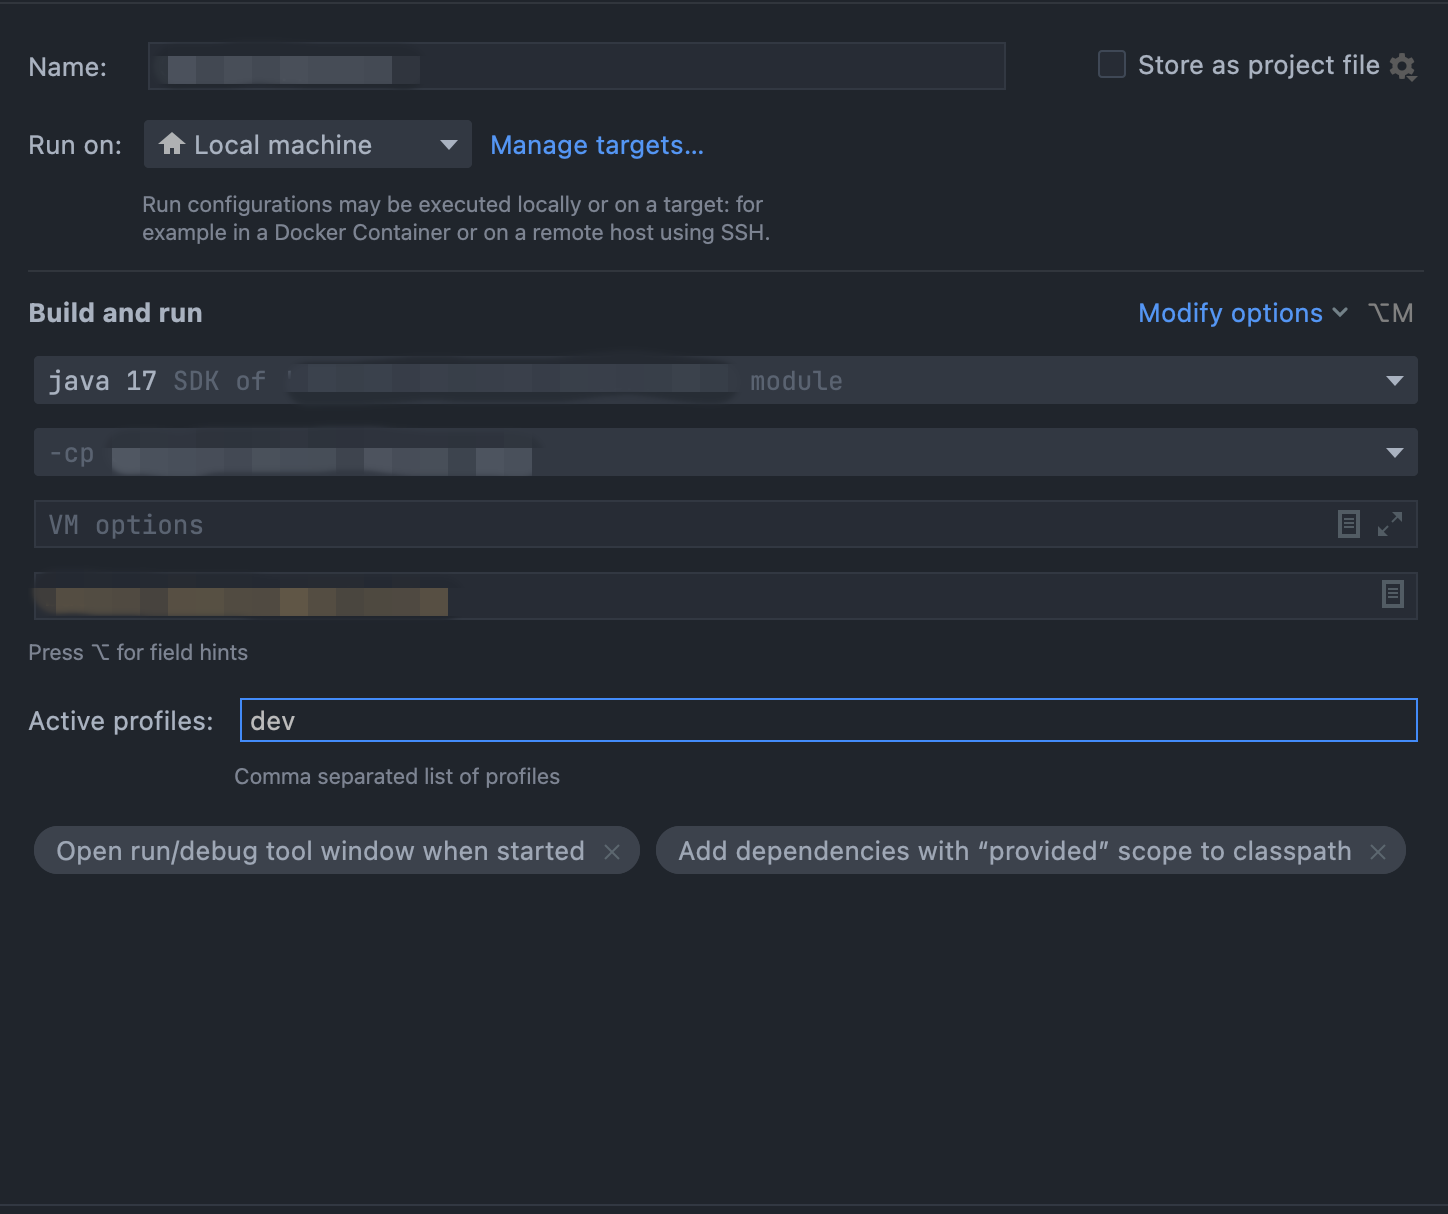 Configurations에서 SpringBoot 항목을 가면 Active profiles 란이 있는데
여기서 원하는 profile 들을 설정해 실행할 수 있다. -
테스트코드 Gradle
테스트코드는 Gradle로 실행시키기 때문에 Configurations에서 Active profiles란이 없다.
(물론 인자로 profile 선택 가능하긴 함)
따라서 테스트코드에@ActiveProfiles를 사용하여 원하는 Profiles를 선택하면 된다.
2. CLI
서비스를 배포하게 된다면 인텔리제이로 실행을 못하기 때문에
자연스럽게 cli로 빌드 및 실행을 하게 됩니다.
따라서 Gradle로 빌드 및 실행을 하게 되는데
2가지 방법이 있는것 같습니다.
-
./gradlew bootRun -Pprofile=dev -
./gradlew bootRun -Dspring.profiles.active=prod
알아보니까
- -D 옵션은 JVM 시스템 property 설정
- -P 옵션은 project의 property를 설정
해준다고 한다.
아직은 초보라서 두개의 차이가 어떤 결과를 불러오는지 자세히 모르기 때문에
아무거나 사용하면 될것같습니다.
느낀점
이렇겐 Prod, Dev 의 환경 분리를 진행하였는데
spring.profiles.active 때문에 애먹었습니다.
아직도 왜 구글링에서는 이렇게 쓰라는지 모르겠고
application profile구분은 파일명으로 해주는거 같은데....
지금껏 한번도 환경분리를 한적이 없는데
이번 프로젝트를 진행하면서 이런 환경을 구축하는 것은 되게 좋았던 것 같습니다.
추가 학습 정보 (중요!!)
spring.profiles.active는 profile 정의가 아니고 원하는 profile을 active시키는 거였다............
어쩐지 profies.active더라
그래서 따로 환경별로 Config 파일에서 Profile 정의를 안해줘도 application-{profile}.property가 존재하고
원하는 profile을 Active 시켜주면 바로 적용된다...............
Config 파일 안만들어도 되서
훨씬 더 간단해졌다 ㅋㅋㅋㅋㅋㅋㅋㅋㅋㅋㅋㅋㅋㅋㅋㅋㅋㅋㅋㅋㅋㅋㅋㅋ
