AppBar
Scaffold
- screen을 위한 기본적 레이아웃과 설정을 제공한다.
Data Fetching
flutter에서 fetch를 하기 위해서는 http라는 패키지를 설치해야 한다.
- 설치방법
- https://pub.dev/
- http 검색해서 해당 페이지 가보면
- https://pub.dev/packages/http
어떻게 설치하고 쓰는지 잘 나와있음.
-
pubspec.yaml 으로 설치하는 방법을 해보자
- 위 파일은 package.json 같은거라 보면 됨.
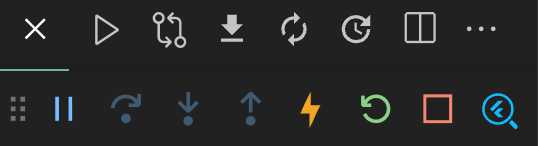
dependencies: http: ^0.13.5디펜던시에 복붙, 저장- 저장했는데 자동 다운로드 안되면?
-> 아래 사진에 패키지 다운로드 버튼 클릭.
🪓 계속
Flutter http package does not exist에러가 떴는데 vscode와 안드로이드 스튜디오 재실행하니 사라졌음.get data
import 'dart:convert';

import 'package:http/http.dart' as http;
import 'package:webflix/models/webtoon_model.dart';

class ApiService {
  final String baseUrl = 'https://webtoon-crawler.nomadcoders.workers.dev';
  final String today = "today";

  Future<List<WebtoonModel>> getTodaysToons() async {
    List<WebtoonModel> webtoonInstances = [];

    final url = Uri.parse('$baseUrl/$today');
    //get은 future를 반환(Pormise) - async await
    // Future<Response> get()
    // get함수는 Future타입을 반환; Future는 지금이 아닌 나중에 완료된다는 뜻
    // 완료되면 Response 타입을 반환할 예정.
    // http 요청 완료 기다리게 하기.
    final response = await http.get(url);
    if (response.statusCode == 200) {
      //response.body는 배열로 들어오며 요소 타입은 확실치 않아서 dynamic

      final List<dynamic> webtoons = jsonDecode(response.body);

      for (var webtoon in webtoons) {
        //webtoonModel클래스의 fromJson 컨트트럭터에 의해
        // 인스턴스화 된 데이터들이 차례대로 webtoonInstatnces 배열에 추가됨.
        webtoonInstances.add(WebtoonModel.fromJson(webtoon));
      }
      return webtoonInstances;
    }
    throw Error();
  }
}
데이터 정제 하기
class WebtoonModel {
  final String title, thumb, id;

// named constructor 이용해서 받아온 json 데이터로 위 프로퍼티들 초기화.
  WebtoonModel.fromJson(Map<String, dynamic> json)
      : title = json['title'],
        thumb = json['thumb'],
        id = json['id'];
}
home_screen에서 써먹기
// StatefulWidget 인 상태
List<WebtoonModel> webtoons = [];
  bool isLoading = true;

  void waitForWebtoons() async {
    //1. ApiService클래스의 getTodaysToons() 메서드를 호출하여 webtoons에 할당
    //2. isLoaidng을 false로 그리고 setState로 build호출
    webtoons = await ApiService.getTodaysToons();
    isLoading = false;
    setState(() {});
  }

  @override
  void initState() {
    super.initState();
    waitForWebtoons();
  }
하지만 isLoading 등을 수동으로 할당해줘야 하고 state를 사용하는 것을 최대한 지양해야 하기 때문에 리팩터링이 필요함.
//StatelessWidget으로 다시 변경
 Future<List<WebtoonModel>> webtoons = ApiService.getTodaysToons();

  @override
  Widget build(BuildContext context) {
    // print(webtoons); //Instance of 'Future<List<WebtoonModel>>
//원래라면 Future타입은 asnyc/await으로 기다려야 하지만 이를 위한 widget 존재
// 'FutureBuilder'

---Scaffold에 body추가
body: FutureBuilder(
          //future 기다려라
          future: webtoons,
          builder: (context, snapshot) {
            //snapshot : Future상태 감지
            if (snapshot.hasData) {
              return const Text("There is data!");
            }
            return const Text('Loading...');
          },
ListView Widget
 return ListView(
   children: [
    for (var webtoon in snapshot.data!) Text(webtoon.title)
                ],
);- ListView는 요소들을 목록으로 나타냄.
- 하지만 최적화가 안되어있다.(한 번에 모든 아이템 로딩)
ListView.builder
 body: FutureBuilder(
          //future 기다려라
          future: webtoons,
          builder: (context, snapshot) {
            //snapshot : Future상태 감지
            if (snapshot.hasData) {
              // ListView.builder는 사용자가 보는 것만 로드하고
              //안보는 것들은 메모리에서 제외시킨다.
              return ListView.builder(
                itemBuilder: (context, index) {
                  //print(index); // 스크롤해보면 해당 아이템의 index가 디버그 콘솔에 나타남.
                  //index: 어떤 아이템이 빌드되는지 알 수 있는 요소
                  var webtoon = snapshot.data![index];

                  return Text(webtoon.title);
                },
                scrollDirection: Axis.horizontal,
                itemCount: snapshot.data?.length,
              );
ListView.separated
- separated는
separatorBuilder를 필수로 가짐. - separatorBuilder는 리스트 사이에 추가해줄 위젯을 리턴.
separatorBuilder: (context, index) {
      return const SizedBox(
                    width: 20,
                  );
                },
Detail Screen
- detail_screen.dart
//'id'를 사용할 수 없다.
 //ApiService에서 id를 사용하려할 때 id 또한 이니셜라이징되기 때문.
 // 그래서 id가 초기화되기를 기다리고 난 후 에 id를 사용할 수 있다.
 // 그래서 statfulWidget으로 변경!
  Future<WebtoonDetailModel> webtoon = ApiService.getToonById(id);
URL launcher
- 앱에서 링크 클릭 시 웹사이트 이동.
shared_preferences
- 중요데이터 말고 간단한 데이터를 기기에 저장해놓고 읽을 수 있게 하는 패키지.
flutter structure에 대한 설명

주먹구구식은 버리고 Why & How를 고민하며 프로그래밍 하는 개발자가 되자!