1. 실습 목표 및 간단한 동작 원리
실습목표
스프링 시큐리티 프로엠워크를 활용하여 인증/인가를 구현하고 회원 정보 저장(영속성)은 MySQL 데이터베이스를 활용하여 구현한다.
구현
- 인증: 로그인
- 인가: 경로별 접근 권한
- 회원가입
시큐리티 동작 원리
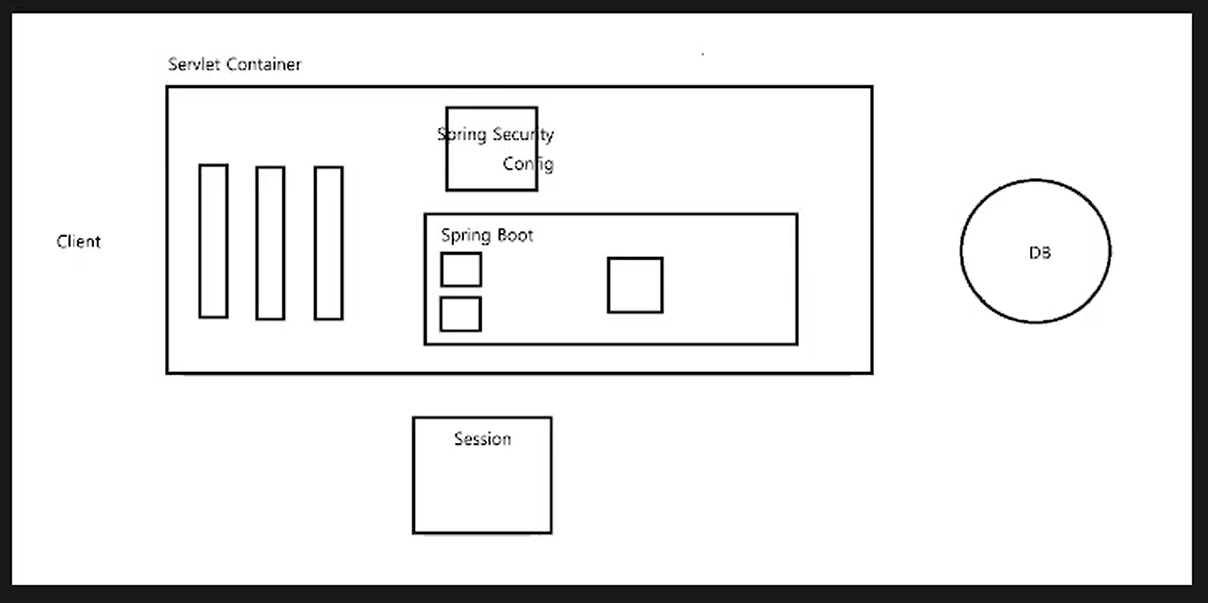
스프링부트 애플리케이션은 서블릿 컨테이너라는 톰캣 서블릿 컨테이너 위에 존재하는데, 클라이언트에게서 요청이 오면, 먼저 서블릿 컨테이너가 요청을 받아 필터를 거친 후에 스프링부트 컨트롤러에 요청이 도착한다. 스프링 시큐리티는 Security Config라는 자바 컨피르 파일을 등록해두면 이 컨피그 파일이 특정한 Filter를 만들어 클라이언트의 요청을 가로챈다. 이후 클라이언트가 가고싶어하는 목적지 이전에 해당 클라이언트가 특정한 권한을 가지고 있는지 분석한다.
만약 로그인을 진행해야 하는경우, 필터에서 모든 유저에 대해 접근을 허용하여 로그인 컨트롤러에서 로그인을 진행한 후, 세션에 로그인 정보를 등록한다. 이후 특정 컨트롤러에 접근할 때는 시큐리티 컨피그가 세션에 등록되어있는 유저 정보를 통해 필터를 통과시키고 특정 페이지에 접근하도록 돕는다.
버전
- Spring Boot 3.1.5
- Security 6.1.5
- Spring Data JPA - MySQL
- mustache
- Intellij Ultimate
2. 프로젝트 생성
의존성
Spring Web
Lombok
Mustache
Spring Security
Spring Data JPA
MySQL Driver
데이터베이스 의존성
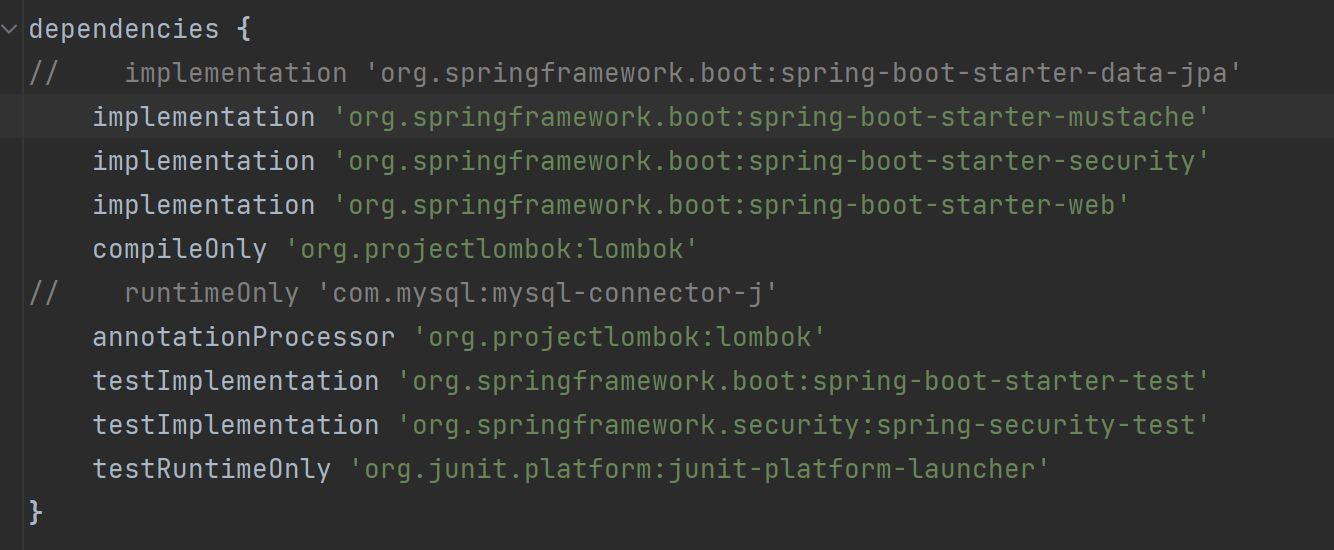
- db쪽 의존성은 잠시 주석처리한다.
main 페이지
MainController.java
package com.example.testsecurity.controller;

import org.springframework.stereotype.Controller;
import org.springframework.web.bind.annotation.GetMapping;

@Controller
public class MainController {

    @GetMapping("/")
    public String mainP() {
        return "main";
    }
}
main.mustache
<html>
<head>
    <meta charset="UTF-8">
    <meta name="viewport"
          content="width=device-width, user-scalable=no,
                   initial-scale=1.0, maximum-scale=1.0, minimum-scale=1.0">
    <meta http-equiv="X-UA-Compatible" content="ie=edge">
    <title>Main Page</title>
</head>
<body>
page
</body>
</html>
3. Security 인가 작업
시큐리티 동작 구조

클라이언트가 우리의 Spring Boot Application에 특정한 요청을 보내는 경우, 요청이 Servlet Container를 지나서 Spring Boot Application으로 들어오게 된다. 그때 Servlet Container는 여러개의 Filter를 가지고 있고, 요청은 이 Filter를 지나서 들어오게 된다. 여기서 SpringSecurity의 의존성을 추가하게 되면, Filter에서 해당 요청을 가로채고, 다음과 같은 사항들을 확인한다. 요청에서 클라이언트가 가고자하는 특정 경로에 대해 1.권한을 가지고 있는지, 2.로그인이 되어있는지, 3.role을 가지고 있는지 검증한다. 이와 같은 작업을 인가 작업이라고 하고, 이는 경로 요청에 대해 SpringSecurity가 대해 미리 검증하는 과정이다.
인가 (검증)
특정한 경로에 요청이 오면 Controller 클래스에 도달하기 전 필터에서 SpringSecurity가 검증을 함
1. 해당 경로의 접근은 누구에게 열려 있는지
2. 로그인이 완료된 사용자인지
3. 해당되는 role을 가지고 있는지
Security Config
인가 설정을 진행하는 클래스
(엄밀하게 정의하면 SecurityFilterChain 설정을 진행함)
시큐리티 Config 클래스 작성
package com.example.testsecurity.config;

import org.springframework.context.annotation.Bean;
import org.springframework.context.annotation.Configuration;
import org.springframework.security.config.annotation.web.builders.HttpSecurity;
import org.springframework.security.config.annotation.web.configuration.EnableWebSecurity;
import org.springframework.security.web.SecurityFilterChain;

@Configuration
@EnableWebSecurity
public class SecurityConfig {

    @Bean
    public SecurityFilterChain filterChain(HttpSecurity http) throws Exception {

        http
                .authorizeHttpRequests((auth) -> auth
                        .requestMatchers("/", "/login").permitAll()
                        .requestMatchers("/admin").hasRole("ADMIN")
                        .requestMatchers("/my/**").hasAnyRole("ADMIN", "USER")
                        .anyRequest().authenticated()
                );

        return http.build();
    }

}
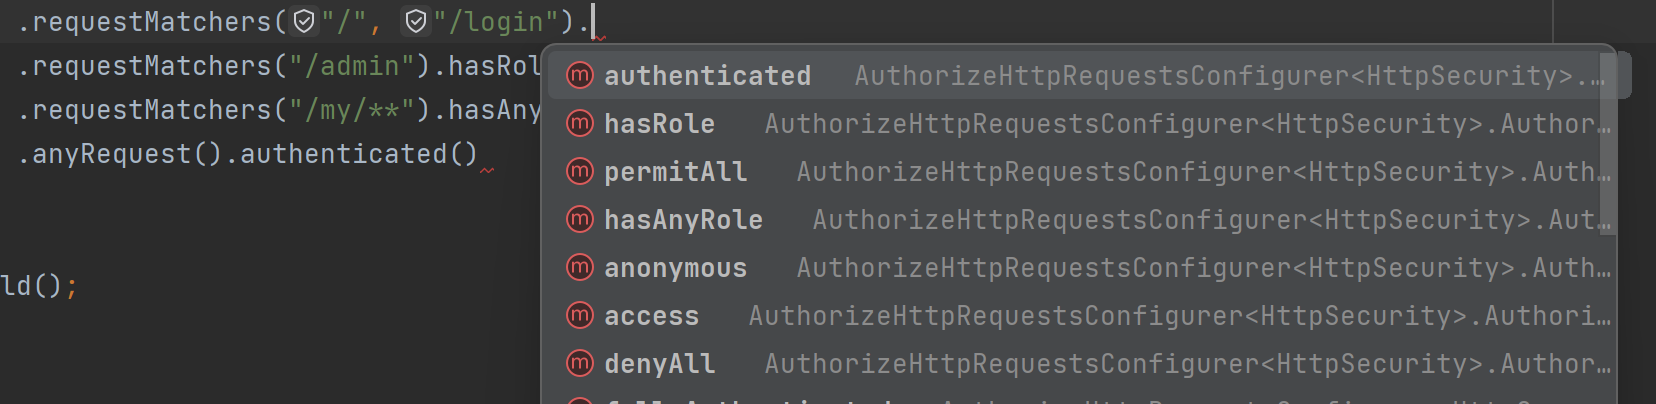
경로별 인가 작성
.reqeustMathers: 경로에 대한 권한을 부여permitAll: 모든 사용자에게 접근 허용hasRole: 특정 권한이 있는 사용자만 접근 가능authenticated: 로그인만 진행하면 모두 접근 가능denyAll: 모든 사용자의 접근 제한
.anyRequest: 위에서 처리하지 않은 나머지 경로 일괄 설정.
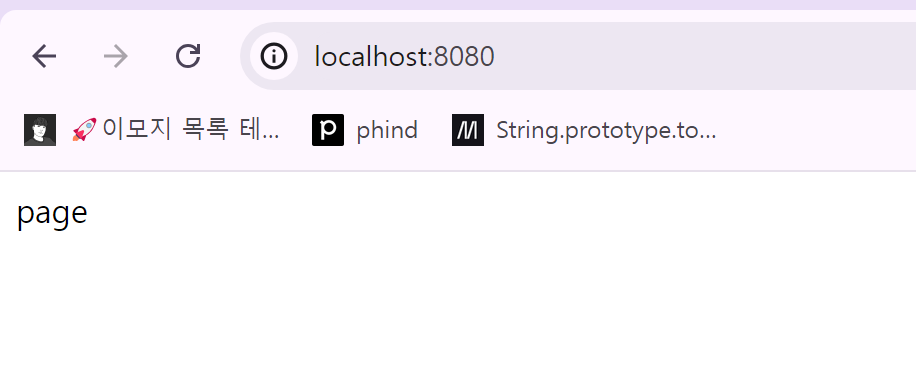
실행
.requestMatchers("/", "/login").permitAll()- 메인페이지에 모든 사용자가 접근 가능하도록 설정.
- 따라서, 이제 메인 페이지에 접근하면 로그인 페이지가 아니라 실제
main.mustache파일이 제공된다.
인가 동작 순서
                .authorizeHttpRequests((auth) -> auth
                        .requestMatchers("/", "/login").permitAll()
                        .requestMatchers("/admin").hasRole("ADMIN")
                        .requestMatchers("/my/**").hasAnyRole("ADMIN", "USER")
.anyRequest().authenticated()- 동작 순서가 상단부터 진행되므로, 순서에 유의해서 작성해야 한다.
- 상단에서 모든 사용자에게 모든 경로를 허가한 뒤 하단에서 특정 경로를 제한하면, 상단에서 이미 접근 권한처리가 이루어졌기 때문에 하단의 경로 제한이 적용되지 않게 된다.
- 특히
anyMatch와 같은 "모든 경로 설정"은 가장 하단에서 이뤄지도록 주의해야 한다.
admin 경로 테스트
AdminController.java
package com.example.testsecurity.controller;

import org.springframework.stereotype.Controller;
import org.springframework.web.bind.annotation.GetMapping;

@Controller
public class AdminController {

    @GetMapping("/admin")
    public String adminP() {
        return "admin";
    }
}
admin.mustache
<html>
<head>
    <meta charset="UTF-8">
    <meta name="viewport"
          content="width=device-width, user-scalable=no, initial-scale=1.0,
                   maximum-scale=1.0, minimum-scale=1.0">
    <meta http-equiv="X-UA-Compatible" content="ie=edge">
    <title>Document</title>
</head>
<body>
    admin page
</body>
</html>
.requestMatchers("/admin").hasRole("ADMIN")- "ADMIN"이라는 ROLE을 가진 회원만
/admin에 접근 가능하도록 제한. - 따로 로그인 페이지도 없어서 현재 해당 페이지에 접근할 수 없는 상황.
- "ADMIN"이라는 ROLE을 가진 회원만
버전별 Security Config 구현 방법
시큐리티 버전 특성
스프링은 버전에 따라 구현 방식이 변경되는데 시큐리티의 경우 특히 세부 버전별로 구현 방법이 많이 다르기 때문에 버전 마다 구현 특징을 확인해야 한다.
새로운 버전이 출시될 때마다 GitHub의 Spring 리포지터리에서 Security의 Release 항목을 통해 변경된 점을 확인할 수 있다.
주요 버전별 구현
- 스프링 부트 2.X.X ~ 2.6.X (스프링 5.X.X ~ 5.6.X)
WebSecurityConfigurerAdapter상속받아 내부의configure메서드를 오버라이딩 하는 방식.
public class WebSecurityConfig extends WebSecurityConfigurerAdapter {

    @Override
    protected void configure(HttpSecurity http) throws Exception {

				http
	        .authorizeRequests()
            .antMatchers("/").authenticated()
            .anyRequest().permitAll();

    }
}- 스프링 부트 2.7.X ~ 3.0.X (스프링 5.7.X M2 ~ 6.0.X)
- 특정한 애노테이션을 만들고, Bean을 등록하는 방식으로 변경
public class SpringSecurityConfig {

    @Bean
    public SecurityFilterChain filterChain(HttpSecurity http) throws Exception {

        http
						.authorizeHttpRequests()
			            .requestMatchers("/admin").hasRole("ADMIN")
			            .anyRequest().authenticated();

        return http.build();
    }
}- 스프링 부트 3.1.X ~ (스프링 6.1.X ~ )
- 3.1.x 버전부터 람다형식 표현 필수
public class SpringSecurityConfig {

    @Bean
    public SecurityFilterChain filterChain(HttpSecurity http) throws Exception {

        http
            .authorizeHttpRequests((auth) -> auth
                  .requestMatchers("/login", "/join").permitAll()
                  .anyRequest().authenticated()
        );

        return http.build();
    }
}
4. 커스텀 로그인 설정
Config 설정 후 로그인 페이지
앞 선 코드의 문제점
스프링 시큐리티 config 클래스 설정 후 특정 경로에 대한 접근 권한이 없는경우 자동으로 로그인 페이지로 리다이렉팅 되지 않고 오류 페이지가 발생한다.
해결 방법
위 문제를 하결하기 위해 Config 클래스를 설정하면 로그인 페이지 설정도 진행해야 한다.
로그인 페이지 생성
login.mustache
<html>
<head>
    <meta charset="UTF-8">
    <meta name="viewport"
          content="width=device-width, user-scalable=no, initial-scale=1.0, maximum-scale=1.0, minimum-scale=1.0">
    <meta http-equiv="X-UA-Compatible" content="ie=edge">
    <title>Document</title>
</head>
<body>
    login page
    <hr>
    <form action="/loginProc" method="post" name="loginForm">
        <input id="username" type="text" name="username" placeholder="id"/>
        <input id="password" type="password" name="password" placeholder="password"/>
        <input type="submit" value="login"/>
    </form>
</body>
</html>submit버튼을 클릭하면/loginProc라는 경로로POST요청이 가게 된다.
로그인 컨트롤러
LoginController.java
package com.example.testsecurity.controller;

import org.springframework.stereotype.Controller;
import org.springframework.web.bind.annotation.GetMapping;

@Controller
public class LoginController {

    @GetMapping("/login")
    public String loginP() {
        return "login";
    }

}
페이지 테스트
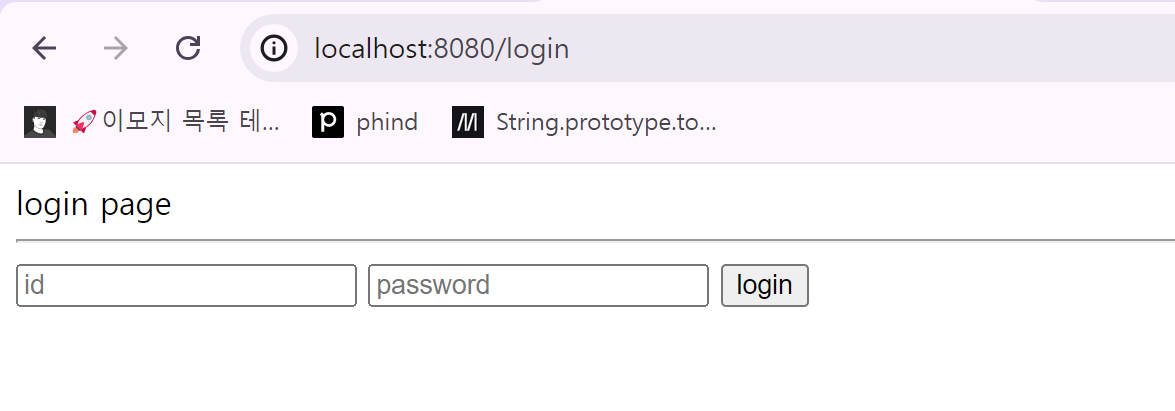
- 이제 문제없이
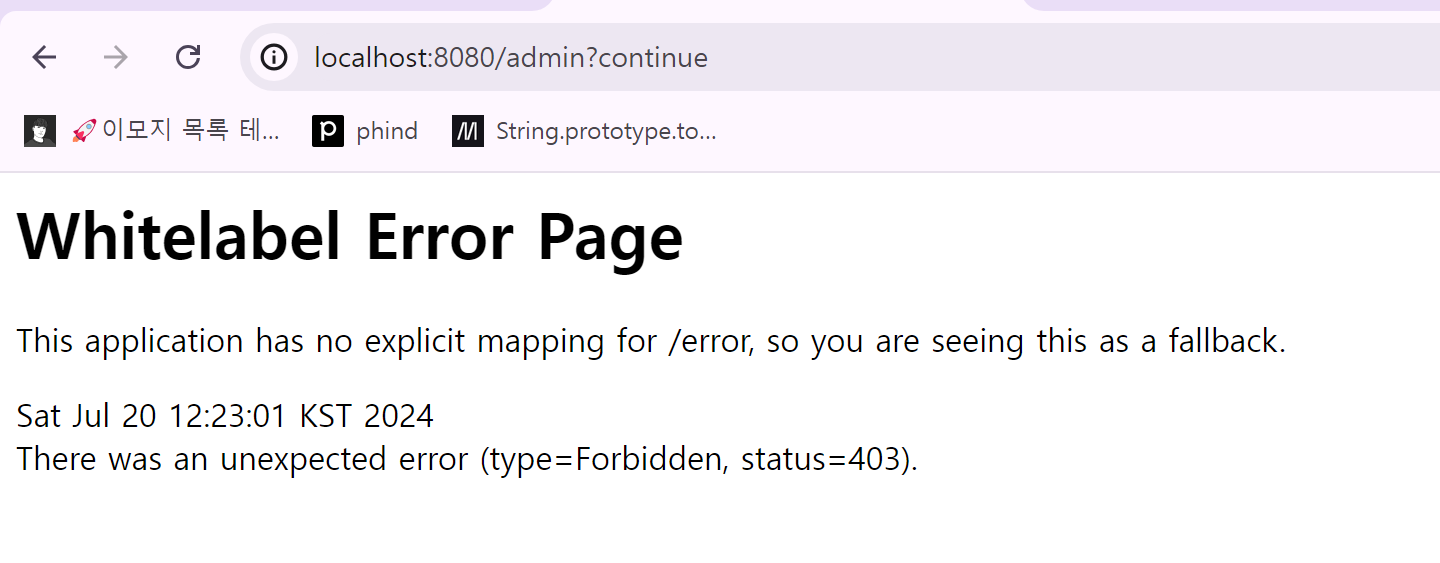
login을 위한 페이지가 제공된다. - 그러나 여전히
/admin경로로 접근해도, 자동으로 로그인 페이지로 전환되지 않는 문제가 남아있다.- 이 문제를 해결하기 위해
SpringConfig파일에 따로 설정을 추가해줘야 한다. 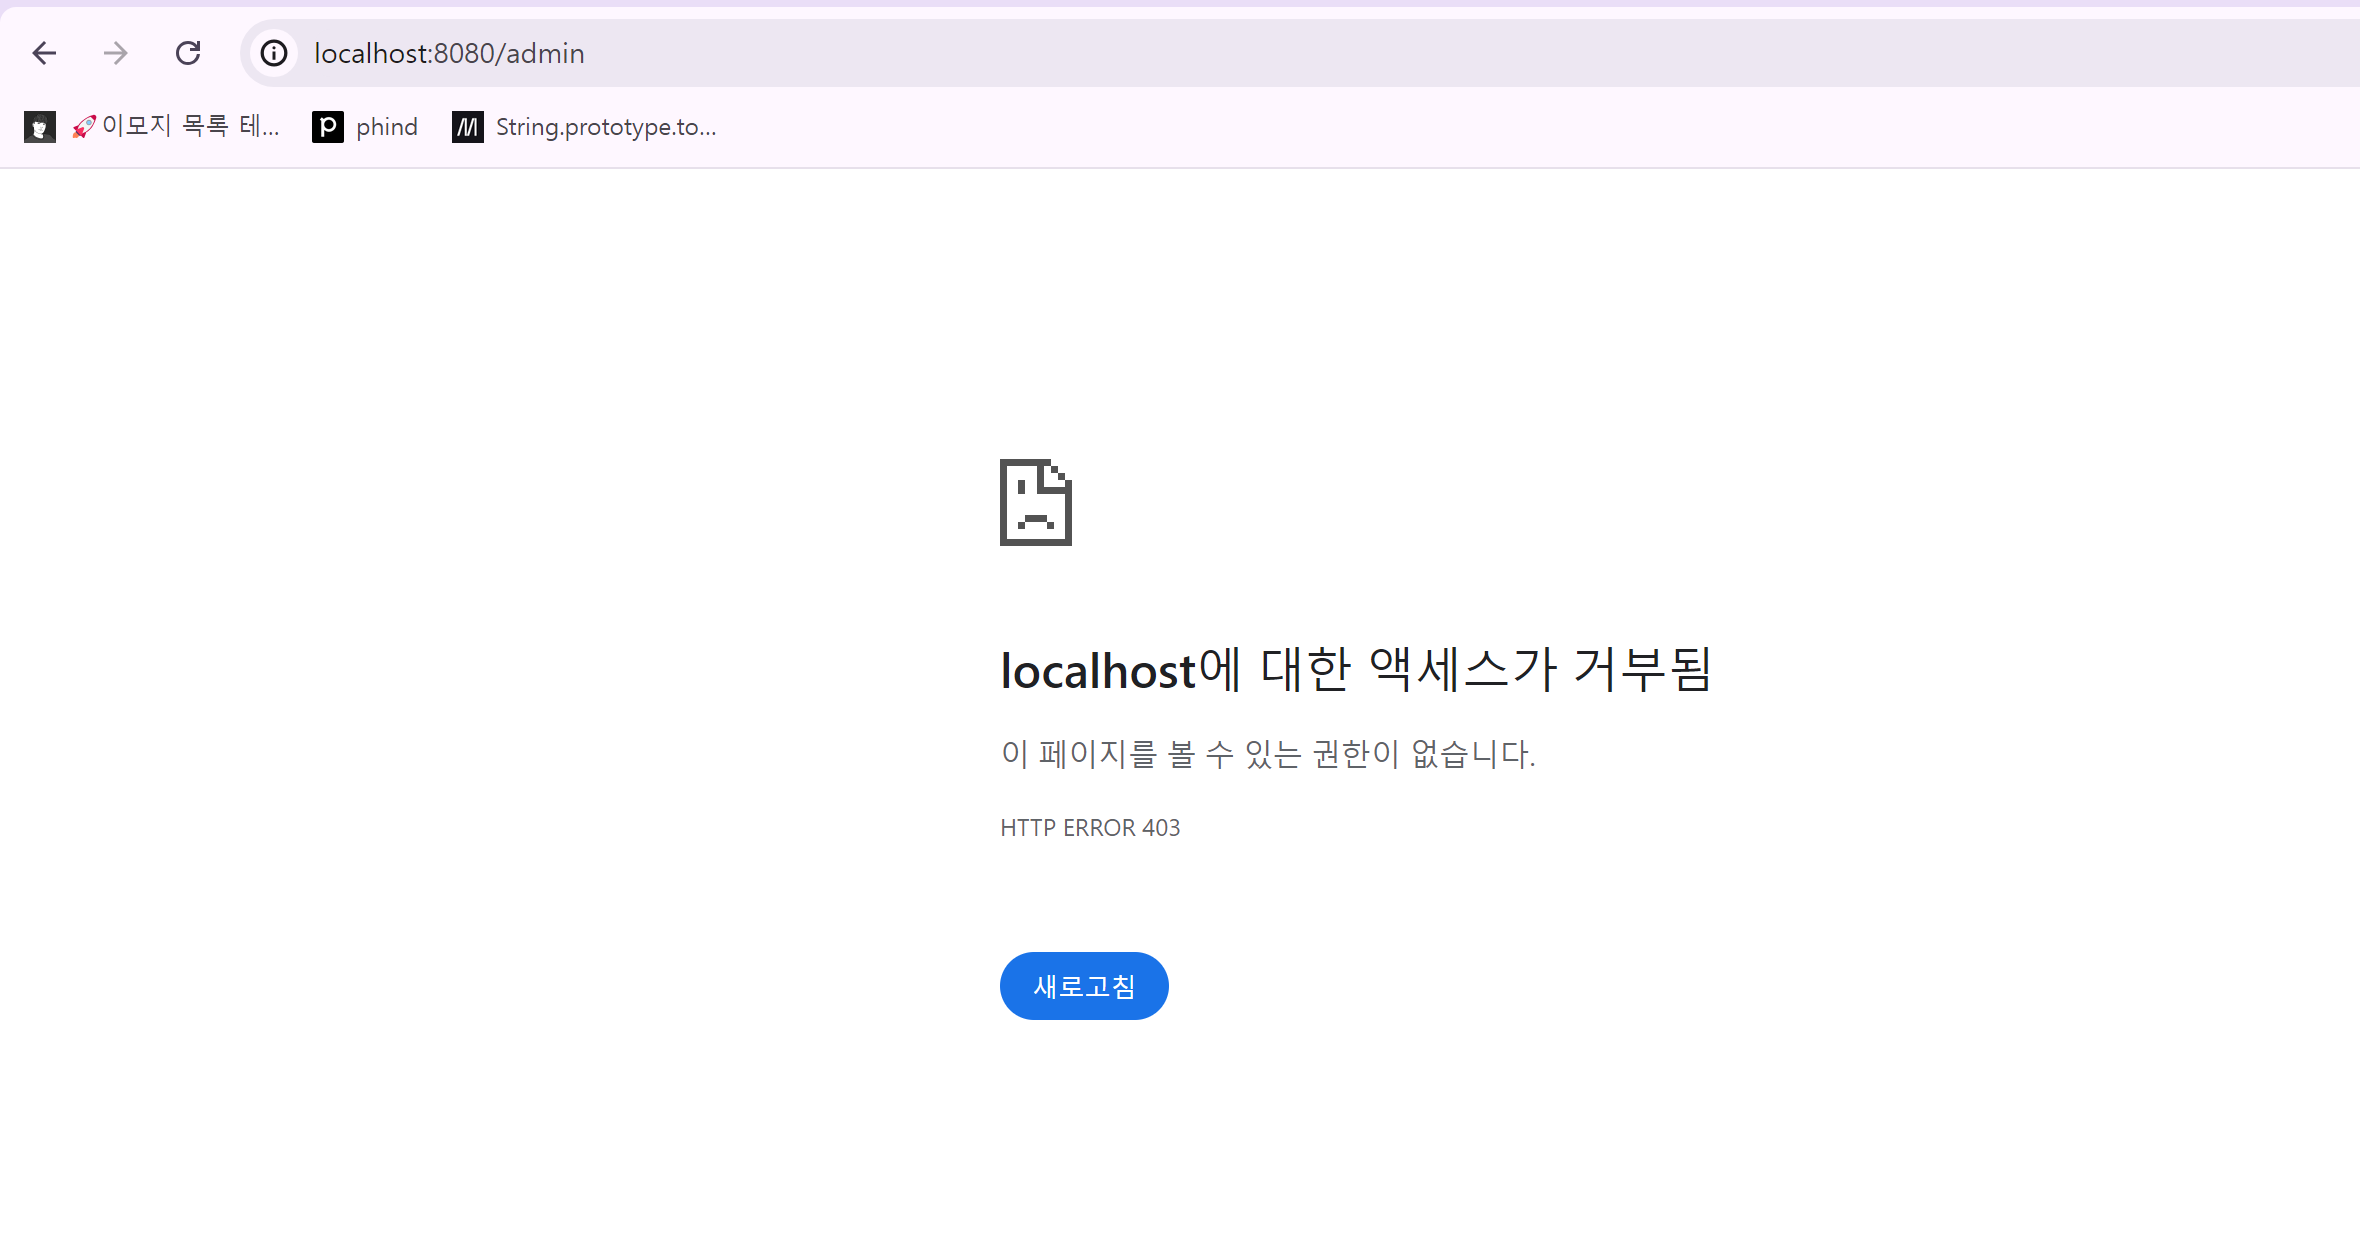
- 이 문제를 해결하기 위해
SpringConfig 재설정: 로그인 페이지 자동 redirect
package com.example.testsecurity.config;

import org.springframework.context.annotation.Bean;
import org.springframework.context.annotation.Configuration;
import org.springframework.security.config.annotation.web.builders.HttpSecurity;
import org.springframework.security.config.annotation.web.configuration.EnableWebSecurity;
import org.springframework.security.web.SecurityFilterChain;

@Configuration
@EnableWebSecurity
public class SecurityConfig {

    @Bean
    public SecurityFilterChain filterChain(HttpSecurity http) throws Exception {

        http
                .authorizeHttpRequests((auth) -> auth
                        .requestMatchers("/", "/login").permitAll()
                        .requestMatchers("/admin").hasRole("ADMIN")
                        .requestMatchers("/my/**").hasAnyRole("ADMIN", "USER")
                        .anyRequest().authenticated()
                );

        http
                .formLogin((auth) -> auth.loginPage("/login")
                        .loginProcessingUrl("/loginProc")
                        .permitAll()
                );

        http
                .csrf((auth) -> auth.disable());

        return http.build();
    }

}
📌 fromLogin 메소드
.loginPage(): 특정 로그인 페이지를 설정. 인가 관련 문제 시 SpringSecurity가 알아서 지정된 페이지로 redirect 해준다.loginProcessingUrl(): html 로그인 폼 양식에서 특정한 경로로 SpringSecurity가 앞단(프론트)에서 받은 데이터를 보내준다..permitAll()설정으로 모든 사용자가 접근가능하도록 설정한다.
csrf disable 설정
csrf((auth) -> auth.disable());- 현재 csrf라는 사이트 위변조 방지 설정이 시큐리티에 자동으로 제공되는데, 이것이 제공되면 POST 요청 시 csrf 토큰이 요구되므로, 지금 개발환경에서만 csrf 설정을 비활성화 한다.
CSRF(Cross-Site Request Forgery)
- CSRF는 웹 보안 취약점 중의 하나로, 인증된 사용자의 권한을 악용하여 원치않는 작업을 수행하게 하는 공격이다.
- 작동원리
- 사용자가 신뢰하는 사이트A 에 로그인하여 인증 세션을 가지고 있다.
- 공격자는 사용자를 악의적인 사이트B로 유도한다.
- 사이트B는 사용자 모르게 사이트A로 요청을 보낸다.
- 사이트A는 유효한 세션으로 인해 이 요청을 신뢰하고 실행한다.
- CSRF 방어
- SpringSecurity의 CSRF 보호는 서버에서 생성한 토큰을 클라이언트에 보내고, 클라이언트가 요청 시 이 토큰을 함께 보내도록 하여 요청의 출처를 점으한다.
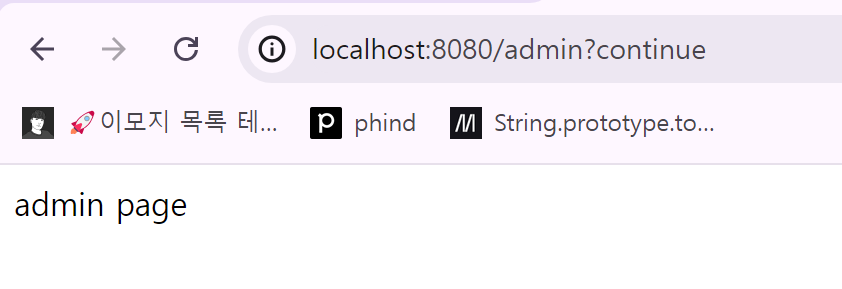
최종 테스트
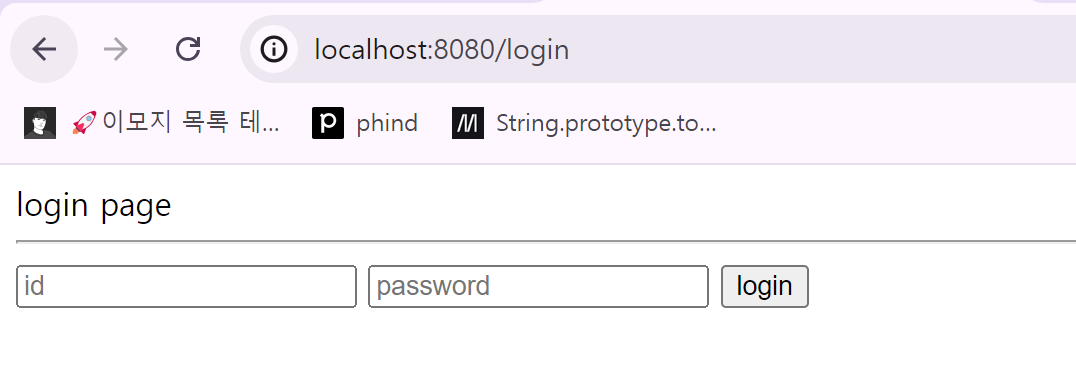
- 이제 admin 페이지에 접근하면, 거부 메시지가 아니라 로그인 페이지로 redirect된다.
- 아직 로그인 기능이 구현되어있지 않지만, 스프링 시큐리티에서 한 접속에 대해 하나의 비밀번호를 제공하므로, 이 비밀번호를 통해 접근권한 테스트가 가능하다.

- 따로 로그인 기능을 구현해두지 않아 에러가 떴을 뿐, 로그인 과정 자체는 진행된 것을 확인할 수 있다.
5. BCrypt 암호화 메소드
시큐리티 암호화
스프링 시큐리티는 사용자 인증(로그인) 시 비밀번호에 대해 단방향 해시 암호화를 진행하여 저장되어 있는 비밀번호와 대조한다.
따라서 회원가입 시 비밀번호 항목에 대해서 암호화를 진행해야 한다.
스프링 시큐리티는 암호화를 위해 BCrypt Password Encoder를 제공하고 권장한다. 따라서 해당 클래스를 return하는 메소드를 만들어 @Bean으로 등록하여 사용하면 된다.
단방향 해시 암호화
- 양방향
- 대칭키
- 비대칭키
- 단방향 (해독이 안되는 암호화)
- 해시 (다양한 암호화 알고리즘이 있는데, 스프링 시큐리티는 BCrypt를 권장한다.)
Security Config 암호화 Bean 추가
    @Bean
    public BCryptPasswordEncoder bCryptPasswordEncoder() {
        return new BCryptPasswordEncoder();
    }
BCrypt (단방향 해시의 한 종류)
- 비밀번호 저장에 특화된 해시함수. Blowfish 암호를 기반으로 한 적응형 함수다.
- 주된 목적은 비밀번호의 안전한 보호. 공격자가 해서도니 비밀번호를 역산하는 것을 어렵게 하는 것이다.
- 솔트(Slat)를 사용하는데, 각 비밀번호에 무작위 값을 추가하여 같은 비밀번호라도 다르게 해시된다.
- 예시: "password" + "랜덤문자열" -> 해시
- 의도적으로 느리게 설계되어 해커의 무차별 대입 공격(brute-force attack)을 어렵게 만든다.
- 정당한 사용자에게는 문제가 없지만, 수천 번 시도해야 하는 해커에게는 큰 장벽이 된다.
6. DB 연결
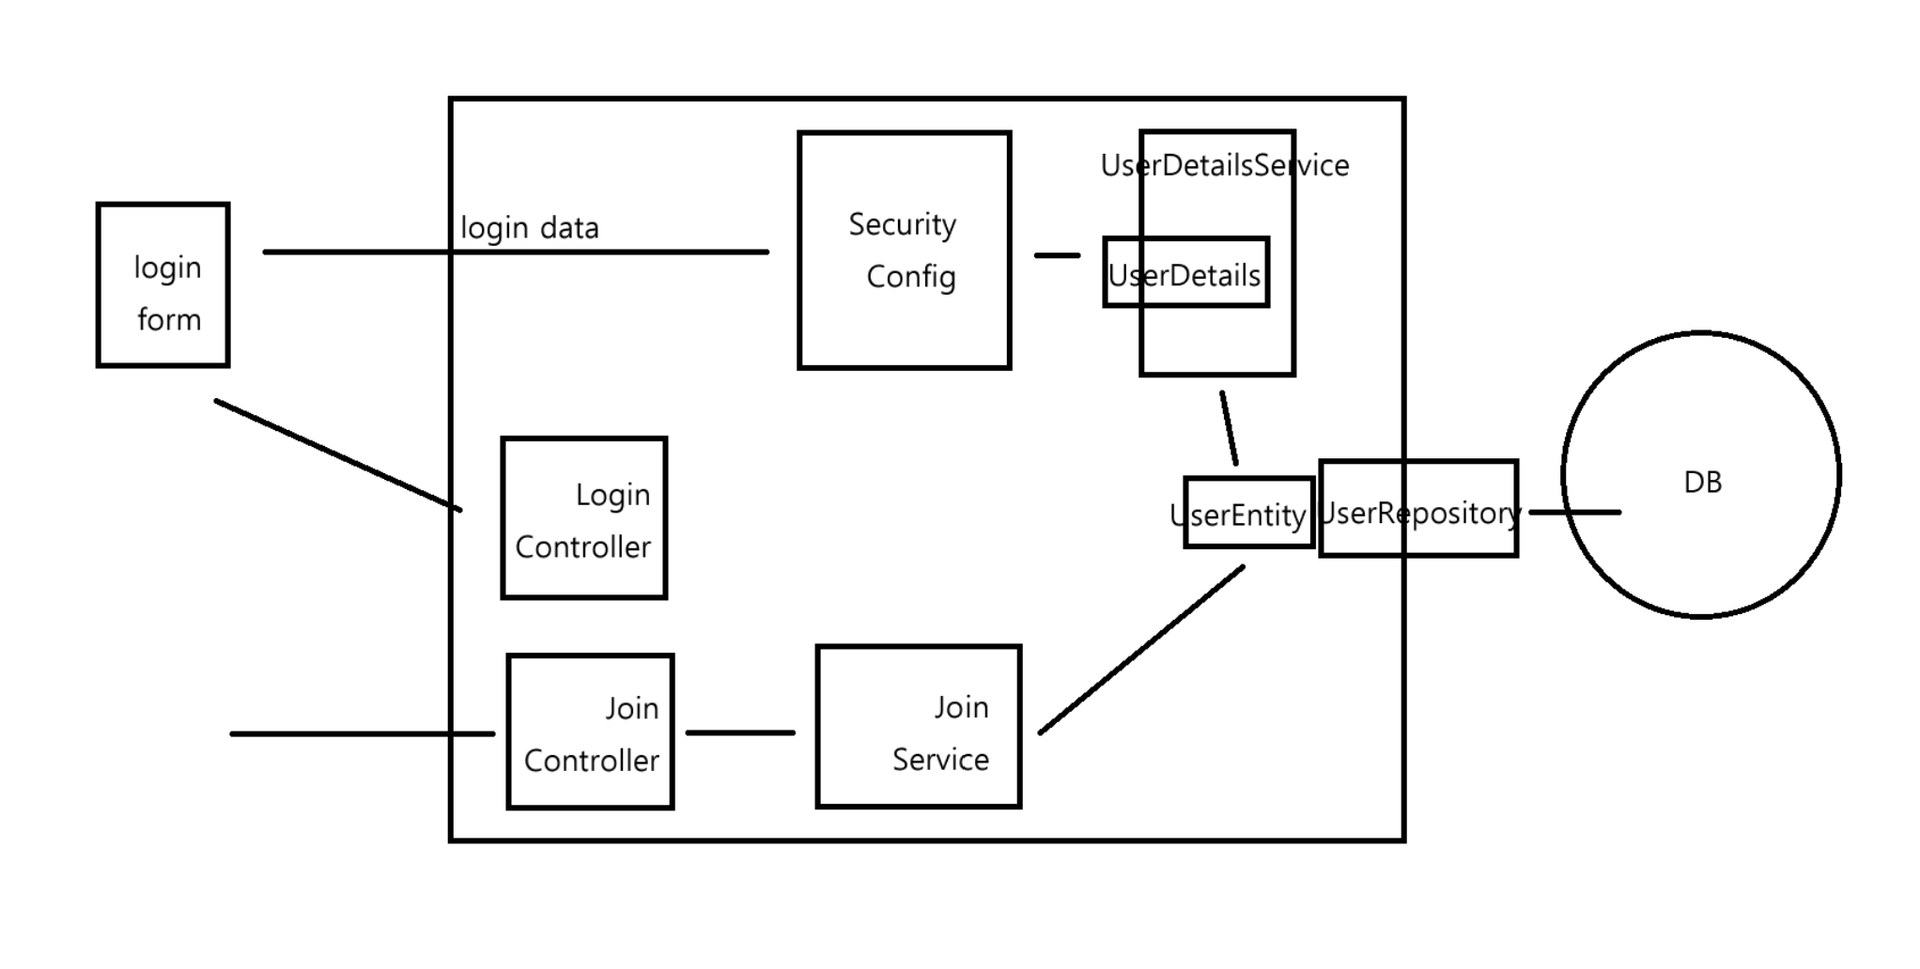
위의 모식도는 뒤에서 실제 사용될 모식도. SpringSecurity가 회원을
인증하기 위해서는 DB가 연결되어 회원 정보가 저장되어야 한다.
데이터베이스 종류와 ORM
회원 정보를 저장하기 위한 데이터베이스는 MySQL 엔진의 데이터베이스를 사용한다. 그리고 접근은 Spring Data JPA를 사용한다.
데이터베이스 의존성
build.gradle
dependencies {
    implementation 'org.springframework.boot:spring-boot-starter-data-jpa'
    runtimeOnly 'com.mysql:mysql-connector-j'
}- 주석처리한 DB 의존성을 주석처리 해제하여 의존성 설정한다.
데이터베이스 단일 연결
spring.datasource.driver-class-name=com.mysql.cj.jdbc.Driver
spring.datasource.url=jdbc:mysql://아이피:3306/데이터베이스?useSSL=false&useUnicode=true&serverTimezone=Asia/Seoul&allowPublicKeyRetrieval=true
spring.datasource.username=아이디
spring.datasource.password=비밀번호- 데이터베이스 연결은 변수 설정을 통해 가능하다.
7. 회원 가입 로직
회원 정보를 통해 인증 인가 작업을 진행하기 대문에 사용자로 부터 회원가입을 진행한 뒤 데이터베이스에 회원 정보를 저장해야 한다.
회원가입 모식도

SpringBoot Application (큰 네모) 내부에 회원 인증/인가와 관련된 로직이 있다. 중간을 기준으로 상단이 로그인을 관리하는 Security 요소들이고, 아래에 JoinController와 JoinService가 회원가입을 진행하는 로직이다. 회원정보를 받아서 UserRepository를 통해 DB에 회원정보를 저장하는 로직을 표현했다.
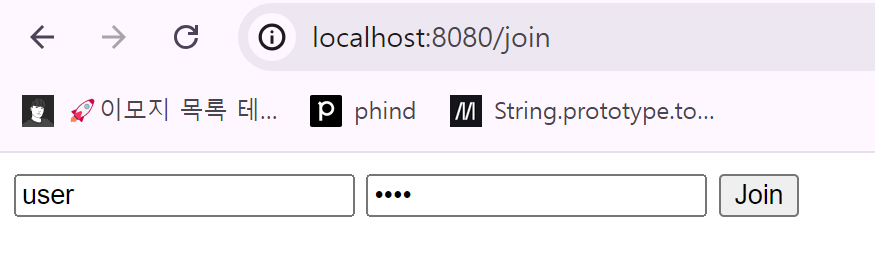
회원가입 페이지
join.mustache
<html>
<head>
    <meta charset="UTF-8">
    <meta name="viewport"
          content="width=device-width, user-scalable=no, initial-scale=1.0, maximum-scale=1.0, minimum-scale=1.0">
    <meta http-equiv="X-UA-Compatible" content="ie=edge">
    <title>Document</title>
</head>
<body>

<form action="/joinProc" method="post" name="joinForm">
    <input type="text" name="username" placeholder="Username"/>
    <input type="password" name="password" placeholder="Password"/>
    <input type="submit" value="Join"/>
</form>

</body>
</html>username,password를 받아/joinProc로 POST 요청을 보내는 html 파일
JoinDTO
import lombok.Getter;
import lombok.Setter;

@Getter
@Setter
public class JoinDTO {

    private String username;
    private String password;
}
JoinController
import com.example.testsecurity.dto.JoinDTO;
import com.example.testsecurity.service.JoinService;
import org.springframework.beans.factory.annotation.Autowired;
import org.springframework.stereotype.Controller;
import org.springframework.web.bind.annotation.GetMapping;
import org.springframework.web.bind.annotation.PostMapping;

@Controller
public class JoinController {

    @Autowired
    private JoinService joinService;

    @GetMapping("/join")
    public String joinP() {
        return "join";
    }

    @PostMapping("/joinProc")
    public String joinProcess(JoinDTO joinDTO) {
        System.out.println(joinDTO.getUsername());

        joinService.joinProcess(joinDTO);

        return "redirect:/login";
    }

}
JoinService
import com.example.testsecurity.dto.JoinDTO;
import com.example.testsecurity.entity.UserEntity;
import com.example.testsecurity.repository.UserRepository;
import org.springframework.beans.factory.annotation.Autowired;
import org.springframework.security.crypto.bcrypt.BCryptPasswordEncoder;
import org.springframework.stereotype.Service;

@Service
public class JoinService {

    @Autowired
    private UserRepository userRepository;

    @Autowired
    private BCryptPasswordEncoder bCryptPasswordEncoder;

    public void joinProcess(JoinDTO joinDTO) {

        // db에 이미 동일한 username을 가진 회원이 존재하는지?


        UserEntity data = new UserEntity();

        data.setUsername(joinDTO.getUsername());
        data.setPassword(bCryptPasswordEncoder.encode(joinDTO.getPassword()));
        data.setRole("ROLE_ADMIN");


        userRepository.save(data);
    }
}
- DB에 User에 대한 테이블을 만들고 데이터를 넣을것이므로 User에 대한 entity를 생성한다.
- 생성된
UserEntity라는 바구니를 통해Repository에서 DB에 저장하게 된다.
UserEntity
package com.example.testsecurity.entity;

import jakarta.persistence.Entity;
import jakarta.persistence.GeneratedValue;
import jakarta.persistence.GenerationType;
import jakarta.persistence.Id;
import lombok.Getter;
import lombok.Setter;

@Getter
@Setter
@Entity
public class UserEntity {

    @Id
    @GeneratedValue(strategy = GenerationType.IDENTITY)
    private int id;

    private String username;
    private String password;

    private String role;

}
Table생성: Hibernate ddl 설정
application.properties
# hibernate ddl 설정
spring.jpa.hibernate.ddl-auto=update
spring.jpa.hibernate.naming.physical-strategy=org.hibernate.boot.model.naming.PhysicalNamingStrategyStandardImpl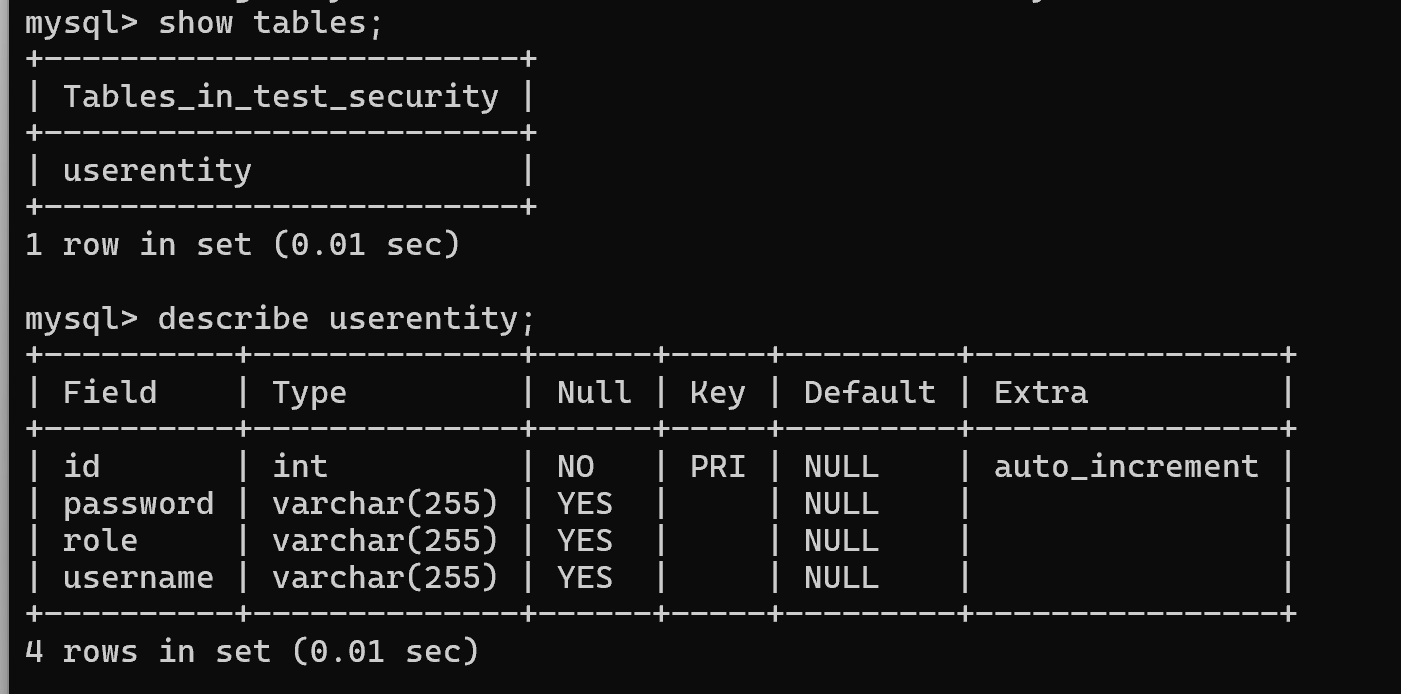
ddl-auto값을update로 설정해두고 프로젝트 실행 시 자동으로 테이블을 생성해준다.- 테이블 생성후에는
none값으로 변경해 테이블이 수정되지 않도록 해준다.
- 테이블 생성후에는
SecurityConfig 접근권한
        http
                .authorizeHttpRequests((auth) -> auth
                        .requestMatchers("/", "/login", "/join", "/joinProc").permitAll()
                        .requestMatchers("/admin").hasRole("ADMIN")
                        .requestMatchers("/my/**").hasAnyRole("ADMIN", "USER")
                        .anyRequest().authenticated()
                );
- 회원가입 경로 추가
테스트
- 회원가입을 하면 암호화된 데이터가 DB에 들어가 있는 것을 확인할 수 있다.

8. 회원 중복 검증 방법
username에 대해서 중복된 가입이 발생하면 서비스에서 아주 치명적인 문제가 발생하기 때문에 백엔드 단에서 중복 검증과 중복 방지 로직을 작성해야 한다.
UserEntity: Unique 설정
package com.example.testsecurity.entity;

import jakarta.persistence.*;
import lombok.Getter;
import lombok.Setter;

@Getter
@Setter
@Entity
public class UserEntity {

    @Id
    @GeneratedValue(strategy = GenerationType.IDENTITY)
    private int id;

    @Column(unique = true)
    private String username;
    private String password;

    private String role;

}
@Column(unique = true)설정 부여
JoinService 중복 검증
UserRepository
package com.example.testsecurity.repository;

import com.example.testsecurity.entity.UserEntity;
import org.springframework.data.jpa.repository.JpaRepository;

public interface UserRepository extends JpaRepository<UserEntity, Integer> {

    boolean existsByUsername(String username);
}
JoinService
import com.example.testsecurity.dto.JoinDTO;
import com.example.testsecurity.entity.UserEntity;
import com.example.testsecurity.repository.UserRepository;
import org.springframework.beans.factory.annotation.Autowired;
import org.springframework.security.crypto.bcrypt.BCryptPasswordEncoder;
import org.springframework.stereotype.Service;

@Service
public class JoinService {

    @Autowired
    private UserRepository userRepository;

    @Autowired
    private BCryptPasswordEncoder bCryptPasswordEncoder;

    public void joinProcess(JoinDTO joinDTO) {

        // db에 이미 동일한 username을 가진 회원이 존재하는지?
        boolean isUser = userRepository.existByUsername(joinDTO.getUsername());
        if (isUser) {
            return;
        }

        UserEntity data = new UserEntity();

        data.setUsername(joinDTO.getUsername());
        data.setPassword(bCryptPasswordEncoder.encode(joinDTO.getPassword()));
        data.setRole("ROLE_ADMIN");


        userRepository.save(data);
    }
}
join.mustache
프론트단에서도 회원가입 아이디 중복 확인 로직을 추가해야 한다.
httpXMRequest 메소드를 통해 백엔드에 미리 구현해둔 API에 이미 존재하는 username인지 검증하는 로직을 추가해야 한다.
가입 불가 문자 정규식 처리
- 다음과 같은 아이디, 비밀번호에 대한 정규식 처리도 필요하다.
- 아이디의 자리수
- 아이디의 특수문자 포함 불가
- admin과 같은 아이디 사용 불가
- 비밀번호 자리수
- 비밀번호 특수문자 포함 필수
9. 세션 사용자 아이디 정보

Security가 자동으로 login 과정을 거치고, DB로부터 저장된 데이터를 기반으로 로그인 데이터를 검증하기 위해서는 UserDetailService와 UserDetails가 구현되어 있어야 한다.
인증
시큐리티를 통해 인증을 진행하는 방법은 사용자가 Login 페이지를 통해 아이디, 비밀번호를 POST 요청 시 스프링 시큐리티가 데이터베이스에 저장된 회원 정보를 조회 후 비밀번호를 검증하고 서버 세션 저장소에 해당 아이디에 대한 세션을 저장한다.
UserDetailService
- 스프링에서 제공하는
UserDetailService를 상속받아 구현해야 한다. loadUserByUsername()가 받는String username은 검증을 위해 스프링 시큐리티가 입력된username값을 넣어준다.
import com.example.testsecurity.dto.CustomUserDetails;
import com.example.testsecurity.entity.UserEntity;
import com.example.testsecurity.repository.UserRepository;
import org.springframework.beans.factory.annotation.Autowired;
import org.springframework.security.core.userdetails.UserDetails;
import org.springframework.security.core.userdetails.UserDetailsService;
import org.springframework.security.core.userdetails.UsernameNotFoundException;
import org.springframework.stereotype.Service;

@Service
public class CustomUserDetailsService implements UserDetailsService {

    @Autowired
    private UserRepository userRepository;

    @Override
    public UserDetails loadUserByUsername(String username) throws UsernameNotFoundException {
        UserEntity userData = userRepository.findByUsername(username);

        if(userData != null) {
            return new CustomUserDetails(userData);
        }

        return null;
    }

}
UserRepository
import com.example.testsecurity.entity.UserEntity;
import org.springframework.data.jpa.repository.JpaRepository;

public interface UserRepository extends JpaRepository<UserEntity, Integer> {
    boolean existsByUsername(String username);
    UserEntity findByUsername(String username);
}
UserDetails
UserDetails는 DB로부터 특정 유저에 대한 데이터를 들고오고, 들고온 데이터를 SpringConfig에 전달해준다.- SpringSecurity는 Username에 대한 비밀번호, ROLE을 검증하고, 검증이 완료되면 스프링 세션에 저장해서 사용자의 접근을 허용해준다.
import com.example.testsecurity.entity.UserEntity;
import org.springframework.security.core.GrantedAuthority;
import org.springframework.security.core.userdetails.UserDetails;

import java.util.ArrayList;
import java.util.Collection;

public class CustomUserDetails implements UserDetails {

    private UserEntity userEntity;

    public CustomUserDetails(UserEntity userEntity) {
        this.userEntity = userEntity;
    }

    /**
     * @return 사용자의 특정 권한(ROLE값)
     */
    @Override
    public Collection<? extends GrantedAuthority> getAuthorities() {
        Collection<GrantedAuthority> collection = new ArrayList<>();

        collection.add(new GrantedAuthority() {
            @Override
            public String getAuthority() {
                return userEntity.getRole();
            }
        });

        return collection;
    }

    @Override
    public String getPassword() {
        return userEntity.getPassword();
    }

    @Override
    public String getUsername() {
        return userEntity.getUsername();
    }

    @Override
    public boolean isAccountNonExpired() {
        return true;
    }

    @Override
    public boolean isAccountNonLocked() {
        return true;
    }

    @Override
    public boolean isCredentialsNonExpired() {
        return true;
    }

    @Override
    public boolean isEnabled() {
        return true;
    }
}
getAuthorities()- 사용자의 권한(roles)를 반환한다.
- 예시에서는
UserEntity의role값을GrantedAuthroity객체로 변환하여 반환한다.
- 계정 상태 관련 메서드들
isAccountNonExpired(),isAccountNonLocked(),isCredentialsNonExpired(),isEnabled()- 계정의 유효성, 잠금 상태, 인증 정보의 만료 여부, 활성화 상태를 나타낸다.
- 예시에서는 모두
ture를 반환하여, 모든 계정이 유효하고 활성화된 상태로 간주된다.- 기능구현을 원한다면 DB에 상태값을 저장하고, 이 필드를 호출해 검증하는 방식으로 구현하면 된다.
실행 및 테스트
- 현재 회원가입 진행 시, 모두 ROLE이 admin으로 들어가게 설정되어 있다.
- 이제 해당 계정으로 로그인을 진행하면
/admin페이지에 접근할 수 있다.

10. 세션 설정(소멸, 중복 로그인, 고정 보호)
로그인 진행 이후 특정 유저의 id, role값을 가진 세션 정보를 알아내는 방법을 알아보자!
SecurityContextHolder
- SpringSecurity의 핵심 클래스로, 현재 보안 컨텍스트에 대한 세부 정보를 저장한다.
getContext()메서드를 통해 현재 보안 컨텍스트에 접근할 수 있다.
Main.Controller.java
import org.springframework.security.core.Authentication;
import org.springframework.security.core.GrantedAuthority;
import org.springframework.security.core.context.SecurityContextHolder;
import org.springframework.stereotype.Controller;
import org.springframework.ui.Model;
import org.springframework.web.bind.annotation.GetMapping;

import java.util.Collection;
import java.util.Iterator;

@Controller
public class MainController {

    @GetMapping("/")
    public String mainP(Model model) {
        String id = SecurityContextHolder.getContext().getAuthentication().getName();

        Authentication authentication = SecurityContextHolder.getContext().getAuthentication();
        Collection<? extends GrantedAuthority> authorities = authentication.getAuthorities();
        Iterator<? extends GrantedAuthority> iter = authorities.iterator();
        GrantedAuthority auth = iter.next();
        String role = auth.getAuthority();

        model.addAttribute("id", id);
        model.addAttribute("role", role);
        return "main";
    }
}
세션 현재 사용자 아이디
- 현재 인증된 사용자의 이름(일반적으로 사용자 ID)을 가져온다.
SecurityContextHolder.getContext().getAuthentication().getName();세션 현재 사용자 Role
Authentication authentication = SecurityContextHolder.getContext().getAuthentication();

Collection<? extends GrantedAuthority> authorities = authentication.getAuthorities();
Iterator<? extends GrantedAuthority> iter = authorities.iterator();
GrantedAuthority auth = iter.next();
String role = auth.getAuthority();SecurityContextHolder.getContext().getAuthentication();- 현재 인증 정보를 담고 있는
Authentication객체를 가져온다.
- 현재 인증 정보를 담고 있는
authentication.getAuthorities();- 사용자에게 부여된 모든 권한
GrantedAuthority을 가져온다.
- 사용자에게 부여된 모든 권한
- 예시에서는 권한 컬렉션의 첫 번재 권한을 가져와 문자열로 변환한다.
- 해당 코드에서는 사용자가 하나의 권한만 가지고 있다고 가정하고 있다.
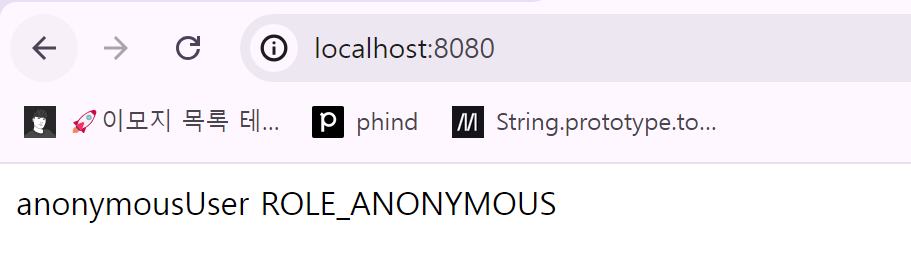
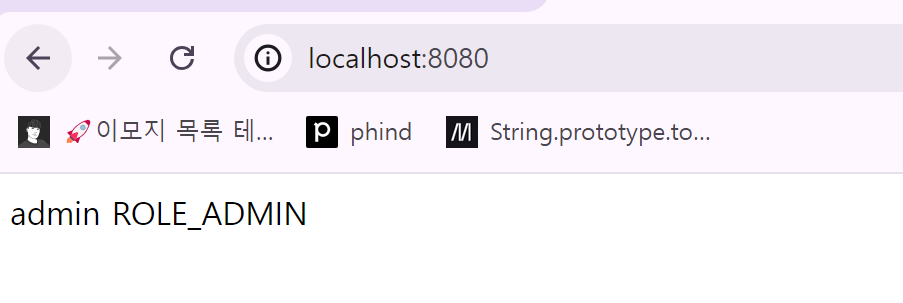
실행 및 테스트
- 로그인하지 않은 경우, 익명으로 표기된다.
- 로그인한 경우, 해당 회원의 정보를 가져온다.
11. csrf enable 설정 방법
CSRF란?
- csrf(Crss-Site Request Forgery)
- 요청을 위조하여 사용자가 원하지 않아조 서버측으로 특정 요청을 강제로 보내는 방식.
- 회원 정보 변경, 게시글 CRUD를 사용자 모르게 요청 가능
개발환경에서 csrf disable()
앞서 개발 환경에서는 Security Config 클래스를 통해 csrf 설정을 비활성화했다. 배포 환경에서는 csrf 공격 방지를 위해 csrf disable 설정을 제거하고 추가적인 설정을 진행해야 한다.
SecurityConfig.java
- csrf diable 설정 구문을 추가해두었다.
import org.springframework.context.annotation.Bean;
import org.springframework.context.annotation.Configuration;
import org.springframework.security.config.annotation.web.builders.HttpSecurity;
import org.springframework.security.config.annotation.web.configuration.EnableWebSecurity;
import org.springframework.security.web.SecurityFilterChain;

@Configuration
@EnableWebSecurity
public class SecurityConfig {

    @Bean
    public SecurityFilterChain filterChain(HttpSecurity http) throws Exception{

        http
                .csrf((auth) -> auth.disable());
`
        return http.build();
    }
}- csrf 주석을 제거하면, 알맞은 아이디와 비밀번호로 로그인해도 로그인이 진행되지 않는다.
- 이는 csrf토큰 관리 시스템을 구축해야 하는데, 이 부분이 구현되지 않았기 때문이다.
배포 환경에서 진행 사항
Security Config 클래스에서 csrf.disable() 설정을 진행하지 않으면 자동으로 enable 설정이 진행된다. enable 설정 시 스프링 시큐리티는 CsrfFilter를 통해 POST, PUT, DELETE 요청에 대해서 토큰 검증을 진행한다.
Security config 클래스 설정
csrf.disable()구문 삭제
POST 요청에서 설정 방법 (mustache 기준)
<form action="/loginReceiver" method="post" name="loginForm">
    <input type="text" name="username" placeholder="아이디"/>
    <input type="password" name="password" placeholder="비밀번호"/>
    <input type="hidden" name="_csrf" value="{{_csrf.token}}"/>
    <input type="submit" value="로그인"/>
</form>- csrf 토큰을 함께 전송하도록 hidden 속성의 input 태그 추가
ajax 요청 시
<meta name="_csrf" content="{{_csrf.token}}"/>
<meta name="_csrf_header" content="{{_csrf.headerName}}"/>- HTML
<head>구획에 해당 요소를 추가한다. - ajax 요청 시 위의 content 값을 가져온 후 함께 요청해야 한다.
XMLHttpRequest요청 시setRequestHeader를 통해_csrf,_csrf_header Key에 대한 토큰 값을 넣어 요청한다.
Get 방식 로그아웃을 진행할 경우 설정 방법
csrf 설정 시 POST 요청으로 로그아웃을 진행해야 하지만 아래 방식을 통해 GET 방식으로 진행할 수 있다.
Security Config 클래스로 로그아웃 설정
@Bean
public SecurityFilterChain securityFilterChain(HttpSecurity http) throws Exception{

    http
            .logout((auth) -> auth.logoutUrl("/logout")
                    .logoutSuccessUrl("/"));

    return http.build();
}
LogoutController.java
@Controller
public class logoutController {

    @GetMapping("/logout")
    public String logout(HttpServletRequest request, HttpServletResponse response) throws Exception {

        Authentication authentication = SecurityContextHolder.getContext().getAuthentication();
        if(authentication != null) {
            new SecurityContextLogoutHandler().logout(request, response, authentication);
        }

        return "redirect:/";
    }
}
오류 발생 시
- 서버 가동 후 로그인 시 아래와 같이 mustache와 csrf 관련 에러가 발생할 수 있다.
- 이 경우 아래의 설정값을 추가하면 해결된다.
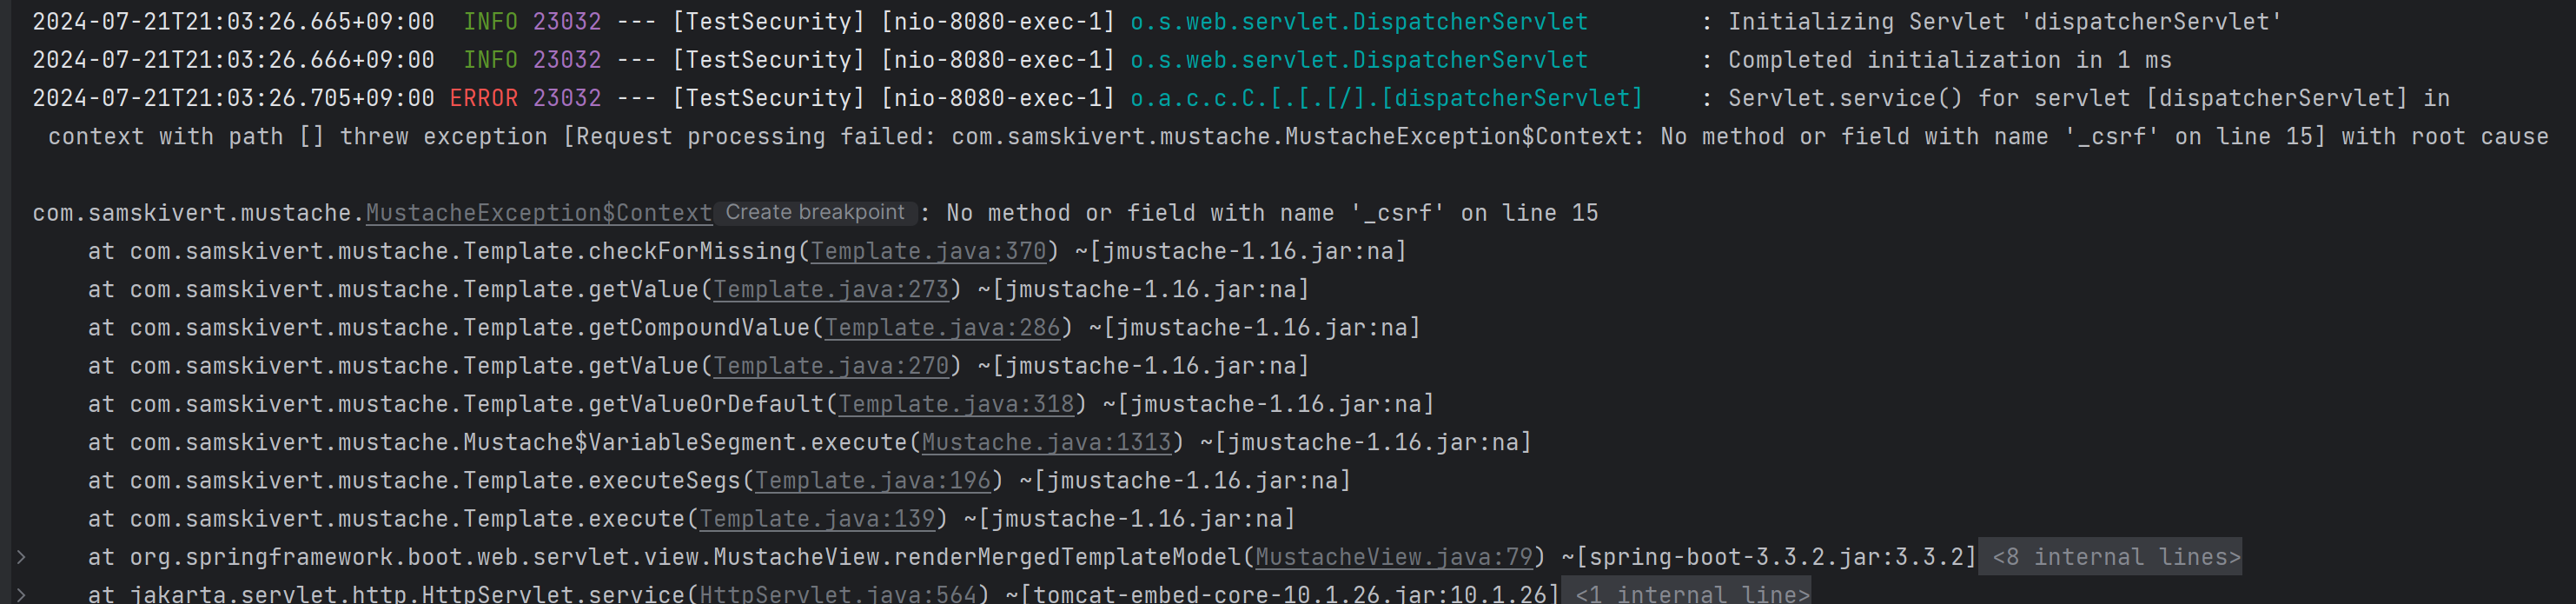
application.properties
spring.mustache.servlet.expose-request-attributes=trueAPI 서버의 경우 csrf.disable()?
앱에서 사용하는 API 서버의 경우 보통 세션을 STATELESS로 관리하기 때문에 스프링 시큐리티 csrf enable 설정을 진행하지 않아도 된다.
12. InMemory 방식 유저 정보 저장
소수의 유저를 저장할 좋은 방법
토이 프로젝트를 진행하는 경우 또는 시큐리티 로그인 환경이 필요하지만 소수의 회원 정보만 가지며 데이터베이스란느 자원을 투자하기 힘든 경우는 회원가입 없는 InMemory 방식으로 유저를 저장하면 된다.
이 경우 InMemoryuserDeetailsManager 클래스를 통해 유저를 등록하면 된다.
InMemoryUserDetailsManager
InMemory 방식 유저 저장
SecurityConfig.java
@Configuration
@EnableWebSecurity
public class SecurityConfig {

		@Bean
    public UserDetailsService userDetailsService() {

        UserDetails user1 = User.builder()
                .username("user1")
                .password(bCryptPasswordEncoder().encode("1234"))
                .roles("ADMIN")
                .build();

        UserDetails user2 = User.builder()
                .username("user2")
                .password(bCryptPasswordEncoder().encode("1234"))
                .roles("USER")
                .build();

        return new InMemoryUserDetailsManager(user1, user2);
    }
}- user1, user2 회원을 InMemory에 저장해두고 사용할 수 있다.
13. http basic 방식 로그인
로그인 방식
- 스프링 시큐리티로 구현할 수 있는 로그인 방식은 크게 2가지가 있다.
- formLogin
- 특정 http 파일에 아이디, 비밀번호를 담는 form을 만든 후 POST 요청으로 로그인을 구현하는 방식.
- httpBasic
- 특정한 페이지 없이 브라우저의 헤더에 아이디와 비밀번호를 넣어 인증하는 방식
- formLogin
Http Basic 인증 방식
Http Basic 인증 방식은 아이디와 비밀번호를 Base64 방식으로 인코딩한 뒤 HTTP 인증 헤더에 부착하여 서버측으로 요청을 보내는 방식.
참조
HttpBasic방식 인증을 위한 Config 클래스 설정
SecurityConfig.java
@Bean
public SecurityFilterChain filterChain(HttpSecurity http) throws Exception{

    http
            .httpBasic(Customizer.withDefaults());

    return http.build();
}
14. Role Hierachy (계층 권한)
권한A, 권한B, 권한C가 존재하고 권한의 계층은 "A < B < C"라고 설정을 진행하고 싶은 경우, RoleHierarchy 설정을 진행할 수 있다.
계층 권한 메소드 등록
SpringConfig
@Bean
public RoleHierarchy roleHierarchy() {

    RoleHierarchyImpl hierarchy = new RoleHierarchyImpl();

    hierarchy.setHierarchy("ROLE_C > ROLE_B\n" +
            "ROLE_B > ROLE_A");

    return hierarchy;
}
메소드 적용을 위한 Role 적용
SpringConfig
@Bean
public SecurityFilterChain filterChain(HttpSecurity http) throws Exception{

    http
            .csrf((auth) -> auth.disable());

    http
            .authorizeHttpRequests((auth) -> auth
                    .requestMatchers("/login").permitAll()
                    .requestMatchers("/").hasAnyRole("A")
                    .requestMatchers("/manager").hasAnyRole("B")
                    .requestMatchers("/admin").hasAnyRole("C")
                    .anyRequest().authenticated()
            );

    http
            .formLogin((auth) -> auth.loginPage("/login")
                    .loginProcessingUrl("/loginProc")
                    .permitAll()
            );

    return http.build();
}
Reference