
-Numble Challenge
1차 회고록
지금까지 React와 같은 라이브러리를 통해 프로젝트를 진행해봤는데 이번 numble 챌린지를 통해
vanilla js로 SPA를 구현해보려고한다.
첫번째 문제(A)는 vanilla js를 통해 어떻게 프로젝트를 구성할 것인지
두번째 문제(B)는 기존 react에서 사용했던 route처럼 컴포넌트별 url 관리를 어떻게 할 것 인지이다.
크게 두가지 방법이 있다.
- 직접 express를 사용해 초기 설정 (A 해결), history를 통한 route 구현(B해결)
- vite를 통해 템플릿을 사용하고 진행 (A 해결), history를 통한 route 구현(B해결)
방법 1. vanillaJS를 통한 프로젝트 구성
- index.html로 첫 보여질 화면을 작성한다.
- 간단한 화면 구현
- js module 등록(index.js)
- express를 이용해 서버 띄우기
const express = require("express");
const path = require("path");

const app = express();

app.use(
  "/static",
  express.static(path.resolve(__dirname, "frontend", "static"))
);

app.get("/*", (req, res) => {
  res.sendFile(path.resolve("frontend", "index.html"));
});

app.listen(process.env.PORT || 3000, () => console.log("Server running ..."));app.get을 통해 index.html 파일을 읽고 클라이언트로 전송app.use에서express.static을 사용해 정적 파일 제공
- __dirname은 디렉토리의 절대 경로를 사용해 안전성을 높이기 위한 것이다.
- html 에 등록한 모듈 구체화 (index.js)
import Home from "./pages/Home.js";
import NotFound from "./pages/NotFound.js";
import Posts from "./pages/Posts.js";
import Settings from "./pages/Settings.js";

const router = async () => {
  const routes = [
    { path: "/", view: Home },
    { path: "/posts", view: Posts },
    { path: "/settings", view: Settings },
  ];

  const pageMatches = routes.map((route) => {
    console.log(route);
    return {
      route, // route: route
      isMatch: route.path === location.pathname,
    };
  });

  let match = pageMatches.find((pageMatch) => pageMatch.isMatch);

	// ❗️ ERROR
	// console.log(match.route.view(), "in routes");
	// 이유 : 생각안하고 보다가 클래스로 코드 변경하고나서 생성자를 통해 만들어야하는데 그냥 호출 시켰다.

  if (!match) {
    match = {
      route: location.pathname,
      isMatch: true,
    };
    const page = new NotFound();
    document.querySelector("#root").innerHTML = await page.getHtml();
  } else {
    const page = new match.route.view();
    document.querySelector("#root").innerHTML = await page.getHtml();
  }
};

window.addEventListener("popstate", () => {
  router();
});

document.addEventListener("DOMContentLoaded", () => {
  document.body.addEventListener("click", (e) => {
    if (e.target.matches("[data-link]")) {
      e.preventDefault();
      history.pushState(null, null, e.target.href);
      router();
    }
  });
  router();
});- route 배열을 통해 class component 교체하는 방식으로 router를 구현한다.
(NotFound가 아니면 넘어온 class-Component의 getHtml(html 리턴 함수)로 DOM에 추가하는 방식)
- vanilla js 로 react 클래스형 component 만들기react.component 살펴보기 ```jsx class Welcome extends React.Component { render() { return <h1>Hello, {this.props.name}</h1>; } } ``` render는 필수 메서드이다. - 단, react나 다른 프레임워크처럼 SPA를 위해 컴포넌트가 교체될 때 url을 변경시켜줘야한다.
history를 통해 구현 (다른 방법으로 hash 등이 있다) - popstate(백 버튼이나 이벤트 처리), pushState(넘길 데이터, document.title, url)로 url 처리
이에 따라 router() 함수 실행으로 컴포넌트 교체
방법 2. vite를 통해 템플릿을 활용한 프로젝트 구성
- express 사용 x , vite를 통한 기본 템플릿 이용
블로그 참고해서 react와 비슷한 디렉토리 구조와 각 페이지 함수형 컴포넌트로 변경했다.
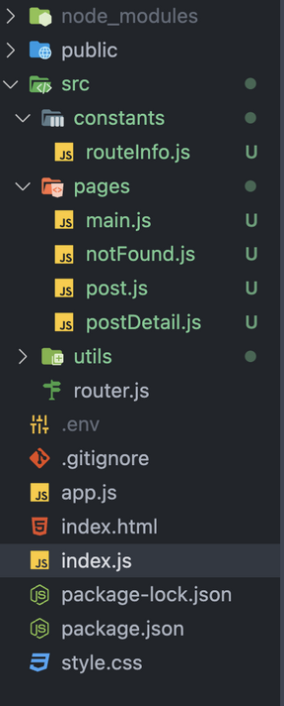
index.html에 index.js (dom 로딩 역할)모듈로 등록한 후 최상위 컴포넌트 APP(app.js)으로 정한 후
express에서와 같이 div아래에 등록하고 컴포넌트 바꾸는 방식으로 구현했다.
2. app.js
- 특정 class 에 click 이벤트 등록 후 타입 검사해서 일치하면 router함수를 통해 컴포넌트 교체
3. baseURL 분리, customEvent 사용, 디렉토리 구조 변경 외에 express와 동일
-
customEvent와 dispatchEvent (참고글)
- CustomEvent(이벤트이름, 이벤트 내에포함할 세부정보 (기본값 null));
- dispatchEvent(발송할 event 객체) dispatch는 반드시 존재 이벤트를 처리한다는 뜻임
-
router 컴포넌트 분해
1. navigate로 이동된 url 값을detail.to에 할당시킨다.
2. 그리고나서 router가 발생했을 때 아까 만들어둔 “historychange”라는 커스텀 이벤트를 통해detail객체를 가져와서 사용한다.
3.detail.to에 들어있는 url 값으로 이동 시킨다.
참고
import { routes } from "./constants/routeInfo";
import NotFound from "./pages/notfound";

function Router($container) {
  this.$container = $container;
  let currentPage = undefined;

  const findMatchedRoute = () =>
    routes.find((route) => route.path.test(location.pathname));

  const route = () => {
    currentPage = null;
    const TargetPage = findMatchedRoute()?.element || NotFound;
    // 현재 url이 routes 배열 안에 존재 그 url에 존재하는 객체의 element를 가져와 targetPage에 할당 시킴
    currentPage = new TargetPage(this.$container);
    // 할당된 인스턴스 생성 , 호출시 반환
  };

  const init = () => {
    window.addEventListener("historychange", ({ detail }) => {
      const { to, isReplace } = detail;

      if (isReplace || to === location.pathname)
        history.replaceState(null, "", to);
      else history.pushState(null, "", to);

      route();
    });

    window.addEventListener("popstate", () => {
      route();
    });
  };

  init();
  route();
}

export default Router;
결론
두가지 방법 모두 해보니 내부 로직은 거의 비슷하지만 express를 통해 직접 정적 파일을 제공해주는지 와
디렉토리 구조를 어떻게 짤 것 인지 정도가 다른 것 같다.
나는 방법 2가 좀 더 react와 비슷하고 깔끔한 것 같아 이것으로 진행하기로 했다.
알게된 점
vanilla js를 통해 SPA를 구현하려하니 생각보다 막막했다.
항상 쓰던 router도 직접 구현해야하니 기존 react 라이브러리가 얼마나 간편하게 만들어주는지 느꼈다.
react의 구동 방식를 알게되었고, 라이프 사이클과 props, state 차이점 등을 알게 되었다.
추후 글 추가 예정
참고
https://www.notion.so/bicco2/1-af6732688b8344ccb52a8077d82f8d05#724b624e626443e6af2ceee18f664b33
https://www.notion.so/bicco2/1-af6732688b8344ccb52a8077d82f8d05#91bcf2e1caed4c748f9a4ae789a9ec5b
https://www.notion.so/bicco2/1-af6732688b8344ccb52a8077d82f8d05#02302bad706f416baad17e5e63d94718
https://www.notion.so/bicco2/1-af6732688b8344ccb52a8077d82f8d05#fd36a48db51744a9accdf35e7de68d34