사전 준비
OAuth 앱 등록
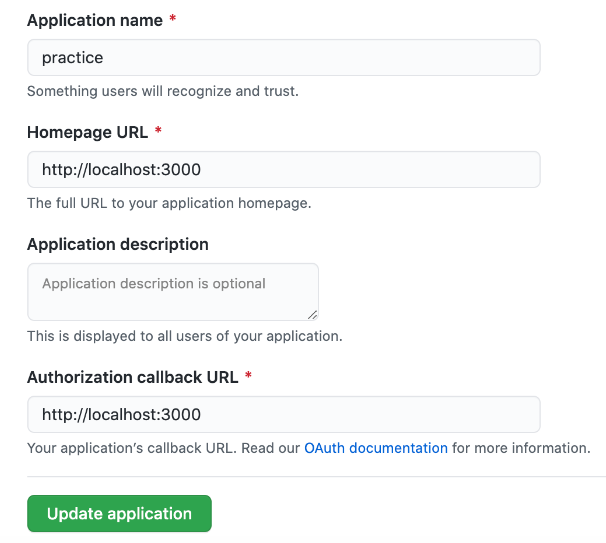
OAuth 앱등록
을 통해 OAuth 앱을 등록한다.
환경변수 설정
.env파일에 Client ID 와 Client Secret의 정보를 채운다.
서버 구현
Controller/callback.js
인증 정보를 바탕으로 Access Token을 받아올 수 있도록 도와주는 라우터이다. 클라이언트에서 받아온 Authorization code를 서버의 /callback 엔드포인트로 전달해 서버에서 github App에게 Access Token 발급을 요청한다.
require('dotenv').config();

const clientID = process.env.GITHUB_CLIENT_ID;
const clientSecret = process.env.GITHUB_CLIENT_SECRET;
const axios = require('axios');

module.exports = (req, res) => {
  // authorization code를 이용해 access token을 발급받기 위한 post 요청을 보낸다. 다음 링크를 참고
  // https://docs.github.com/en/free-pro-team@latest/developers/apps/identifying-and-authorizing-users-for-github-apps#2-users-are-redirected-back-to-your-site-by-github
  const code = req.body.authorizationCode;

  // github 에서 부여받은 client_ID, client_secret, code를 담아 post요청 보내기
  axios.post( 'https://github.com/login/oauth/access_token',
    { client_id: clientID, client_secret: clientSecret, code },
    // 클라이언트가 서버에 데이터를 전송할 때 가공해달라고 요청
   // 우리가 읽을 수 있는 형태로 받아내기 위한 명령어
    { headers: { accept: 'application/json' } }
  )
  .then( (result) => {
    res.status(200).json( { accessToken: result.data.access_token })
  })
}
controlloer/images.js
const images = require('../resources/resources');

module.exports = (req, res) => {
  // Mypage로부터 access token을 제대로 받아온 것이 맞다면, resource server의 images를 클라이언트로 보낸다.
  if (!req.headers.authorization) {
    res.status(403).send( {message: 'no permission to access resources' })
  } else {
    res.status(200).json( { images } )
  }
}
클라이언트 구현
components/Login.js
import React, { Component } from 'react';

class Login extends Component {
  constructor(props) {
    super(props)

    this.socialLoginHandler = this.socialLoginHandler.bind(this)

    // GitHub로부터 사용자 인증을 위해 GitHub로 이동해야 합니다. 적절한 URL을 입력한다.
    // OAuth 인증이 완료되면 authorization code와 함께 callback url로 리디렉션 한다.
    // 참고: https://docs.github.com/en/free-pro-team@latest/developers/apps/identifying-and-authorizing-users-for-github-apps

    this.GITHUB_LOGIN_URL = 'https://github.com/login/oauth/authorize?client_id=8445fb169d689e21f972'
  }

  socialLoginHandler() {
    window.location.assign(this.GITHUB_LOGIN_URL)
  }

  render() {
    return (
      <div className='loginContainer'>
        OAuth 2.0으로 소셜 로그인을 구현해보세요.
        <img id="logo" alt="logo" src="https://image.flaticon.com/icons/png/512/25/25231.png" />
        <button
          onClick={this.socialLoginHandler}
          className='socialloginBtn'
        >
          Github으로 로그인
          </button>
      </div>
    );
  }
}

export default Login;
로그인에 성공하면 authorization Code를 내 앱에 발급해준다. 그럼 이 코드를 서버에 요청하고 access Token을 달라고 요청한다.
App.js
import React, { Component } from 'react';
import { BrowserRouter as Router } from 'react-router-dom';
import Login from './components/Login';
import Mypage from './components/Mypage';
import axios from 'axios';
class App extends Component {
  constructor() {
    super();
    this.state = {
      isLogin: false,
      accessToken: ''
    };
    this.getAccessToken = this.getAccessToken.bind(this);
  }

  async getAccessToken(authorizationCode) {
    // 받아온 authorization code로 다시 OAuth App에 요청해서 access token을 받을 수 있다.
    // access token은 보안 유지가 필요하기 때문에 클라이언트에서 직접 OAuth App에 요청을 하는 방법은 보안에 취약할 수 있다.
    // authorization code를 서버로 보내주고 서버에서 access token 요청을 하는 것이 적절하다.

    // T서버의 /callback 엔드포인트로 authorization code를 보내주고 access token을 받아온다.
    // access token을 받아온 후
    //  - 로그인 상태를 true로 변경하고,
    //  - state에 access token을 저장한다.
    const res = await axios.post('http://localhost:8080/callback', {
      authorizationCode
    })
    this.setState( {
      isLogin: true,
      accessToken: res.data.accessToken
    })
  }

  componentDidMount() {
    const url = new URL(window.location.href)
    const authorizationCode = url.searchParams.get('code')
    if (authorizationCode) {
      // authorization server로부터 클라이언트로 리디렉션된 경우, authorization code가 함께 전달된다.
      // ex) http://localhost:3000/?code=5e52fb85d6a1ed46a51f
      this.getAccessToken(authorizationCode)
    }
  }

  render() {
    const { isLogin, accessToken } = this.state;
    return (
      <Router>
        <div className='App'>
          {isLogin ? (
            <Mypage accessToken={accessToken} />
          ) : (
              <Login />
            )}
        </div>
      </Router>
    );
  }
}

export default App;
access Token을 받았으면, github에게 사용자 정보 get요청을 한다.
Component/Mypage.js
import React, { Component } from "react";
import axios from 'axios';
const FILL_ME_IN = 'FILL_ME_IN'

class Mypage extends Component {

  constructor(props) {
    super(props);
    this.state = {
      images: [],
      name: '',
      login: '',
      html_url: '',
      public_repos: 0

      // GitHub API 를 통해서 받아올 수 있는 정보들 중에서
      // 이름, login 아이디, repository 주소, public repositoty 개수를 포함한 정보들을 담는다.
    }
  }

  async getGitHubUserInfo() {
    // GitHub API를 통해 사용자 정보를 받아온다.
    // https://docs.github.com/en/free-pro-team@latest/rest/reference/users#get-the-authenticated-user
    // get 요청을 통해 받아온 정보들을 상태에 저장해서 클라이언트에 보내준다.
    await axios.get('https://api.github.com/user', {
      headers: {
        authorization: `token ${this.props.accessToken}`,
        accept: 'application/json'
      }
    })
    .then( data => {
      const { name, login, html_url, public_repos } = data.data;
      this.setState({ name, login, html_url, public_repos })
    })
  }

  async getImages() {
    // 마찬가지로 액세스 토큰을 이용해 local resource server에서 이미지들을 받아와준다.
    // resource 서버에 GET /images 로 요청
    await axios.get('http://localhost:8080/images', {
      headers: { authorization: `token ${this.props.accessToken}`}
    })
    .then( data => {
      this.setState( { images: data.data.images });
    })
  }

  componentDidMount() {
    this.getGitHubUserInfo()
    this.getImages()
  }

  render() {
    const { accessToken } = this.props

    if (!accessToken) {
      return <div>로그인이 필요합니다</div>
    }

    return (
      <div>
        <div className='mypageContainer'>
          <h3>Mypage</h3>
          <hr />

          <div>안녕하세요. <span className="name" id="name">{this.state.name}</span>님! GitHub 로그인이 완료되었습니다.</div>
          <div>
            <div className="item">
              나의 로그인 아이디:
              <span id="login">{this.state.login}</span>
            </div>
            <div className="item">
              나의 GitHub 주소:
              <span id="html_url">{this.state.html_url}</span>
            </div>
            <div className="item">
              나의 public 레포지토리 개수:
              <span id="public_repos">{this.state.public_repos}</span>개
            </div>
          </div>

          <div id="images">
            {this.state.images.map( (img, i) => {
              return <img key={i} src={img.blob} alt={img.file} />
            })}
            {/* img 태그를 이용해 resource server로 부터 받은 이미지를 출력*/}
          </div>
        </div>
      </div >
    );
  }

}

export default Mypage;

Blockchain Developer