1. ClusterIP
2. NodePort
기본 오브젝트를 생성할 deployment.yaml과 Nodeport로 된 service 파일 2개를 생성한다.
# deployment.yaml

apiVersion: apps/v1
kind: Deployment
metadata:
  name: hello
spec:
  replicas: 3
  selector:
    matchLabels:
      app: hello
  template:
    metadata:
      name: hello
      labels:
        app: hello
    spec:
      containers:
      - name: nginx
        image: nginxdemos/hello:plain-text
        ports:
        - name: http
          containerPort: 80
          protocol: TCP
# service.yaml
apiVersion: v1
kind: Service
metadata:
name: hello
labels:
app: hello
spec:
type: NodePort
ports:
- name: http
protocol: TCP
port: 8080
targetPort: 80
# nodePort: 31000
selector:
app: hello실행 시켜준다.

서비스 목록을 확인해보면, 우리가 만든 hello 서비스가 보인다.

PORT가 8080:30775/TCP 인데 이는 NodePort 서비스 흐름으로 이해해보면,
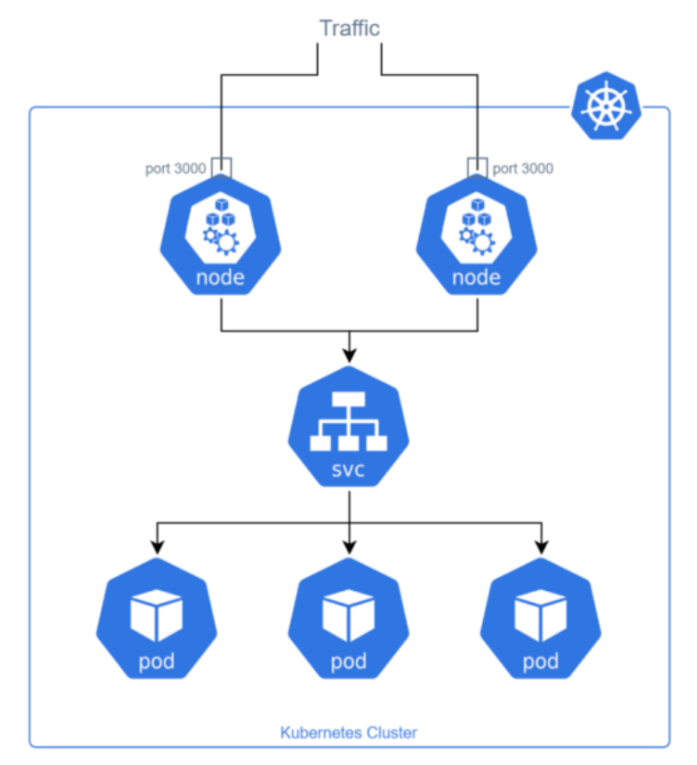
30775포트의 노드로 트래픽이 들어오고 8080포트 클러스터ip로 전달되고 pod의 80포트 주소로 로드밸런싱되어 들어가는 것이다.
자세히 보면,
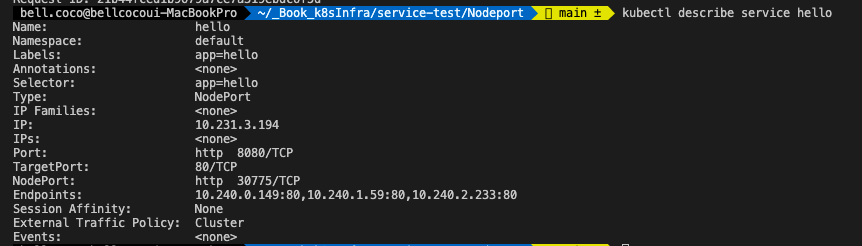
Endpoints로 보이는 것들이 pod들의 ip:port 주소들이다.
워커노드ip:서비스포트로 접속해보면 잘 접속되어 확인해볼 수 있다.


나는 능히 할 수 있는 버섯이다! 🍄🟫