
1. GraphQL을 사용한 외부 API 사용
1.1 외부API 확인
1.2 API Schema설정 및 GraphQL resolvers작성
2. GraphQL 관계구현
2.1 관계 구현
1. GraphQL을 사용한 외부 API 사용
1.1 외부API 확인
- 저번시간에 GraphQL에 관련해서 공부를 했었다.
- DB커넥션없이 Server에 직접 데이터를 만들어서 사용을 했었다.
- open API를 사용해서 Json데이터를 GraphQL을 통해서 받아오겠다.
이번에 사용할 OpenAPI는 https://yts.mx/api/v2/list_movies.json 을 쓸 예정이다.
1.2 API Schema설정 및 GraphQL resolvers작성
- 먼저 받아오는 데이터 Design을 gql을 사용해서 표한한다.
const typeDefs = gql`
type Movie {
    id: Int!
    url: String!
    imdb_code: String!
    title: String!
    title_english: String!
    title_long: String!
    slug: String!
    year: Int!
    rating: Float!
    runtime: Float!
    genres: [String]!
    summary: String
    description_full: String!
    synopsis: String
    yt_trailer_code: String!
    language: String!
    background_image: String!
    background_image_original: String!
    small_cover_image: String!
    medium_cover_image: String!
    large_cover_image: String!
  }`
- resolvers에 받아온 데이터에 적용할 Query를 넣어준다.
const resolvers = {
  Query: {
   allMovies() {
     //fetch를 통해 json파일을 받아오고 결과값을 return한다.
      return fetch("https://yts.mx/api/v2/list_movies.json")
        .then((r) => r.json())
        .then((json) => json.data.movies);
    },
  }
- 작성한 Query도 데이터 디자인작성한곳에 넣어서 적용을 합니다.
const typeDefs = gql`
type Query {
    allMovies: [Movie!]!
  }
type Movie {
    id: Int!
    url: String!
    imdb_code: String!
    title: String!
    title_english: String!
    title_long: String!
    slug: String!
    year: Int!
    rating: Float!
    runtime: Float!
    genres: [String]!
    summary: String
    description_full: String!
    synopsis: String
    yt_trailer_code: String!
    language: String!
    background_image: String!
    background_image_original: String!
    small_cover_image: String!
    medium_cover_image: String!
    large_cover_image: String!
  }`
- npm start를 통해 Apollo server를 열어준다. Query양식에 맞게 입력해준다.
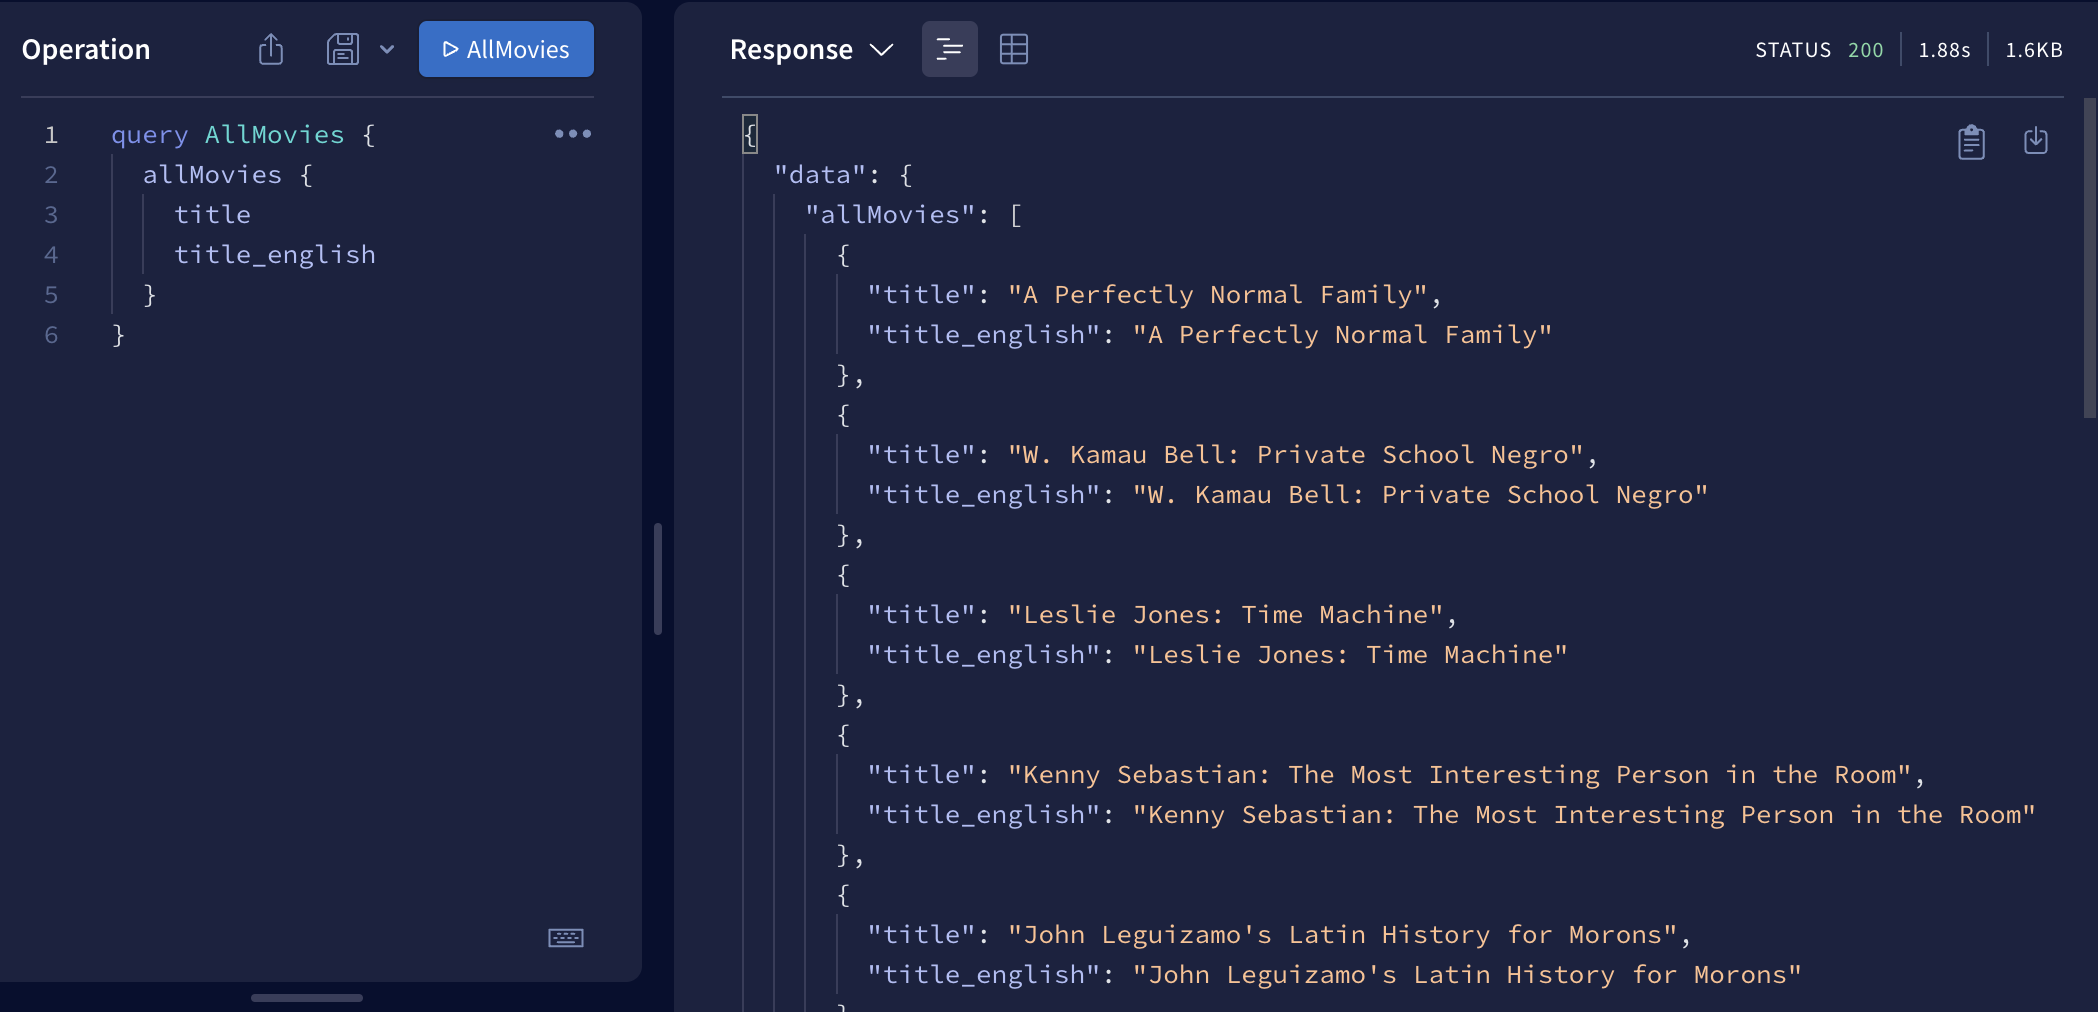
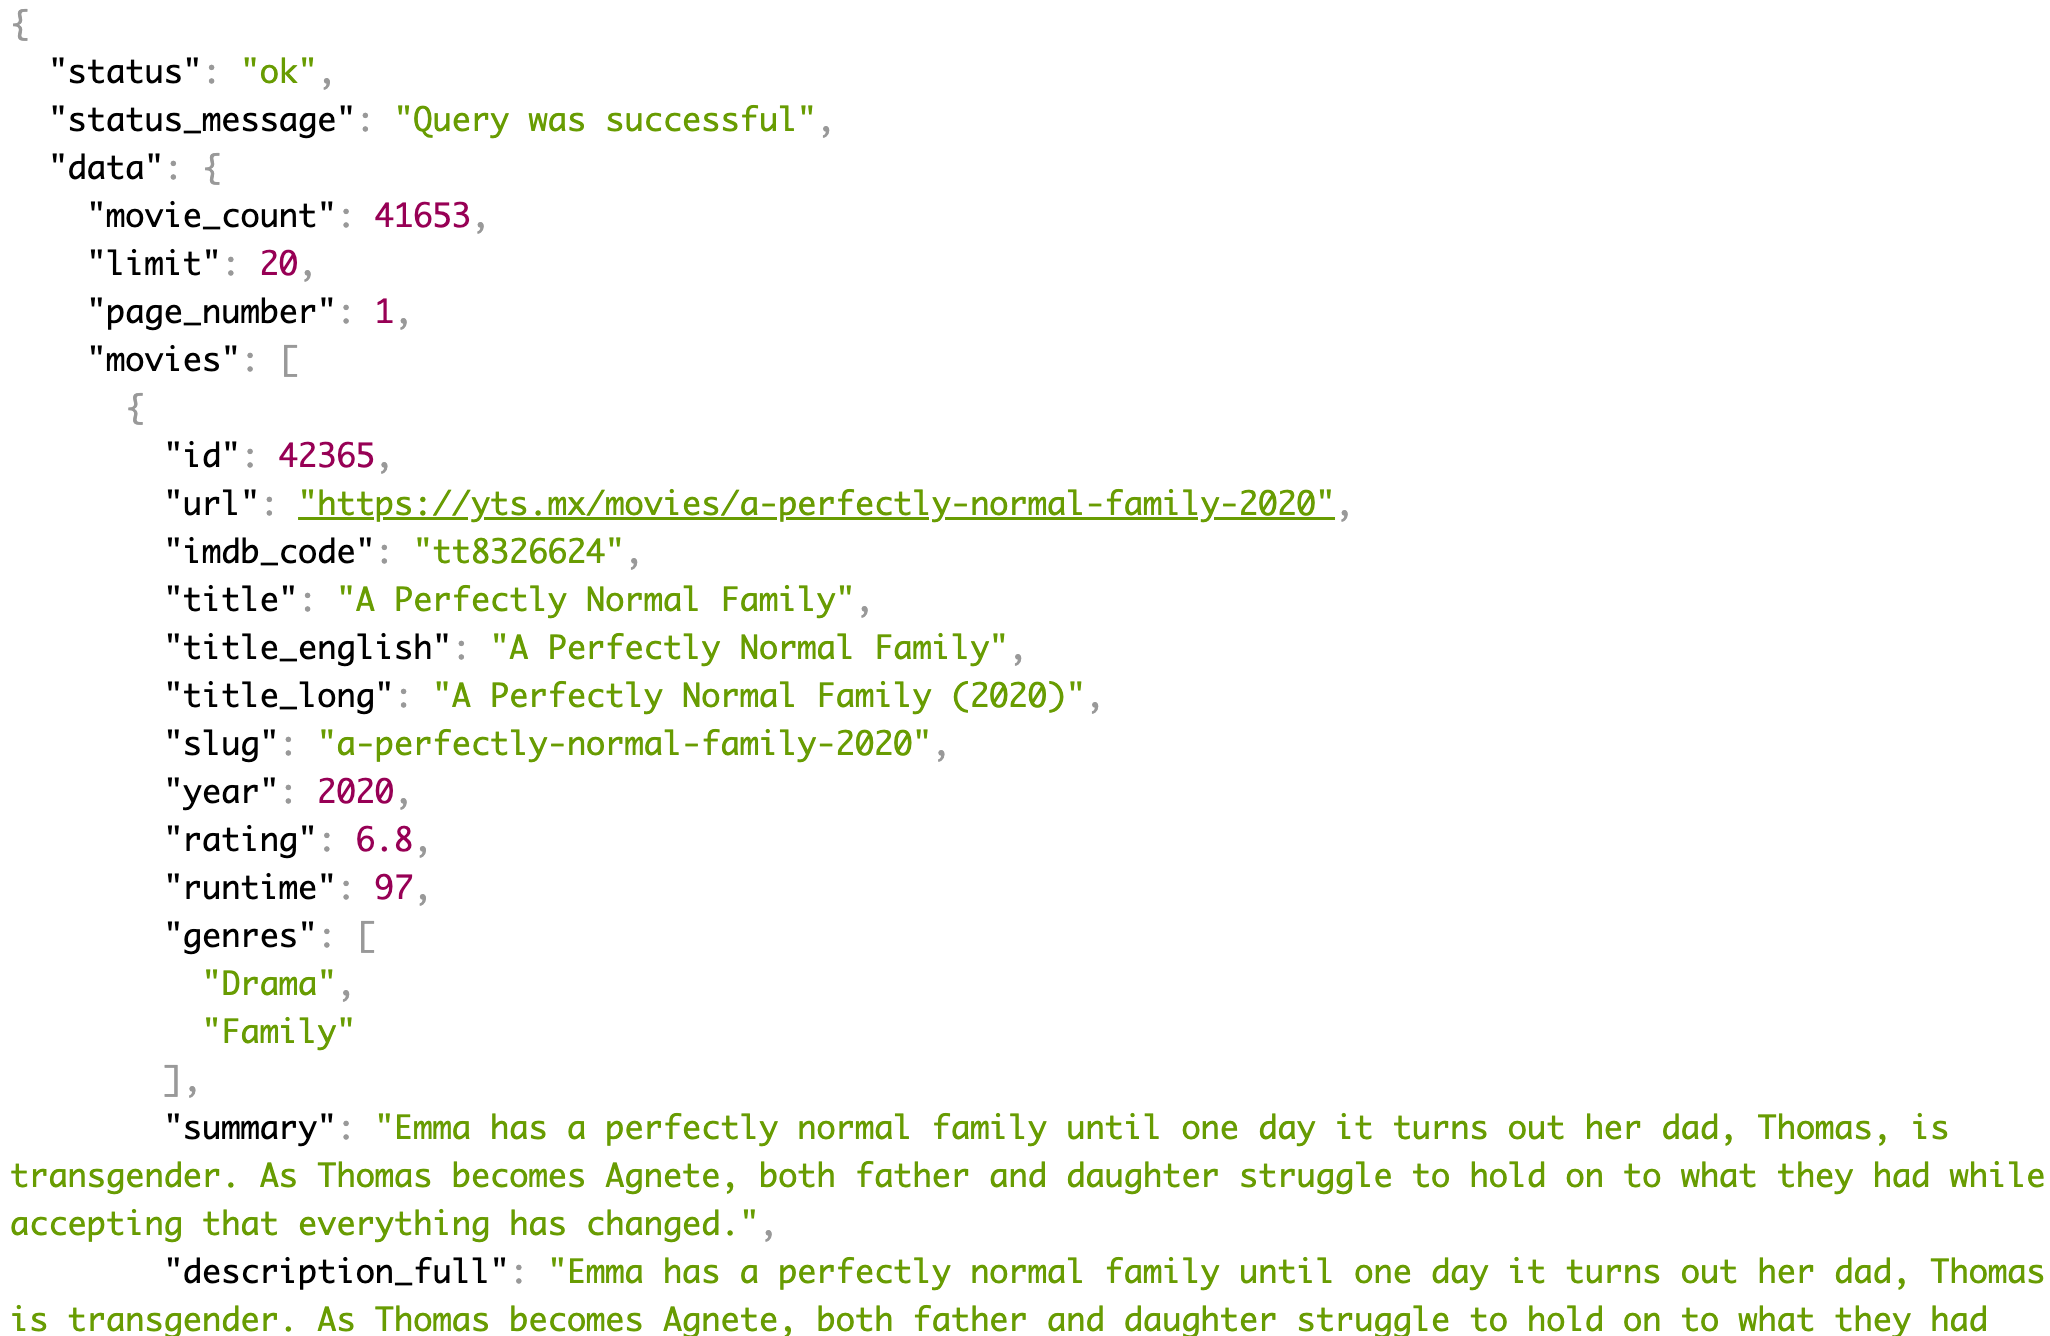
OpenAPI에 있는 데이터들이 정상적으로 출력되는것을 볼 수 있다.
- DB 커넥션은 아니지만 내가 만든 local의 Apollo Server에 정상적으로 데이터가 들어가 있는것을 확인할 수 있었다.
- ApolloServer에 들어간 데이터를 프론트에서 띄워즈는 방법을 연구해 봐야겠다.
2. GraphQL 관계구현
2.1 관계 구현
- 보통 DB의 관계는 DB Model 디자인상 관계를 설정하고 PK와 FK관계를 통해 데이터를 호출하고 사용한다.
- GraphQL도 디자인을 통해서 관계를 만든다.
const typeDefs = gql`
  type User {
    id: ID!
    firstname: String!
    lastname: String!
    fullName: String!
  }
//Tweet을 작성할때 author부분에 User모델을 Nullunable로 넣어준다.
  type Tweet {
    id: ID!
    text: String!
    author: User!
  }
//PostTweet은 Text와 userId argument를 받고 정상적으로 Tweet을 Return 하게 된다.
  type Mutation {
    postTweet(text: String! , userId: ID!): Tweet!
  }
`
//Mutation에 Post요청에 argument로 입력하는 text와 작성하는 userId를 입력 받는다.
const resolvers = {
Mutation: {
postTweet(_, { text, userId }) {
const newTweet = {
id: tweets.length + 1,
text,
userId,
};
tweets.push(newTweet);
//새로 작성된 Tweet을 반환한다.
return newTweet;
},
}
} !!! 그럼 여기서 UserId만 입력하는데 User에서 자동으로 입력된값을 찾아주는건지 의문이 생겼다.
const resolvers = {
 	Tweet:{
    //Tweet의 author 부분을 확인하여 User와의 관계를 형성해준다.
    author({ userId }){
      return users.find(user => user.id === userId)
    }
  }
}
위와같이 관계로 정립된 부분은 연결된 부분에 받아온 데이터로 어떻게 관계를 형성할것인지 명시 해주어야 한다.
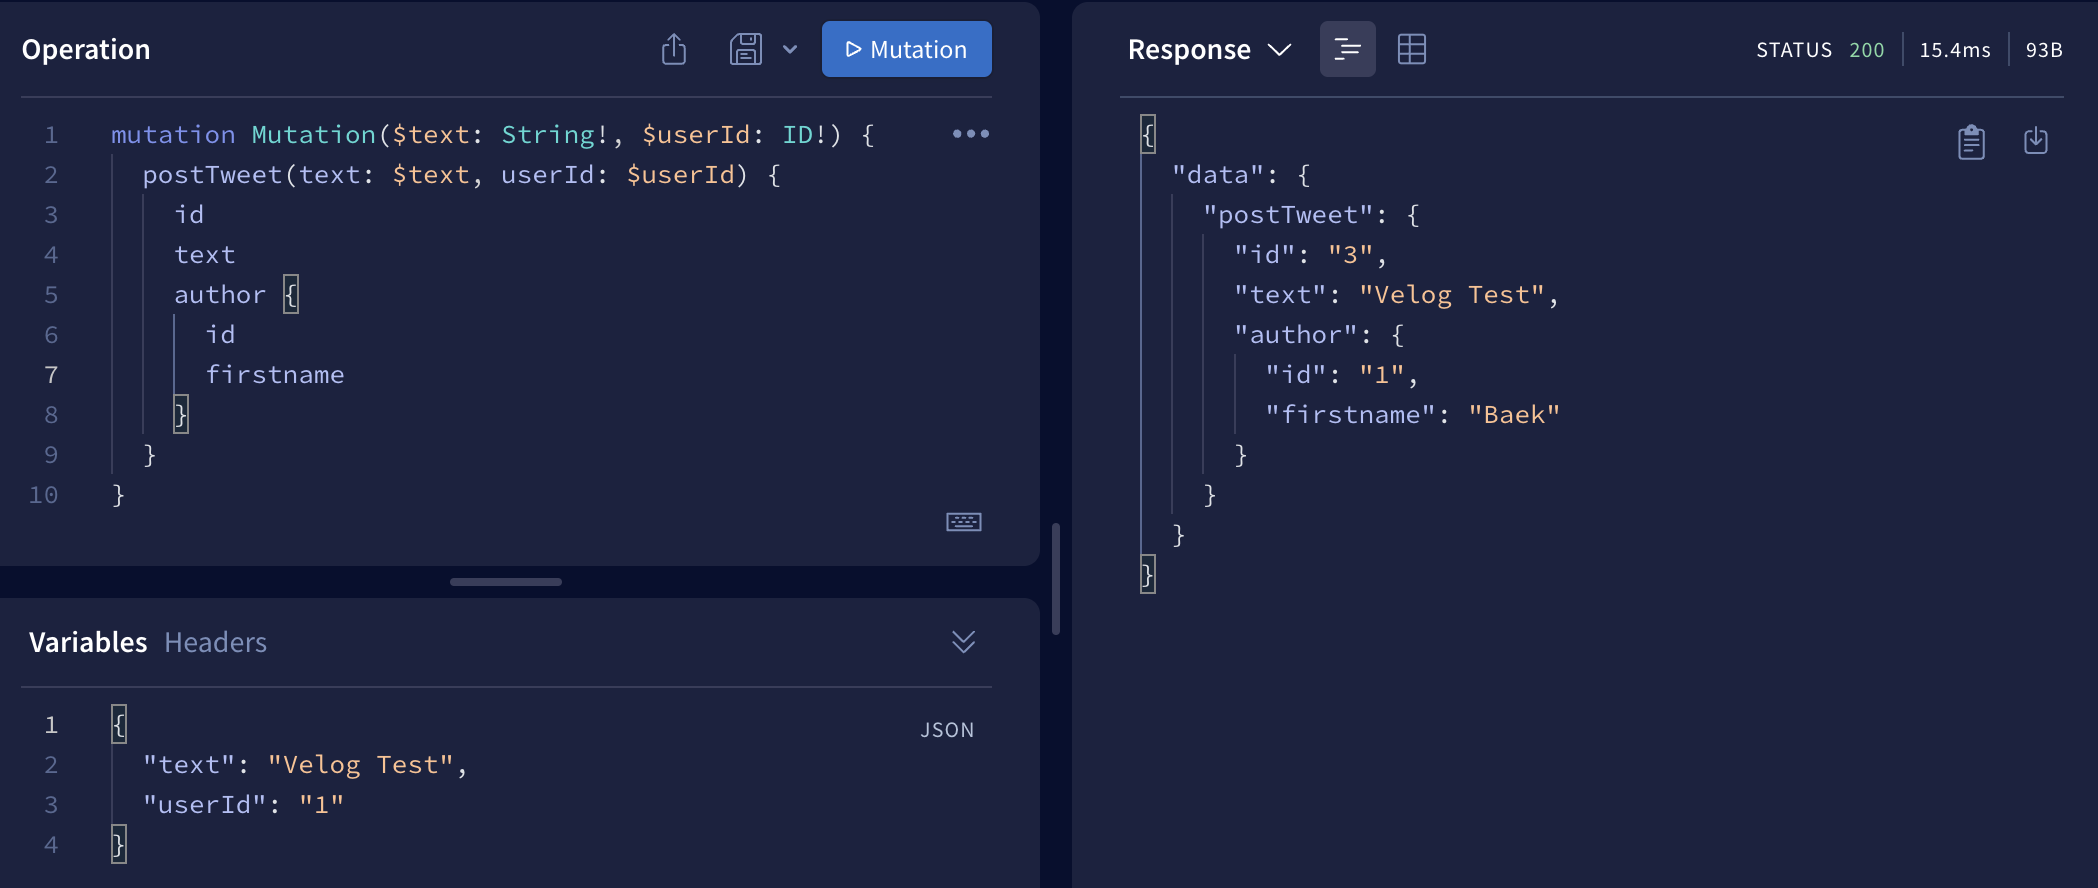
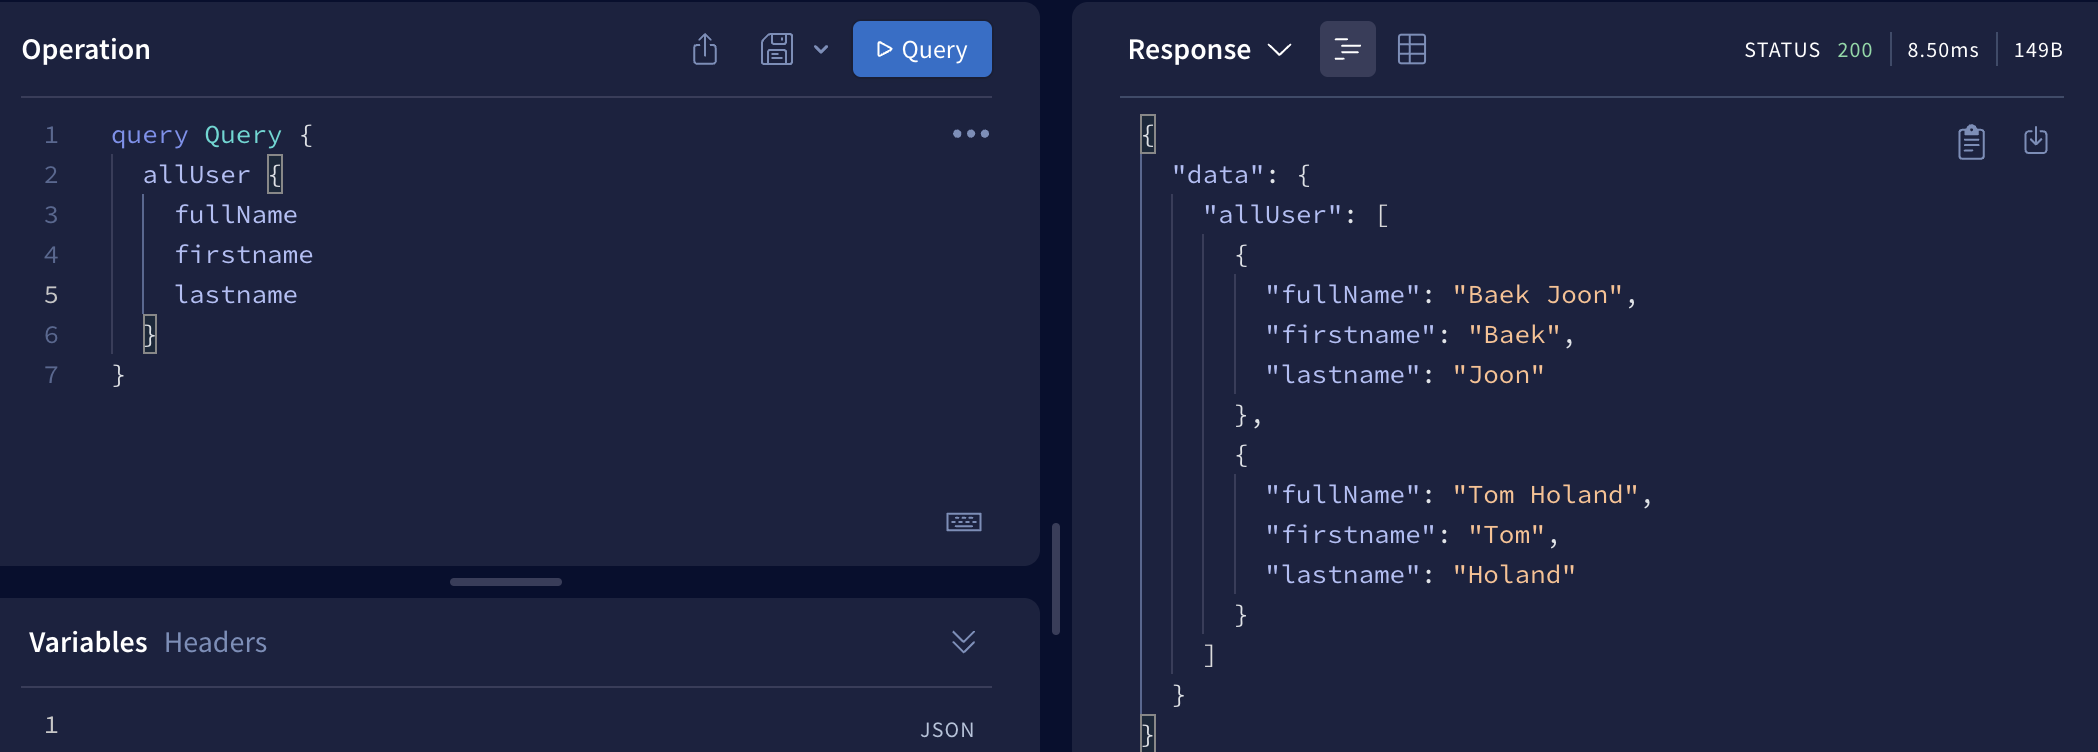
최종적으로 결과값이 잘 반환되었다.
TIP)userId를 저렇게 처리 해준다면 데이터 안의 값을 직접적으로 변경하거나 조작할 수 있지 않을까?
- 물론 되는 부분이다.
//입력된 데이터값 let users = [ { id: "1", firstname: "Baek", lastname: "Joon", }]User:{ // 해당 유저의 칼럼을 argument로 가져서 데이터를 생성할 수 있다. fullName({firstname, lastname}){ return `${firstname} ${lastname}` } },
- 위와 같이 내부에 있는 데이터도 직접적으로 관리 할 수 있게 되는것이다.
- 데이터를 가지고 올때 DB에 직접적으로 변경을 가하는것이 아닌 경우 위 방법이 매우 유용할것으로 보인다.
향후 진행방향
- Django에 GraphQL을 접목시켜 볼예정이다.
- GraphQL서버을 열어서 데이터를 가공할 수 있게된다면 프론트에서 어떻게 수신을 하고 보여줄지도 연습해 봐야겠다.

이게 되네?