
최근 유지 보수 관리하고 있는 앱에 코드푸쉬 설정이 필요해서 세팅하는 김에 가이드 글을 작성하게 됐습니다.
자세한 설명 없이 과정만 작성했습니다.
감사합미다.
- Appcenter cli 설치
npm install -g appcenter-cli- Appcenter login
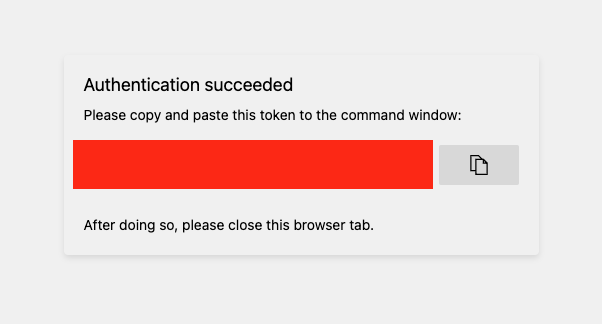
appcenter login- Y 누르고 진행

- code 복사 후 터미널에 입력
- Apps 생성
appcenter apps create -d {Apps 이름} -o {iOS/Android} -p React-Native- 보통 Apps 이름은 {ProjectName_ios} {ProjectName_android}로 작명한다.
appcenter codepush deployment add -a {User Name}/{Apps 이름} {Deployment Name}- Deployment Name은 보통 Staging, Production 두 가지로 관리함 중간 단계 ReleaseStaging을 추가해 세 가지로 관리하는 경우도 있다.
appcenter codepush deployment add -a user/myApp_android Staging
appcenter codepush deployment add -a user/myApp_android Production
appcenter codepush deployment add -a user/myApp_ios Staging
appcenter codepush deployment add -a user/myApp_ios Production- RN 프로젝트에 react-native-code-push 라이브러리 설치
yarn add react-native-code-pushiOS
-
cd ios && pod installpod 설치 -
/ios/{your project name}/Info.plist열어서 해당 내용 추가
<?xml version="1.0" encoding="UTF-8"?>
<!DOCTYPE plist PUBLIC "-//Apple//DTD PLIST 1.0//EN" "http://www.apple.com/DTDs/PropertyList-1.0.dtd">
<plist version="1.0">
<dict>
  ...
  <key>CodePushDeploymentKey</key>
  <string>${CODEPUSH_KEY}</string>
  ...
</dict>
</plist>- /ios/AppDelegate.m 열어서 해당 내용 추가, 수정
// 최상단에 추가
#import <CodePush/CodePush.h>
return [[NSBundle mainBundle] URLForResource:@"main" withExtension:@"jsbundle"];
파일 안에서 해당 라인을
return [CodePush bundleURL];로 수정한다.
- (NSURL *)sourceURLForBridge:(RCTBridge *)bridge
{
  #if DEBUG
    return [[RCTBundleURLProvider sharedSettings] jsBundleURLForBundleRoot:@"index" fallbackResource:nil];
  #else
    return [CodePush bundleURL];
  #endif
}-
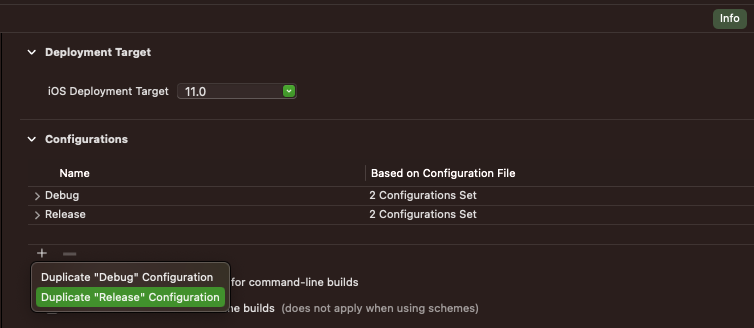
xCode로 project를 열고, PROJECT/Info/Duplicate Release Configuration을 선택한다.
생성된 Configuration의 이름을 Staging으로 설정해준다.
-
같은 PROJECT 탭에서 Build Settings로 이동
Add User-Defined Setting 선택해서
MULTI_DEPLOYMENT_CONFIG 설정을 만든다.


Release에는 $(BUILD_DIR)/$(CONFIGURATION)$(EFFECTIVE_PLATFORM_NAME)
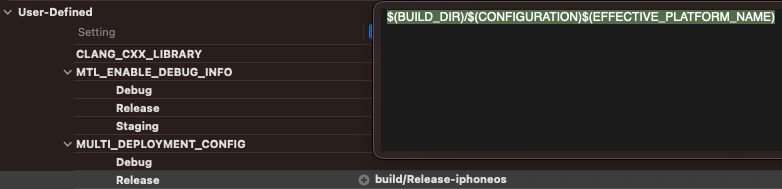
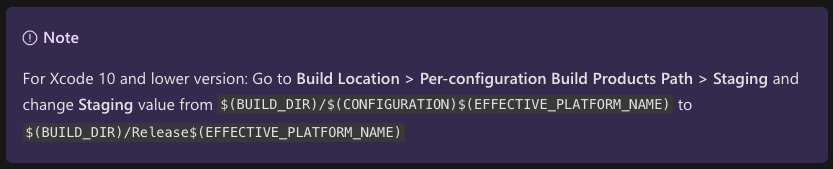
Staging에는 $(BUILD_DIR)/Release$(EFFECTIVE_PLATFORM_NAME)

(xCode 버전이 10 이하인 경우)
똑같이 Add User-Defined Setting 선택 후
이번에는 CODEPUSH_KEY 설정을 만든다.

appcenter codepush deployment list -a user/yourApp_ios -k 명령어를 사용해
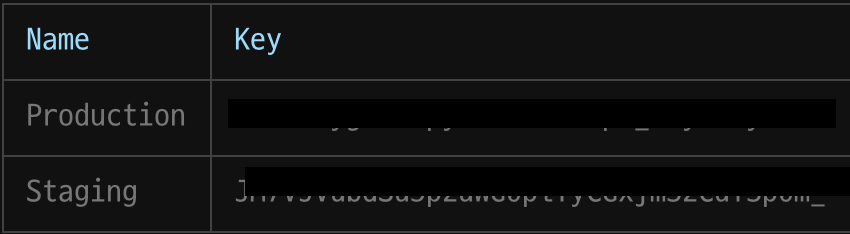
Staging -> Staging / Production -> Release 각각 기입해서 설정해 준다.
Android
- /android/settings.gradle 파일을 열어 하단 내용을 추가한다.
include ':app', ':react-native-code-push'
project(':react-native-code-push').projectDir = new File(rootProject.projectDir, '../node_modules/react-native-code-push/android/app')- /android/gradle.properties 파일을 열어 프로퍼티를 추가한다.
// debug는 빈 값을 넣어야 한다.
CODEPUSH_DEPLOYMENT_KEY_DEBUG=
CODEPUSH_DEPLOYMENT_KEY_STAGING={Staging deployment key}
CODEPUSH_DEPLOYMENT_KEY_PRODUCTION={Production deployment key}- /android/app/build.gradle 파일을 열어 하단 내용을 추가한다.
apply from: "../../node_modules/react-native-code-push/android/codepush.gradle"추가로 buildTypes 블록을 찾아 각 build type에 맞게 resValue를 설정한다.
android {
    ...
    buildTypes {
        debug {
            ...
            // Note: CodePush updates shouldn't be tested in Debug mode as they're overriden by the RN packager. However, because CodePush checks for updates in all modes, we must supply a key.
            resValue "string", "CodePushDeploymentKey", CODEPUSH_DEPLOYMENT_KEY_DEBUG
            ...
        }
        releaseStaging {
            ...
            initWith release // release build type 설정을 상속
            resValue "string", "CodePushDeploymentKey", CODEPUSH_DEPLOYMENT_KEY_STAGING
            // Note: It's a good idea to provide matchingFallbacks for the new buildType you create to prevent build issues
            // Add the following line if not already there
            matchingFallbacks = ['release']
            ...
        }
        release {
            ...
            resValue "string", "CodePushDeploymentKey", CODEPUSH_DEPLOYMENT_KEY_PRODUCTION
            ...
        }
    }
    ...
}- /android/app/src/main/java 안에 있는 MainApplication.java 파일을 열어 하단 내용을 추가한다.
// 최상단
import com.microsoft.codepush.react.CodePush;

...
public class MainApplication extends Application implements ReactApplication {
    private final ReactNativeHost mReactNativeHost = new ReactNativeHost(this) {
        ...
        // 이 블록 최하단에 getJSBundleFile() 메서드를 추가한다.
        @Override
        protected String getJSBundleFile() {
            return CodePush.getJSBundleFile();
        }
    };
}
react-native
// Wrapper function
codePush(rootComponent: React.Component): React.Component;
codePush(options: CodePushOptions)(rootComponent: React.Component): React.Component;

// Decorator; Requires ES7 support
@codePush
@codePush(options: CodePushOptions)
예시처럼 codePush는 options를 옵셔널 하게 넣어서 사용할 수 있다.
공식 문서에서 소개되는 예시를 확인해 보면
- default 적용
기본 설정을 그대로 사용해서 앱은 언제나 최신 버전의 번들을 다운로드 받고,
유저가 앱을 종료 후 다시 시작하는 시점에 설치한다.
가장 조용하게 앱을 업데이트하는 방법으로 소개된다.
// Fully silent update which keeps the app in
// sync with the server, without ever
// interrupting the end user
class MyApp extends Component<{}> {}
MyApp = codePush(MyApp);
export default MyApp;

// functional
const MyApp = () => {};
export default codePush(MyApp);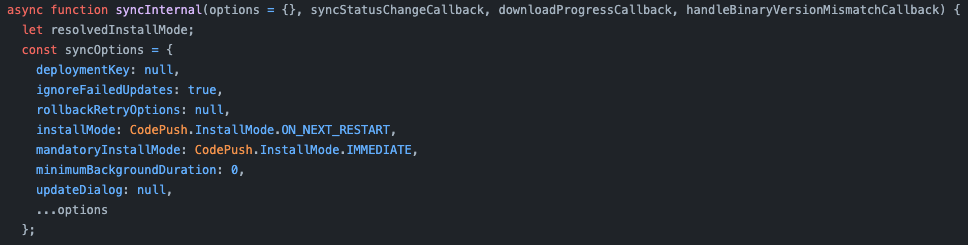
기본 syncOptions는 이렇게 설정돼있다.
각 옵션은 react-native-code-push/docs/api-js.md에서 더 자세히 확인할 수 있다.
- 1번과 거의 같음.
checkFrequency, installMode 옵션을 수정해 앱이 백그라운드로 내려간 상황에서도
늘 최신 번들을 확인하여 설치하고, 다시 포어그라운드로 앱이 올라왔을 때 설치한다.
// Sync for updates every time the app resumes.
const codePushOptions = {
  checkFrequency: codePush.CheckFrequency.ON_APP_RESUME,
  installMode: codePush.InstallMode.ON_NEXT_RESUM,
};

class MyApp extends Component<{}> {}
MyApp = codePush(codePushOptions)(MyApp);
export default MyApp;

// functional
const MyApp = () => {};
export default codePush(codePushOptions)(MyApp);- 유저와 인터렉션 모달 로직 추가
updateDialog 옵션을 추가해 유저가 선택해서 업데이트를 진행할 수 있다.
installMode를 IMMEDIATE로 지정해 즉시 앱이 재실행되고 최신 번들을 적용함.
// Active update, which lets the end user know
// about each update, and displays it to them
// immediately after downloading it
const codePushOptions = {
  updateDialog: true,
  installMode: codePush.InstallMode.IMMEDIATE,
};

class MyApp extends Component<{}> {}
MyApp = codePush(codePushOptions)(MyApp);
export default MyApp;

// functional
const MyApp = () => {};
export default codePush(codePushOptions)(MyApp);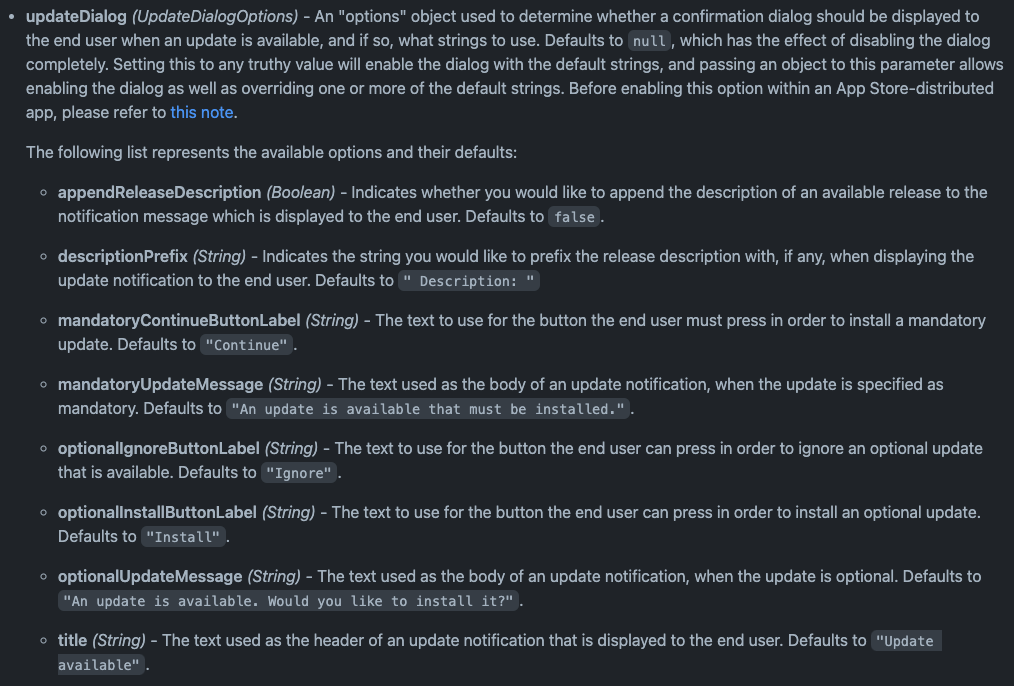
updateDialog는 여러 옵션을 사용해서 커스터마이징이 가능하다.
- syncStatus, downloadProgress 값 사용하기
// Make use of the event hooks to keep track of
// the different stages of the sync process.
class MyApp extends Component<{}> {
    codePushStatusDidChange(status) {
        switch(status) {
            case codePush.SyncStatus.CHECKING_FOR_UPDATE:
                console.log("Checking for updates.");
                break;
            case codePush.SyncStatus.DOWNLOADING_PACKAGE:
                console.log("Downloading package.");
                break;
            case codePush.SyncStatus.INSTALLING_UPDATE:
                console.log("Installing update.");
                break;
            case codePush.SyncStatus.UP_TO_DATE:
                console.log("Up-to-date.");
                break;
            case codePush.SyncStatus.UPDATE_INSTALLED:
                console.log("Update installed.");
                break;
        }
    }

    codePushDownloadDidProgress(progress) {
        console.log(progress.receivedBytes + " of " + progress.totalBytes + " received.");
    }
}
MyApp = codePush(MyApp);
export default MyApp;
제공하는 api 중 하나인 sync() 메서드를 사용해도 해당 기능을 사용할 수 있다.
// Prompt the user when an update is available
// and then display a "downloading" modal
codePush.sync({ updateDialog: true },
  (status) => {
      switch (status) {
          case codePush.SyncStatus.DOWNLOADING_PACKAGE:
              // Show "downloading" modal
              break;
          case codePush.SyncStatus.INSTALLING_UPDATE:
              // Hide "downloading" modal
              break;
      }
  },
  ({ receivedBytes, totalBytes, }) => {
    /* Update download modal progress */
  }
);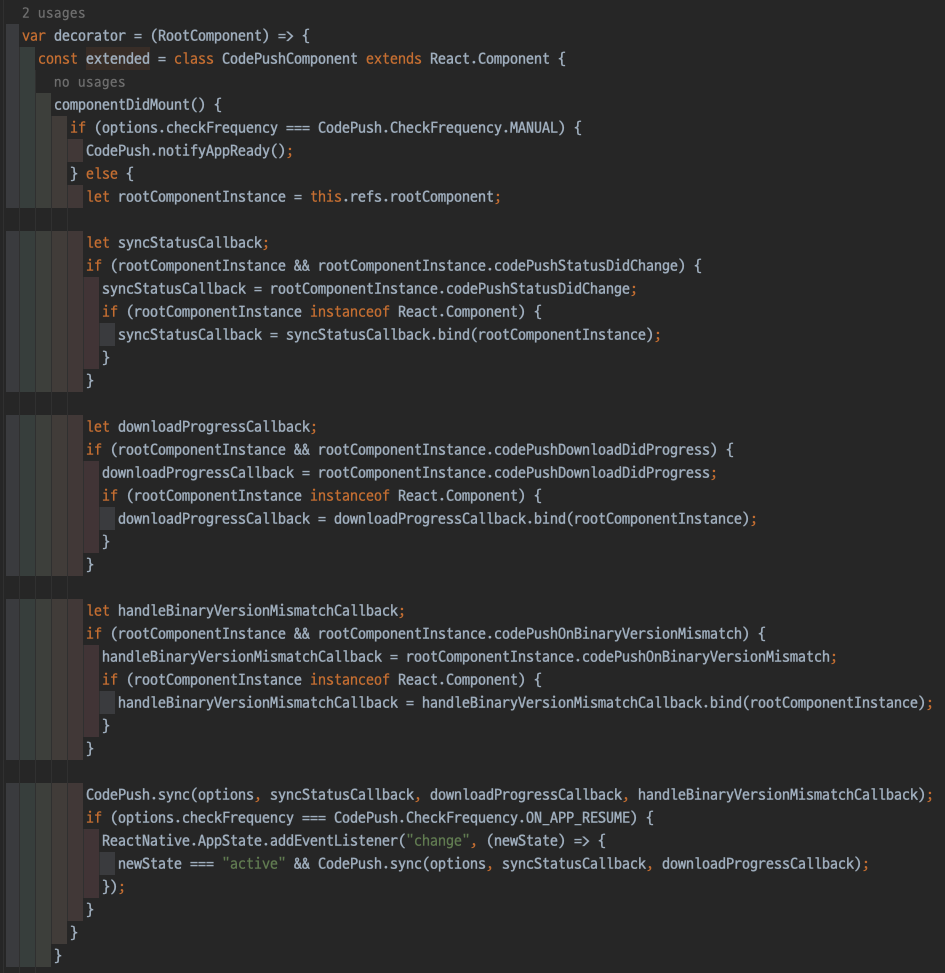
실제 CodePush.js 코드를 확인해 보면 checkFrequency가 MANUAL인지 아닌지에 따라 분기가 갈린다.
MANUAL이 아닌 경우 자체적으로 sync() 함수를 실행하기 때문에 코드푸쉬 로직을 재정의 하려면
가장 먼저 설정하는 codePush 옵션에 checkFrequency를 무조건 MANUAL로 설정해 줘야 한다.
그래야 기존 codePush 옵션과 충돌하지 않는다.