MyBatis
- MyBatis 소개
- MyBatis 설정
- MyBatis 적용1 - 기본
- MyBatis 적용2 - 설정과 실행
- MyBatis 적용3 - 분석
- MyBatis 기능 정리1 - 동적 쿼리
- MyBatis 기능 정리2 - 기타 기능
1. MyBatis 소개
- MyBatis는 앞서 설명한 JdbcTemplate보다 더 많은 기능을 제공하는 SQL Mapper 이다. 기본적으로 JdbcTemplate이 제공하는 대부분의 기능을 제공한다.
- JdbcTemplate과 비교해서 MyBatis의 가장 매력적인 점은 SQL을 XML에 편리하게 작성할 수 있고 또 동적 쿼리를 매우 편리하게 작성할 수 있다는 점이다.
- JdbcTemplate은 스프링에 내장된 기능이고, 별도의 설정없이 사용할 수 있다는 장점이 있다. 반면에 MyBatis는 약간의 설정이 필요하다.
- 위 게시물은 MyBatis의 상세한 기술을 자세하게 다루지는 않는다. 다. MyBatis를 왜 사용하는지, 그리고
주로 사용하는 기능 위주로 다룰 것이다. 추가로 필요한 내용은 공식 사이트를 참고하자- https://mybatis.org/mybatis-3/ko/index.html
2. MyBatis 설정
mybatis-spring-boot-starter 라이브러리를 사용하면 MyBatis를 스프링과 통합하고, 설정도 아주
간단히 할 수 있다.
build.gradle 의존관계 추가
	//MyBatis 추가
	implementation 'org.mybatis.spring.boot:mybatis-spring-boot-starter:2.2.0'
main/test - application.properties 추가
#MyBatis
mybatis.type-aliases-package=hello.itemservice.domain
mybatis.configuration.map-underscore-to-camel-case=true
logging.level.hello.itemservice.repository.mybatis=tracemybatis.type-aliases-package- 마이바티스에서 타입 정보를 사용할 때는 패키지 이름을 적어주어야 하는데, 여기에 명시하면 패키지 이름을 생략할 수 있다.
- 지정한 패키지와 그 하위 패키지가 자동으로 인식된다.
- 여러 위치를 지정하려면 , , ; 로 구분하면 된다.
mybatis.configuration.map-underscore-to-camel-case- JdbcTemplate의
BeanPropertyRowMapper에서 처럼 언더바를 카멜로 자동 변경해주는 기능을 활성화 한다. 바로 다음에 설명하는 관례의 불일치 내용을 참고하자.
- JdbcTemplate의
logging.level.hello.itemservice.repository.mybatis=trace- MyBatis에서 실행되는 쿼리 로그를 확인할 수 있다.
관례의 불일치
- 자바 객체는 주로 카멜 표기법을 사용한다 ->
itemName - 관계형 데이터베이스는 언더스코어를 사용하는
snake_case표기법을 사용한다 ->item_name - 해당 옵션을 켜면
snake_case는 자동으로 해결되니 그냥 두면 되고, 컬럼 이름과 객체 이름이 완전히 다른 경우에는 조회 SQL에서 별칭을 사용하면 된다.
3. MyBatis 적용1 - 기본
- XML에 작성한다는 점을 제외하고는 JDBC 반복을 줄여준다는 점에서 기존 JdbcTemplate과 거의 유사하다.
itemMapper
package hello.itemservice.repository.mybatis;

import hello.itemservice.domain.Item;
import hello.itemservice.repository.ItemSearchCond;
import hello.itemservice.repository.ItemUpdateDto;
import org.apache.ibatis.annotations.Mapper;
import org.apache.ibatis.annotations.Param;

import java.util.List;
import java.util.Optional;

@Mapper
public interface ItemMapper {
    void save(Item item);
    void update(@Param("id") Long id, @Param("updateParam") ItemUpdateDto updateParam);
    Optional<Item> findById(Long id);
    List<Item> findAll(ItemSearchCond itemSearch);
}- 마이바티스 매핑 XML을 호출해주는 매퍼 인터페이스이다.
- 이 인터페이스에는
@Mapper애노테이션을 붙여주어야 한다. 그래야 MyBatis에서 인식할 수 있다 - 이 인터페이스의 메서드를 호출하면 다음에 보이는
xml의 해당 SQL을 실행하고 결과를 돌려준다. - 이제 같은 위치에 실행할 SQL이 있는 XML 매핑 파일을 만들어주면 된다.
참고로 자바 코드가 아니기 때문에
src/main/resources하위에 만들되, 패키지 위치는 맞추어 주어야 한다.
src/main/resources/hello/itemservice/repository/mybatis/ItemMapper.xml
<?xml version="1.0" encoding="UTF-8"?>
<!DOCTYPE mapper PUBLIC "-//mybatis.org//DTD Mapper 3.0//EN"
"http://mybatis.org/dtd/mybatis-3-mapper.dtd">
<mapper namespace="hello.itemservice.repository.mybatis.ItemMapper">
<insert id="save" useGeneratedKeys="true" keyProperty="id">
insert into item (item_name, price, quantity)
values (#{itemName}, #{price}, #{quantity})
</insert>
<update id="update">
update item
set item_name=#{updateParam.itemName},
price=#{updateParam.price},
quantity=#{updateParam.quantity}
where id = #{id}
</update>
<select id="findById" resultType="Item">
select id, item_name, price, quantity
from item
where id = #{id}
</select>
<select id="findAll" resultType="Item">
select id, item_name, price, quantity
from item
<where>
<if test="itemName != null and itemName != ''">
and item_name like concat('%',#{itemName},'%')
</if>
<if test="maxPrice != null">
and price <= #{maxPrice}
</if>
</where>
</select>
</mapper>
namespace: 앞서 만든 매퍼 인터페이스를 지정하면 된다.
참고 - XML 파일 경로 수정하기
XML 파일을 원하는 위치에 두고 싶으면application.properties에 다음과 같이 설정하면 된다.
mybatis.mapper-locations=classpath:mapper/**/*.xml
Insert
- Insert SQL은
<insert>를 사용하면 된다. - id 에는 매퍼 인터페이스에 설정한 메서드 이름을 지정하면 된다. 여기서는 메서드 이름이
save()이므로save로 지정하면 된다. - 파라미터는 #{} 문법을 사용하면 된다. 그리고 매퍼에서 넘긴 객체의 프로퍼티 이름을 적어주면 된다.
- #{} 문법을 사용하면
PreparedStatement를 사용한다. JDBC의 ? 를 치환한다 생각하면 된다. useGeneratedKeys는 데이터베이스가 키를 생성해 주는IDENTITY전략일 때 사용한다.keyProperty는 생성되는 키의 속성 이름을 지정한다. Insert가 끝나면item객체의id속성에 생성된 값이 입력된다.
Update
- 여기서는 파라미터가
Long id,ItemUpdateDto updateParam으로 2개이다. 파라미터가 1개만 있으면
@Param을 지정하지 않아도 되지만, 파라미터가 2개 이상이면@Param으로 이름을 지정해서 파라미터를
구분해야 한다.
Select
resultType은 반환 타입을 명시하면 된다. 여기서는 결과를Item객체에 매핑한다.- JdbcTemplate의
BeanPropertyRowMapper처럼 SELECT SQL의 결과를 편리하게 객체로 바로
변환해준다. - 자바 코드에서 반환 객체가 하나이면
Item,Optional<Item>과 같이 사용하면 되고, 반환 객체가 하나
이상이면 컬렉션을 사용하면 된다. 주로List를 사용한다. 다음을 참고하자.
Select - findAll
- Mybatis는
<where>,<if>같은 동적 쿼리 문법을 통해 편리한 동적 쿼리를 지원한다. <if>는 해당 조건이 만족하면 구문을 추가한다.<where>은 적절하게 where 문장을 만들어준다.- 예제에서
<if>가 모두 실패하게 되면 SQLwhere를 만들지 않는다. - 예제에서
<if>가 하나라도 성공하면 처음 나타나는and를where로 변환해준다.
- 예제에서
XML 특수문자
< : <
> : >
& : &4. MyBatis 적용2 - 설정과 실행
MyBatisItemRepository
package hello.itemservice.repository.mybatis;

import hello.itemservice.domain.Item;
import hello.itemservice.repository.ItemRepository;
import hello.itemservice.repository.ItemSearchCond;
import hello.itemservice.repository.ItemUpdateDto;
import lombok.RequiredArgsConstructor;
import org.springframework.stereotype.Repository;

import java.util.List;
import java.util.Optional;

@Repository
@RequiredArgsConstructor
public class MyBatisItemRepository implements ItemRepository {

    private final ItemMapper itemMapper;

    @Override
    public Item save(Item item) {
        itemMapper.save(item);
        return item;
    }

    @Override
    public void update(Long itemId, ItemUpdateDto updateParam) {
        itemMapper.update(itemId, updateParam);
    }

    @Override
    public Optional<Item> findById(Long id) {
        return itemMapper.findById(id);
    }

    @Override
    public List<Item> findAll(ItemSearchCond cond) {
        return itemMapper.findAll(cond);
    }
}
MyBatisItemRepository는 단순히ItemMapper에 기능을 위임한다.
MyBatisConfig
@Configuration
@RequiredArgsConstructor

public class MyBatisConfig {

    private final ItemMapper itemMapper;

    @Bean
    public ItemService itemService() {
        return new ItemServiceV1(itemRepository());
    }

    @Bean
    public ItemRepository itemRepository() {
        return new MyBatisItemRepository(itemMapper);
    }
}
ItemServiceApplication 변경
@Import(MyBatisConfig.class)
@SpringBootApplication(scanBasePackages = "hello.itemservice.web")
프로그램 실행 결과
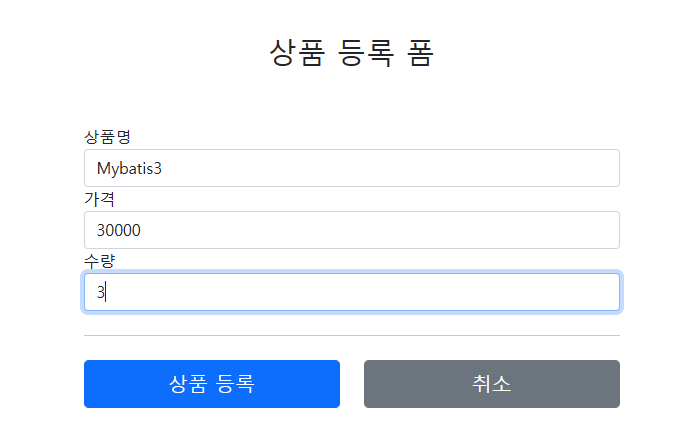
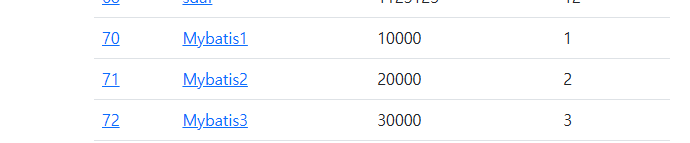
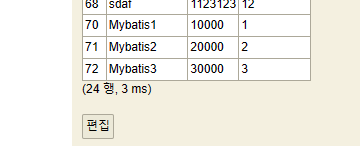
정상처리 되는 것을 확인 할 수 있다.
5. MyBatis 적용3 - 분석
ItemMapper 매퍼 인터페이스의 구현체가 없는데 어떻게 동작한 것일까?
이 부분은 MyBatis스프링 연동 모듈에서 자동으로 처리해주는데 다음과 같다.
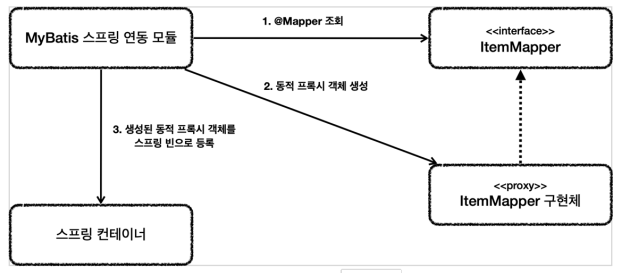
1. 애플리케이션 로딩 시점에 MyBatis 스프링 연동 모듈은 @Mapper가 붙어있는 인터페이스를 조사한다.
2. 해당 인터페이스가 발견되면 동적 프록시 기술을 사용해서 ItemMapper 인터페이스의 구현체를 만든다.
3. 생성된 구현체를 스프링 빈으로 등록한다.
로그를 추가해서 확인해보자.

- 출력해보면 JDK 동적 프록시가 적용된 것을 확인할 수 있다.
동적 프록시 기술은 나중에 다시 한번 알아보겠다.
매퍼 구현체
- 마이바티스 스프링 연동 모듈이 만들어주는
ItemMapper의 구현체 덕분에 인터페이스 만으로 편리하게 XML의 데이터를 찾아서 호출할 수 있다. - 원래 마이바티스를 사용하려면 더 번잡한 코드를 거쳐야 하는데, 이런 부분을 인터페이스 하나로 매우 깔끔하고 편리하게 사용할 수 있다.
- 매퍼 구현체는 예외 변환까지 처리해준다. MyBatis에서 발생한 예외를 스프링 예외 추상화인
DataAccessException에 맞게 변환해서 반환해준다. JdbcTemplate이 제공하는 예외 변환 기능을 여기서도 제공한다고 이해하면 된다.
6. MyBatis 기능 정리1 - 동적 쿼리
마이바티스가 제공하는 최고의 기능이자 마이바티스를 사용하는 이유는 바로 동적 SQL 기능 때문이다.
공식 메뉴얼에서 제공하는 예제를 통해 동적 SQL을 알아보자.
if
    <select id="findActiveBlogWithTitleLike"
            resultType="Blog">
        SELECT * FROM BLOG
        WHERE state = ‘ACTIVE’
        <if test="title != null">
            AND title like #{title}
        </if>
    </select>
choose, when, otherwise
    <select id="findActiveBlogLike"
            resultType="Blog">
        SELECT * FROM BLOG WHERE state = ‘ACTIVE’
        <choose>
            <when test="title != null">
                AND title like #{title}
            </when>
            <when test="author != null and author.name != null">
                AND author_name like #{author.name}
            </when>
            <otherwise>
                AND featured = 1
            </otherwise>
        </choose>
    </select>
trim, where, set
    <select id="findActiveBlogLike"
            resultType="Blog">
        SELECT * FROM BLOG
        WHERE
        <if test="state != null">
            state = #{state}
        </if>
        <if test="title != null">
            AND title like #{title}
        </if>
        <if test="author != null and author.name != null">
            AND author_name like #{author.name}
        </if>
    </select>
이 예제들의 문제점은 문장을 모두 만족하지 않으면 오류가 발생한다.
SELECT * FROM BLOG
WHERE
결국 WHERE문을 언제 넣어야 할지 상황에 따라서 동적으로 달라지는 문제가 있다. <where>를 사용하면 이런 문제를 해결할 수 있다.
<where> 사용
    <select id="findActiveBlogLike" resultType="Blog">
        SELECT * FROM BLOG
        <where>
            <if test="state != null">
                state = #{state}
            </if>
            <if test="title != null">
                AND title like #{title}
            </if>
            <if test="author != null and author.name != null">
                AND author_name like #{author.name}
            </if>
        </where>
</select><where>는 문장이 없으면 where를 추가하지 않는다. 문장이 있으면 where를 추가한다. 만약 and가 먼저 시작된다면 and를 지운다.
동적 쿼리에 대한 자세한 내용은 다음을 참고하자.
https://mybatis.org/mybatis-3/ko/dynamic-sql.html
7. MyBatis 기능 정리2 - 기타 기능
Result Maps
결과를 매핑할 때 테이블은 user_id이지만 객체는 id이다. 이 경우 컬럼명과 객체의 프로퍼티 명이 다르다. 그러면 다음과 같이 별칭(as)을 사용하면 된다.
    <select id="selectUsers" resultType="User">
        select
            user_id as "id",
            user_name as "userName",
            hashed_password as "hashedPassword"
        from some_table
        where id = #{id}
    </select>
별칭을 사용하지 않고도 문제를 해결할 수 있는데, 다음과 같이 resultMap을 선언해서 사용하면 된다.
    <resultMap id="userResultMap" type="User">
        <id property="id" column="user_id" />
        <result property="username" column="user_name"/>
        <result property="password" column="hashed_password"/>
    </resultMap>
    <select id="selectUsers" resultMap="userResultMap">
        select user_id, user_name, hashed_password
        from some_table
        where id = #{id}
    </select>
결과 매핑에 대한 자세한 내용은 다음을 참고하자.
https://mybatis.org/mybatis-3/ko/sqlmap-xml.html#Result_Maps
참고
김영한: 스프링 DB 2편 - 데이터 접근 활용 기술(인프런)
Github - https://github.com/b2b2004/Spring_DB
