이미지업로드 + 물품추가
1. vue.js 형태 만들기
<el-form>
  <el-form-item label=" " label-width="100px">
    <el-upload action="#"
               list-type="picture-card"
               :on-preview="handlePreview"
               :on-remove="handleRemove"
               :on-change="handleChange"
               :auto-upload="false">
      <el-icon><plus /></el-icon>
    </el-upload>
    <el-dialog v-model="dialogVisible">
      <img style="width:100%;" :src="dialogImageUrl" alt="" />
    </el-dialog>
  </el-form-item>
</el-form>action이미지 선택하자마자 올리는 명령list-type="picture-card"Element-Plus 기본 요소:on-preview="handlePreview"돋보기 누르면 미리보기 창:on-remove="handleRemove"삭제 버튼 이벤트:on-change="handleChange"상태가 변경 되었을때 동작하는 메소드
: 이 메소드가 동작 할때가 업로드 할 파일을 결정하는 타이밍:auto-upload="false"자동으로 업로드 할지말지
1-1. 아이콘 사용
import { Plus } from '@element-plus/icons-vue'불러오기components: { Plus, },
: 아이콘은 모두 컴포넌트화 되어있음- 아이콘 사용 (가운데 + 모양)
<el-icon><plus /></el-icon>
1-2. 미리보기 다이얼로그
<el-dialog v-model="dialogVisible">
  <img style="width:100%;" :src="dialogImageUrl" alt="" />
</el-dialog>"width:100%;"은style=""안에 있어야함.
: element-plus에서는"width:100%;"만 써져있어서 수정해야함.- 메소드
handlePreview(file) {
  // 미리보기
  // console.log('미리보기');
  // console.log(file);
  // console.log(URL.createObjectURL(file.raw)); //임시 URL 만들기
  this.dialogImageUrl = file.url // 임시이미지 주소
  this.dialogVisible = true      // 다이얼로그 표시
},
: console.log(file);
: blob은 미리보기에 이미지를 띄우기 위해 크롬에서 임시로 사용하는 주소
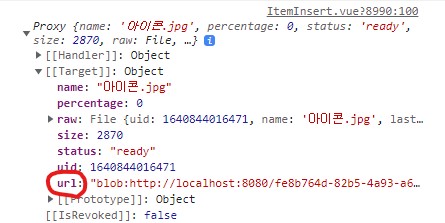
: console.log(URL.createObjectURL(file.raw));는 blob을 생성하는 명령어

1-3. handleChange()
handleChange(file, fileList){
  console.log('체인지!');
  console.log(file, fileList);
  this.additem.image = file.raw;
}- 이미지 파일을 선택하면 상태가 바뀌고, 파일의 로그가 뜬다.
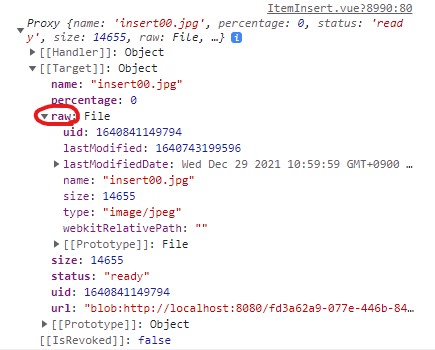
: 이미지 파일의 정보가file안에raw에 들어있기때문에
:this.additem.image = file.raw;=additem안에image에 이미지 파일 정보를 넣어준다.
1-4. 상태변수 (data()) 잡아주기
data(){
  return{
    additem : {
      image    : null,
      name     : '',
      content  : '',
      price    : 0,
      quantity : 1000
    },
      dialogVisible : false,
      dialogImageUrl : '',
  }
},v-model도 연결해준다
2. 업로드!! (handleUpload())
async handleUpload(){
  if(this.additem.image === null){
    alert('이미지를 첨부하세요');
    return false;
  }
  const url = `/item/insert`;
  const headers = {"Content-Type":"multipart/form-data"};
  // 파일이 첨부되면 이런 헤더를 쓴다.
  let body = new FormData(); // body를 새로운 폼 데이터로 정의하고
  body.append("file", this.additem.image);  // 모든 값을 body에 넣는다.
  body.append("name", this.additem.name);
  body.append("content", this.additem.content);
  body.append("price", this.additem.price);
  body.append("quantity", this.additem.quantity);

  const response = await this.axios.post(url, body, {headers:headers});
  // console.log(response.data);

  if(response.data.status === 200){
    alert('등록되었습니다.')
    this.$router.push({name:'Seller'})
  }
},-
if(this.additem.image === null)이미지 첨부 유효성 검사
: 1-3. 에서this.additem.image = file.raw;명령어 때문에 이미지는this.additem.image의 값을 가진다. -
const url =/item/insert;단순 글쓰기라서 번호 필요없음 -
const headers = {"Content-Type":"multipart/form-data"};
: 이미지, 파일 등이 첨부되면headers의 형태가 바뀐다 -
let body = new FormData();
: 이미지는JSON형태로 넣지 못하기 때문에 새로운 형태의body를 만든다.
:body.append("file", this.additem.image);
:body.append("name", this.additem.name);
:body.append("content", this.additem.content);
:body.append("price", this.additem.price);
:body.append("quantity", this.additem.quantity); -
const response = await this.axios.post(url, body, {headers:headers});
:url,body,headers모두 던짐