[Docker] Springboot RabbitMQ 초간단 연동
개발환경
OS: Windows 11
IDE: Spring Tool Suite 4.14.1
JAVA: 17
* [Docker] Docker Compose로 RabbitMQ, Redis 함께 구동하기에서 이어지는 글입니다.
Springboot RabbitMQ 연동
* RabbitMQ를 도커로 실행중이라는 전제 하에 진행
(참고: https://velog.io/@armton/series/Docker)
1. Springboot 프로젝트 생성
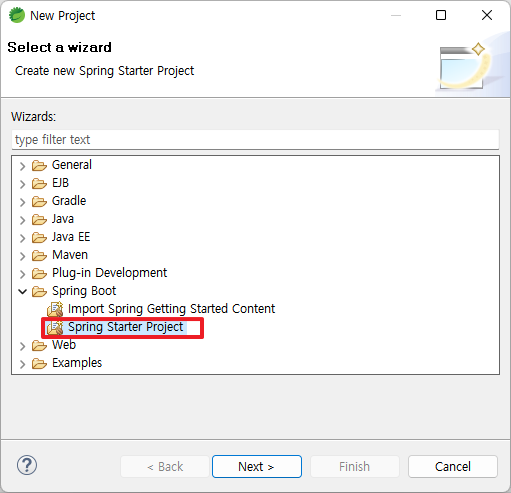
1-1. New Project > Spring Starter Project
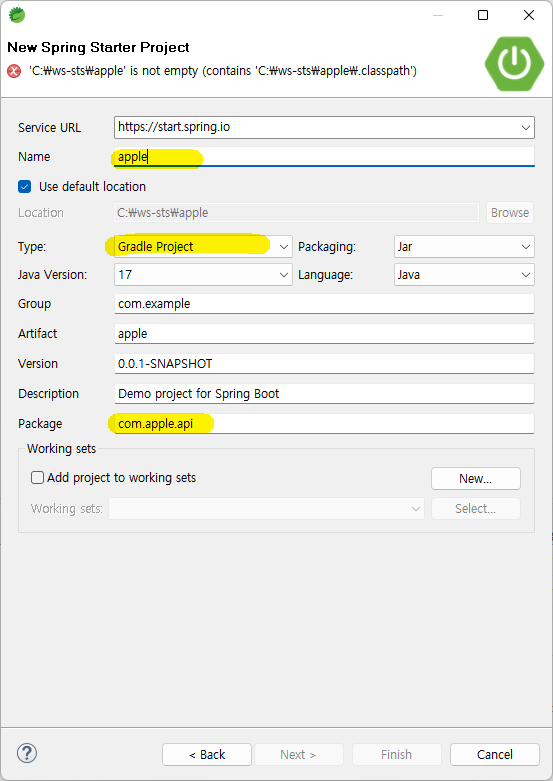
1-2. Gradle 타입으로 생성(이미 생성하고 난 후의 캡처라 오류남..)
1-3. 의존성 추가
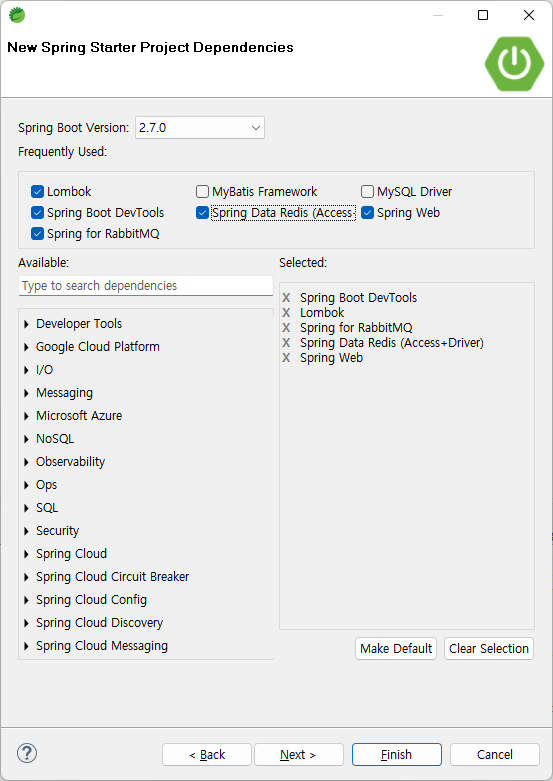
- Spring Web
- Spring Boot DevTools
- Spring for RabbitMQ
- Lombok(선택)
- Spring Data Redis (Access_Driver) (나중에 같이 할거라 미리 추가함)
1-4. 의존성 확인
    plugins {
    	id 'org.springframework.boot' version '2.7.0'
    	id 'io.spring.dependency-management' version '1.0.11.RELEASE'
    	id 'java'
    }

    group = 'com.example'
    version = '0.0.1-SNAPSHOT'
    sourceCompatibility = '17'

    configurations {
    	compileOnly {
    		extendsFrom annotationProcessor
    	}
    }

    repositories {
    	mavenCentral()
    }

    dependencies {
    	**implementation 'org.springframework.boot:spring-boot-starter-amqp'**
    	implementation 'org.springframework.boot:spring-boot-starter-data-redis'
    	implementation 'org.springframework.boot:spring-boot-starter-web'
    	compileOnly 'org.projectlombok:lombok'
    	developmentOnly 'org.springframework.boot:spring-boot-devtools'
    	annotationProcessor 'org.projectlombok:lombok'
    	testImplementation 'org.springframework.boot:spring-boot-starter-test'
    	testImplementation 'org.springframework.amqp:spring-rabbit-test'
    }

    tasks.named('test') {
    	useJUnitPlatform()
    }
1-5. 구동 테스트
1-5-1. 기본 테스트
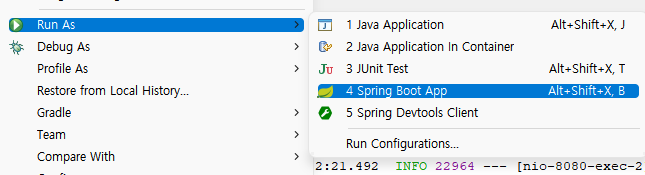
프로젝트 우클릭 > Runs As > Spring Boot App (단축키 Alt+Shift+X, B)
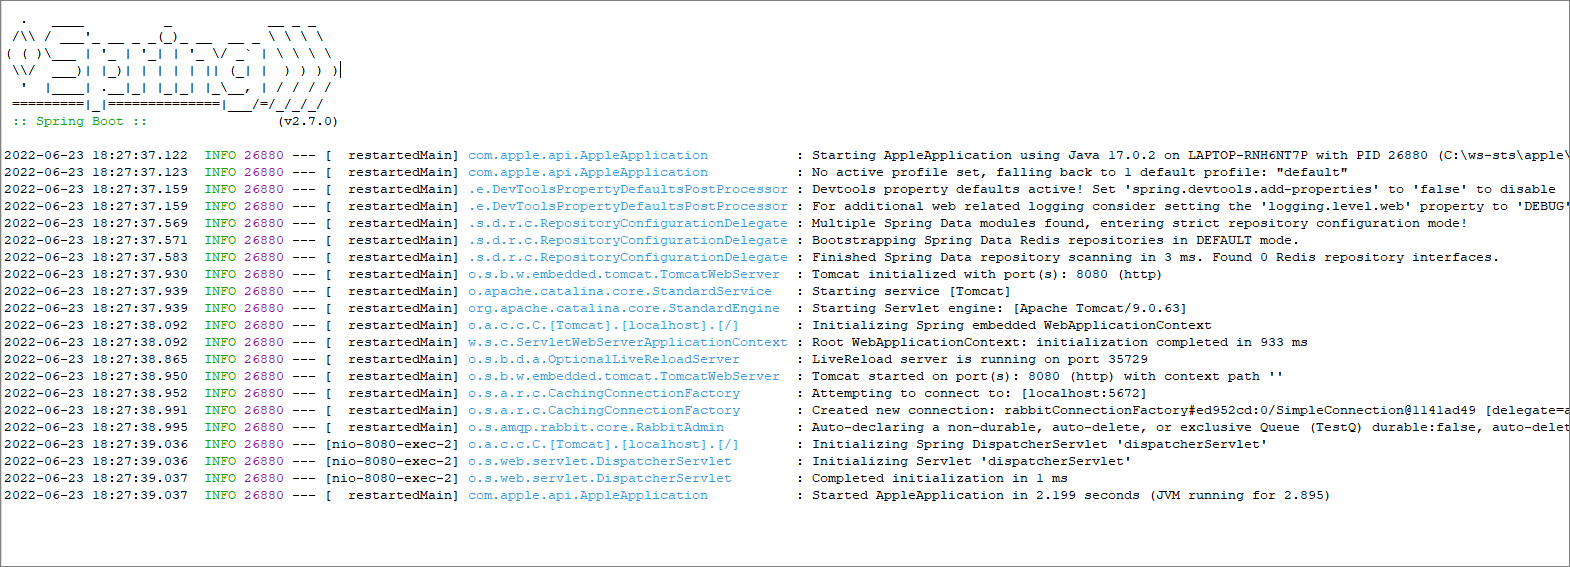
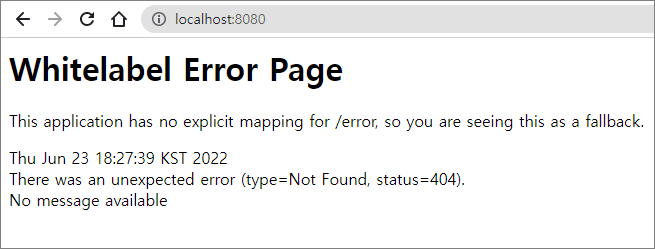
Whitelabel Error Page 페이지가 나오면 성공
1-5-2. 예제 테스트
1-5-2-1. SampleController.java 작성
            package com.apple.api;

            import org.springframework.web.bind.annotation.RequestMapping;
            import org.springframework.web.bind.annotation.RestController;

            @RestController
            public class SampleController {

            	@RequestMapping("/hello")
            	public String index() {
                    return "ㅎㅇㅎㅇ~";
                }

            }
1-5-2-2. 재기동 하고 localhost:8080/hello 접속
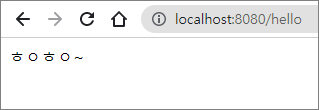
굿
2. RabbitMQ 연동
2-1. RabbitMQ 접속 구성정보 설정
2-1-1. application.properties를 application.yml로 확장자 변경(properties와 크게 다르지 않다고 하는데 모든 블로그 예제들이 yml로 사용하길래 일단 따라함)
2-1-2. 구성정보 저장
    ```yaml
    spring:
      rabbitmq:
        host: localhost # rabbitMQ host (docker로 띄웠음)
        port: 5672 # default port
        username: guest # default username
        password: guest # default password
    config:
      app:
        duration: 10000
    ```
2-2. Sender 컴포넌트(Sender.java ) 작성
    package com.apple.api;

    import org.springframework.amqp.core.Queue;
    import org.springframework.amqp.rabbit.core.RabbitMessagingTemplate;
    import org.springframework.beans.factory.annotation.Autowired;
    import org.springframework.context.annotation.Bean;
    import org.springframework.stereotype.Component;

    @Component
    public class Sender {

    		@Autowired
        RabbitMessagingTemplate template;

        @Bean
        Queue queue() {
            return new Queue("TestQ", false);
        }

        public void send(String message) {
            template.convertAndSend("TestQ", message);
        }
}Queue: 메시지 송수신을 위해 amqp에서 제공하는 큐(java.util 아님)- 참고: https://docs.spring.io/spring-amqp/api/org/springframework/amqp/core/Queue.html
send(String message): 메시지를 받아서RabbitMessagingTemplate에 메시지를 전송함.
2-3. MessageController.java 작성
    package com.apple.api;

    import java.util.Map;

    import org.springframework.beans.factory.annotation.Autowired;
    import org.springframework.web.bind.annotation.PostMapping;
    import org.springframework.web.bind.annotation.RequestBody;
    import org.springframework.web.bind.annotation.RestController;

    @RestController
    public class MessageController {

    		@Autowired
        Sender sender;

        @PostMapping("/messages")
        public String sendMessage(final @RequestBody Map<String,String> req ) {
            String message = req.get("message");
            try {
                sender.send(message);
                return "send message success";
            }
            catch (Exception e ){
                System.out.println(e.getMessage());
                return "send message fail";
            }
        }

}- Json 형식으로 데이터를 보내면 (ex -
{message:”Hello”})Map형태로 받아서 message키값을 읽어와서sender.send를 통해 메시지큐에 보냄.
2-4. 동작 테스트
2-4-1. 서비스 구동
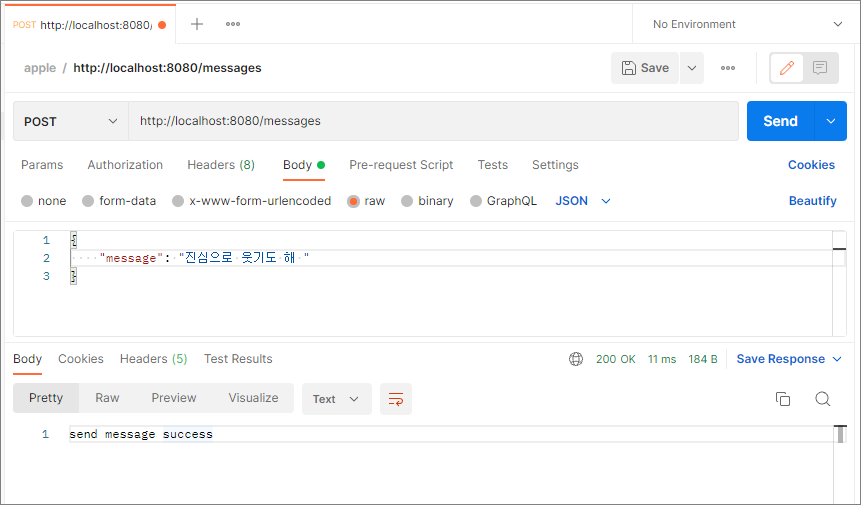
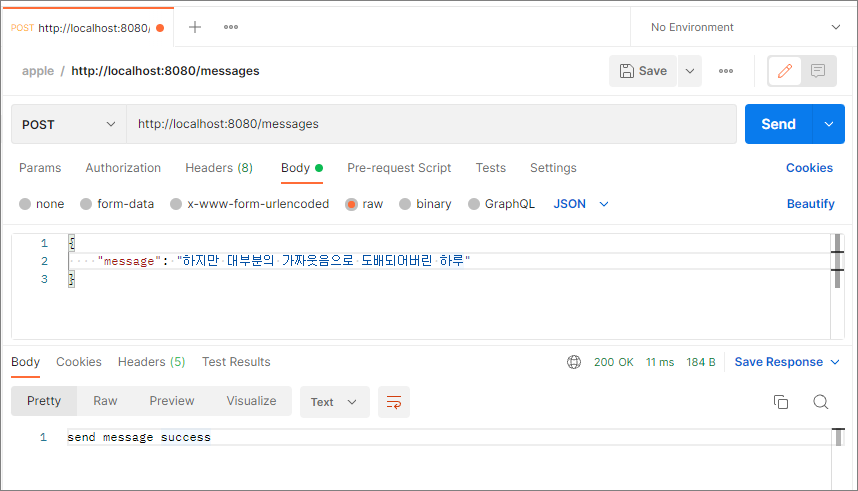
2-4-2. Postman으로 요청 보내보기

    1. /messages로 url 설정(3단계의 RequestMapping에 지정한)
    2. 전송 형식 지정
    3. 데이터 타입 지정(3단계에서 미리에 지정한 `message`)
    4. Body 작성
    5. 보내기! (publish)
    6. 결과 확인

        → 성공적으로 보내지면 3단계에서 지정한 결과값이 리턴됨.
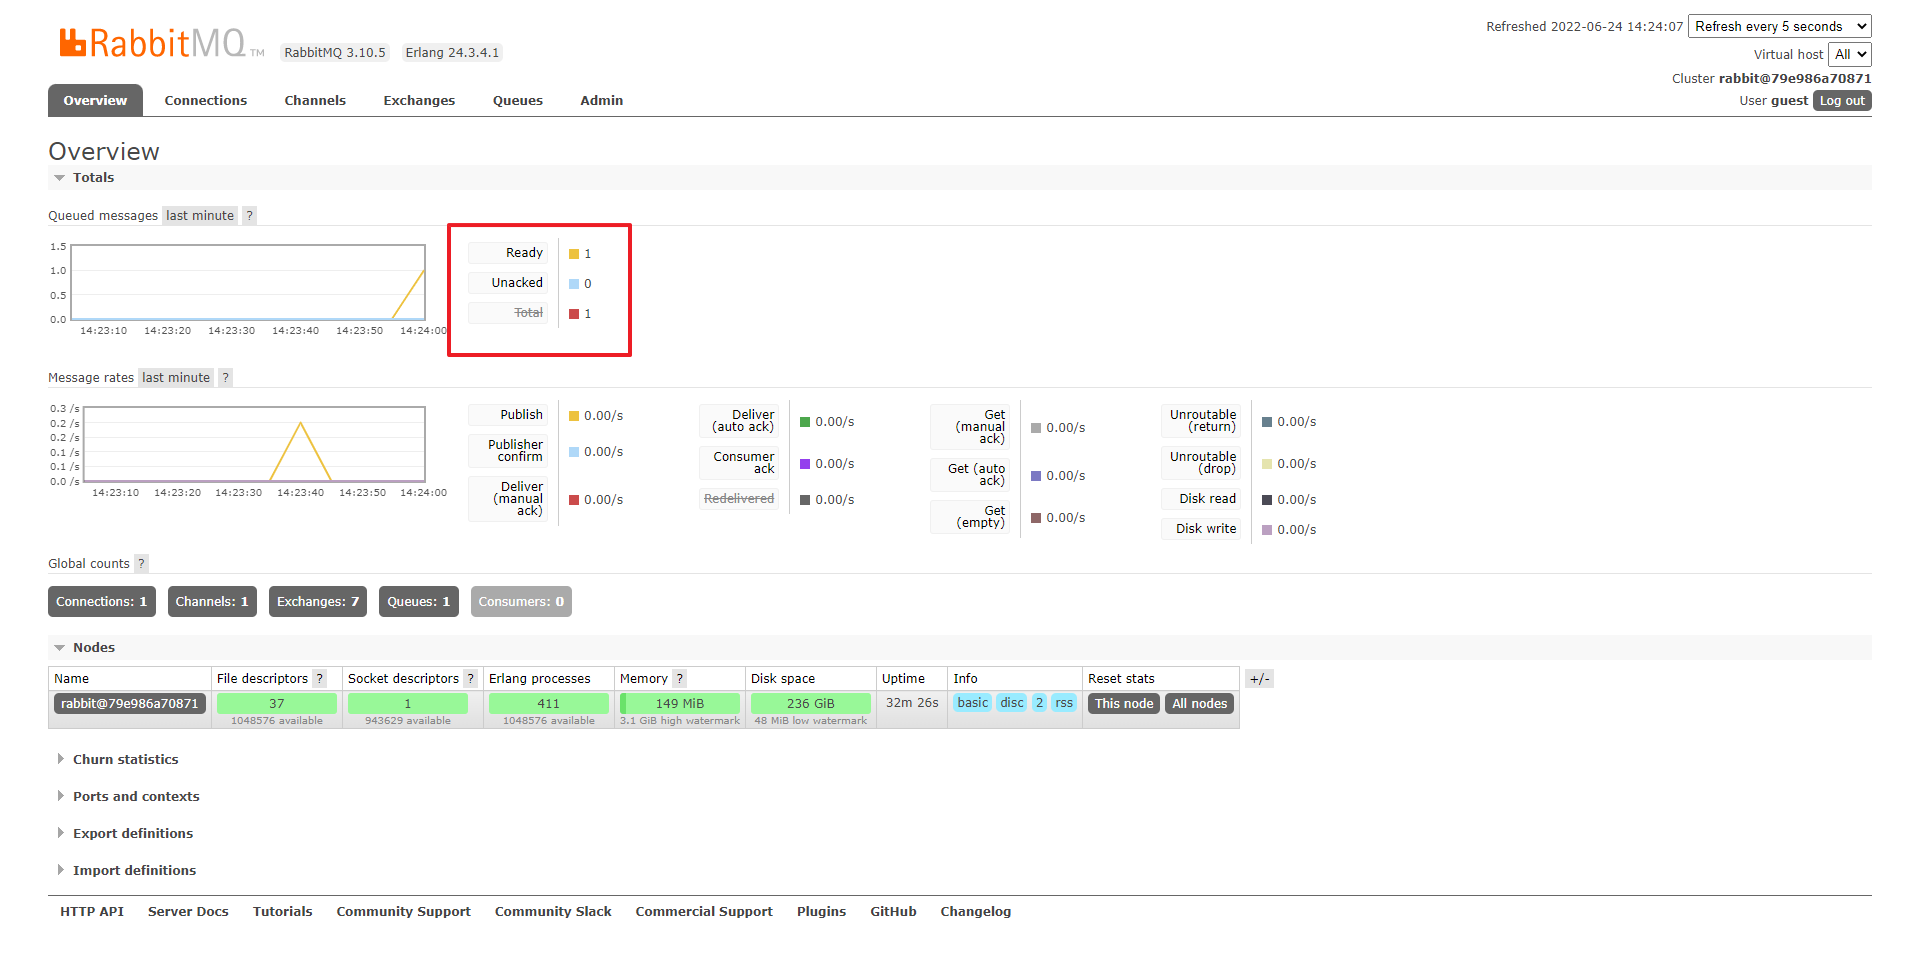
2-4-3. RabbitMQ 콘솔에서 확인(localhost:15672)

- Ready와 Total에 publish 개수가 표시되면 굿
2-5. IDE에서 요청한 메시지 확인해보기
2-5-1. (Listener.java) 작성
package com.apple.api.rabbitmq;
import org.springframework.amqp.rabbit.annotation.RabbitListener;
import org.springframework.stereotype.Component;
@Component
public class Listener {
@RabbitListener(queues = "TestQ")
public void processMessage(String content) {
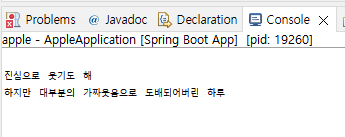
System.out.println(content);
}
}@RabbitListener: queues 에 수신 받을 큐의 이름을 설정하면 해당 큐에 담긴 메시지를 아래 메소드가 수신받아 로직을 수행
2-5-2. 재기동 후 4단계처럼 요청
2-5-3. IDE 콘솔 확인
2-5-4. RabbitMQ 콘솔 확인
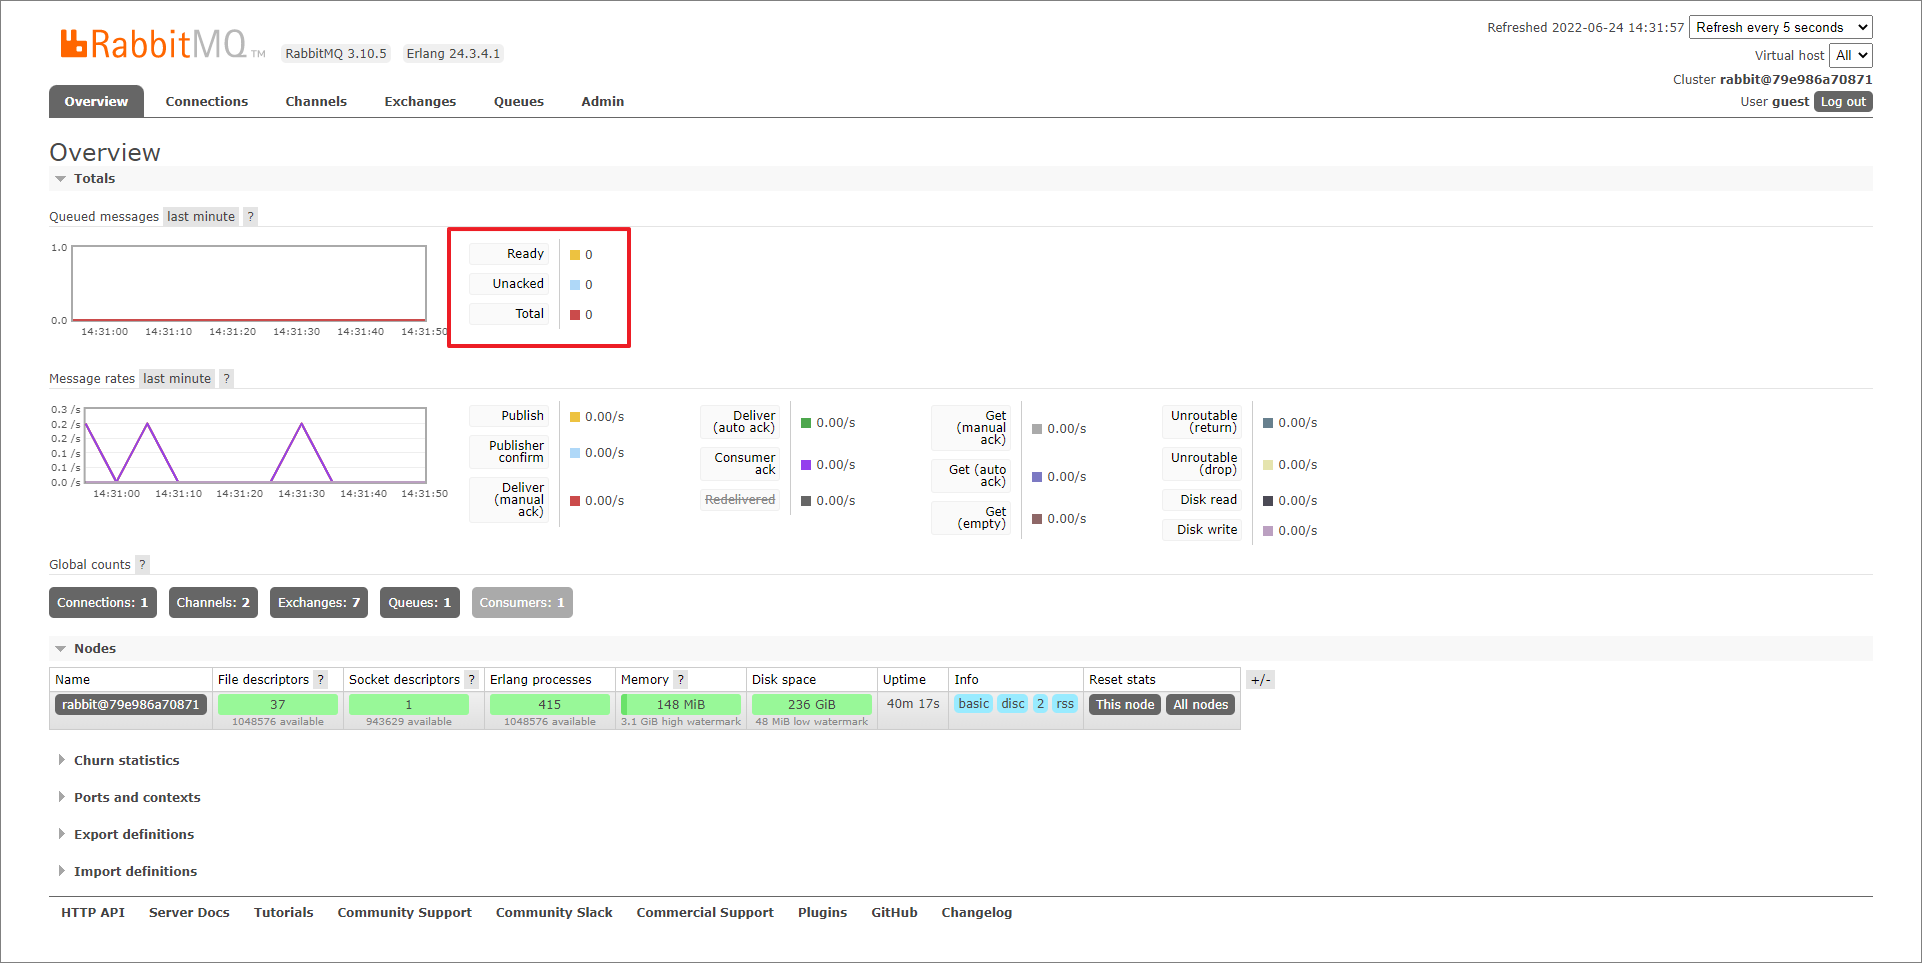
@RabbitListener를 사용하면 Ready에는 표시되지 않음.
