NestJS Document
먼저 $ nest g 명령어를 통해서 모듈과 프로바이더 등을 생성해봅시다.
$ nest g -h명령어를 입력하면 명령어를 통해 생성할 수 있는 파일 목록이 출력됩니다.

$ nest g mo user
$ nest g s user
$ nest g co user
위의 명령어를 입력하면 src/user 디렉터리 내부에 user.module.ts, user.service.ts, user.controller.ts 파일이 생성됩니다.
전 Sequelize ORM을 통해 데이터베이스를 다룰 것이라 user.model.ts 라는 파일을 추가로 생성해주고 간단한 테이블 선언 코드를 작성해주었습니다.
// src/user/user.module.ts
import { Module } from '@nestjs/common';
import { SequelizeModule } from '@nestjs/sequelize';
import { UserController } from './user.controller';
import { UserService } from './user.service';
import { User } from './user.model';
import { AuthModule } from '../auth/auth.module';

@Module({
	imports: [
		SequelizeModule.forFeature([User]),
		AuthModule
	],
	exports: [UserService],
	controllers: [UserController],
	providers: [UserService]
})
export class UserModule{}
공식 도큐먼트에서는 access 토큰을 응답 패킷에 담에 전송하고 access 토큰을 통해 인증을 진행할 때는 요청 패킷의 헤더에서 Authorization key에 저장된 토큰값을 통해 인증을 진행하는 방식으로 작성이 되어있는데 저는
서버에서 /user로 POST 요청 > user controller > passport authentication > jwt access token 생성 > 쿠키에 저장 > 유저 정보 응답
같은 방식을 생각하고 코드를 작성했기에 공식 도큐먼트에 작성된 내용과 이 포스트의 내용이 조금씩 다를 수 있습니다.
먼저 auth 모듈과 서비스 파일을 생성합니다.
$ nest g mo auth
$ nest g s auth
// src/auth/auth.module.ts
import { Module } from '@nestjs/common';
import { AuthService } from './auth.service';
import { UsersModule } from '../user/user.module';
@Module({
imports: [UsersModule],
providers: [AuthService],
})
export class AuthModule {}모듈을 위와 같이 작성하고 auth.service.ts 파일도 작성해줍시다.
import { Injectable } from '@nestjs/common';
import { UserService } from '../user/user.service';
import { compare } from 'bcrypt';

@Injectable()
export class AuthService {
	constructor(
		private userService: UserService
	){}

	async validateUser(username: string, password: string): Promise<any> {
		const user = await this.userService.findOne(username);
		if (!user || (user && !compare(password, user.password)))
			return null;
		return await this.userService.findUser(user.id); // select * from user where id = user.id;
	}
}
도큐먼트에서는 예시 코드에서 단순하게 password === user.password로 비교를 진행했는데 저는 bcrypt를 통해 해싱된 password 값과 입력값을 비교하도록 하였습니다.
이제 Express에서 Passport local strategy를 작성해준 것과 같이 NestJS의 방식으로 Passport strategy를 작성해줍시다.
auth.module.ts 파일이 있는 곳에 local.strategy.ts 파일을 생성합니다.
코드는 도큐먼트에 작성된 코드를 그대로 사용해보겠습니다.
// src/auth/local.strategy.ts
import { Strategy } from 'passport-local';
import { PassportStrategy } from '@nestjs/passport';
import { Injectable, UnauthorizedException } from '@nestjs/common';
import { AuthService } from './auth.service';

@Injectable()
export class LocalStrategy extends PassportStrategy(Strategy) {
	constructor(private authService: AuthService) {
		super();
	}

	async validate(username: string, password: string): Promise<any> {
		const user = await this.authService.validateUser(username, password);
		if (!user) {
			throw new UnauthorizedException();
		}
		return user;
	}
}
그리고 auth/auth.module.ts 코드를 다음과 같이 수정해줍시다.
// stc/auth/auth.module.ts
import { Module } from '@nestjs/common';
import { AuthService } from './auth.service';
import { UsersModule } from '../users/users.module';
import { PassportModule } from '@nestjs/passport';
import { LocalStrategy } from './local.strategy';

@Module({
  	imports: [UsersModule, PassportModule],
  	providers: [AuthService, LocalStrategy],
})
export class AuthModule {}
그리고 user/user.controller.ts 에 컨트롤러를 추가해줍니다.
// src/user/user.service.ts
import { Controller, Post, UseGuards, Request } from '@nestjs/common';
import { AuthGuard } from '@nestjs/passport';

@Controller('/user')
export class UserController {
	constructor(){};

	@UseGuards(AuthGuard('local'))
	@Post()
	async login(@Request() req) {
		return req.user;
	}
}
useGuards ?
useGuards는 경비 역할을 하는 미들웨어라고 생각하면 됩니다.
인자로 넣어주는 데이터는@Injectable()데코레이터를 통해 선언된 클래스여야합니다.
위의 코드에서는 해당 클래스 내부의 validate에서 에러가 발생하지 않고 값을 반환받으면 @Post() 데코레이터 아래에 선언된 함수가 실행됩니다.
이제 JWT 토큰을 생성하기 전에 올바르게 작동하는지 테스트해봅시다.
$ curl -X Post http://localhost:3075/user -d '{"username": "username", "password": "password"}' -H "Content-Type: application/json"

{"id": 1, "username": "username", ... }
올바르게 쿼리의 결과를 반환받는 것을 확인했으니 이제 JWT 토큰을 생성해서 쿠키에 저장해봅시다.
먼저 필요한 모듈을 설치해봅시다.
$ npm i --save @nestjs/jwt passport-jwt
$ npm i --save-dev @types/passport-jwt
그리고 auth/auth.service.ts 에 토큰을 생성해주는 method를 작성해줍니다.
// src/auth/auth.service.ts
import { Injectable } from '@nestjs/common';
import { UserService } from '../user/user.service';
import {compare} from 'bcrypt';
import { JwtService } from '@nestjs/jwt';

@Injectable()
export class AuthService {
	constructor(
		private userService: UserService,
		private jwtService: JwtService,
	){}

	async validateUser(username: string, password: string): Promise<any> {
		const user = await this.userService.findOne(username);
		if (!user || (user && !compare(password, user.password)))
			return null;
		return await this.userService.findUser(user.id);
	}

	async login(user: any) {
		const payload = { username: user.username, sub: user.id };
		return { access_token: this.jwtService.sign(payload) };
	}
}
그리고 의존성 주입을 해야하니 auth.module.ts 에 코드를 추가해줍니다.
// src/auth/auth.module.ts
import { Module } from '@nestjs/common';
import { PassportModule } from '@nestjs/passport'
import { JwtModule } from '@nestjs/jwt';
import { AuthService } from './auth.service';
import { LocalStrategy } from './local.strategy';
import { UserModule } from '../user/user.module';

@Module({
	imports: [
		UserModule,
		PassportModule.,
		JwtModule.register({
                      secret: 'jwt secret key',
                      signOptions: { expiresIn: 3600 },
		}),
	],
	providers: [AuthService, LocalStrategy],
	exports: [AuthService, JwtModule],
})
export class AuthModule {}user/user.controller.ts의 login method를
return this.authService.login(req.user);로 업데이트 해주고 테스트를 해봅시다.
$ curl -X Post http://localhost:3075/user -d '{"username": "username", "password": "password"}' -H "Content-Type: application/json"

{"access_token": token 값}
토큰 값이 올바르게 반환되네요.
마지막으로 토큰 값을 쿠키에 저장하고 쿠키에 저장된 access 토큰 값을 통해 authorization을 처리하는 코드를 작성하겠습니다.
auth/jwt.strategy.ts 파일을 생성하고 다음과 같이 코드를 작성합니다.
// src/auth/jwt.strategy.ts
import { Strategy } from 'passport-jwt';
import { PassportStrategy } from '@nestjs/passport';
import { Injectable } from '@nestjs/common';
import { ConfigService } from '@nestjs/config';

const fromAuthCookie = function () {
	return function (request) {
		let token = null;
		if (request && request.cookies ) {
			token = request.cookies['Authorization'];
		}
		return token;
	}
}

@Injectable()
export class JwtStrategy extends PassportStrategy(Strategy) {
	constructor(
		private readonly config: ConfigService
	) {
		super({
			jwtFromRequest: fromAuthCookie(),
			ignoreExpiration: false,
			secretOrKey: 'jwt secret key',
		});
	}

	async validate(payload: any) {
		return { userId: payload.sub, username: payload.username };
	}
}
도큐먼트에서의 예시 코드는 ExtractJwt.fromAuthHeaderAsBearerToken() method를 통해 요청 패킷의 헤더에 Authorization 키에 저장된 값을 사용하는데 저는 쿠키에 저장한 값을 꺼내서 쓰려고 하기에 함수를 하나 생성해서 해당 함수를 통해 쿠키에 저장된 토큰 값을 사용했습니다.
auth/auth.module.ts의 providers 배열에 JwtStrategy를 추가하고 user/user.controller.ts 코드를 수정합니다.
@Controller('/user')
export class UserController {
	constructor(private authService: AuthService){};

	@UseGuards(authGuard('jwt'))
	@Get()
	async getProfile(@Request() req) {
		return req.user;
	}

	@UseGuards(authGuard('local'))
	@Post()
	async login(@Session() session, @Request() req, @Res({ passthrough: true}) response) {
		const access_token = await (await this.authService.login(req.user)).access_token;
		await response.cookie('Authorization', access_token);
		return req.user;
	}
}
이제 마지막으로 테스트를 해봅시다.
Postman을 통해 테스트하였습니다.
http://localhost:3075/user로 로그인 정보를 body에 담아 POST 요청을 전송한 결과로 쿠키에 토큰 값이 저장된 것을 볼 수 있습니다.
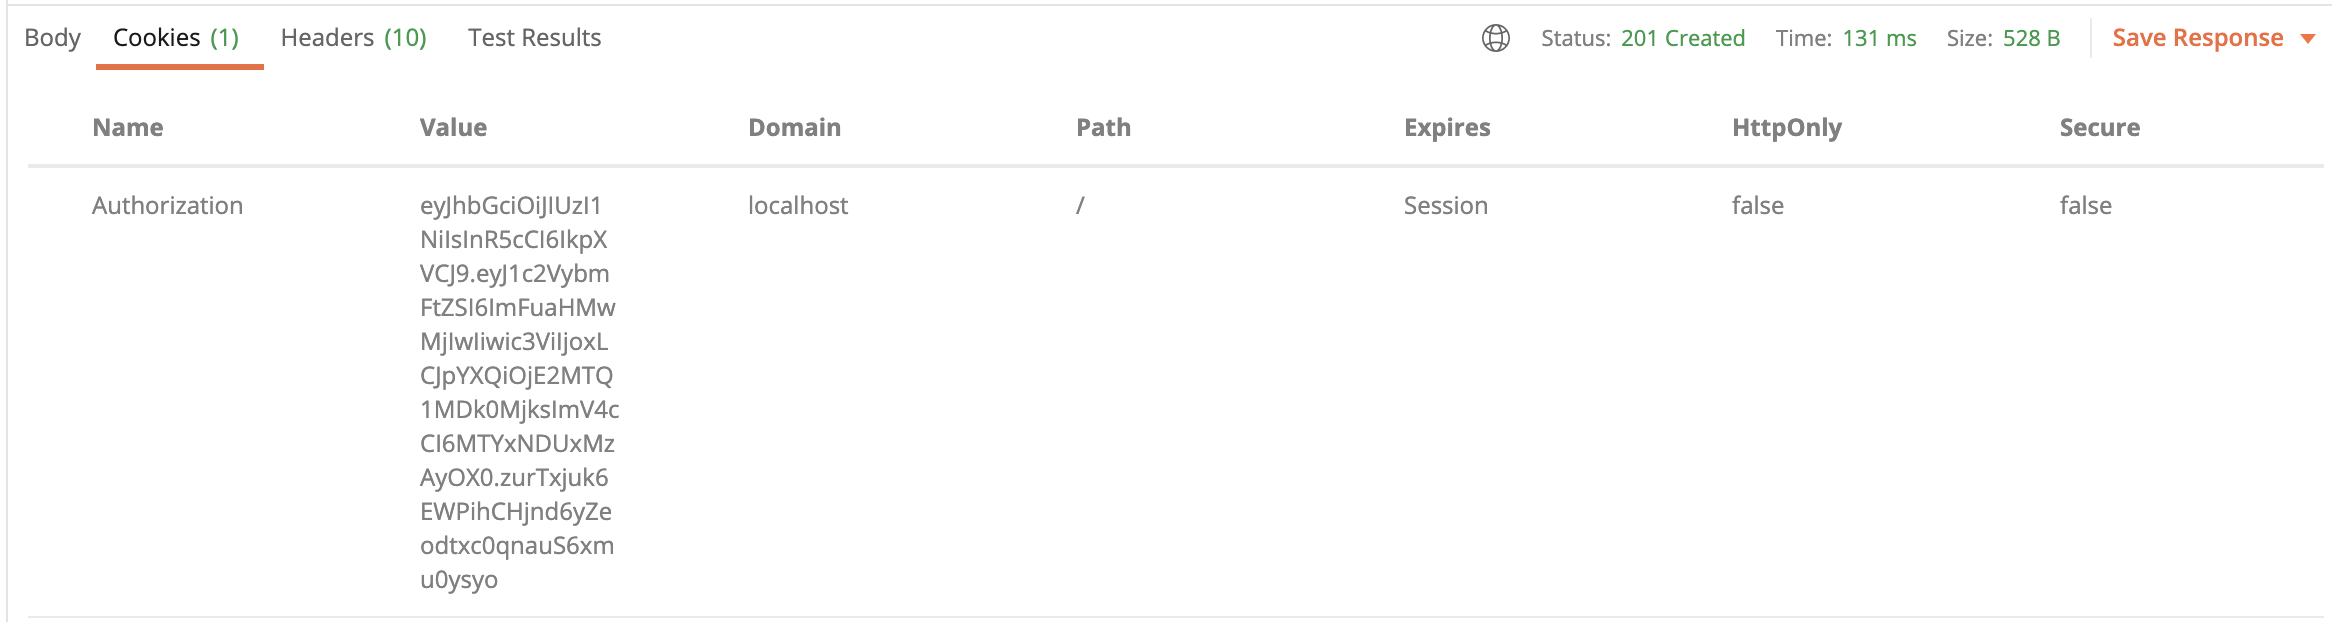
쿠키에 토큰 값이 저장된 것을 확인했으니 http://localhost:3075/user 로 GET 요청을 전송해봅시다.
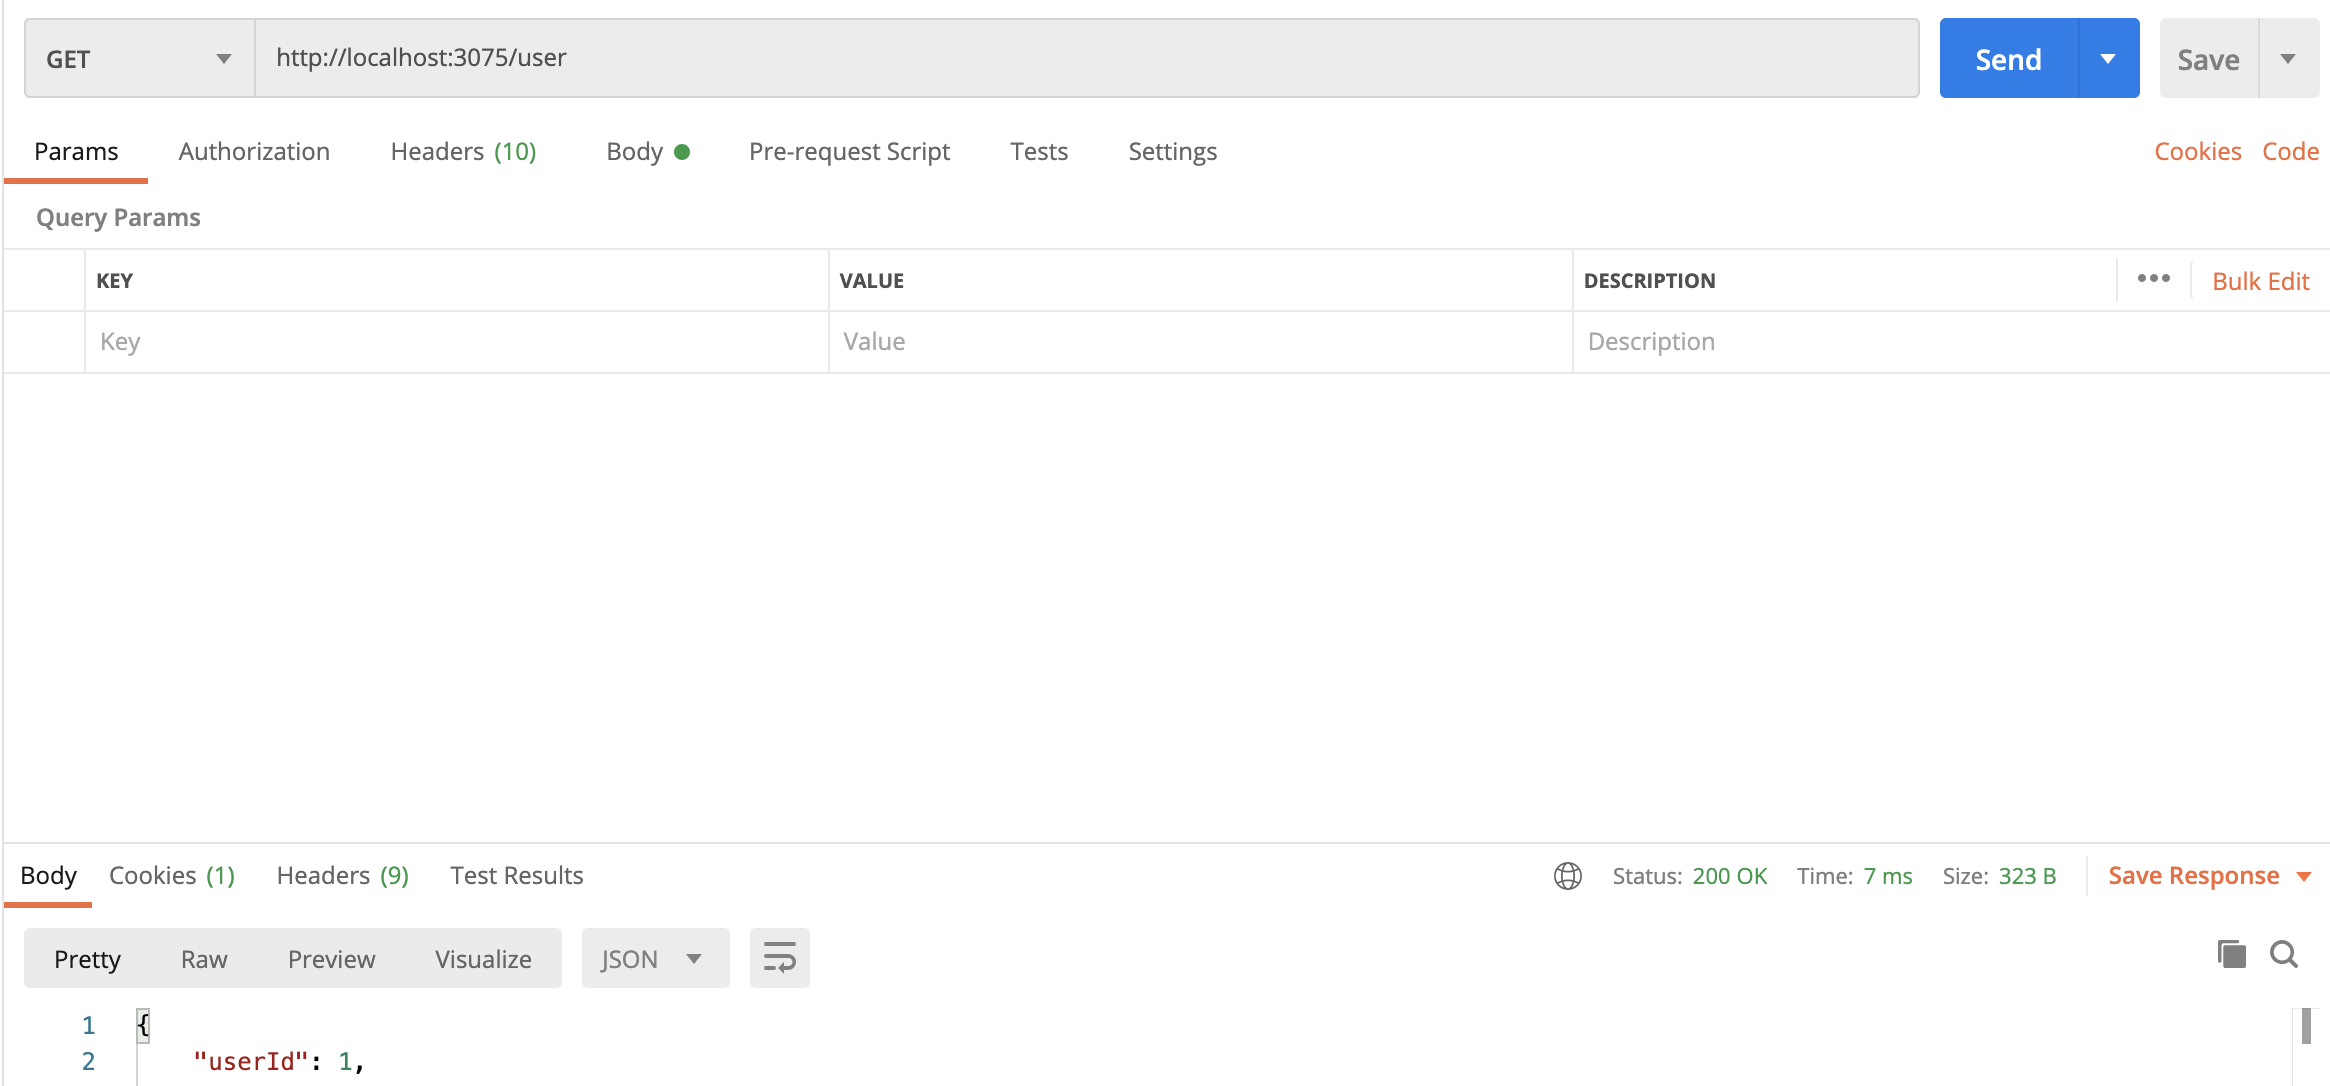
유저 데이터를 받는 것을 확인했습니다.

Guard 내에서 쿠키의 토큰을 어떻게 받아야하나 고민을 많이했는데 도움 많이 받았습니다. 감사합니다.