해상도를 높이는 컴퓨터 비전 Task를 GAN으로 구현해보기 위해 AI 양재 허브 인공지능 오픈소스 경진대회의 1등 수상자의 코드를 리뷰해보기로 한다.
먼저 이 수상작은 ESRGAN: Enhanced Super-Resolution Generative Adversarial Networks - Xintao Wang의 논문을 BasicSR에 맞게 실용적인 용도로 구현한 깃허브 코드를 바탕으로 구현되었다.
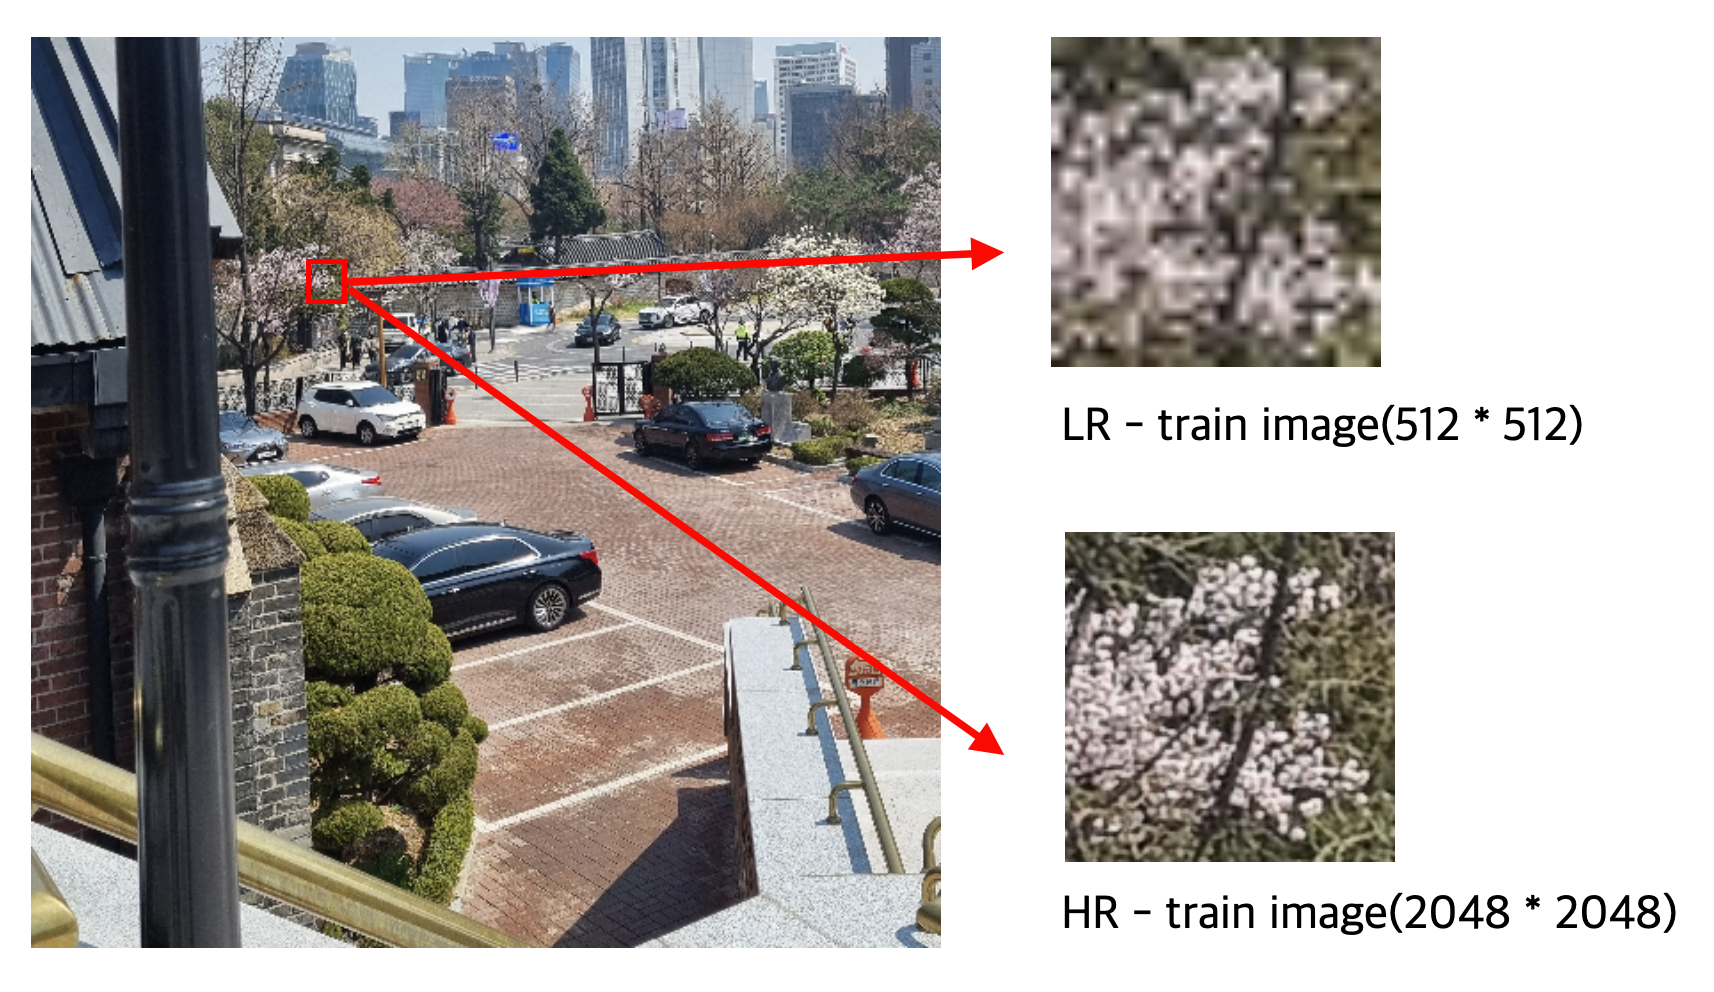
이미지 초해상화란, 저해상도(Low Resolution) 영상으로부터 고해상도 (High Resolution) 영상을 생성하는 기술이다. 이 대회는 같은 이미지를 고해상도와 저해상도 2사진씩 학습시켜서 저해상도인 사진을 고해상도의 사진으로 초해상화 시켜서 그 품질을 PSNR (Peak Signal-to-Noise Ratio) 방식으로 측정한다.
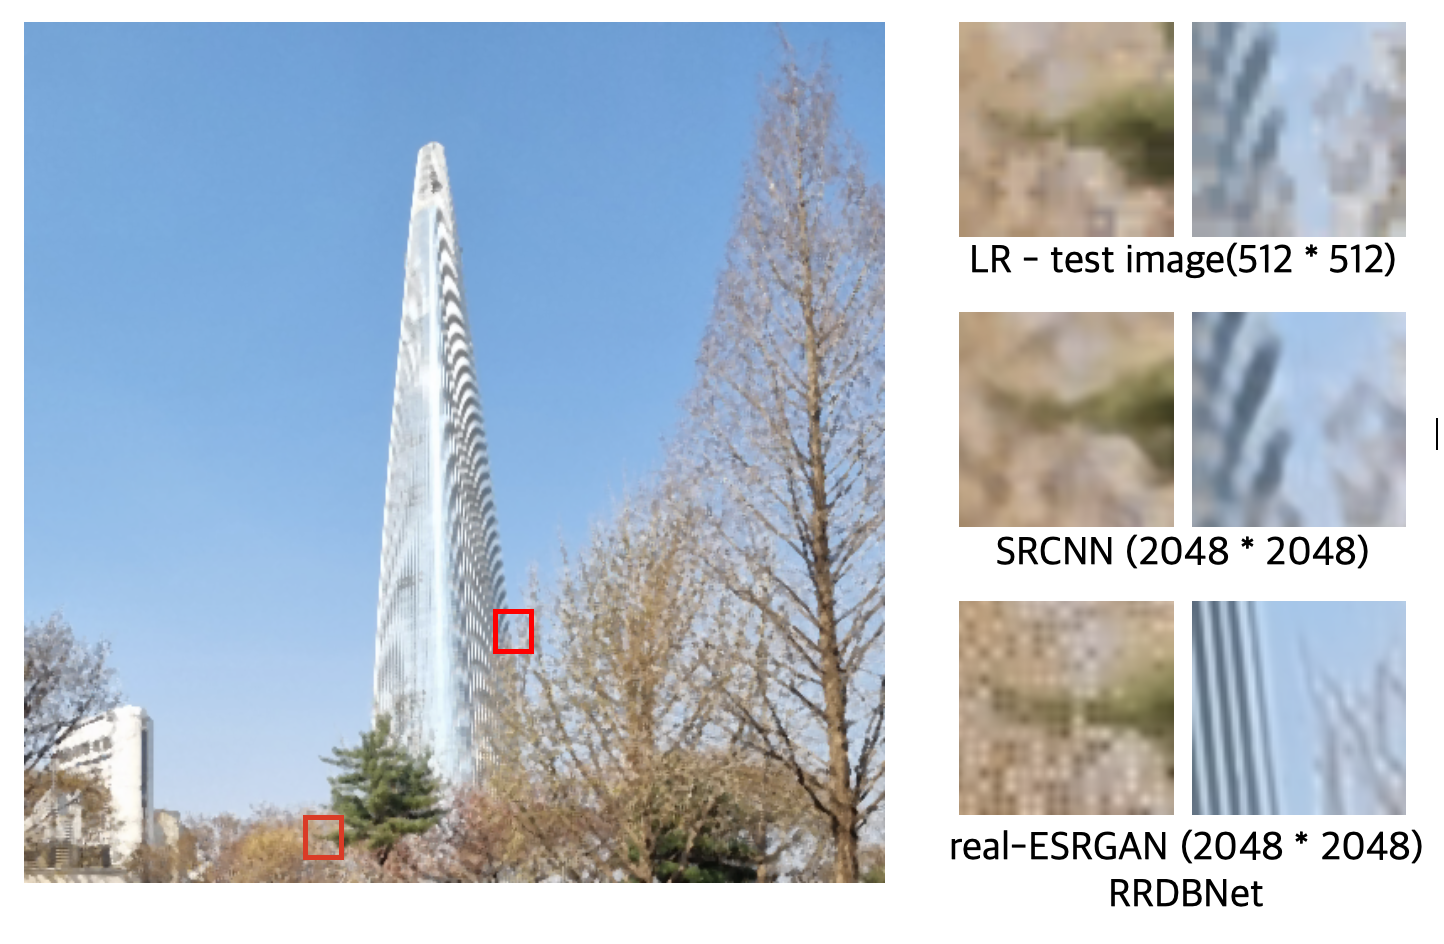
먼저 베이스라인의 SRCNN 모델과 이번 실험에서 사용한 real-ESRGAN(RRDBNet)의 비교사진 이다.
SRCNN
화질이 좋아졌다기 보다 뭉개지거나 잘못 학습되어 이상한 색이 들어간 부분도 생긴다. 원리를 간단하게만 살펴보면
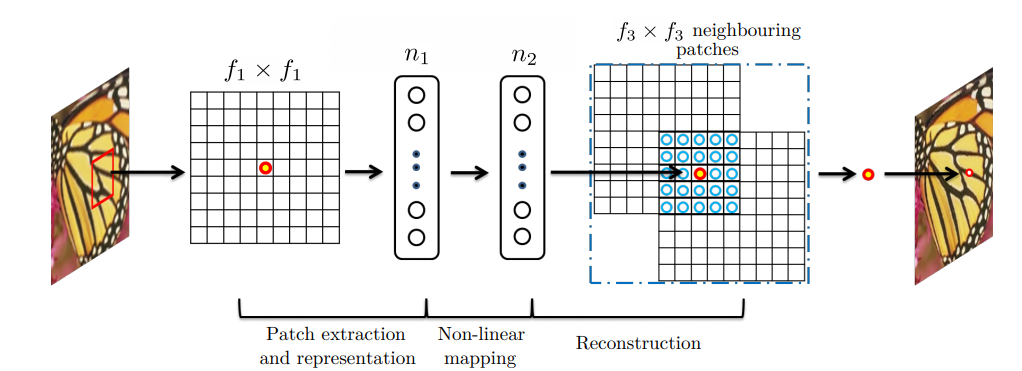
- Feature extraction layer에서 저해상도 patch를 추출한다.
- Non-linear mapping layer를 통해 저해상도 patch의 특징을 각각 정의 내리는 연산(mapping)을 진행한다.
- reconstruction layer에서는 이 정의된 mapping을 기준으로 고해상도로 커진 아웃풋에 근접한 patch의 특징을 통해 결과물을 내게 된다.
Real-ESRGAN
SRCNN은 구조 자체가 간단하기 때문에 좋은 결과는 보기 힘들다. 그래서 수상자는 RealESRGAN이라는 모델을 사용해서 좋은 결과를 얻게 된다. 정확히는 restoration application인 RealESRGAN에 속한 RealESRNet의 RRDBNet 이다.
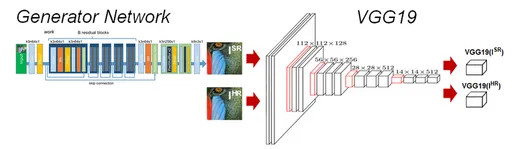
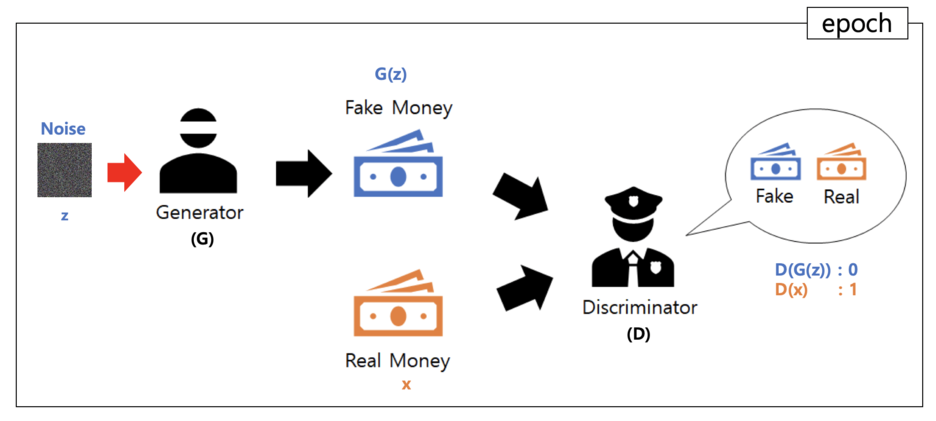
SRGAN은 GAN(Generative Adversarial Networks)을 이용한 초해상도 컴퓨터 비전 task를 진행하는 것을 의미한다. 즉, 일단 LR을 HR로 만들어본 뒤(Generator,Unsupervised Learning) 실제 HR과 비교하여 맞으면 1 아니면 0으로 결과를 내준다.(Discriminator, Supervised Learning) 이를 반복하여 결국 실제 HR에 가까워질때까지 적대적으로 학습해나가는 방법이 GAN이다.
RRDBNet 모델을 사용한 결과
RRDB
기존의 SRGAN에서 Batch Normalization(BN)을 뺀 Residual Block(RB)가 Dense Block의 기초이다. training dataset과 test dataset의 statistics가 많이 달라서 오히려 BN을 사용하면 artifact 가 생기게 되고, 일반화 성능 또한 저하 된다고 한다.
Residual in Residual Dense Block(RRDB)는 5개의 Conv.로 이루어진 Dense Block을 3번 통과 시킨 후, 통과 전 이미지와 weighted sum을 한 구조이다.
RRDBNet
RRDBNet은 이 RRDB를 Basic Block으로 삼아 SR을 inference 해내는 구조이다.
이 RRDBNet을 실용적인 Image Super Resolution에 활용할 수 있게 만든 라이브러리가 BasicSR의 RealESRGAN이다. 데이콘 1등팀도 이 Github를 baseline 삼아 원본 데이터를 학습시켰다.
먼저 1등팀의 베이스라인을 돌리는 방법을 소개하려고 한다.
1등 팀 베이스라인 사용방법
# 1. 1등팀의 baseline github를 pull한다.
!git clone https://github.com/Jinwoo1126/Dacon_SR.git

# 2. 라이브러리를 설치한다.
!pip install basicsr
!pip install facexlib
!pip install gdown
!pip install gfpgan
!pip install -r requirements.txt
!python setup.py develop

# 3. inputs 폴더안에 train 폴더를 넣어준다.(test폴더는 이미 존재)
./Dacon_SR
├── ...
├── inputs
│   ├── train # 넣어줘야 함
|   |   ├── hr
│   │   |   ├── 0000.png
│   │   |   ├── 0001.png
│   │   |   ├── 0002.png
|   |   |    ...
│   │   ├── lr
|   |       ├── 0000.png
|   |       ├── 0001.png
|   |       ├── 0002.png
|   |        ...
│   ├── test # 이미 있음
│       ├── 20000.png
│       ├── 20001.png
│       ├── ...
├── options
│   ├── ...
│   ├── finetune_realesrnet_x4plus_pairdata.yml # argparser 고칠 yaml 파일
├── realesrgan
│   ├── ...
│   ├── train.py
├── ...
├── results # inference한 파일이 저장됨
├── scripts
├── submission # results의 파일들 zip파일로 묶음
├── weights
│   ├── net_g_905000.pth # 다운받아서 넣어줘야 함
├── ...
├── inference_rrdbnetrot.py # inference 실행 파일

# 4.pth 파일을 다운 받아서 'weight' 폴더에 넣어준다.
!gdown 1piw_MOIE5bTH3-o9rmWqp3uIZoYcc5Wl # pth 파일 구글드라이브 다운로드
# https://drive.google.com/file/d/1piw_MOIE5bTH3-o9rmWqp3uIZoYcc5Wl/view
!mv net_g_905000.pth weights # 수동으로 옮겨도 된다.

# 5. Inference 파일 실행
!python inference_rrdbnetrot.py --model_path=./weights/net_g_905000.pth --input=./inputs/test/lr --suffix=''
# 주의! : 일부 가상환경처럼 num_worker_per_gpu가 사용이 불가능한 환경에서는 Dacon_SR/options/finetune_realesrnet_x4plus_pairdata.yml
# 파일에서 num_worker_per_gpu: 0 으로 수정해야 오류를 막을 수 있다.

# 'results' 폴더 안에 test 이미지에 대한 sr inference 파일이 저장된다.
Inference 상태 확인
%pylab inline
import matplotlib.pyplot as plt
import matplotlib.image as mpimg
lr_path = r'./inputs/test/lr/'
hr_path = r'./results/'
lr_imgs = [os.path.join(lr_path,f) for f in os.listdir(lr_path)]
hr_imgs = [os.path.join(hr_path,f) for f in os.listdir(hr_path)]
sample = 2
size = 15
plt.figure(figsize = (size, size//sample))
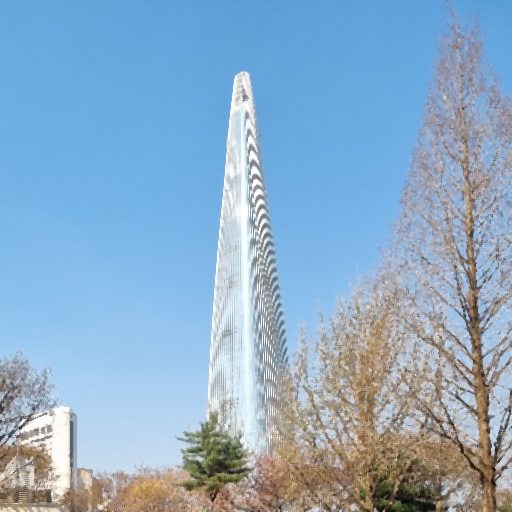
plt.suptitle('Low Resolution Images ( Resolution : 512 ) ', size = 18)
for idx in range(sample):
plt.subplot(1,sample,idx+1)
img = mpimg.imread(lr_imgs[idx])
plt.imshow(img)
plt.axis('off')
plt.show()
plt.figure(figsize = (size, size//sample))
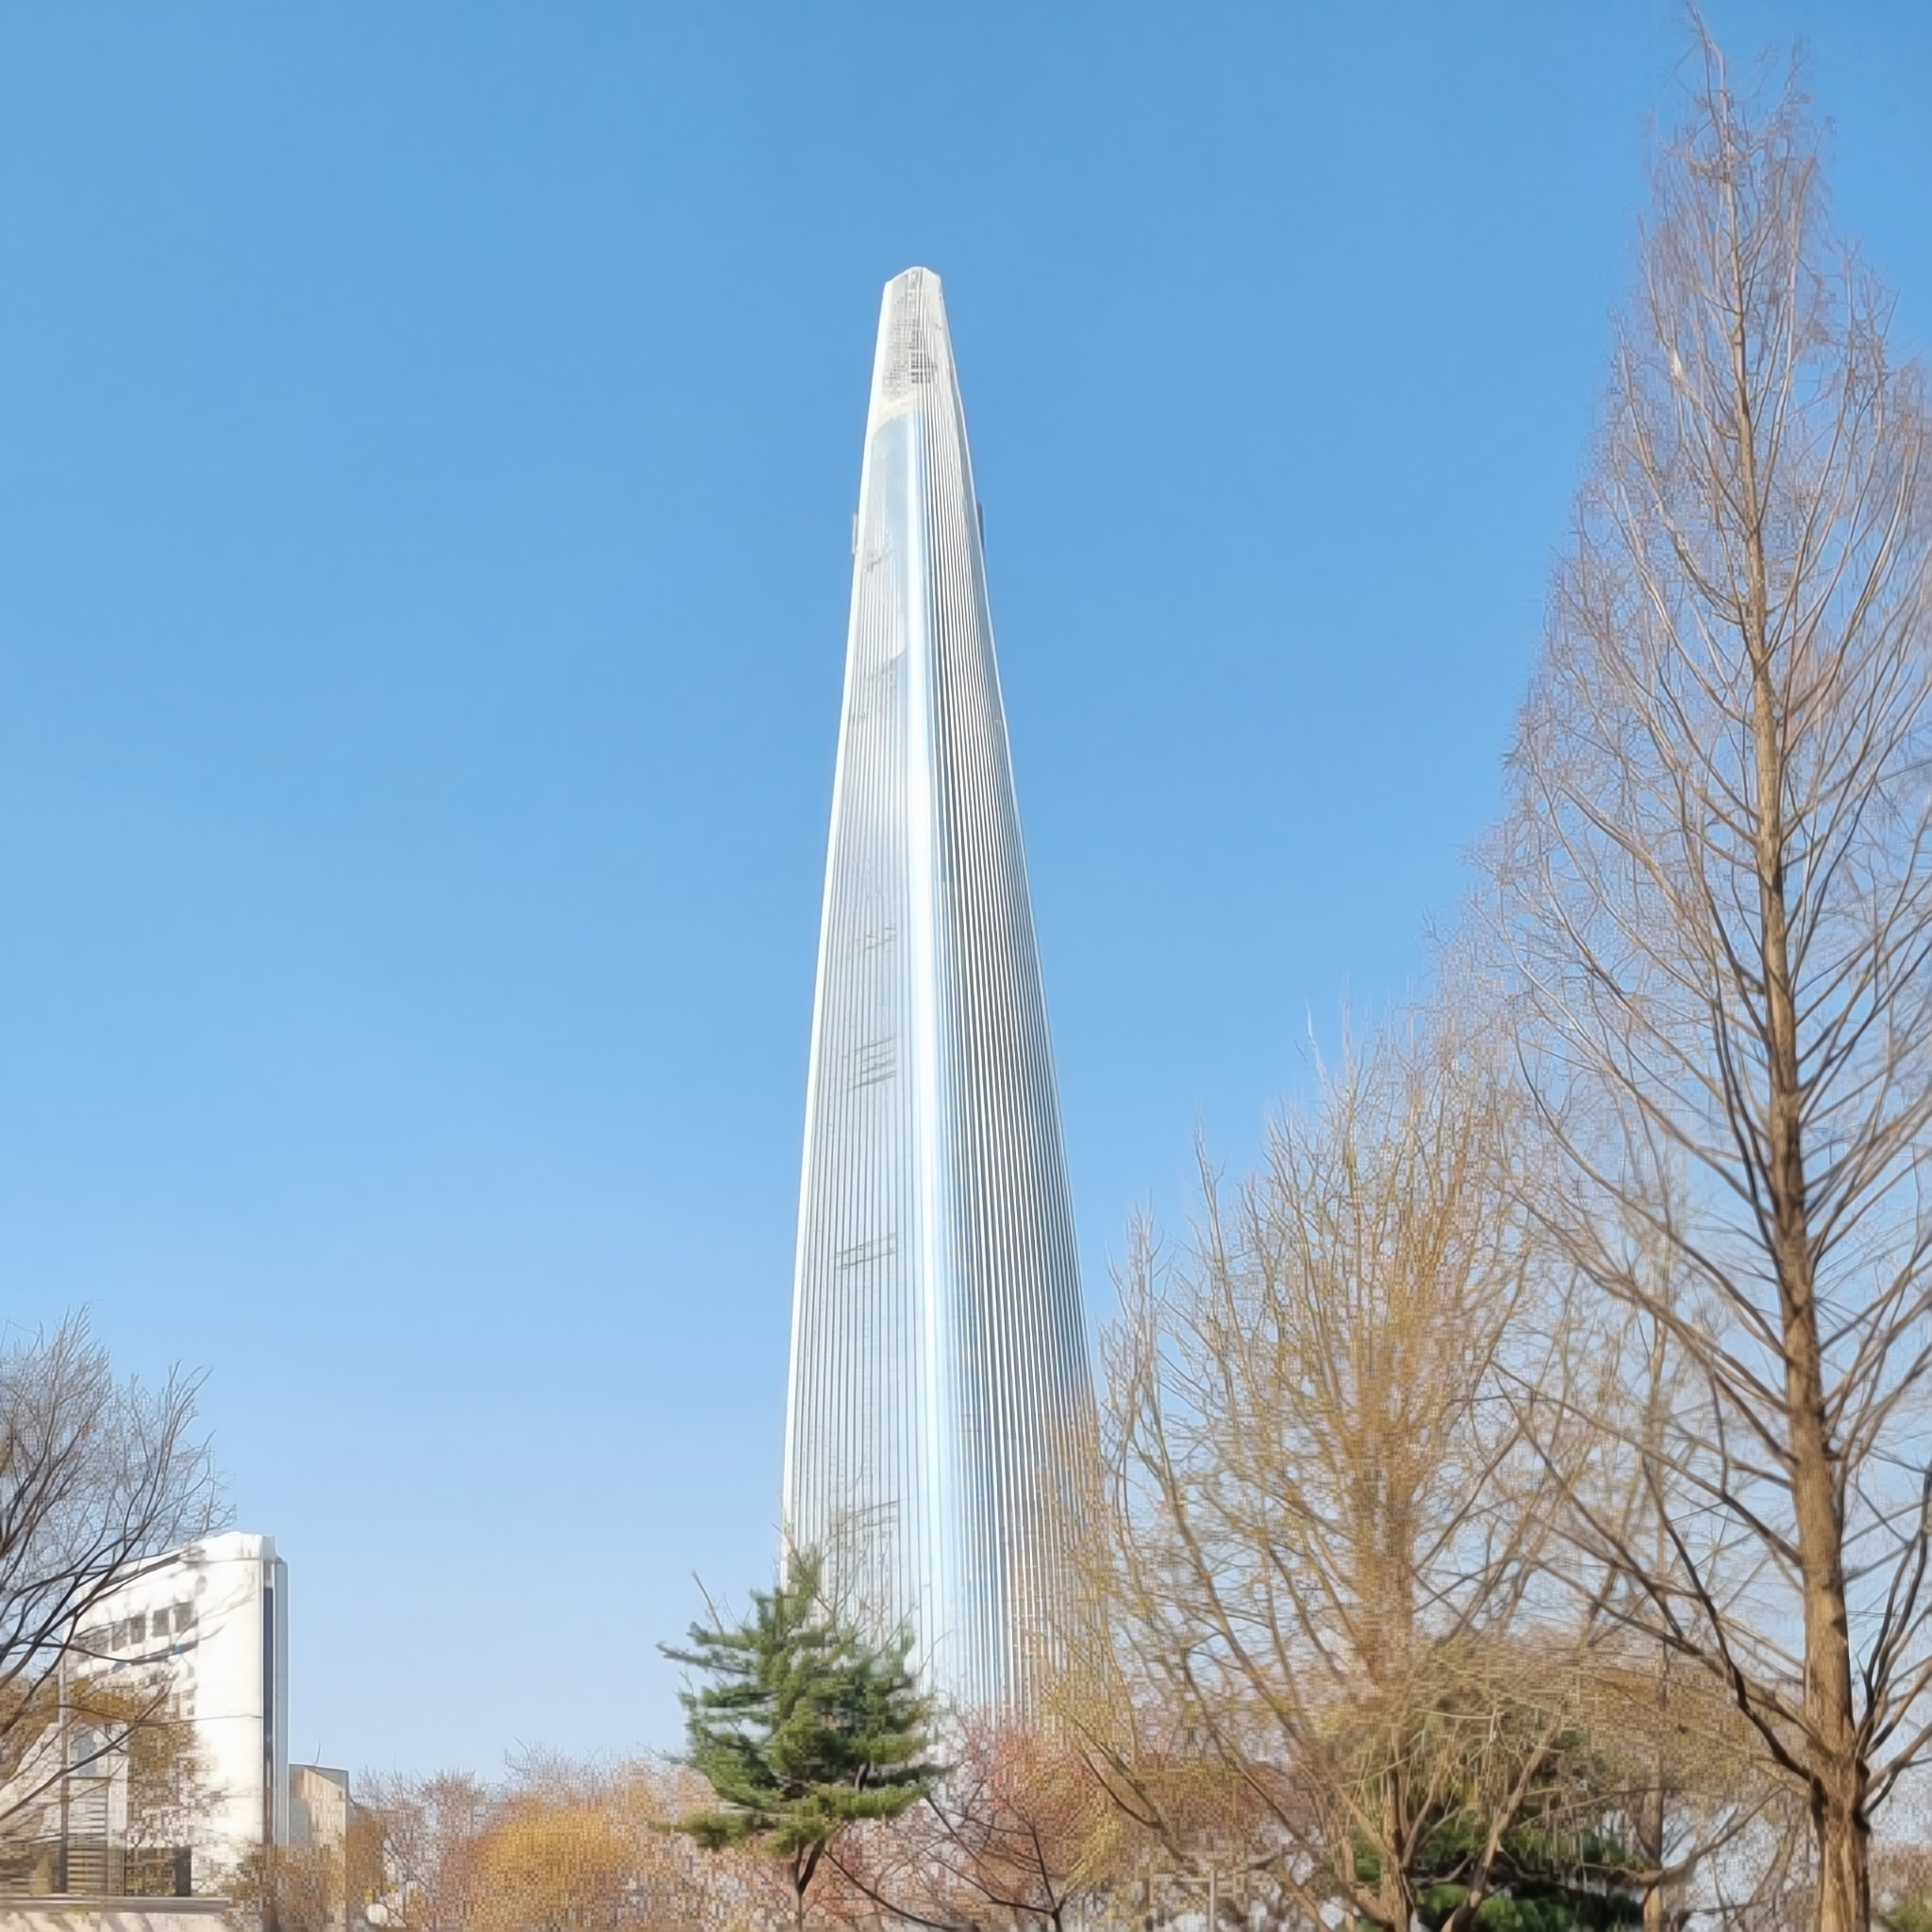
plt.suptitle('High Resolution Images ( Resolution : 2048 ) ', size = 18)
for idx in range(sample):
plt.subplot(1,sample,idx+1)
img = mpimg.imread(hr_imgs[idx])
plt.imshow(img)
plt.axis('off')
plt.show()제출 파일 생성
%pylab inline
import matplotlib.pyplot as plt
import matplotlib.image as mpimg

lr_path = r'./inputs/test/lr/'
hr_path = r'./results/'

lr_imgs = [os.path.join(lr_path,f) for f in os.listdir(lr_path)]
hr_imgs = [os.path.join(hr_path,f) for f in os.listdir(hr_path)]

sample = 2
size = 15

plt.figure(figsize = (size, size//sample))
plt.suptitle('Low Resolution Images ( Resolution  : 512 ) ', size = 18)

for idx in range(sample):
    plt.subplot(1,sample,idx+1)
    img = mpimg.imread(lr_imgs[idx])
    plt.imshow(img)
    plt.axis('off')

plt.show()

plt.figure(figsize = (size, size//sample))
plt.suptitle('High Resolution Images ( Resolution  : 2048 ) ', size = 18)

for idx in range(sample):
    plt.subplot(1,sample,idx+1)
    img = mpimg.imread(hr_imgs[idx])
    plt.imshow(img)
    plt.axis('off')

plt.show()
다음 포스팅에서는 real-ESRGAN으로 train하는 방법과 학습 실험 변수를 조절하는 방법을 소개하겠다.