📚 공부한 책 : 코드로배우는 스프링 부트 웹프로젝트
❤️ github 주소 : https://github.com/qkralswl689/LearnFromCode/tree/main/board2022
1.@RestController 와 JSON 처리
REST방식(다양한 방식)의 호출을 이용해 댓글을 처리한다
- 모든 댓글은 게시물의 조회 화면에서 처리되도록 하고 Ajax를 이용해 컨트롤러와 JSON 포맷으로 데이터를 교환하는 방식을 사용한다
★ Ajax란? - 출처 : surim's develog
2.JSON과 Ajax로 댓글처리
게시물 조회 하면에서 해야할 작업
- 게시물이 로딩된 이후 화면에서 댓글의 숫자를 클릭하면 해당 게시물에 속한 댓글을 Ajax로 가져와 화면에 보여준다
- 특정 버튼 클릭시 새로운 댓글을 입력할 수 있는 모달창 보여주고 Ajax의 POST방식으로 댓글전송
- 댓글 등록 후 댓글의 목록을 새로 가져와 방금 전 추가한 댓글을 볼 수 있도록 한다
- 댓글 삭제 & 수정은 특정 댓글을 선택해 모달창에서 처리한다
2-1.ReplyRepository 수정
getRepliesByBoardOrderByRno() 추가
-> Board 객체를 파라미터로 받고 모든 댓글을 순번대로 가져온다
import com.example.board2022.entity.Board;
import com.example.board2022.entity.Reply;
import org.springframework.data.jpa.repository.JpaRepository;
import org.springframework.data.jpa.repository.Modifying;
import org.springframework.data.jpa.repository.Query;
import org.springframework.data.repository.query.Param;

import java.util.List;


public interface ReplyRepository extends JpaRepository<Reply,Long> {

    // Board 삭제시 댓글들 삭제
    @Modifying
    @Query("delete from Reply r where r.board.bno =:bno ")
    void deleteByBno(@Param("bno")Long bno);

    // 게시물로 댓글 목록 가져오기
    List<Reply> getRepliesByBoardOrderByRno(Board board);
}
2-2.Test 코드 작성
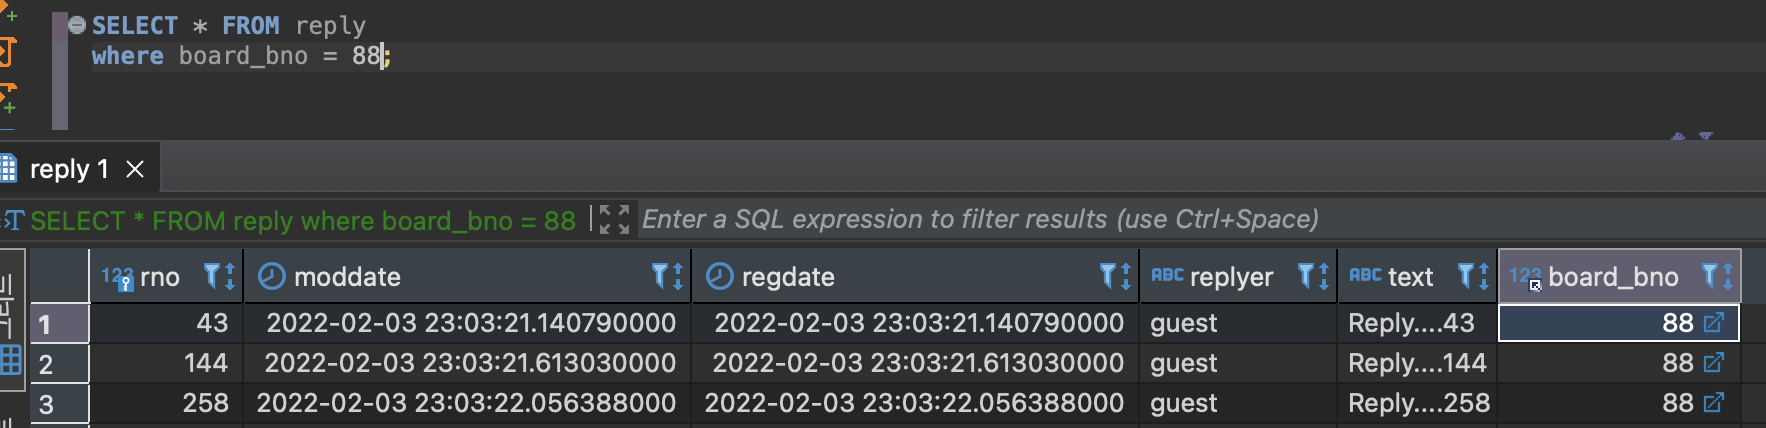
88번 게시물의 댓글을 순차적으로 조회하는 내용으로 테스트코드 작성
import com.example.board2022.entity.Board;
import com.example.board2022.entity.Reply;
import org.junit.jupiter.api.Test;
import org.springframework.beans.factory.annotation.Autowired;
import org.springframework.boot.test.context.SpringBootTest;

import java.util.List;

@SpringBootTest
public class ReplyRepositoryTests {

    @Autowired
    ReplyRepository replyRepository;

	//...생략
    @Test
    public void testListByBoard(){

        List<Reply> replyList = replyRepository.getRepliesByBoardOrderByRno(Board.builder().bno(88L).build());

        replyList.forEach(reply -> System.out.println(reply));
    }
}- 실행쿼리 및 실행결과
Hibernate:
    select
        reply0_.rno as rno1_2_,
        reply0_.moddate as moddate2_2_,
        reply0_.regdate as regdate3_2_,
        reply0_.board_bno as board_bn6_2_,
        reply0_.replyer as replyer4_2_,
        reply0_.text as text5_2_
    from
        reply reply0_
    where
        reply0_.board_bno=?
    order by
        reply0_.rno asc
Reply(rno=43, text=Reply....43, replyer=guest)
Reply(rno=144, text=Reply....144, replyer=guest)
Reply(rno=258, text=Reply....258, replyer=guest)- DB에서 88번 게시물 댓글 조회결과
3.ReplyDTO와 ReplyService/ReplyController
3-1.ReplyDTO 작성
Reply를 컨트롤러와 서비스 영역에서 처리하기 위해 ReplyDTO 클래스를 작성한다
- ReplyDTO를 Reply 엔티티로 처리하거나 반대의 경우에 대한 처리는 ReplyService interface , ReplyServiceImpl class를 작성해 처리한다
import lombok.AllArgsConstructor;
import lombok.Builder;
import lombok.Data;
import lombok.NoArgsConstructor;

import java.time.LocalDateTime;

@Builder
@AllArgsConstructor
@NoArgsConstructor
@Data
public class ReplyDTO {

    private Long rno;

    private String text;

    private String replyer;

    private Long bno; //게시글 번호

    private LocalDateTime regDate, modDate;
}
3-2.Service interface 작성
서비스 인터페이스에는 다음과 같은 기능을 선언한다
- 게시물 등록
- 특정 게시물의 댓글 리스트 가져오기
- 댓글 수정 ,삭제
- Reply 를 ReplyDTO로 변환하는 entityToDTO()
- ReplyDTO를 Reply로 변환하는 dtoToEntity()
★ dtoToEntity() : Reply 엔티티 객체가 Board 엔티티 객체를 참조하기 때문에 별도의 처리가 필요하다
import com.example.board2022.dto.ReplyDTO;
import com.example.board2022.entity.Board;
import com.example.board2022.entity.Reply;

import java.util.List;

public interface ReplyService {

    Long register(ReplyDTO replyDTO); //댓글 등록

    List<ReplyDTO> getList(Long bno); // 특정 게시물의 댓글 목록

    void modify(ReplyDTO replyDTO); //댓글 수정

    void remove(Long rno);//댓글 삭제

    // ReplyDTO를 Reply 객체로 변환 Board객체의 처리가 수반된다
    default Reply dtoToEntity(ReplyDTO replyDTO){

        Board board = Board.builder().bno(replyDTO.getBno()).build();

        Reply reply = Reply.builder()
                .rno(replyDTO.getRno())
                .text(replyDTO.getText())
                .replyer(replyDTO.getReplyer())
                .board(board)
                .build();

        return reply;
    }

    //Reply 객체를 ReplyDTO 로 변환 Board 객체가 필요하지 않으므로 게시물 번호만
    default ReplyDTO entityToDTO(Reply reply){

        ReplyDTO dto = ReplyDTO.builder()
                .rno(reply.getRno())
                .text(reply.getText())
                .replyer(reply.getReplyer())
                .regDate(reply.getRegDate())
                .modDate(reply.getModDate())
                .build();

        return dto;
    }
}
3-3.ServiceImpl class 작성
import com.example.board2022.dto.ReplyDTO;
import com.example.board2022.entity.Board;
import com.example.board2022.entity.Reply;
import com.example.board2022.repository.ReplyRepository;
import lombok.RequiredArgsConstructor;
import org.springframework.stereotype.Service;

import java.util.List;
import java.util.stream.Collectors;

@Service
@RequiredArgsConstructor
public class ReplyServiceImpl implements ReplyService{

    private final ReplyRepository replyRepository;


    @Override
    public Long register(ReplyDTO replyDTO) {

        Reply reply = dtoToEntity(replyDTO);

        replyRepository.save(reply);

        return reply.getRno();
    }

    @Override
    public List<ReplyDTO> getList(Long bno) {

        List<Reply> result = replyRepository.getRepliesByBoardOrderByRno(Board.builder().bno(bno).build());

        return result.stream().map(reply -> entityToDTO(reply)).collect(Collectors.toList());
    }

    @Override
    public void modify(ReplyDTO replyDTO) {

        Reply reply = dtoToEntity(replyDTO);

        replyRepository.save(reply);

    }

    @Override
    public void remove(Long rno) {

        replyRepository.deleteById(rno);

    }
}
3-4.Test 코드 작성
getList() 테스트
import com.example.board2022.dto.ReplyDTO;
import org.junit.jupiter.api.Test;
import org.springframework.beans.factory.annotation.Autowired;
import org.springframework.boot.test.context.SpringBootTest;

import java.util.List;

@SpringBootTest
public class ReplyServiceTests {

    @Autowired
    private ReplyService service;

    @Test
    public void testGetList(){

        Long bno = 96L; // DB에 존재하는 번호

        List<ReplyDTO> replyDTOList = service.getList(bno);

        replyDTOList.forEach(replyDTO -> System.out.println(replyDTO));
    }
}- 실행쿼리 및 실행결과
Hibernate:
    select
        reply0_.rno as rno1_2_,
        reply0_.moddate as moddate2_2_,
        reply0_.regdate as regdate3_2_,
        reply0_.board_bno as board_bn6_2_,
        reply0_.replyer as replyer4_2_,
        reply0_.text as text5_2_
    from
        reply reply0_
    where
        reply0_.board_bno=?
    order by
        reply0_.rno asc
ReplyDTO(rno=249, text=Reply....249, replyer=guest, bno=null, regDate=2022-02-03T23:03:21.986165, modDate=2022-02-03T23:03:21.986165)
ReplyDTO(rno=294, text=Reply....294, replyer=guest, bno=null, regDate=2022-02-03T23:03:22.171646, modDate=2022-02-03T23:03:22.171646)
4.@RestController
컨트롤러를 만들어 조회화면에서 Ajax로 댓글을 표시해준다
-> 댓글데이터를 JSON으로 만들어 처리하고 데이터만 전송한다
4-1.Controller 작성
@RestController 의 경우 모든 메서드의 리턴 타입은 기본으로 JSON을 사용한다
-> 메서드의 반환타입은 ResponseEntity 라는 객체를 이용한다 ResponseEntity 객체를 이용하면 HTTP의 상태 코드 등을 같이 전달할 수 있다
@GetMapping()에는 URL의 일부를 {}로 묶은 변수를 이용한다
-> 메서드 내에서 @PathVariable 이라는 것으로 처리한다
=> 브라우저에서 '/replies/board/97'과 같이 특정 게시물 번호로 조회할 때 '97'이라는 데이터를 변수로 처리할 수 있다
import com.example.board2022.dto.ReplyDTO;
import com.example.board2022.service.ReplyService;
import lombok.RequiredArgsConstructor;
import org.springframework.beans.factory.annotation.Autowired;
import org.springframework.http.HttpStatus;
import org.springframework.http.MediaType;
import org.springframework.http.ResponseEntity;
import org.springframework.web.bind.annotation.GetMapping;
import org.springframework.web.bind.annotation.PathVariable;
import org.springframework.web.bind.annotation.RequestMapping;
import org.springframework.web.bind.annotation.RestController;

import java.util.List;

@RestController
@RequestMapping("/replies/")
@RequiredArgsConstructor
public class ReplyController {

    @Autowired
    private final ReplyService replyService;

    @GetMapping(value = "/board/{bno}",produces = MediaType.APPLICATION_JSON_VALUE)
    public ResponseEntity<List<ReplyDTO>> getListByBoard(@PathVariable("bno") Long bno){

        return new ResponseEntity<>(replyService.getList(bno), HttpStatus.OK);
    }
}
5.조회화면 처리
5-1.Ajax 처리
사용자가 해당 게시물의 댓글의 수를 파악하고 댓글의 숫자를 클릭할 때 Ajax로 데이터 처리한다
- read.html 추가
<a th:href="@{/board/list(page=${requestDTO.page} , type=${requestDTO.type}, keyword =${requestDTO.keyword})}">
            <button type="button" class="btn btn-info">List</button>
        </a>

        <div >
            <div class="mt-4">
                <h5 ><span class="badge badge-info addReply">Add Reply</span> </h5>
                <h5 ><span class="badge badge-secondary replyCount"> Reply Count  [[${dto.replyCount}]]</span> </h5>
            </div>
            <div class="list-group replyList">

            </div>
        </div>

  <script th:inline="javascript">
    // Reply Count 부분을 클릭했을 때 해당 게시물의 댓글을 jquery의 getJSON()을 활용해 가져오고 이를 console.log()를 이용해 확인한다
            $(document).ready(function() {

                var bno = [[${dto.bno}]];

                var listGroup  = $(".replyList");

                $(".replyCount").click(function(){

                    $.getJSON('/replies/board/'+bno, function(arr){

                        console.log(arr);

                    })//end getJSON

                })//end click
		});
</script>
6.댓글 추가,수정,삭제 처리
6-1.댓글 추가
댓글추가 버튼 클릭시 모달창을 띄운다
-> 모달창은 댓글의 수정, 삭제도 함께 처리할 수 있도록 여러개의 버튼을 추가해준다
- JavaScript : 'Add Reply' 버튼의 클릭부분은 모달창을 보여주고 모달창 내에서 필요한 버튼만 보여주도록 처리한다
'Save' 버튼 클릭시 댓글 등록이 된다 -> JS 객체를 생성 후 해당 객체를 JSON.stringify()를 이요해 JSON 문자열로 바꾸어 전송하도록한다
=> 댓글 추가작업 성공 후 모달창을 화면에서 숨기고 다시 해당 게시물의 댓글을 가져오는 loadJSONData()를 호출해 화면을 갱신한다
- html 추가
<div class="modal" tabindex="-1" role="dialog">
<div class="modal-dialog" role="document">
<div class="modal-content">
<div class="modal-header">
<h5 class="modal-title">Modal title</h5>
<button type="button" class="close" data-dismiss="modal" aria-label="Close">
<span aria-hidden="true">×</span>
</button>
</div>
<div class="modal-body">
<div class="form-group">
<input class="form-control" type="text" name="replyText" placeholder="Reply Text...">
</div>
<div class="form-group">
<input class="form-control" type="text" name="replyer" placeholder="Replyer">
<input type="hidden" name="rno" >
</div>
</div>
<div class="modal-footer">
<button type="button" class="btn btn-danger replyRemove">Remove</button>
<button type="button" class="btn btn-warning replyModify">Modify</button>
<button type="button" class="btn btn-primary replySave">Save</button>
<button type="button" class="btn btn-outline-secondary replyClose" data-dismiss="modal">Close</button>
</div>
</div>
</div>
</div>
<script>
//...생략
//모달 창
var modal = $('.modal');
$(".addReply").click(function () {
modal.modal('show');
//댓글 입력하는 부분 초기화 시키기
$('input[name="replyText"]').val('');
$('input[name="replyer"]').val('');
$(".modal-footer .btn").hide(); //모달 내의 모든 버튼을 안 보이도록
$(".replySave, .replyClose").show(); //필요한 버튼들만 보이도록
});
// 저장
$(".replySave").click(function() {
var reply = {
bno: bno,
text: $('input[name="replyText"]').val(),
replyer: $('input[name="replyer"]').val()
}
console.log(reply);
$.ajax({
url: '/replies/',
method: 'post',
// JS 객체를 생성 후 해당 객체를 JSON.stringify()를 이요해 JSON 문자열로 바꾸어 전송하도록한다
data: JSON.stringify(reply),
contentType: 'application/json; charset=utf-8',
dataType: 'json',
success: function(data){
console.log(data);
var newRno = parseInt(data);
alert(newRno +"번 댓글이 등록되었습니다.")
modal.modal('hide');
// 댓글 추가작업 성공 후 모달창을 화면에서 숨기고 다시 해당 게시물의 댓글을 가져오는 loadJSONData()를 호출해 화면을 갱신한다
loadJSONData();
}
})
});
</script>- Controller 작성
@RequestBody : JSON으로 들어오는 데이터를 자동으로 해당 타입의 객체로 매핑해주는 역할 -> 별도의 처리 없이도 JSON 데이터를 특정 타입의 객체로 변환해서 처리 가능
20
import com.example.board2022.dto.ReplyDTO;
import com.example.board2022.service.ReplyService;
import lombok.RequiredArgsConstructor;
import org.springframework.beans.factory.annotation.Autowired;
import org.springframework.http.HttpStatus;
import org.springframework.http.MediaType;
import org.springframework.http.ResponseEntity;
import org.springframework.web.bind.annotation.*;

import java.util.List;

@RestController
@RequestMapping("/replies/")
@RequiredArgsConstructor
public class ReplyController {

    @Autowired
    private final ReplyService replyService;


    @PostMapping("")

    public ResponseEntity<Long> register(@RequestBody ReplyDTO replyDTO){

        Long rno = replyService.register(replyDTO);

        return new ResponseEntity<>(rno, HttpStatus.OK);
    }


}- 실행화면
6-2.댓글 삭제
DELETE 방식을 사용해 데이터를 전송한다
-> 'data-rno'속성을 이용해 댓글의 번호를 저장하고 댓글의 제목, 내용은 CSS 클래스를 이용해 처리한다,
DELETE 방식으로 Ajax를 이용해 서버를 호출하고 처리결과는 문자열로 전송하고 'success' 면 정상적으로 삭제되었다고 가정한다
- html 작성
	<script>
      	// 모달창에 댓글의 정보를 출력
       $('.replyList').on("click", ".card-body", function(){

                    var rno = $(this).data("rno");

                    $("input[name='replyText']").val( $(this).find('.card-title').html());
                    $("input[name='replyer']").val( $(this).find('.card-subtitle').html());
                    $("input[name='rno']").val(rno);

                    $(".modal-footer .btn").hide();
                    $(".replyRemove, .replyModify, .replyClose").show();

                    modal.modal('show');

                });

     		 // 댓글 삭제
                $(".replyRemove").on("click", function(){

                    var rno = $("input[name='rno']").val(); //모달 창에 보이는 댓글 번호 hidden처리되어 있음

                    $.ajax({
                        url: '/replies/' + rno,
     				 // DELETE 방식으로 Ajax를 이용해 서버 호출
                        method: 'delete',
                        success: function(result){
                            console.log("result: " + result);
                            if(result ==='success'){
                                alert("댓글이 삭제되었습니다");
                                modal.modal('hide');
                                loadJSONData();
                            }
                        }
                    })
                });
</script>
- Controller 작성
@DeleteMapping 사용
-> 댓글의 번호(rno)로 삭제 하고 문자열로 결과 전송한다
import com.example.board2022.dto.ReplyDTO;
import com.example.board2022.service.ReplyService;
import lombok.RequiredArgsConstructor;
import org.springframework.beans.factory.annotation.Autowired;
import org.springframework.http.HttpStatus;
import org.springframework.http.MediaType;
import org.springframework.http.ResponseEntity;
import org.springframework.web.bind.annotation.*;

import java.util.List;

@RestController
@RequestMapping("/replies/")
@RequiredArgsConstructor
public class ReplyController {

    @Autowired
    private final ReplyService replyService;

    @DeleteMapping("/{rno}")
    public ResponseEntity<String> remove(@PathVariable("rno") Long rno){

        replyService.remove(rno);

        return new ResponseEntity<>("success", HttpStatus.OK);
    }
}- 실행화면
6-3.댓글 수정 처리
PUT 방식으로 처리하며 댓글의 번호, 게시물의 번호, 내용, 작성자를 함께 전달해야 한다
-> 모든 내용을 하나의 객체로 구성해 JSON 형태로 전달하고 서버에서는 JSON 데이터를 ReplyDTO 로 변환해서 처리한다
- html 작성
	<script>
       $(".replyModify").click(function() {

                    var rno = $("input[name='rno']").val();

                    var reply = {
                        rno: rno,
                        bno: bno,
                        text: $('input[name="replyText"]').val(),
                        replyer: $('input[name="replyer"]').val()
                    }

                    console.log(reply);
                    $.ajax({
                        url: '/replies/' + rno,
                        method: 'put',
                        data:  JSON.stringify(reply),
                        contentType: 'application/json; charset=utf-8',
                        success: function(result){

                            console.log("RESULT: " + result);

                            if(result ==='success'){
                                alert("댓글이 수정되었습니다");
                                modal.modal('hide');
                                loadJSONData();
                            }
                        }
                    });
                });

            });
<script>- Controller 작성
@PutMapping으로 댓글 데이터를 ReplyDTO 객체로 변환해 처리한다
import com.example.board2022.dto.ReplyDTO;
import com.example.board2022.service.ReplyService;
import lombok.RequiredArgsConstructor;
import org.springframework.beans.factory.annotation.Autowired;
import org.springframework.http.HttpStatus;
import org.springframework.http.MediaType;
import org.springframework.http.ResponseEntity;
import org.springframework.web.bind.annotation.*;

import java.util.List;

@RestController
@RequestMapping("/replies/")
@RequiredArgsConstructor
public class ReplyController {

    @Autowired
    private final ReplyService replyService;

    @PutMapping("/{rno}")
    public ResponseEntity<String> modify(@RequestBody ReplyDTO replyDTO){

        replyService.modify(replyDTO);

        return new ResponseEntity<>("success",HttpStatus.OK);
    }
}- 실행화면