📒자바스크립트의 클래스
자바스크립트 문법에도 클래스는 존재합니다.
클래스는 객체지향 프로그래밍 패러다임을 선택한 언어에서 핵심입니다.
class Student {
  // 필드
  name;
  grade;
  age;

  // 생성자
  constructor(name, grade, age) {
    this.name = name;
    this.grade = grade;
    this.age = age;
  }

  // 메서드
  study() {
    console.log("열심히 공부 함");
  }

  introduce() {
    console.log(`안녕하세요!`);
  }
}

let studentB = new Student("홍길동", "A+", 27);

studentB.study(); // 열심히 공부 함
studentB.introduce(); // 안녕하세요!
클래스는 위와 같이 선언이 가능합니다.
자바스크립트에서 클래스는 필드(멤버 변수)를 선언하지 않고 바로 생성자에 적어도 됩니다.
✔️상속
상속은 객체지향 프로그래밍에서 꽃이라고 불리는 기능입니다.
위에서 만든 Student 클래스를 상속하는 클래스를 선언하고 싶다면 다음과 같이 작성할 수 있습니다.
class StudentDeveloper extends Student {
}
이 때 하위 클래스의 생성자에서 상위 타입의 생성자를 반드시 호출해주어야 합니다.
그렇지 않으면 에러가 발생합니다.

class StudentDeveloper extends Student {
  // 필드
  favoriteSkill;

  // 생성자
  constructor(name, grade, age, favoriteSkill) {
    super(name, grade, age);
    this.favoriteSkill = favoriteSkill;
  }

  // 메서드
  programming() {
    console.log(`${this.favoriteSkill}로 프로그래밍 함`);
  }
}
📒타입스크립트의 클래스
타입스크립트에서는 클래스 선언 시 생성자에서 멤버 변수를 초기화하지 않는다면,
필드값을 반드시 초기화해주어야 하며 타입 주석도 같이 달아주어야 합니다.
초기화를 진행하지 않으면 암묵적으로 any 타입으로 추론합니다.
class Employee {
  // 필드
  name: string = "";
  age: number = 0;
  position: string = "";

  // 생성자
  constructor(name: string, age: number, position: string) {
    this.name = name;
    this.age = age;
    this.position = position;
  }

  // 메서드
  work() {
    console.log("일함");
  }
}
하지만 생성자에서 값 초기화를 진행한다면 필드 선언시의 초기화가 생략 가능하며, 타입 주석도 생략 가능합니다.
타입스크립트가 생성자를 통해서 알아서 추론합니다.
class Employee {
  // 필드
  name;
  age;
  position;

  // 생성자
  constructor(name: string, age: number, position: string) {
    this.name = name;
    this.age = age;
    this.position = position;
  }

  // 메서드
  work() {
    console.log("일함");
  }
}
타입스크립트는 일반 함수를 생성자 함수 방식으로 객체를 만드는 것을 지원하지 않습니다.
따라서 class 만이 new를 통해 객체를 생성할 수 있는 유일한 객체입니다.
✔️선택적 멤버 변수와 읽기 전용 멤버 변수
클래스로부터 생성한 인스턴스의 프로퍼티가 선택적 프로퍼티가 되도록 하려면 클래스를 선언할 때 필드에 ?를 붙여주면 됩니다.
class Employee {
  // 필드
  name: string = "";
  age: number = 0;
  position?: string = "";

  // 생성자
  constructor(name: string, age: number, position: string) {
    this.name = name;
    this.age = age;
    this.position = position;
  }

  // 메서드
  work() {
    console.log("일함");
  }
}
readonly 키워드를 통해 읽기 전용 멤버 변수로 만들수도 있습니다.
class Employee {
  // 필드
  readonly name: string = "";
  age: number = 0;
  position?: string = "";

  // 생성자
  constructor(name: string, age: number, position: string) {
    this.name = name;
    this.age = age;
    this.position = position;
  }

  // 메서드
  work() {
    console.log("일함");
  }
}
✔️상속
class ExecutiveOfficer extends Employee {
  officeNumber: number;

  constructor(
    name: string,
    age: number,
    position: string,
    officeNumber: number
  ) {
    super(name, age, position);
    this.officeNumber = officeNumber;
  }
}
다른 클래스를 상속하는 하위 클래스를 선언할 때 반드시 상위클래스의 생성자를 호출해야 합니다.
✔️타입
클래스는 사용자 정의 타입과 마찬가지라고 했습니다.
따라서 클래스도 타입으로 사용할 수 있습니다.
class Employee {
  (...)
}

const employeeC: Employee = {
  name: "",
  age: 0,
  position: "",
  work() {},
};
Employee 타입은 name, age, position 필드(프로퍼티)와 work 메서드를 가지는 객체면 되기 때문에 위와 같이 작성할 수 있습니다.
📒접근 제어자
접근 제어자는 타입스크립트에서만 제공되는 기능입니다.
접근 제어자의 종류는 다음과 같습니다.
- public: 모든 범위에서 접근 가능
- private: 클래스 내부에서만 접근 가능
- protected: 클래스 내부 또는 상속 클래스(하위 클래스)에서만 접근 가능
✔️public
public 접근제어자는 필드를 모든 범위에서 접근 가능하도록 정의합니다.
직접 public 접근 제어자를 명시해도 되지만
기본적으로 접근 제어자를 명시하지 않으면 public 입니다.
class Employee {
  // 필드
  name: string;      // 자동으로 public
  age: number;       // 자동으로 public
  position: string;  // 자동으로 public

  // 생성자
  constructor(name: string, age: number, position: string) {
    this.name = name;
    this.age = age;
    this.position = position;
  }

  // 메서드
  work() {
    console.log("일함");
  }
}

const employee = new Employee("이정환", 27, "devloper");

employee.name = "홍길동";
employee.age = 30;
employee.position = "디자이너";
✔️private
private 접근 제어자는 필드를 클래스 내부에서만 접근 가능하도록 설정할 수 있습니다.
class Employee {
  // 필드
  private name: string; // private 접근 제어자 설정
  public age: number;
  public position: string;

  ...

  // 메서드
  work() {
    console.log(`${this.name}이 일함`); // 여기서는 접근 가능
  }
}

const employee = new Employee("이정환", 27, "devloper");

employee.name = "홍길동"; // ❌ 오류
employee.age = 30;
employee.position = "디자이너";
📌자바스크립트의 private field(#)와 타입스크립트의 private 접근제어자
자바스크립트의 private 접근 제어자를 나타내는 #키워드(private field) 기능이 있습니다.
타입스크립트의 private 접근 제어자와 자바스크립트의 #키워드는 어떤 차이가 있는지 알아봅시다
class PrivateMember {
    private priv: string = 'private';
}

class ChildPrivatemember extends PrivateMember {
    private priv: string = 'private';
}
위 코드는 다음과 같은 에러가 발생합니다.

타입스크립트에서 private 접근제어자가 붙은 속성(멤버 변수는) 해당 클래스 내부에서만 접근 가능합니다. 따라서 하위 클래스에서 상위 클래스의 private 속성에 접근하거나 재정의하는 것은 허용되지 않습니다.
하지만 자바스크립트의 private field(#)에서는 에러가 발생하지 않습니다.
class PrivateField {
    #priv: string = 'private';
}

class ChildPrivateField extends PrivateField{
    #priv: string = 'private';
}
✔️protected
protected 접근 제어자는 필드를 클래스 내부와 하위 클래스에서만 접근 가능하도록 설정합니다.
class Employee {
  // 필드
  private name: string; // private 접근 제어자 설정
  protected age: number;
  public position: string;

  ...

  // 메서드
  work() {
    console.log(`${this.name}이 일함`); // 여기서는 접근 가능
  }
}

class ExecutiveOfficer extends Employee {
 // 메서드
  func() {
    this.name; // ❌ 오류
    this.age; // ✅ 가능
  }
}

const employee = new Employee("이정환", 27, "devloper");

employee.name = "홍길동"; // ❌ 오류
employee.age = 30; // ❌ 오류
employee.position = "디자이너";
class Employee {
// 생성자
constructor(
private name: string,
protected age: number,
public position: string
) {
this.name = name;
this.age = age;
this.position = position;
}
// 메서드
work() {
console.log(`${this.name} 일함`);
}
}✔️필드 생략하기
생성자의 매개변수에 접근 제어자를 설정할 수 있습니다.
생성자의 매개변수에 접근 제어자를 설정하면 자동으로 필드도 함께 선언되기 때문에 동일한 이름으로 필드를 선언할 수 없습니다.
동일한 이름의 필드를 제거해 주어야 하기 때문에 필드를 생략할 수 있습니다.
class Employee {
  // 생성자
  constructor(
    private name: string,
    protected age: number,
    public position: string
  ) {
    this.name = name;
    this.age = age;
    this.position = position;
  }

  // 메서드
  work() {
    console.log(`${this.name} 일함`);
  }
}생성자의 매개변수에 접근 제어자를 설정하면 this.필드 = 매개변수 도 자동으로 수행되기 때문에 생성자의 구현부도 생략이 가능합니다.
class Employee {
  // 생성자
  constructor(
    private name: string,
    protected age: number,
    public position: string
  ) {}

  // 메서드
  work() {
    console.log(`${this.name} 일함`);
  }
}
타입스크립트에서 클래스를 선언할 때는 보통 생성자의 매개변수에 접근 제어자를 설정하여 필드와 생성자 내부 구현부를 생략하여 간결하게 작성하는 편입니다.
📒인터페이스와 클래스
타입스크립트의 인터페이스는 클래스의 설계도 역할을 할 수 있습니다.
클래스에 어떤 필드들이 존재하고 어떤 메서드가 존재하는지 정의할 수 있습니다.
그리고 클래스는 이 인터페이스를 구현하도록 선언합니다.
/**
 * 인터페이스와 클래스
 */

interface CharacterInterface {
  name: string;
  moveSpeed: number;
  move(): void;
}

class Character implements CharacterInterface {
  constructor(
    public name: string,
    public moveSpeed: number,
    private extra: string
  ) {}

  move(): void {
    console.log(`${this.moveSpeed} 속도로 이동!`);
  }
}
implements 키워드를 통해 인터페이스를 구현할 수 있으며, 인터페이스를 구현하는 클래스는 반드시 인터페이스에 선언된 필드와 메서드를 충족해야 합니다.
인터페이스를 구현한 클래스에서 인터페이스의 속성은 public이어야 합니다.
interface Human {
    name: string;
    age: number;
    married: boolean;
}

class Person implements Human {
    name;
    age;
    married;

    constructor(name: string, age: number, married: boolean) {
        this.name = name;
        this.age = age;
        this.married = married;
    }
}
애초에 인터페이스의 속성은 protected나 private이 될 수 없습니다.
interface Human {
    name: string;
    protected age: number;
    married: boolean;
}
따라서 인터페이스를 구현한 클래스의 속성도 전부 public이어야 합니다.
인터페이스를 구현한 클래스의 속성이 protected이거나 private이면 에러가 발생합니다.
interface Human {
    name: string;
    age: number;
    married: boolean;
}

class Person implements Human {
    name;
    private age;
    protected married;

    constructor(name: string, age: number, married: boolean) {
        this.name = name;
        this.age = age;
        this.married = married;
    }
}
📒override
클래스의 메서드에 사용할 수 있는 override 키워드가 있습니다.
override 키워드는 noImplicitOverride 옵션이 활성화되어 있어야 사용할 수 있습니다.
옵션이 활성화 되어있으면 상위 클래스의 메서드를 오버라이드 할 때 명시적으로 override 키워드를 사용해주어야 합니다.
class Human {
    eat() {
        console.log('냠냠');
    }
    sleep() {
        console.log('쿨쿨');
    }
}

class Employee extends Human {
    work() {
        console.log('끙차');
    }
    sleep() {
        console.log('에고고');
    }
}
📒오버로딩
class Person {
    name?: string;
    age?: number;
    married?: boolean;
    constructor();
    constructor(name: string, married: boolean);
    constructor(name: string, age: number, married: boolean);
    constructor(name?: string, age?: boolean | number, married?: boolean) {
        if (name) {
            this.name = name;
        }
        if (typeof age === 'boolean') {
            this.married = age;
        } else {
            this.age = age;
        }
        if (married) {
            this.married = married;
        }
    }
}
클래스의 생성자도 오버로딩을 적용할 수 있습니다.
일반 함수와 비슷하게 타입 선언을 여러 번 하면 됩니다.
📒인덱스 시그니처
클래스의 속성에도 인덱스 시그니처를 사용할 수 있으며, static 속성에도 인덱스 시그니처를 적용할 수 있습니다.
때문에 속성을 자유롭게 추가할 수 있습니다.
class Signature {
    [propName: string]: string | number | undefined;
    static [propName: string]: boolean;
}

const sig = new Signature();
sig.hello = 'world';
Signature.isGood = true;
위 코드는 인덱스 시그니처를 적용했기 떄문에 클래스와 인스턴스에 자유롭게 속성을 추가할 수 있습니다.
인덱스 시그니처를 제거하면 동적으로 속성 추가가 불가능합니다.
class Signature {
    // [propName: string]: string | number | undefined;
    // static [propName: string]: boolean;
}

const sig = new Signature();
sig.hello = 'world';
Signature.isGood = true;
📒클래스, 인터페이스 메서드의 this
클래스나 인터페이스의 메서드에서는 this를 타입으로 사용할 수 있습니다.
class Person {
    age: number;
    married: boolean;
    constructor(age: number, married: boolean) {
        this.age = age;
        this.married = married;
    }
    sayAge() {
        console.log(this.age);
    }
    sayMarried(this: Person) {
        console.log(this.married);
    }
    sayCallback(callback: (this: this) => void) {
        callback.call(this);
    }
}
기본적으로 this는 클래스 자기 자신이지만 sayMarried 메서드처럼 명시적으로 this를 타이핑할 수도 있습니다.
여기서 sayCallback 메서드를 보면 매개변수로 콜백 함수를 가지고 있습니다.
콜백함수의 this는 this로 타이핑되어 있습니다. 이러면 콜백함수의 this 타입은 Person 인스턴스가 됩니다.
class A {
    callbackWithThis(cb: (this: this) => void) {
        cb.call(this);
    }
    callbakcWithoutThis(cb: () => void) {
        cb();
    }
}

new A().callbackWithThis(function () {
    this;
});

new A().callbackWithoutThis(function () {
  this; //에러
});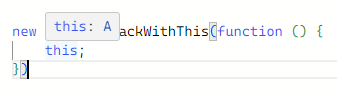

콜백 함수에서 this를 사용하고 싶다면 this를 타이핑 해야하비다. 그 this가 클래스 자신이라면 this: this로 타이핑하면 됩니다.
