🐣 INTRO
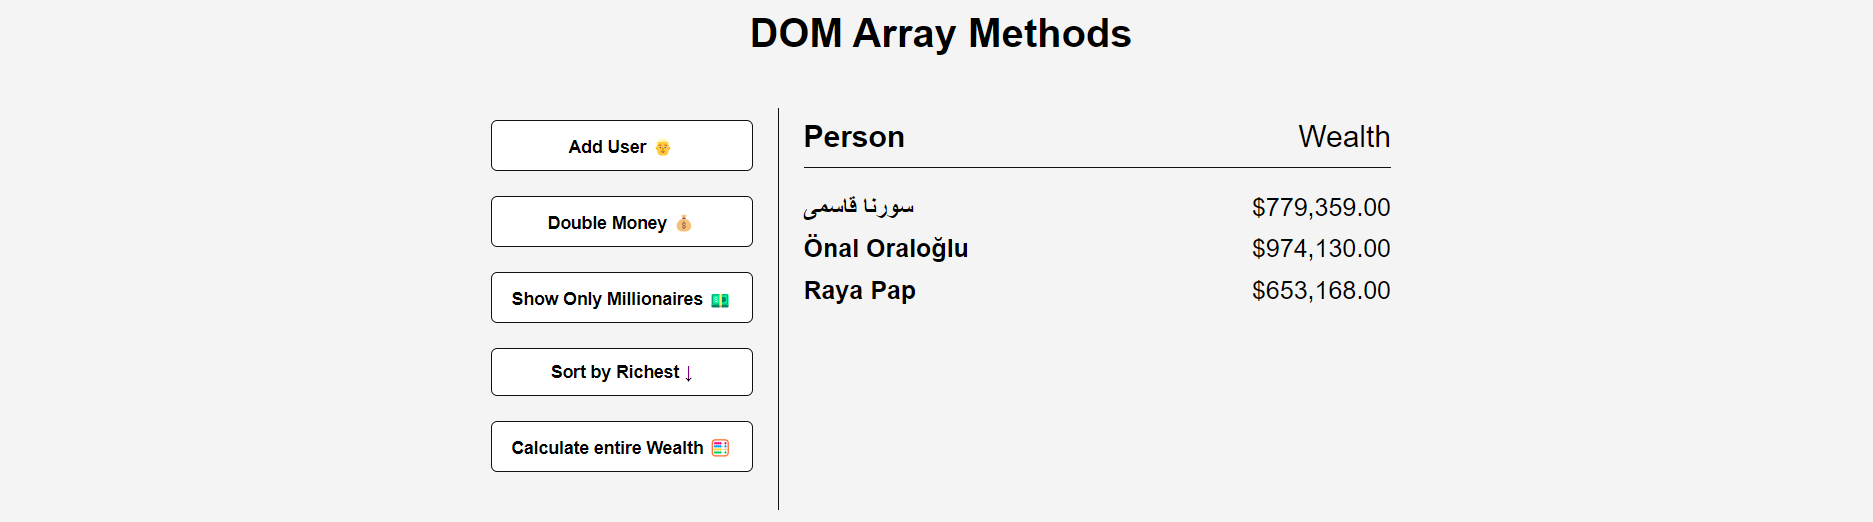
- 버튼을 통해 데이터들을 조작할 수 있는 미니 프로젝트를 구현해보기!
ADD USERDOUBLE MONEYSHOW ONLY MILLIONAIRESSORT BY RICHESTCALCULATE WEALTH
- 데이터는 API를 통해 끌어오기!
👩🏻💻 HTML
<!DOCTYPE html>
<html lang="en">
  <head>
    <meta charset="UTF-8" />
    <meta name="viewport" content="width=device-width, initial-scale=1.0" />
    <link rel="stylesheet" href="style.css" />
    <title>Document</title>
  </head>
  <body>
    <h1>DOM Array Methods</h1>

    <div class="container">
      <aside>
        <button class="add-user">Add User</button>
        <button class="double">Double Money</button>
        <button class="show-millionaires">Show Only Millionaires</button>
        <button class="sort">Sort by Richest</button>
        <button class="calculate-wealth">Calculate entire Wealth</button>
      </aside>

      <main id="main">
        <h2><strong>Person</strong> Wealth</h2>
      </main>
    </div>
    <script src="script.js"></script>
  </body>
</html>👩🏻💻 CSS
* {
  box-sizing: border-box;
}

body {
  background: #f4f4f4;
  font-family: Arial, Helvetica, sans-serif;
  display: flex;
  flex-direction: column;
  align-items: center;
  min-height: 100vh;
  margin: 0;
}

.container {
  display: flex;
  padding: 20px;
  margin: 0 auto;
  max-width: 100%;
  width: 800px;
}

aside {
  padding: 10px 20px;
  width: 250px;
  border-right: 1px solid #111;
}

button {
  background-color: white;
  border: solid 1px #111;
  border-radius: 5px;
  display: block;
  width: 100%;
  padding: 10px;
  margin-bottom: 20px;
  font-weight: bold;
  font-size: 14px;
}

main {
  flex: 1;
  padding: 10px 20px;
}

h2 {
  border-bottom: 1px solid #111;
  padding-bottom: 10px;
  display: flex;
  justify-content: space-between;
  font-weight: 300;
  margin: 0 0 20px;
}

h3 {
  background-color: #fff;
  border-bottom: 1px solid #111;
  padding: 10px;
  display: flex;
  justify-content: space-between;
  font-weight: 300;
  margin: 20px 0 0;
}

.person {
  display: flex;
  justify-content: space-between;
  font-size: 20px;
  margin-bottom: 10px;
}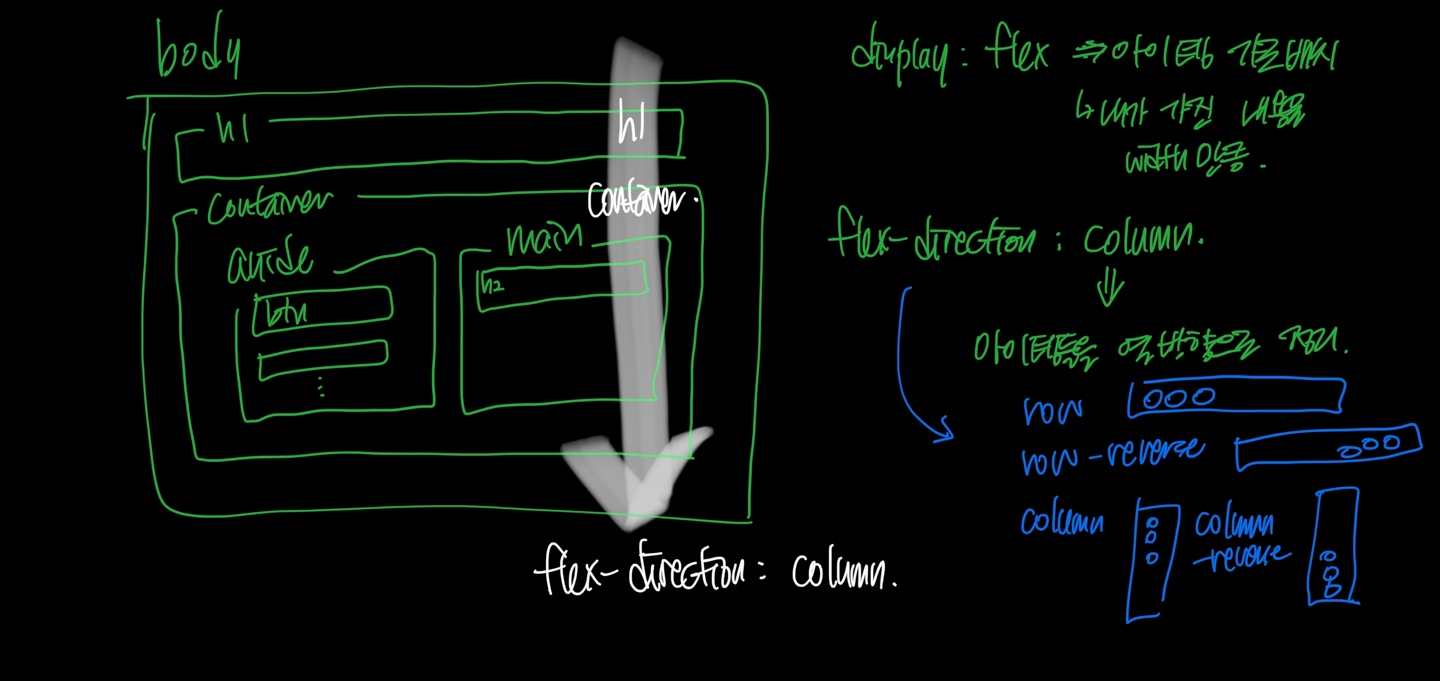
- 이번 프로젝트 공부하면서
HTML,CSS코드를 작성할 때 이렇게 그림을 그리면서 큰 틀을 작성해보는 것이 중요함을 느꼈다!!bodyh1container-aside,main
- 구조가 이렇게 되어있기 때문에 어디에 어떤
CSS코드를 줘야하는지 고민해볼 수 있었다.
PM을 지향하는 FE 개발자 이아현입니다 :)
좋은 글 잘 보고 갑니다 :)